This is a great fun safari binocular project to craft with your kids! Grab some cardboard tubes and odd resources, and you are done!
So let’s go exploring!
Adventures ahead!
February half-term holidays are over and kids are back in school, and before we know it we have reached the next half-term holiday, so the question is, how can you keep them interested and their imagination alive?
MY INTENTION!
In this post I shall be using some of my recycled cardboard inner tubes and crafting something really easy, simple and favourable with the kids, I shall make a Binocular craft for kids!
Spring is nearly upon us, and now is the time to have your kids go into the garden and do some foraging!
What! you may ask, yes get your kids to look around for mini beasts, turning rocks over and discovering tiny creatures that hide in dark places in a world of their own!
LET’S GO HUNTING!
Picture from Pexels.com by Tatiana Syrikova.
Even though, we are heading into spring, there is still a chill in the air.
KEEPING THEM WARM!
So regarding this slow change in the weather, transgressing from the colder months into the warmer ones, we should still dress our kids in their insulated gear keeping them warm with their, woolly hats, scarves padded coats and gloves.
READY FOR THEIR ADVENTURE!
Then they will be ready to venture out-doors into our damp chilled gardens, parks or forests and seek little surprises!
UNPREDICTABLE WEATHER!
Although based on our British weather, where one minute it’s raining, the next the sun comes out and it’s warm, or there are also turbulent winds, where everything flies past you, having said that, I do favour the windy weather with some sunshine, that makes a great combination for hanging out the washing!
Because of our unusual climate, deciding what to wear is confusing, just be prepared for the unusual outcome!
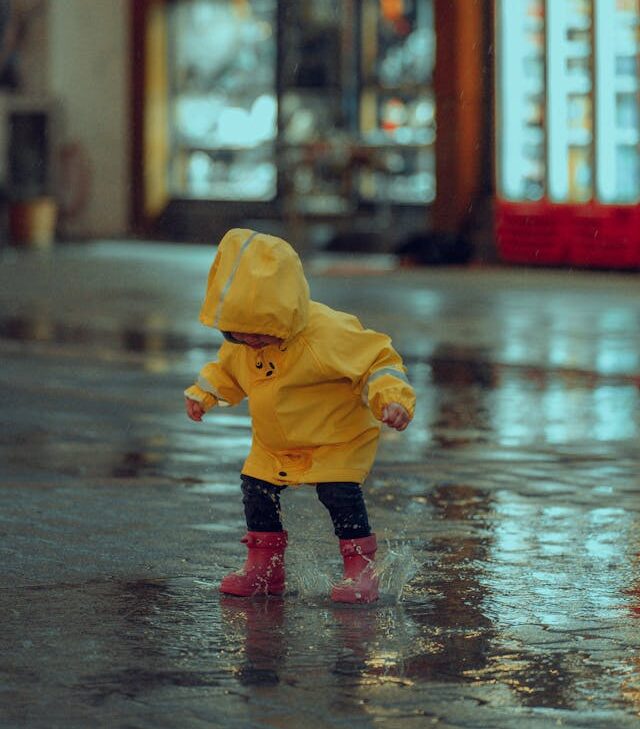
Picture form Pexels.com by Atahan Demir.
Kids don’t mind the rain, as rain makes puddles, and more of a reason to go out and splash around!
A super fun time to Splish, Splosh without worrying how wet they will get!
Back to our kids venturing out-doors.
LISTENING TO SOUNDS!
Simply, have them sit up and listen, and ask the children to close their eyes and listen……..there are incredible sounds everywhere that echo around us.
WHICH NOISES!
Let me ask you this, have you ever gone outside, on a beautiful summer’s day, and stood still, with your eyes closed and listened……and can you pinpoint any familiar noises?
HAVE A GUESS!
There will be an orchestra of different high and low notes. Street noises, cars, trucks, people walking, talking, dogs barking, kids talking or crying and amongst this array of sounds, you can decipher bird tweets, squarks, chirping in a group or singular!
‘What can you hear?’ I would ask. I have done this activity numerous times, for the children to stand still for a moment and prize their ears and listen to the different notes or echos around them, and they would call out what they could hear!
TUNE IN!
If I pin-point a particular sound, and then I would get the kids to see if they can zoom into it, and see if they can hear it too.
It’s strange how they can tune in and hear it too, even though there were so many other noises in the mix.
Picture from Pexels.com by Alan Mass.
Later, I would question them if they could hear the different bird tweets, and at the same time, I would love watching their expressions!
WHAT CAN YOU SEE?
Picture form Pexels.com by Cottonbro studio.
Then have the children look towards the direction of where they think the sounds are coming from.
This is where the fun starts.
Therefore within this post, I shall be crafting a very easy and simple activity to address the outdoors.
I shall be crafting using carboard tube into fun binoculars!
LET’S INVESTIGATE!
The idea is to have kids craft their very own binoculars, paint them up with their favourite safari animal colours, and go out hunting for evidence.
Children would not only be listening, but they would be looking too, from the start of their adventure!
BE CREATIVE!
Of course, this would be make-believe and the children would use their imaginations, pretending to be scientists doing important research ahead of them!
CRAFTING IN AN INVENTIVE WAY!
The whole activity from the crafting part to going out and using the binoculars, is a great excuse for kids to get involved in exploring and recording their findings!
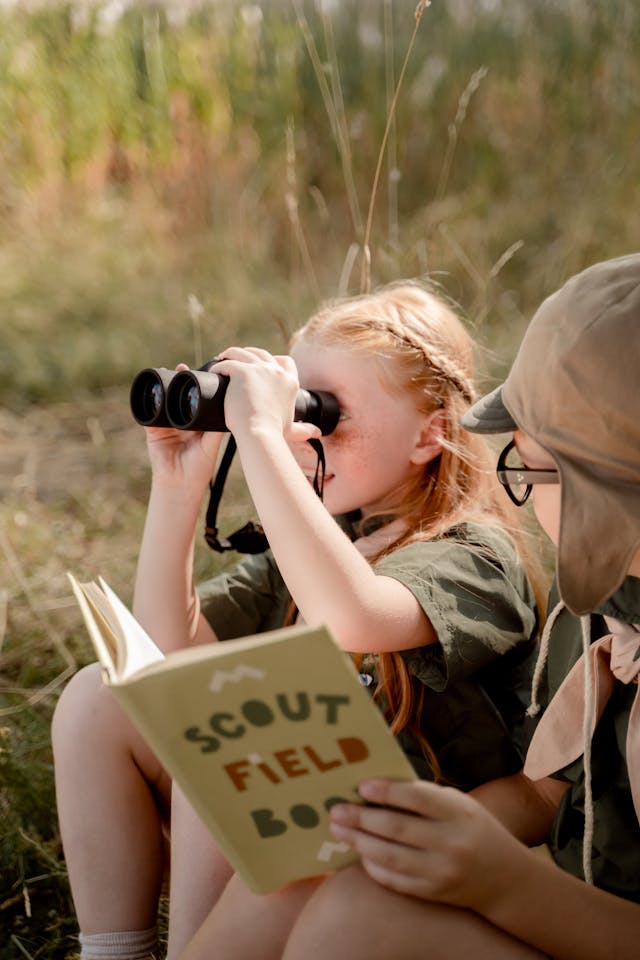
Picture from Pexel.com by Cottonbro studio.
Although our binoculars aren’t the real deal they can still go hunting around and record their findings, like these fellows in the picture!
ARE YOU READY ?
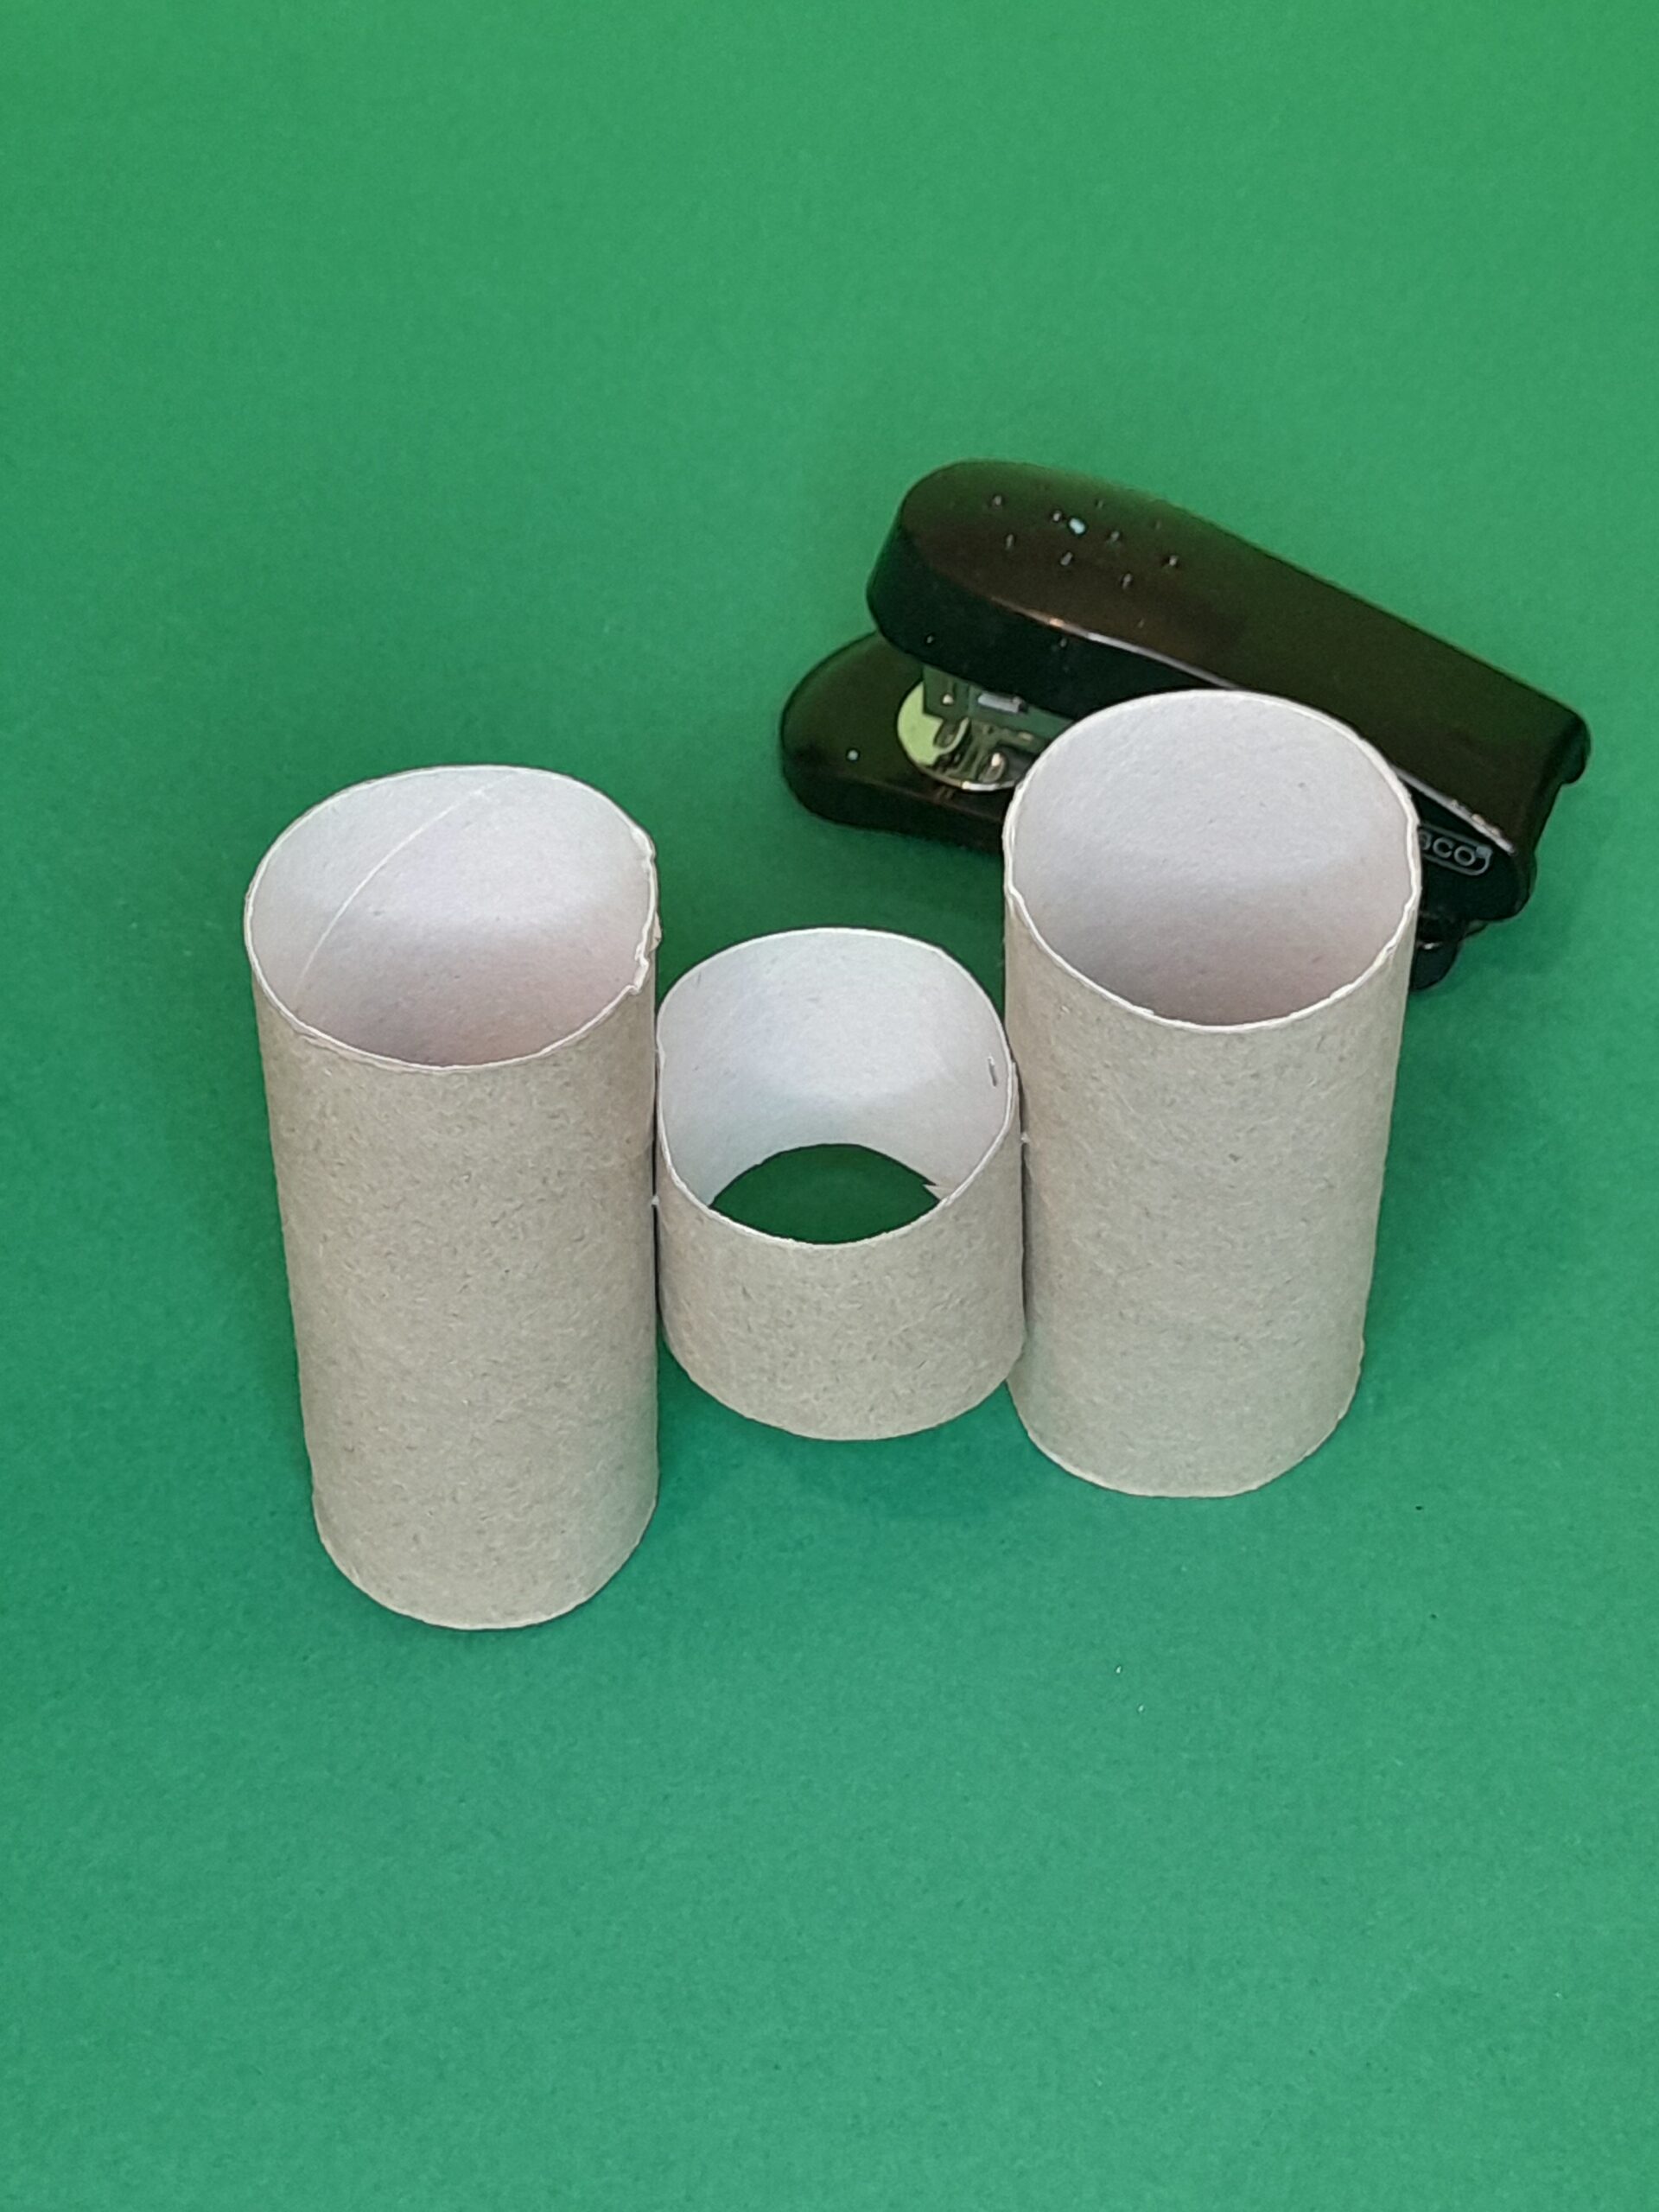
Here are the resources.
12 cardboard inner tubes.
Green card. (for leaves).
Some packaging wrap.
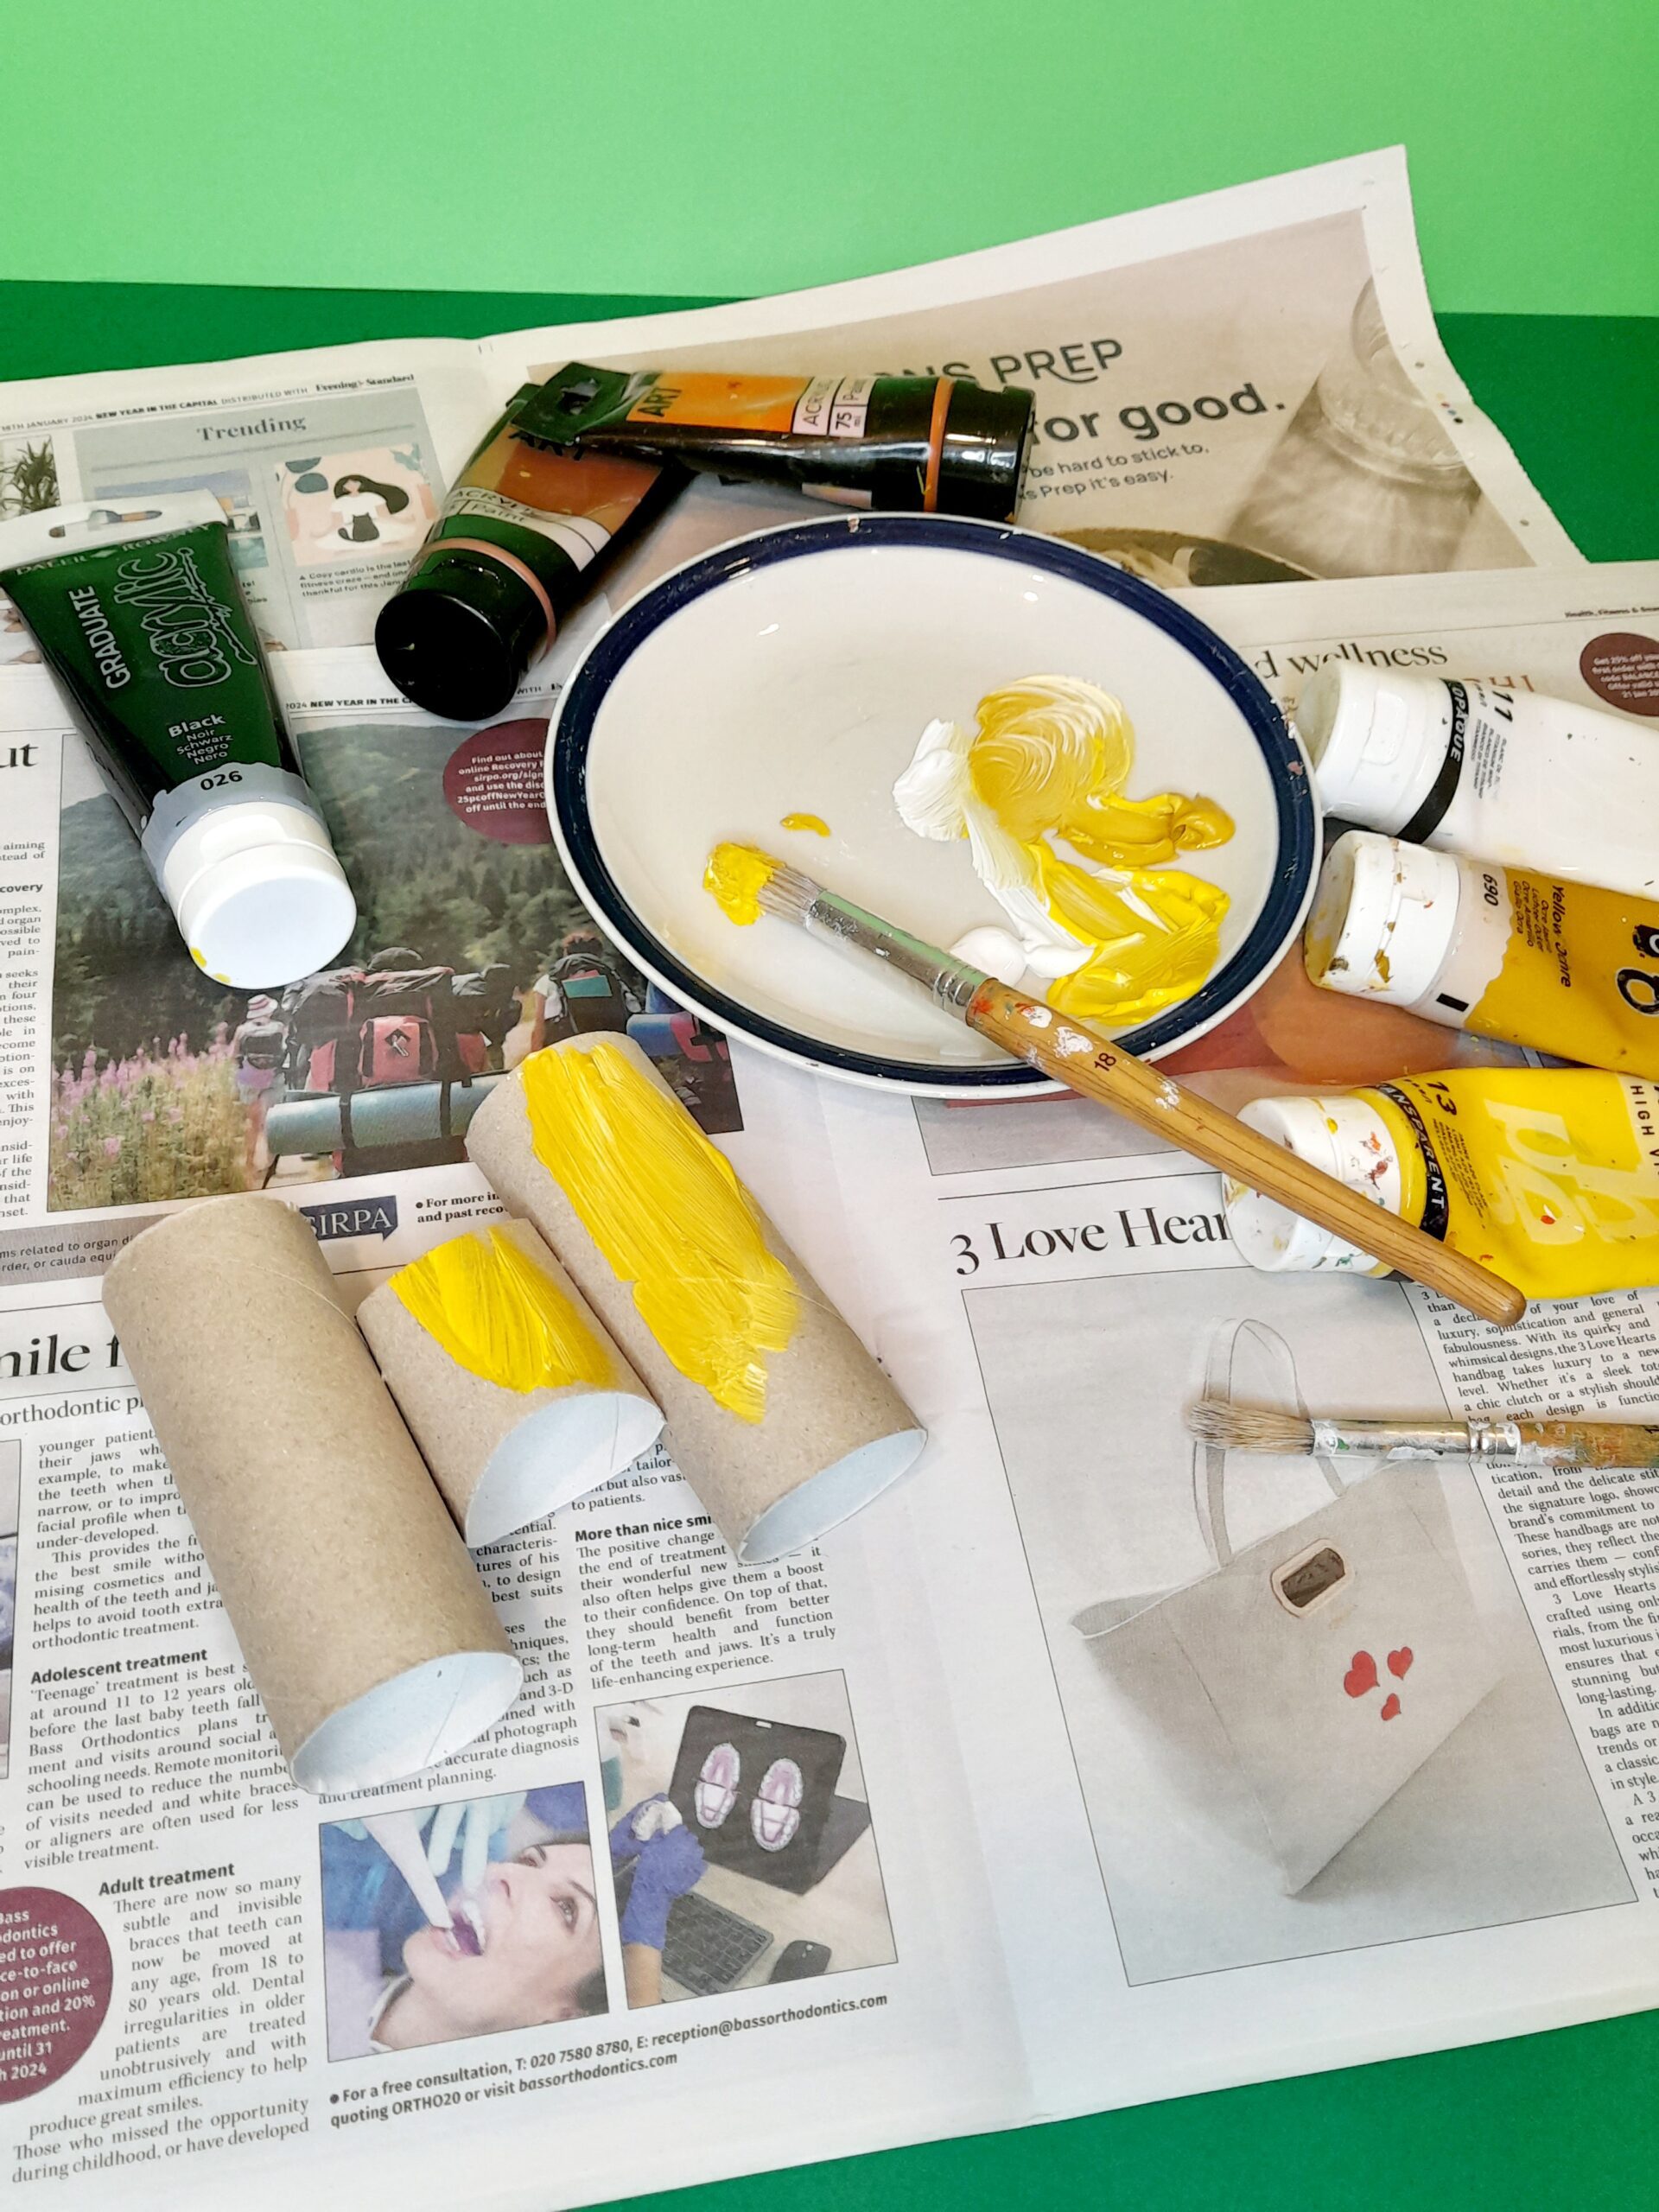
Different acrylic paints/orange/yellow/brown/black/white/etc.
Range of brushes, large to small. Paint plate.
Disposable gloves/a puncher (not shown).
Scissors large/small.
Stapler/double-sided tape.
Garden twine. (not shown)
LET’S START!
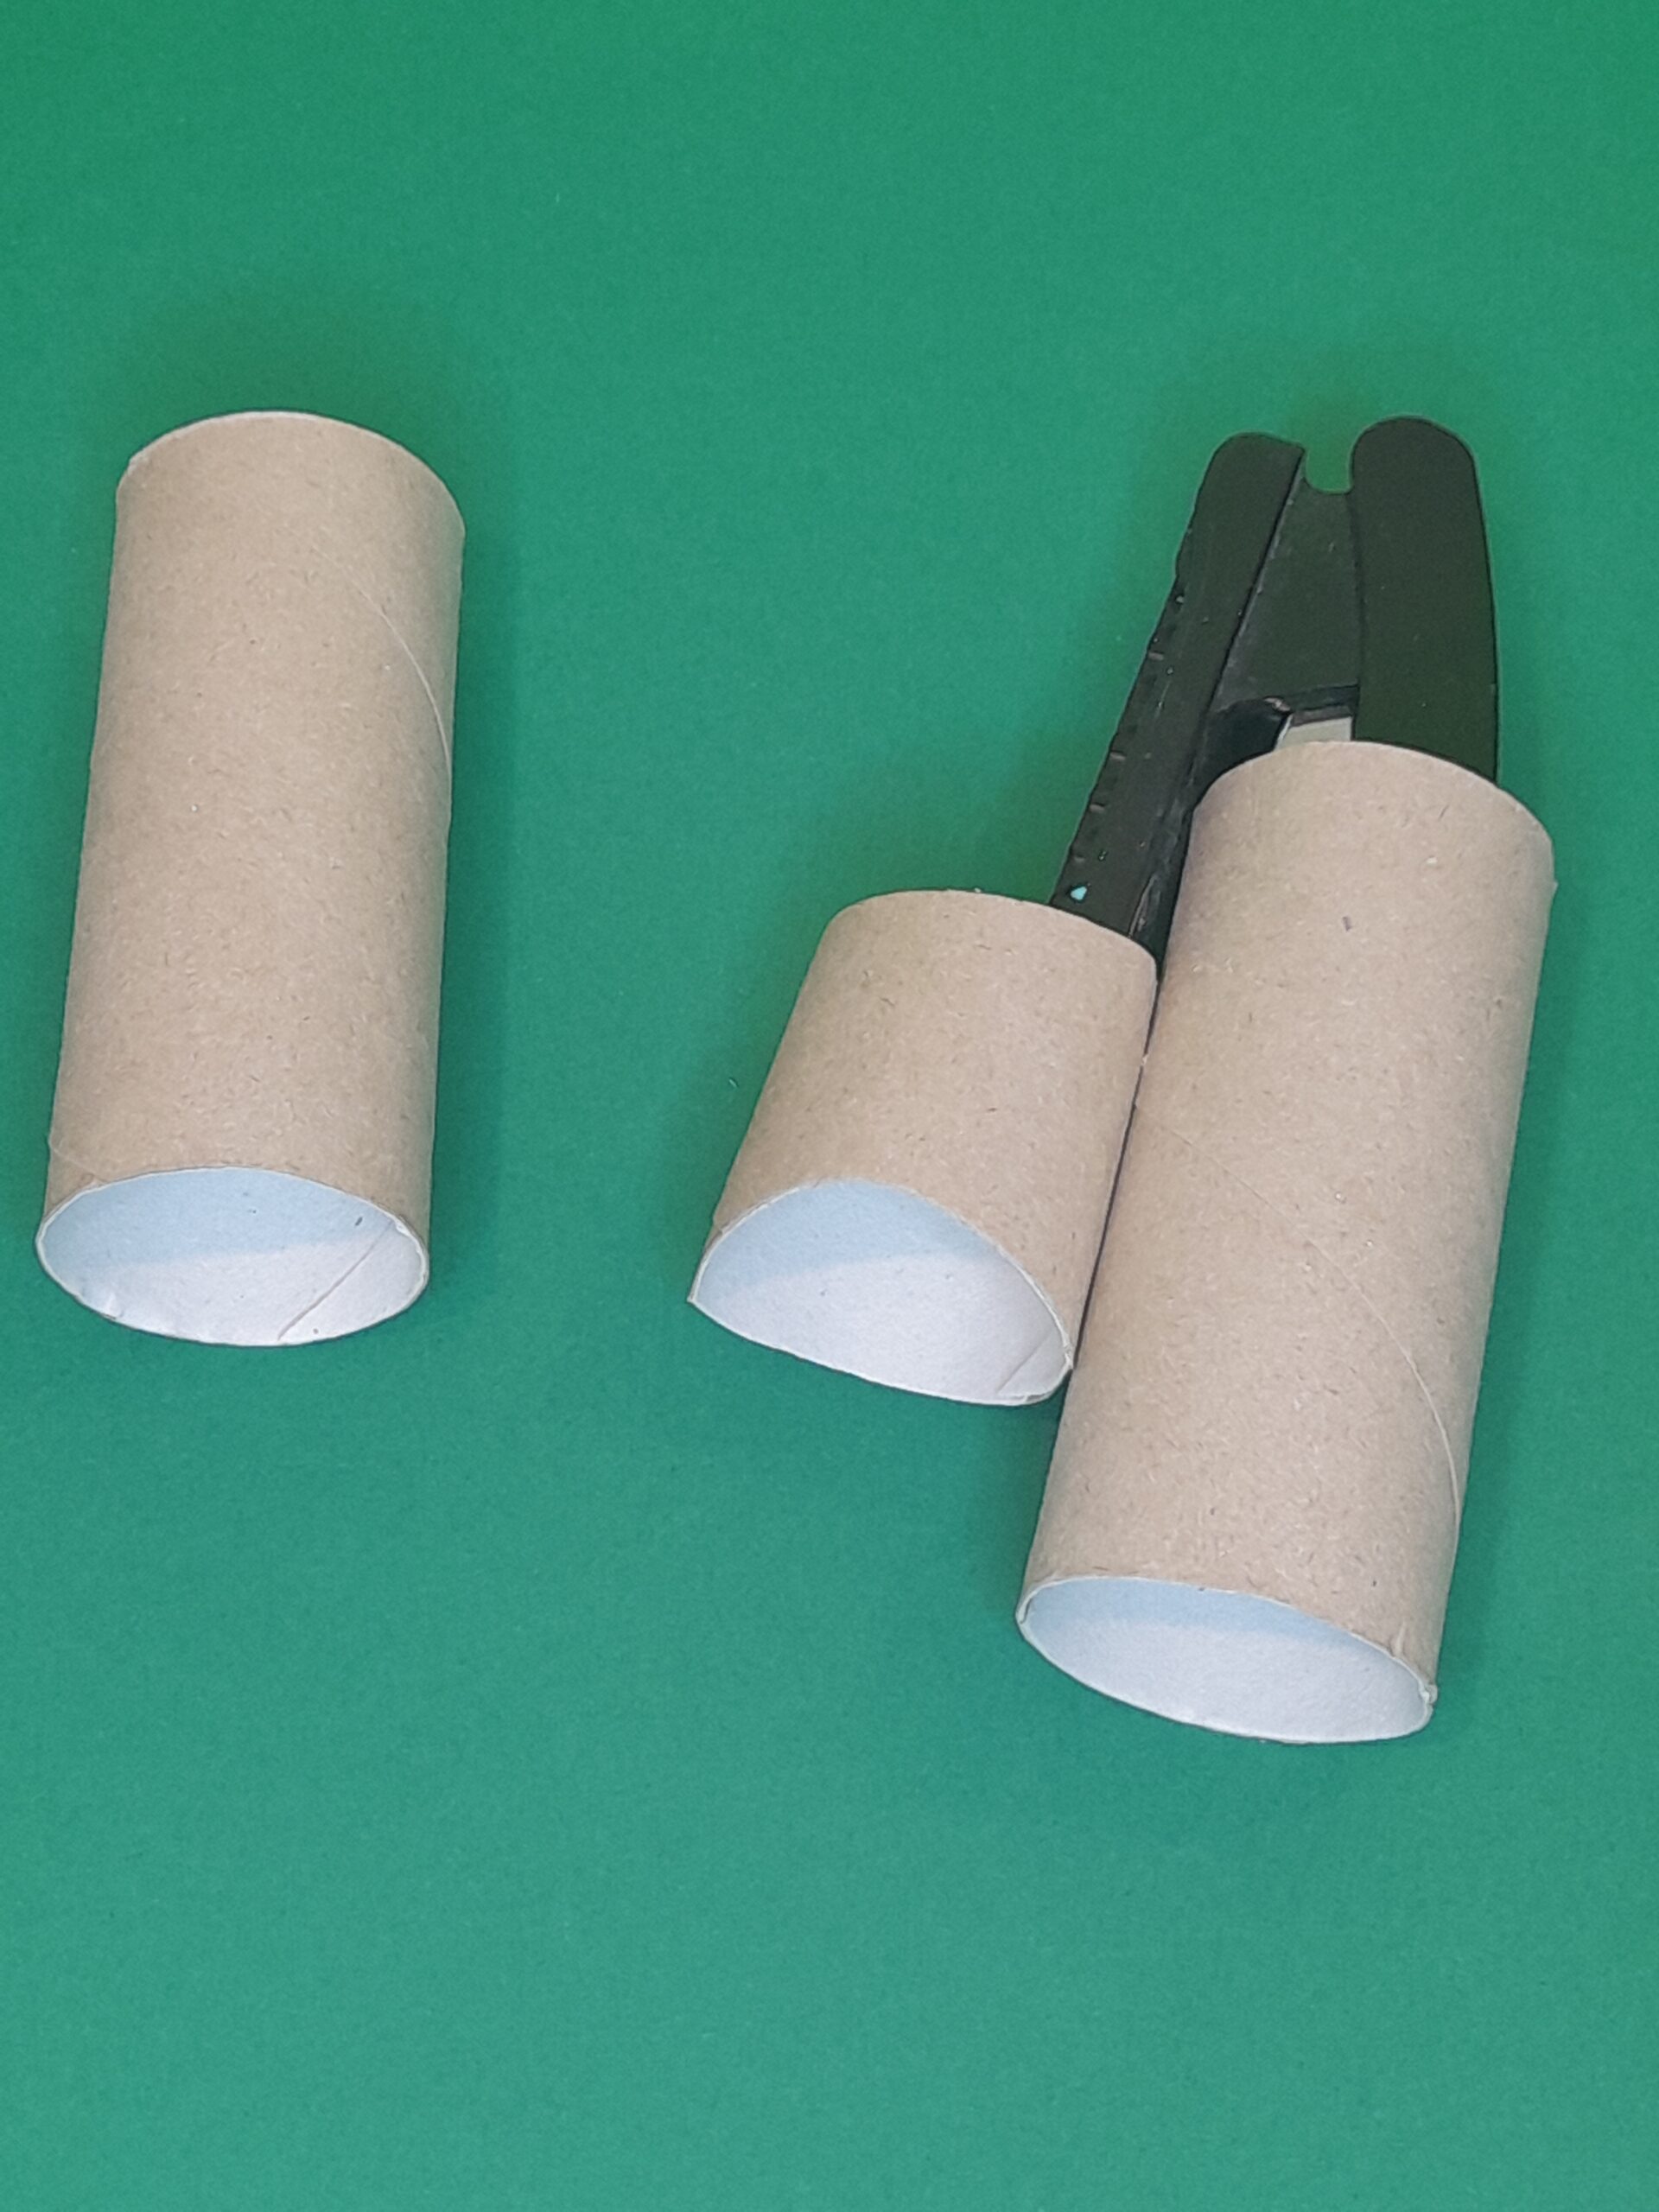
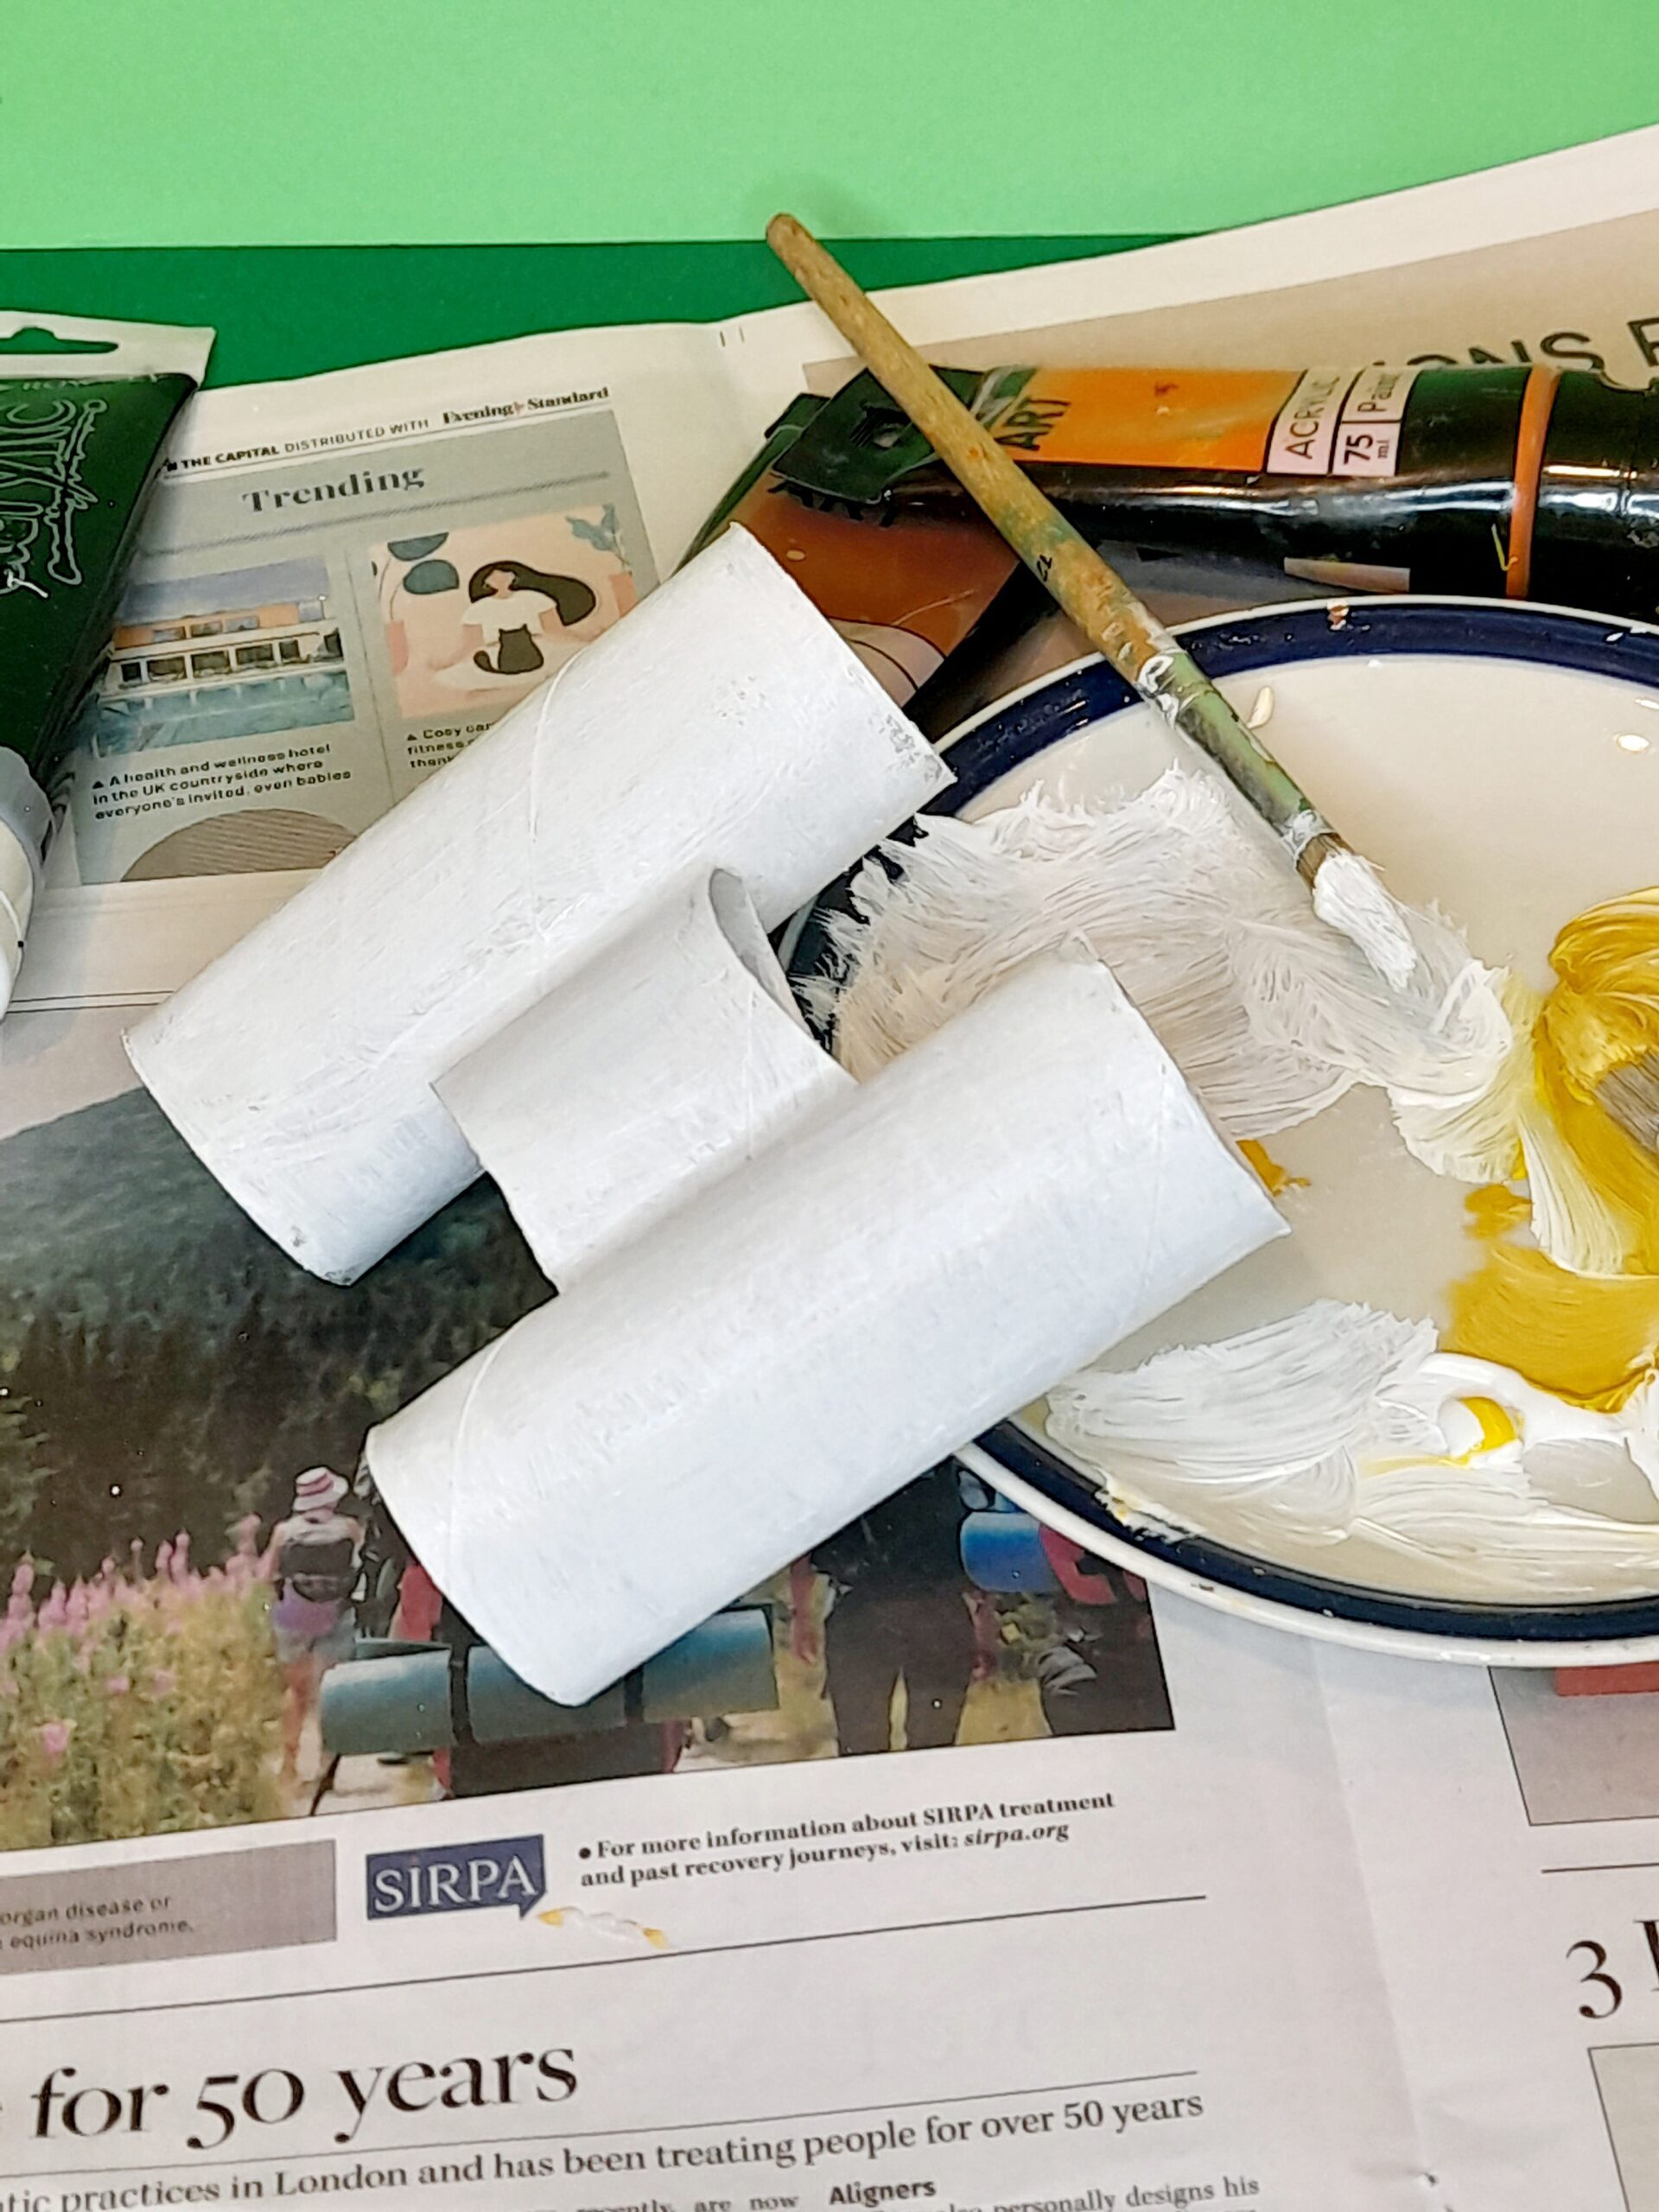
1) Cut one tube in half, and cut a slight curve out of each side of half a tube.
2) Now staple it half way down onto 2 tubes as shown above.
3) So you have the start of a binoculars.
4) Paint your binoculars with your choice of colour.
5) Continue painting until your tubes are completely covered.
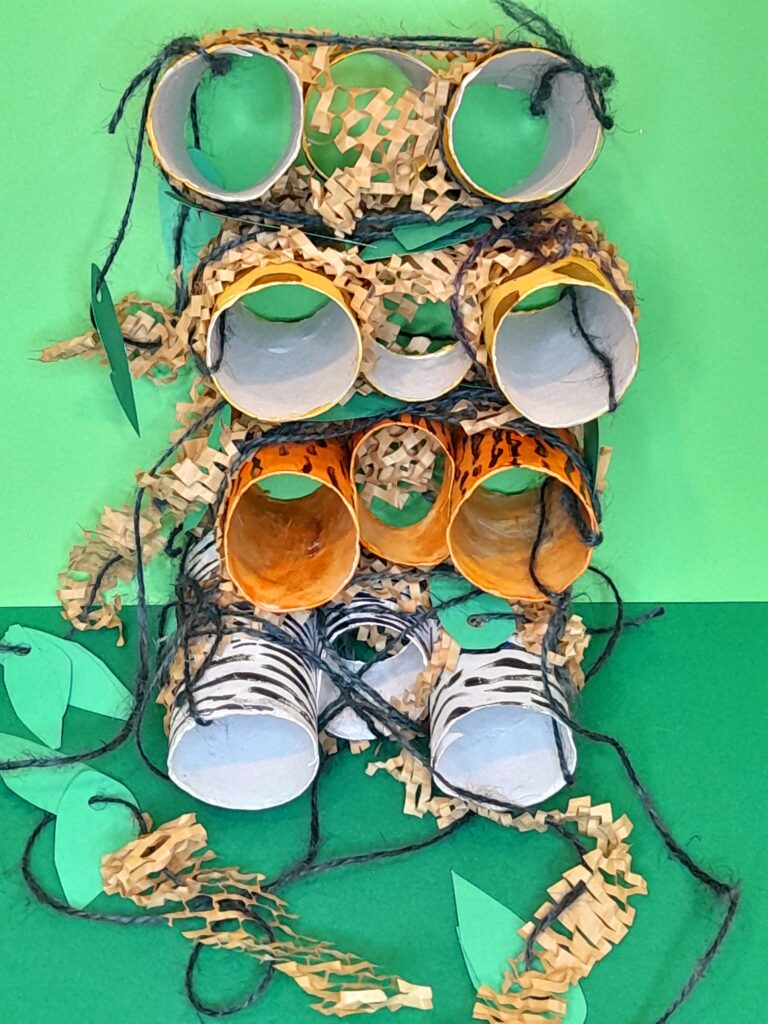
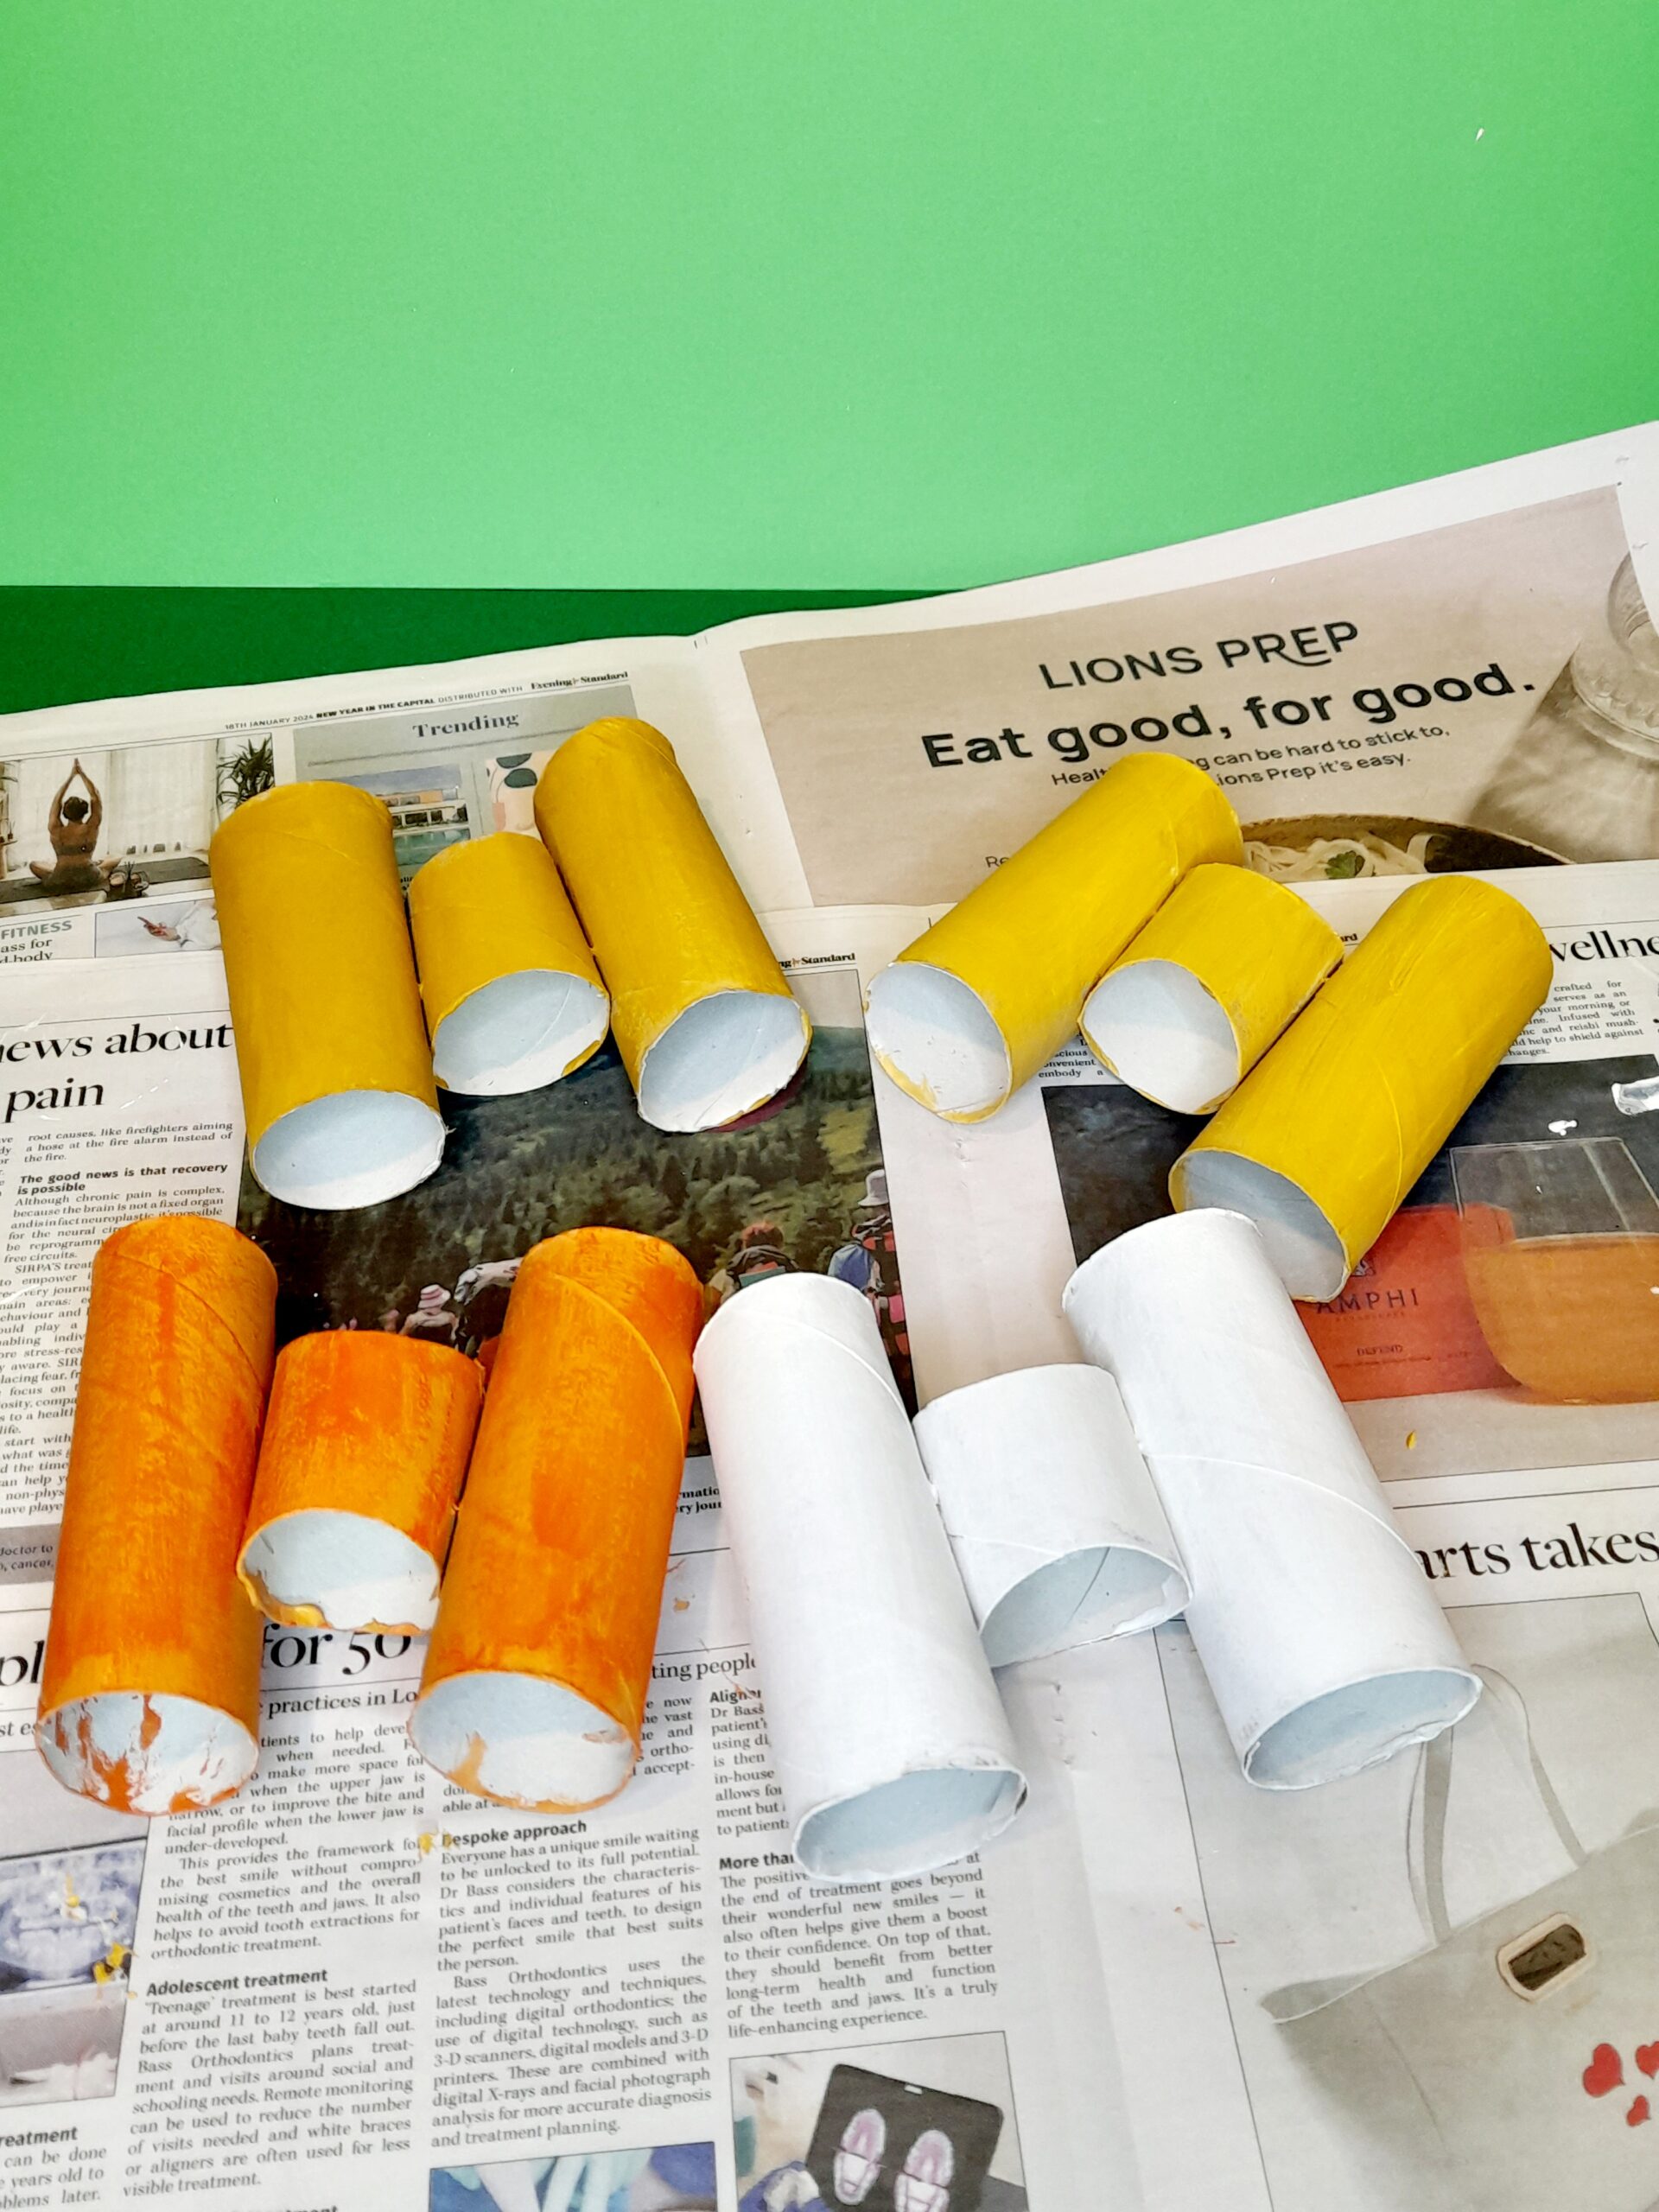
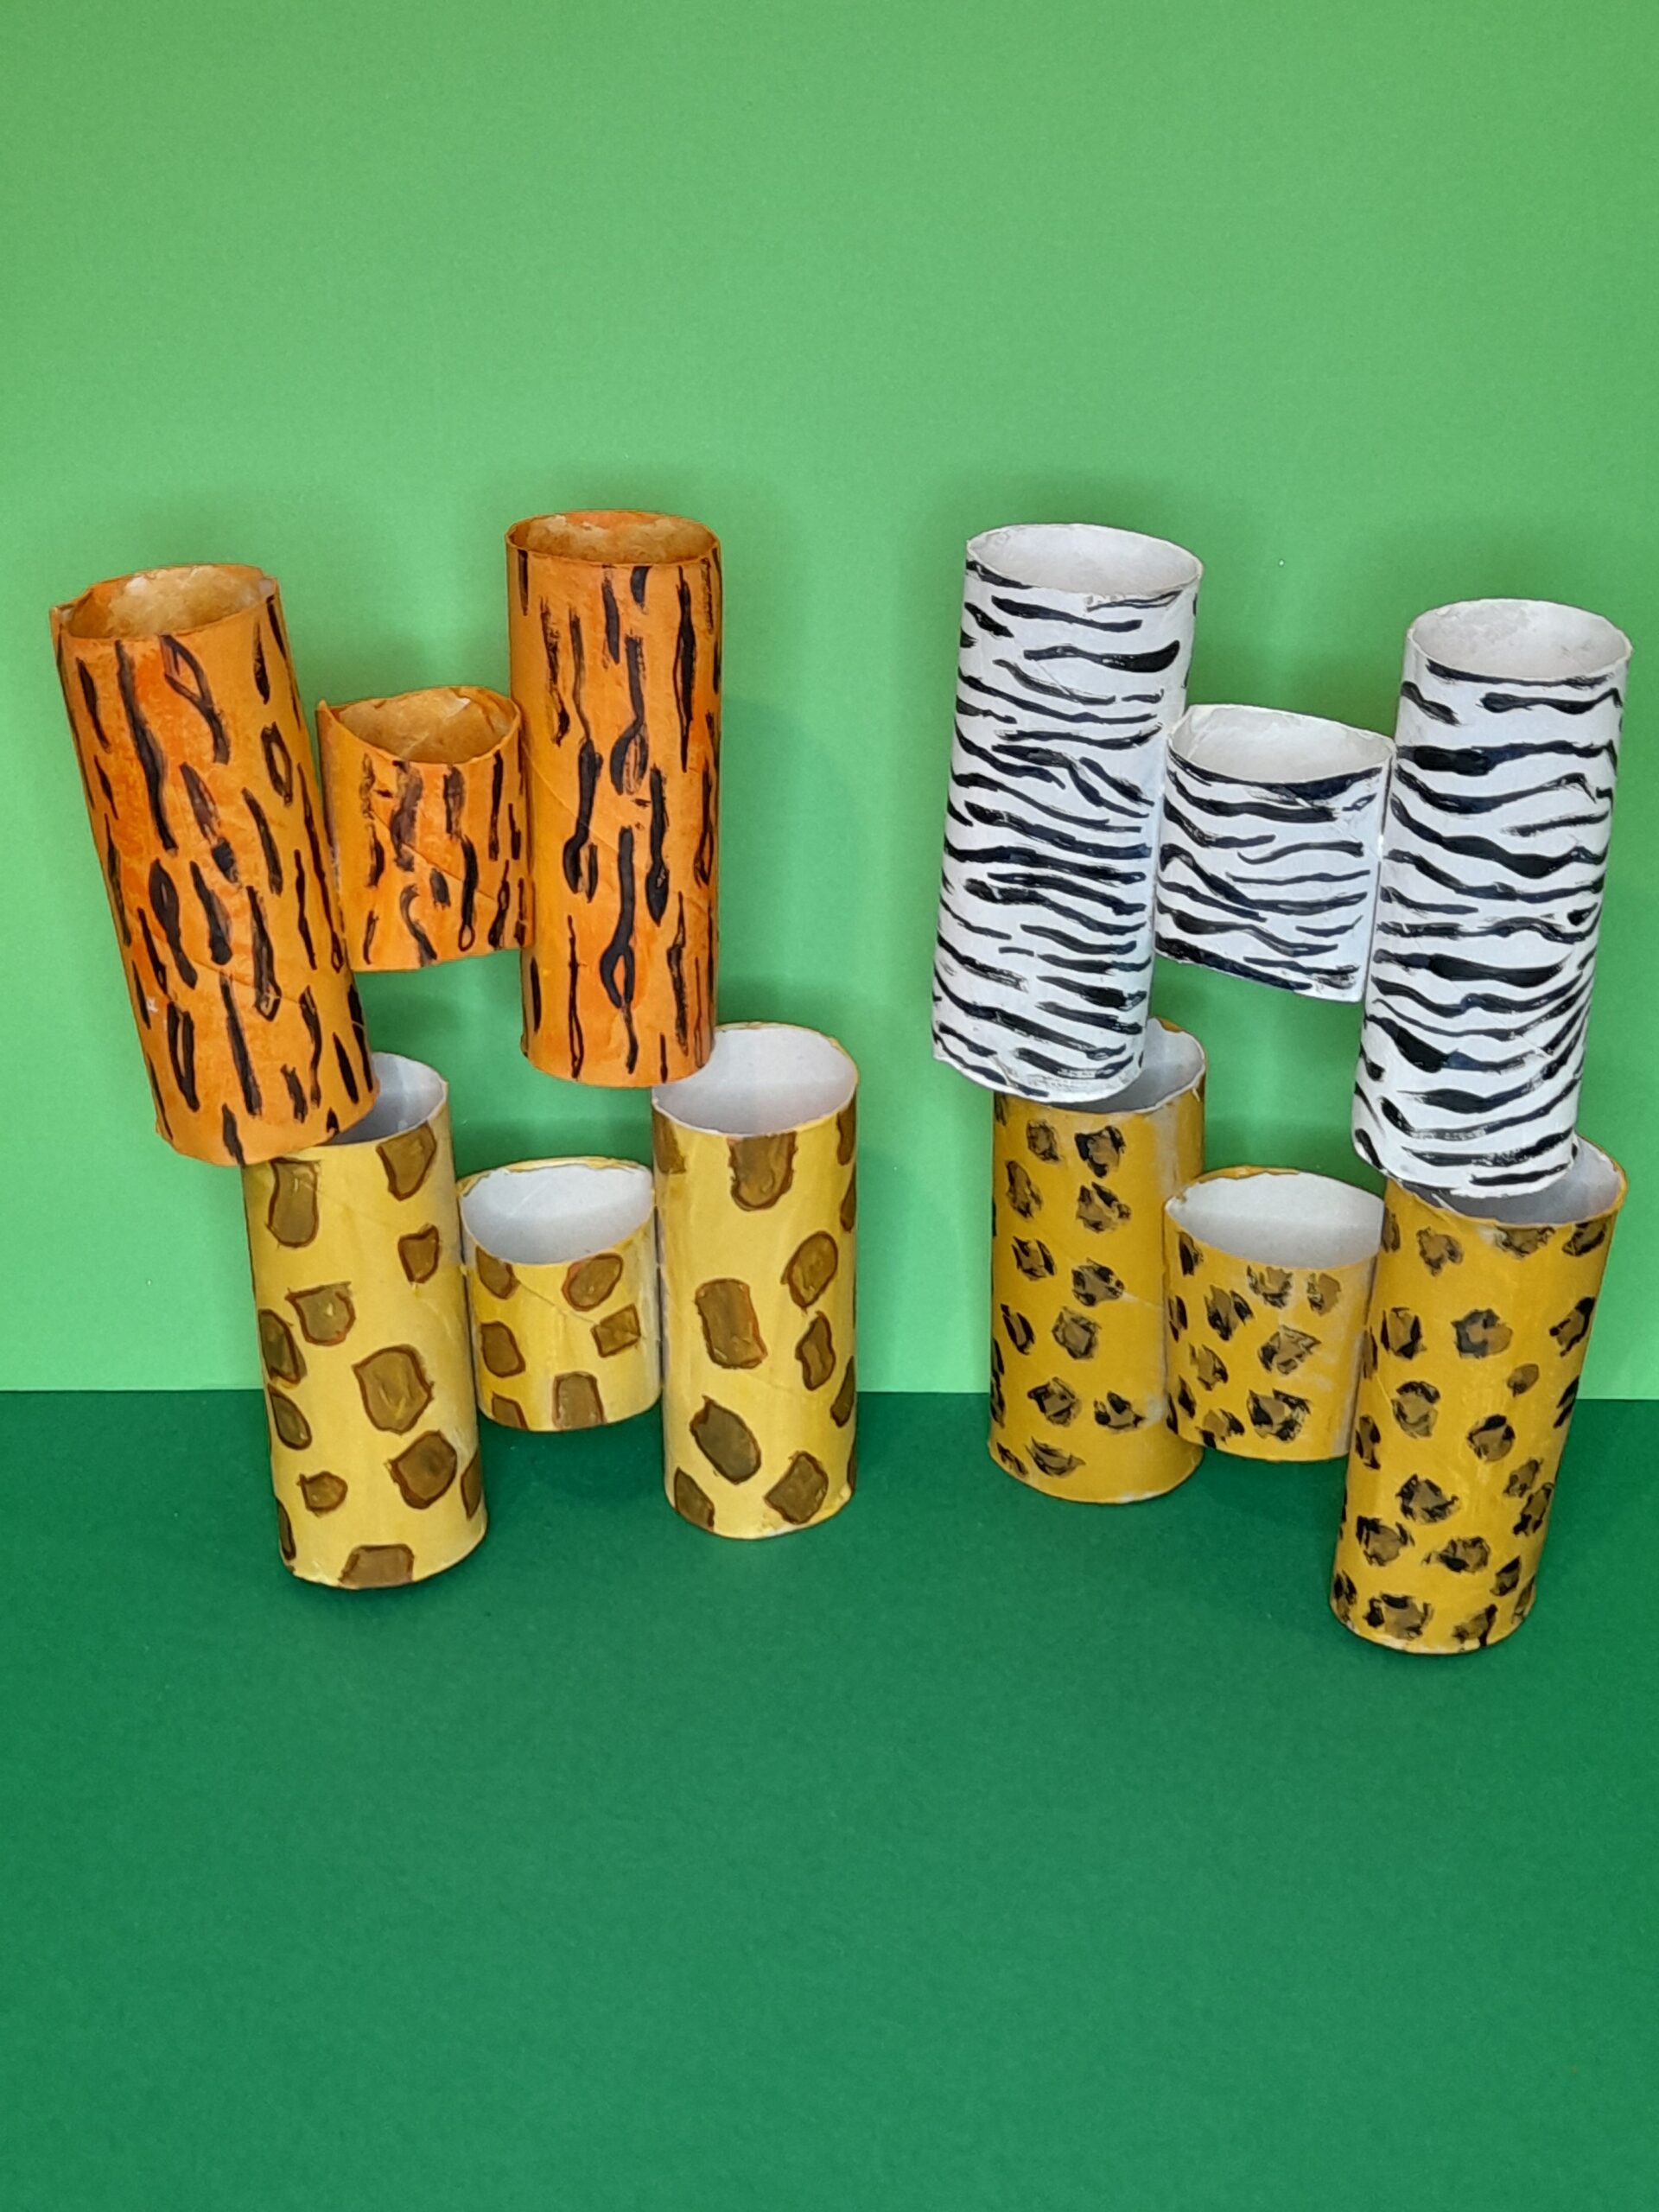
6) Here are four colour versions, you can choose one for your safari animal.
7) When painted, you have a Tiger, Zebra, Giraffe and Leopard colours. You choose your favourite.
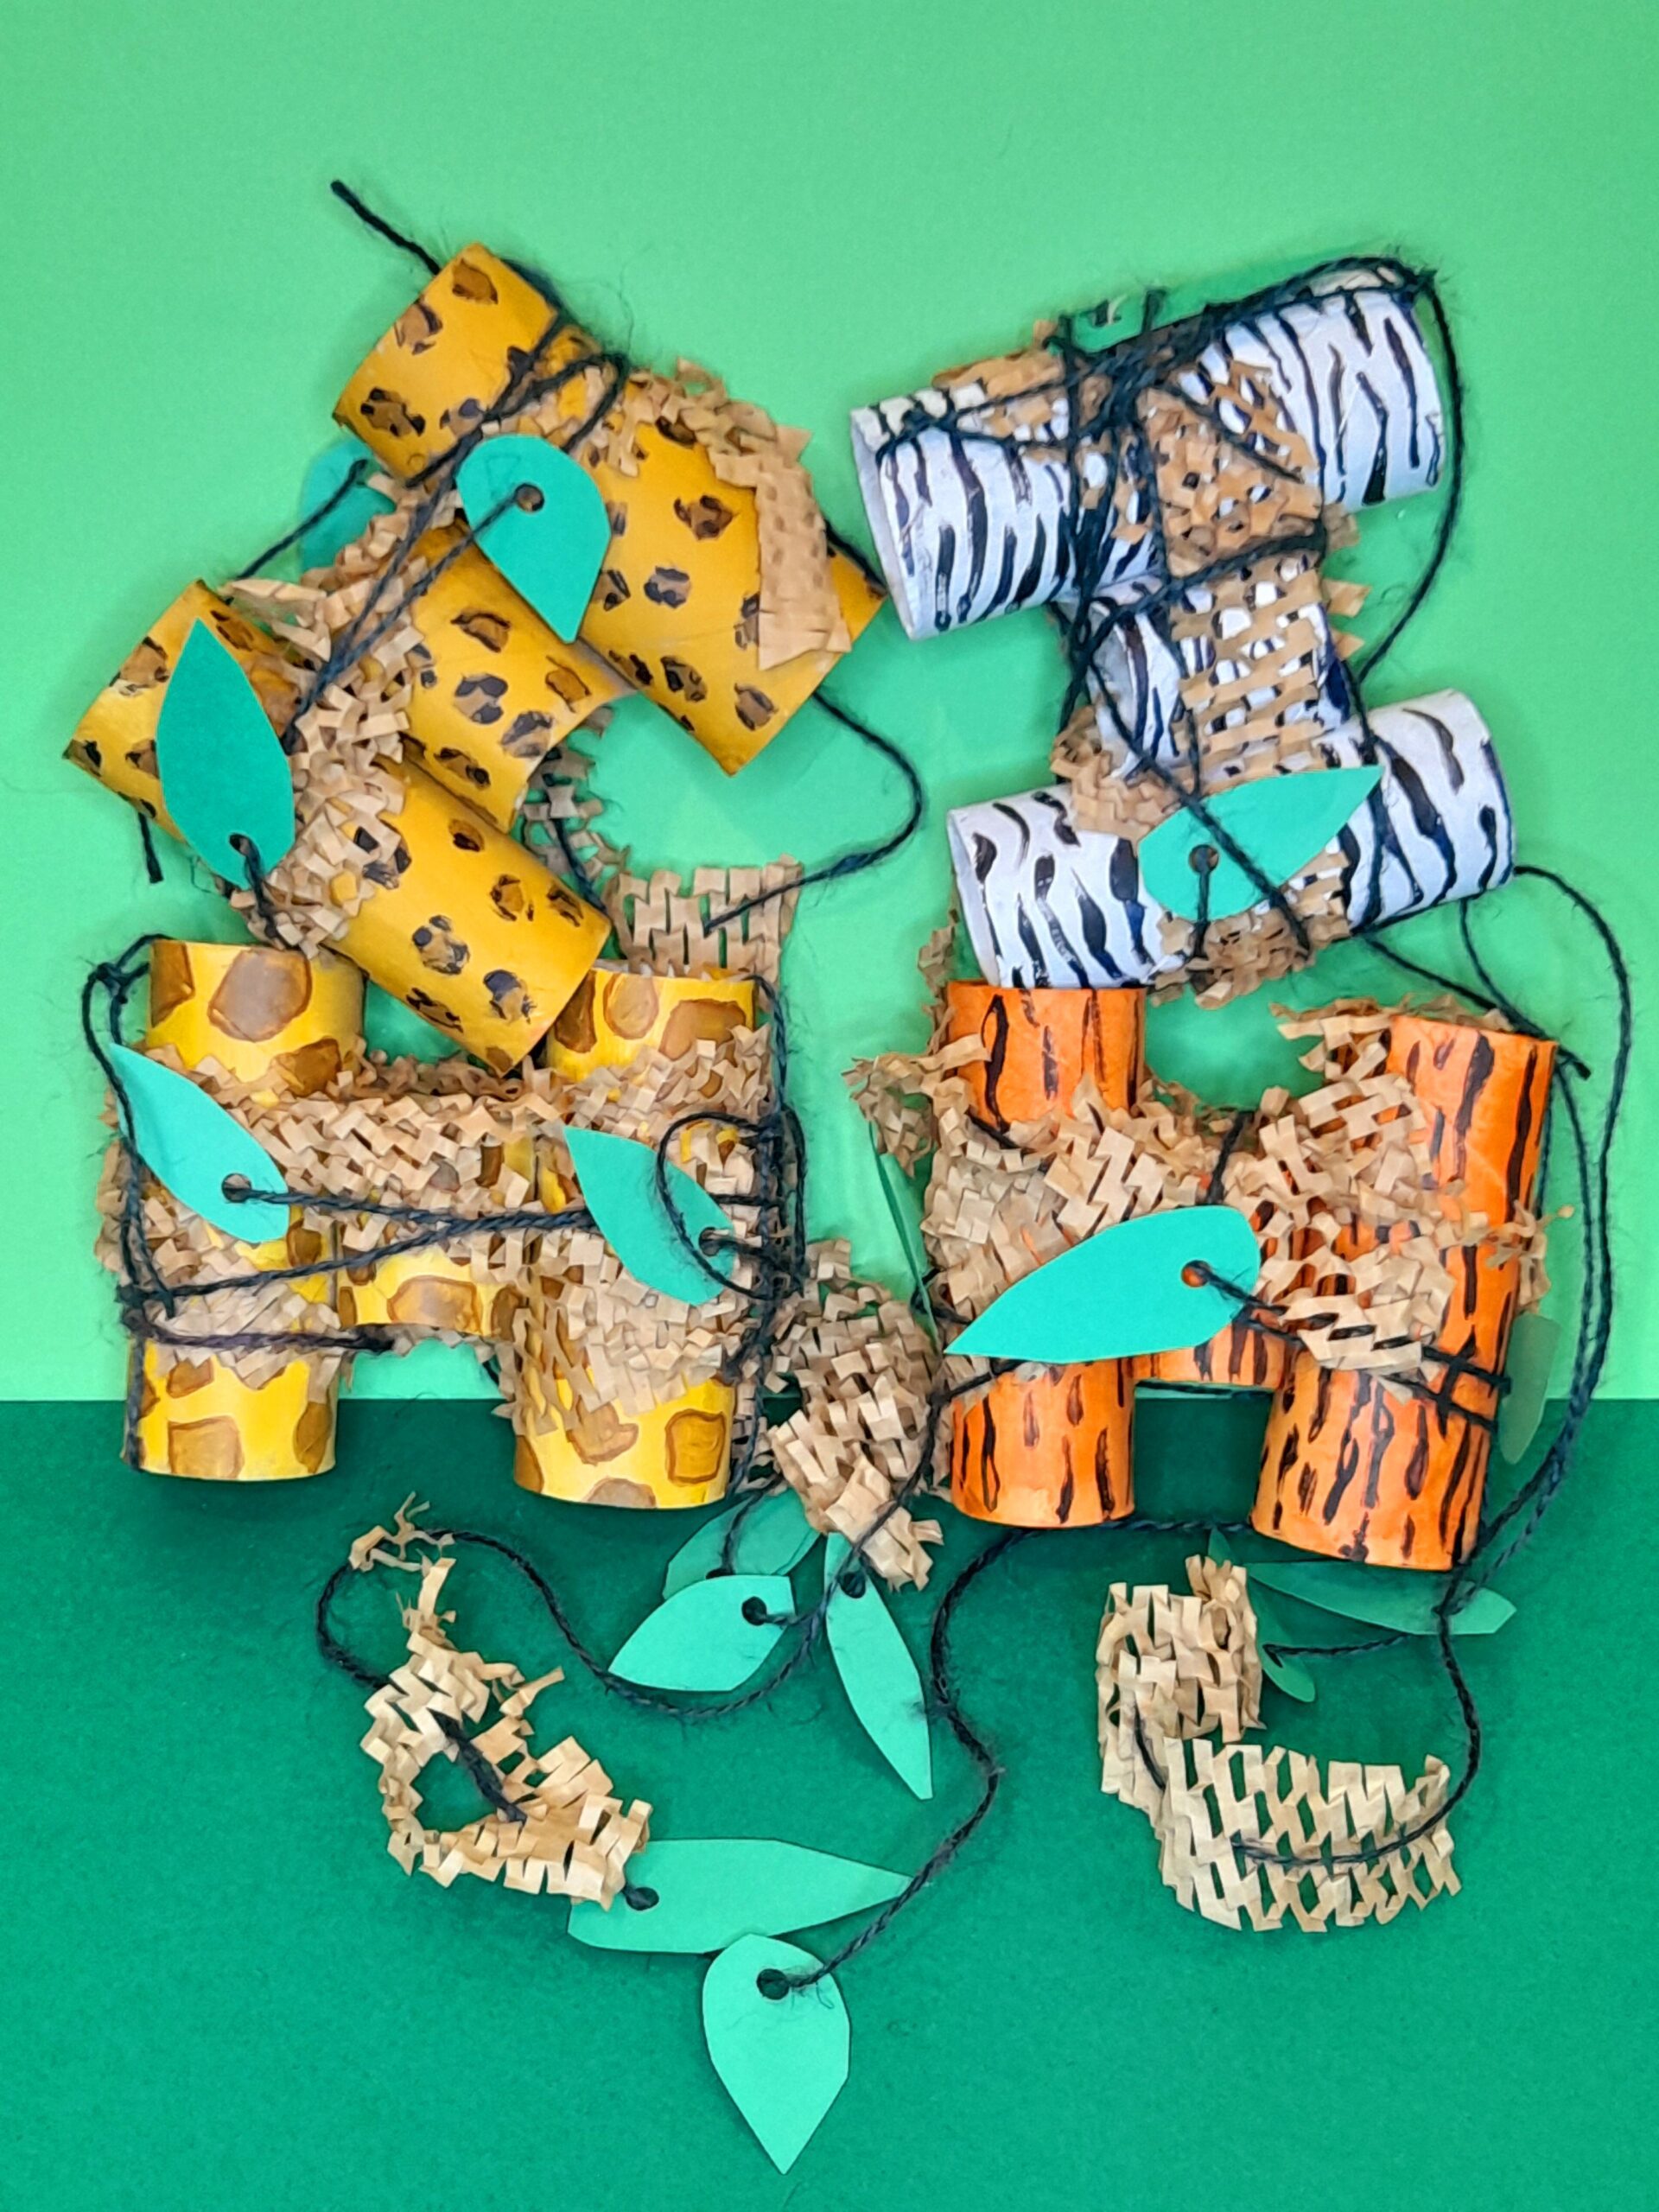
8) Cut strips of brown packaging weave.
9) Wrap around the binoculars and tie into a knot.
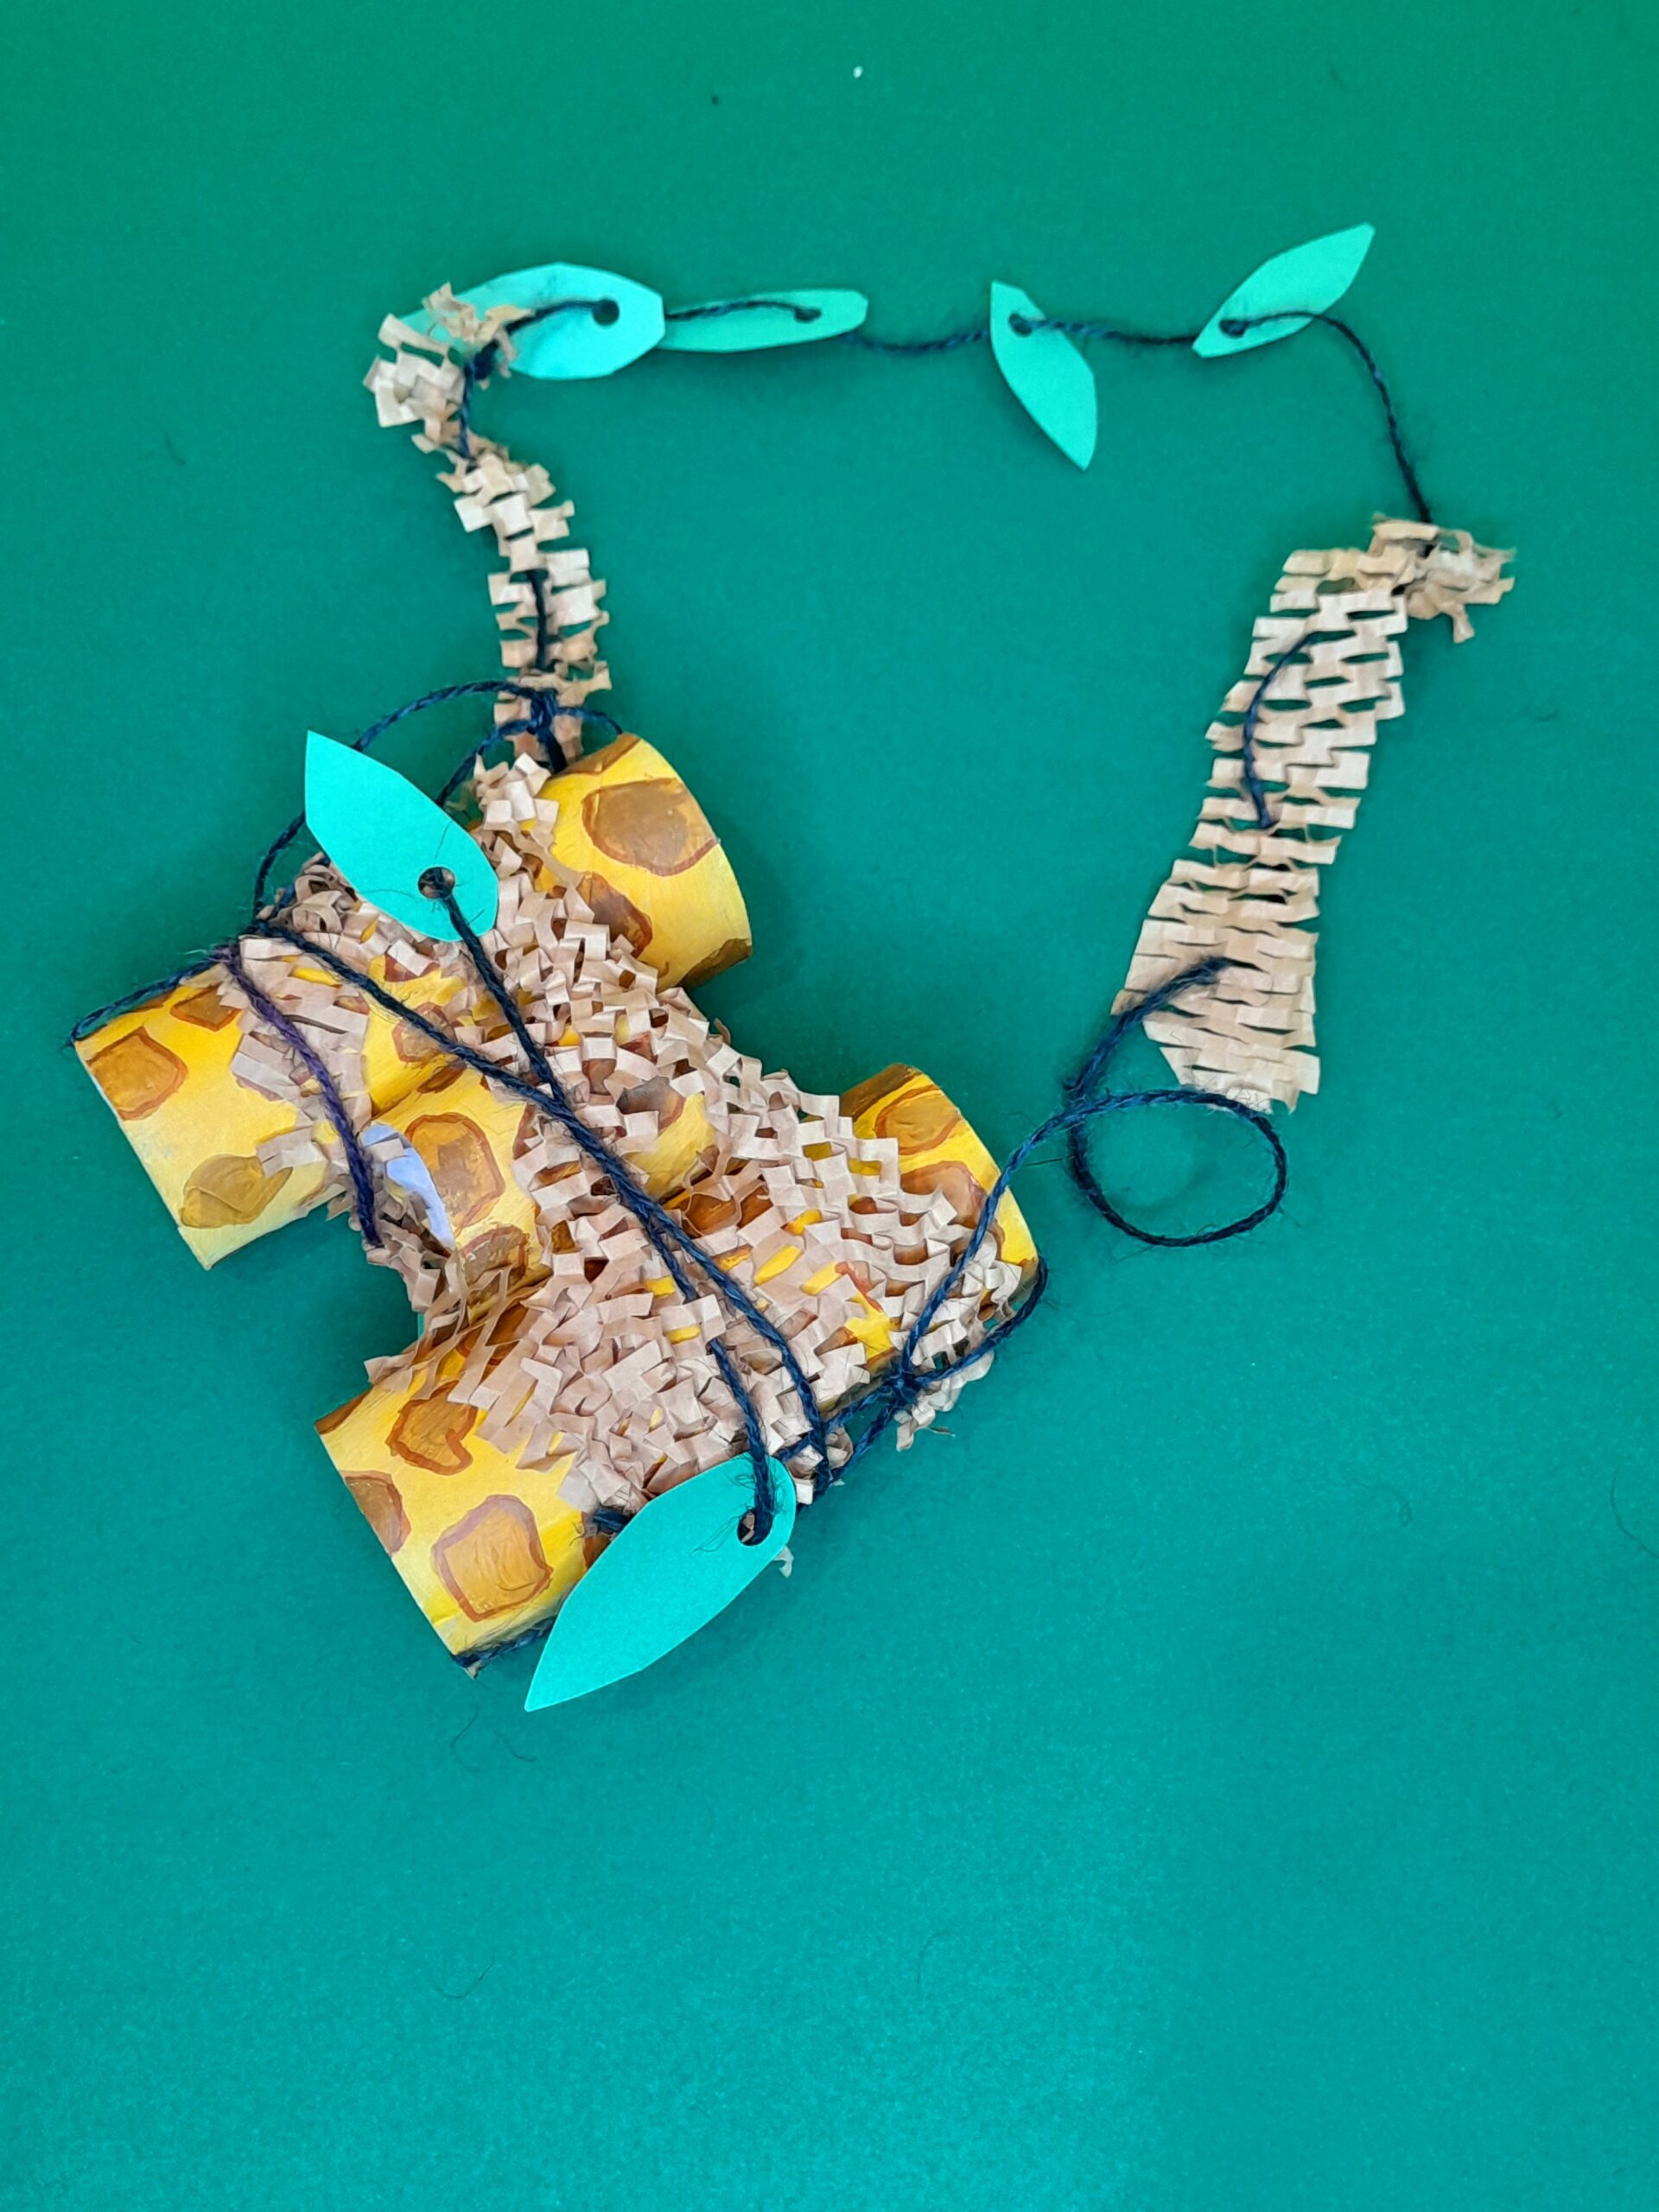
10) Cut leaf shapes and punch holes at one end and thread garden twine through four or five.
11) Measure a long piece of twine to fit around the childs neck. Thread some leaves and brown weave onto twine and tie one end to one tube and the other end onto the other tube, to make the cord.
12) Wrap the twine around the binoculars and tie into a knot to hold in place.
Click on any image to expand it.
On the left, are four versions of the safari animal binoculars, and on the right with the twine tied on to make the cord.
SOME TIPS!
ATTACHING PARTS.
Stapling the three parts together, the two tubes and the middle bit will hold well, although you can use double-sided tape instead.
THE MIDDLE PART.
You can leave out cutting a curved section out of the middle section, as kids’ noses are small you may not need to do this, it’s only applicable if that part would touch their nose and therefore be uncomfortable.
PAINTING BINOCULARS.
Decide which animal print you would like to paint, add a base coat, and then fill in the details when the base coat is dry.
BINDING.
Cut a few strips of packaging wrap, that looks like weaving, and wrap around the binoculars. This gives more of a jungle feel to it.
ADDING TWINE.
Garden twine is a useful resource to use. Cut a long length. Then cut leaves out of the green card, punch out holes in them and thread the leaves through the twine. This is ready to wrap around the binoculars.
ADDED EFFECT.
You can cut some packaging wrap and thread this through the twine, this is added texture if you like. It may not last, but initially, it does play a part in the whole look.
TYING THE CORD.
Measure out enough twine to go around the child’s neck and some more to attach to either side of the binocular tubes.
RIGHT WEATHER.
As these binoculars are made out of cardboard inner tubes and have been painted, check that it’s a dry day to venture out and have fun exploring, as the binoculars can get wet and damaged!
MAKE BELIEF!
How did you find doing this project? Just think of all the different types of animal-coloured patterns you can craft, the basic resource, the cardboard tubes are there, all you need is a bit of imagination!
ON THE OTHER HAND……..
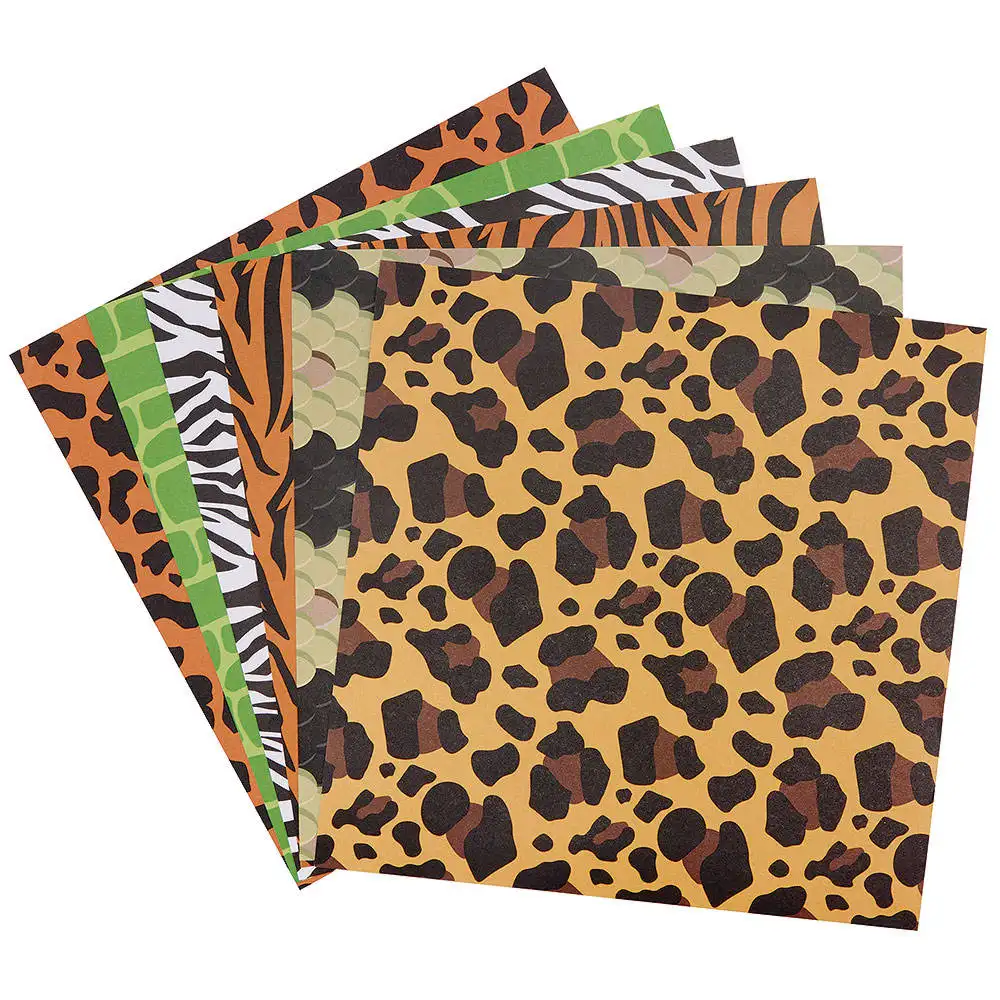
If trying to paint these colourful animal patterns, is too complicated for your kids to do, then Baker Ross offers, this brilliant selection of animal papers that are suitable for this kind of project!
I have ordered this pack, and I will show you four completed binoculars, using these papers with different animal patterns.
These papers are from the Jungle Animal printed paper pack.
HERE THEY ARE!
Here are four binoculars.
Here is the Tiger paper.
Here is the Zebra paper.
Here is the Leopard paper.
Here is the Giraffe paper.
JUNGLE ANIMAL PAPERS.
Here are four choices of animal prints, from the Jungle Animal pack.
I use the tiger, zebra, leopard, and giraffe papers to make a set of binoculars. Above each one are the ones I painted with similar patterns.
YOUR CHOICE.
You can choose whether to paint the animal patterns or use these fabulous animal prints, which would do the same job but would be less messy.
EASY ACCESS.
At least you now know these patterns are available and are an alternative option.
HOW TO USE.
Each sheet can be cut in half, just the right amount to wrap around one tube. With the offcuts, you can stick them together and use them to wrap around the middle part of the binoculars.
A QUICKER SOLUTION.
All in all if you don’t have the right paints, and would prefer a quicker solution, then this pack of Jungle Animals provide 48 sheets, 8 each of 6 designs, measuring 23 x 23cm, 128gsm a good weight, and enough to play about with if you make a mistake.
Hey there, when you click on links in this post and you make a purchase, I may earn a small commission that l can use towards resources (other than throw-outs) for project making within my website😀
You can trial run this amazing kids site, for just £1 for 30 days and see what they can offer you!
At Kids Pass they offer discounted rates as much as 40% off great kid’s deals!
Jump in and check them out and don’t miss this fabulous opportunity.
TO CONCLUDE!
In this post, I show you how to craft very easy binoculars, with a safari look!
USING WHAT RESOURCE?
Save your cardboard inner tubes, you would need at least three for each binocular, but if you want to make more than one, just choose your favourite safari animal and check out your acrylic paints.
OUT-DOORS ADVENTURE!
This is a fun activity, where you can get kids back into their gardens, parks or forests, and explore.
EXPLORE TINY CREATURES!
What better way to go hunting and investigating the tiny beasts in their inhabitants, that live under stones, wrotting bark, plants and any dark places!
So let’s get our kids interested again and venture out into the unknown, allowing them to use their imaginations with their make-shift binocular craft for kids!
Perhaps you would like to craft a safari animal?
Here is a previous post on how to craft giraffes using cardboard inner tubes.
What a fantastic and creative project! I absolutely love the idea of making binoculars with kids – it’s not only a fun and engaging activity but also a wonderful way to encourage their imagination and exploration of the world around them. The step-by-step instructions seem very clear and easy to follow, making it accessible for kids of various ages. Plus, using everyday materials is a great way to teach kids about recycling and repurposing items creatively. Thank you for sharing this wonderful craft idea!
Hey Enxhi, thanks for your lovely comment! Give a child any kind of tublular shape, and they love to look through it, up and down and around and around! And especially now that the weather is starting to warm up, it’s the perfect time to get kids out into the gardens, parks or forests, and do some investigating!
Even though these crafted binoculars are make-belief, it’s still a great way to have kids pretend they are scientists and are on an important mission.
Cardboard inner tubes are a very versatile resource to use in craft activities, and I have used them in many projects, and I hope I am educating kids as well as parents, that they can use their everyday throw-outs and recycle them into fun kids projects.
Once again thanks for jumping in and taking a look and I hope I have inspired you to have a go!
Julia. ?
I absolutely love this article and I love your site, it is so inspirational.
I am going back to Liverpool this week for the Easter break, so I am going to share this article and other articles with my niece and nephew, and with my friends and their children. We could have so much fun working on binoculars using recycled cardboard and inner tubes.
I will let you know how we get on and how my friends get on with their children. We could make some good Easter presents with some of your other articles, that the kids could take back to school for their friends and teachers.
Hey Tom, it’s absolutely my pleasure and I love that you like my projects and want to pass them on!
And in the process children you know can get inspired to make something out of rubbish!
The binoculars are very easy to put together, and once completed then let the magic happen.
Out into the gardens, parks or forests and their imagination will take over!
Please keep in touch as I am looking to craft something for the Easter break, although like you mention
you can still dive into previous craft projects and check out some Easter fun activities kids can do before hand.
Thanks for your support and your generous comment.
Oh, if your niece or nephew get to make any of these project, please do send photos of their work, then I can add
them as an update to this post.
Happy Crafting!
Julia.?
Hi, I stumbled into your website and it is very interesting and good way of recycling those tissue paper inner cardboard. I have always wanted to find out how I can recycle those and thanks to you, now I know. I have 5 grandkids but one is 16 years old who probably will not be interested in it but I have two that are 4 and 5. I cant wait to try to make this with them. Thank you!
Hi Liza, I am so happy you dicovered my site, as my intention and the ethos of my website, is to take our recycling and upcycle any odd rubbish that can be transformed into fun kids projects!
Cardboard inner tubes are a very versatile resource and you can make quite a number of things with them, so within my website
you will come across them numerous times!
Your 16 year old, can aid or help the two younger children to make these binoculars, maybe when stapling, painting or even adding
different embellishment on to them, as they may need a bit of help and guidance there, and once they have completed their binoculars they can all go out and record what they find, and your 16 year old can help them look for mini-beast, wild flowers and different birds.
Furthermore, they could have a go at drawing their findings, make a record of them and show it off in their class back at school, but remember if it rains the binoculars can get damaged, so save this type of activity for when the weather is on our side!
Thanks for your lovely comment.
Happy Crafting! Oh, don’t forget to save those tubes!
Julia.?
Hi Julia,
I’m totally on board with crafting those binoculars with the kiddos—it sounds like a ton of fun! I am imagining us cutting, stapling, and painting our way to adventure.. And those animal-print papers? What a brilliant idea to make the process mess-free and super colorful! Thanks for sharing all those handy tips about the crafting process. Can’t wait to gather the supplies and dive into this creative journey with my little explorers!
Hey Chas,thanks for jumping in and taking a look! I am glad to have inspired you to double up with your cardboard tubes and just by adding a lick of paint, or the animal papers, voila! You will have safari like binoculars!
This is a fun activity to get kids out into the open air and go investigating and see what’s out there!
Now spring is upon us, it’s an excuse to go hunting with their make-belief binoculars and search the land!
So start saving those cardboard tubes and let the magic happen!
Happy Crafting!
Julia.?
Hi Julia,
This is such a fun and easy craft that I am going to try with my daycare kids!
I always have plenty of cardboard tubes lying around wondering what to do with them. So, I will give the binoculars a go.
I love the idea of painting them, I also have plenty of patterned felt and other fabric to use as well.
It will be exciting to see what my kids come up with.
Thanks for the inspiration!
Jenny.
Hi Jenny, happy to have inspired you! Cardboard inner tubes always come in handy, their shape determines what they can be turned into, and how easy is it to put two together and make these fun binoculars!
This is a great activity for your kids to do, and once they have completed their binoculars however they go about it, they will be eager to get outside and put them to good use. Kids have great imagination, and they can pretend to be super scientists getting down to serious investigating!
Oh, and when your kids have made their fun binoculars, I would love to see them, and even add them to this post as an update, and show them off!
Thanks for your super comment!
And Happy Crafting!
Julia. ?


What a fantastic and creative project! I absolutely love the idea of making binoculars with kids – it’s not only a fun and engaging activity but also a wonderful way to encourage their imagination and exploration of the world around them. The step-by-step instructions seem very clear and easy to follow, making it accessible for kids of various ages. Plus, using everyday materials is a great way to teach kids about recycling and repurposing items creatively. Thank you for sharing this wonderful craft idea!
Hey Enxhi, thanks for your lovely comment! Give a child any kind of tublular shape, and they love to look through it, up and down and around and around! And especially now that the weather is starting to warm up, it’s the perfect time to get kids out into the gardens, parks or forests, and do some investigating!
Even though these crafted binoculars are make-belief, it’s still a great way to have kids pretend they are scientists and are on an important mission.
Cardboard inner tubes are a very versatile resource to use in craft activities, and I have used them in many projects, and I hope I am educating kids as well as parents, that they can use their everyday throw-outs and recycle them into fun kids projects.
Once again thanks for jumping in and taking a look and I hope I have inspired you to have a go!
Julia. ?
Hey Julia,
I absolutely love this article and I love your site, it is so inspirational.
I am going back to Liverpool this week for the Easter break, so I am going to share this article and other articles with my niece and nephew, and with my friends and their children. We could have so much fun working on binoculars using recycled cardboard and inner tubes.
I will let you know how we get on and how my friends get on with their children. We could make some good Easter presents with some of your other articles, that the kids could take back to school for their friends and teachers.
Thank you for sharing and keep up the great work.
Happy Easter.
All the best,
Tom
Hey Tom, it’s absolutely my pleasure and I love that you like my projects and want to pass them on!
And in the process children you know can get inspired to make something out of rubbish!
The binoculars are very easy to put together, and once completed then let the magic happen.
Out into the gardens, parks or forests and their imagination will take over!
Please keep in touch as I am looking to craft something for the Easter break, although like you mention
you can still dive into previous craft projects and check out some Easter fun activities kids can do before hand.
Thanks for your support and your generous comment.
Oh, if your niece or nephew get to make any of these project, please do send photos of their work, then I can add
them as an update to this post.
Happy Crafting!
Julia.?
Hi, I stumbled into your website and it is very interesting and good way of recycling those tissue paper inner cardboard. I have always wanted to find out how I can recycle those and thanks to you, now I know. I have 5 grandkids but one is 16 years old who probably will not be interested in it but I have two that are 4 and 5. I cant wait to try to make this with them. Thank you!
Hi Liza, I am so happy you dicovered my site, as my intention and the ethos of my website, is to take our recycling and upcycle any odd rubbish that can be transformed into fun kids projects!
Cardboard inner tubes are a very versatile resource and you can make quite a number of things with them, so within my website
you will come across them numerous times!
Your 16 year old, can aid or help the two younger children to make these binoculars, maybe when stapling, painting or even adding
different embellishment on to them, as they may need a bit of help and guidance there, and once they have completed their binoculars they can all go out and record what they find, and your 16 year old can help them look for mini-beast, wild flowers and different birds.
Furthermore, they could have a go at drawing their findings, make a record of them and show it off in their class back at school, but remember if it rains the binoculars can get damaged, so save this type of activity for when the weather is on our side!
Thanks for your lovely comment.
Happy Crafting! Oh, don’t forget to save those tubes!
Julia.?
Hi Julia,
I’m totally on board with crafting those binoculars with the kiddos—it sounds like a ton of fun! I am imagining us cutting, stapling, and painting our way to adventure.. And those animal-print papers? What a brilliant idea to make the process mess-free and super colorful! Thanks for sharing all those handy tips about the crafting process. Can’t wait to gather the supplies and dive into this creative journey with my little explorers!
Hey Chas,thanks for jumping in and taking a look! I am glad to have inspired you to double up with your cardboard tubes and just by adding a lick of paint, or the animal papers, voila! You will have safari like binoculars!
This is a fun activity to get kids out into the open air and go investigating and see what’s out there!
Now spring is upon us, it’s an excuse to go hunting with their make-belief binoculars and search the land!
So start saving those cardboard tubes and let the magic happen!
Happy Crafting!
Julia.?
Hi Julia,
This is such a fun and easy craft that I am going to try with my daycare kids!
I always have plenty of cardboard tubes lying around wondering what to do with them. So, I will give the binoculars a go.
I love the idea of painting them, I also have plenty of patterned felt and other fabric to use as well.
It will be exciting to see what my kids come up with.
Thanks for the inspiration!
Jenny.
Hi Jenny, happy to have inspired you! Cardboard inner tubes always come in handy, their shape determines what they can be turned into, and how easy is it to put two together and make these fun binoculars!
This is a great activity for your kids to do, and once they have completed their binoculars however they go about it, they will be eager to get outside and put them to good use. Kids have great imagination, and they can pretend to be super scientists getting down to serious investigating!
Oh, and when your kids have made their fun binoculars, I would love to see them, and even add them to this post as an update, and show them off!
Thanks for your super comment!
And Happy Crafting!
Julia. ?