Let’s craft a layered Snowman recycled Christmas card, using some recycling and a bit of glitter! Then you can craft as many as you want!
A Snowman theme?
It’s that time of the year again. Christmas come upon us, and as usual, I would hunt around for a decent Christmas card that I like, but still prefer to make my own.
It would be a feat, as you need to put aside some time and come up with an idea that’s a Christmas vibe!
A JOY TO CRAFT A SNOWMAN CARD!
For me, it’s that rush you get and the joy in making something by hand, and those receiving these cards would appreciate the time and effort used to hand-make these Christmas cards!
LET IT SNOW, LET IT SNOW AGAIN!
So I surfed the net and went over ideas that I haven’t tried before. As I was doing this, I just wondered if it would snow this year and whether we’d have an opportunity to make a snowman, and voila! I shall pitch for a Snowman. I will look around for surplus resources, bits of card, buttons, coloured papers, glue, and anything I can reuse or recycle for card making.
MY VISION FOR THE SNOWMAN RECYCLED CHRISTMAS CARD!
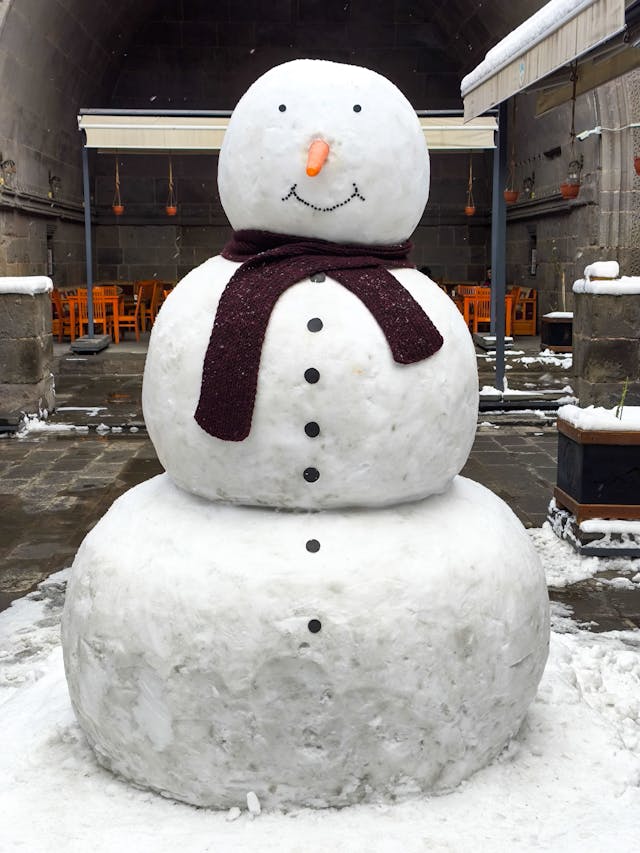
Typical 3 ball snowman. Picture from Pexels.com by Ibrahim Serdar
Kids are familiar with a white blobby-looking snowman, and an easy way to do this is to find cups or tubs that go down in size. I went for three decreasing sizes.
The top part would be the head, and the next two are the middle and bottom of the body.
So you will need to search for three decreasing circular tubs, tumblers or cups to do the snowman shape.
PREPARE BEFORE YOU START SNOWMAN CARDS!
It’s always wise to prepare your resources before you start, then build from that.
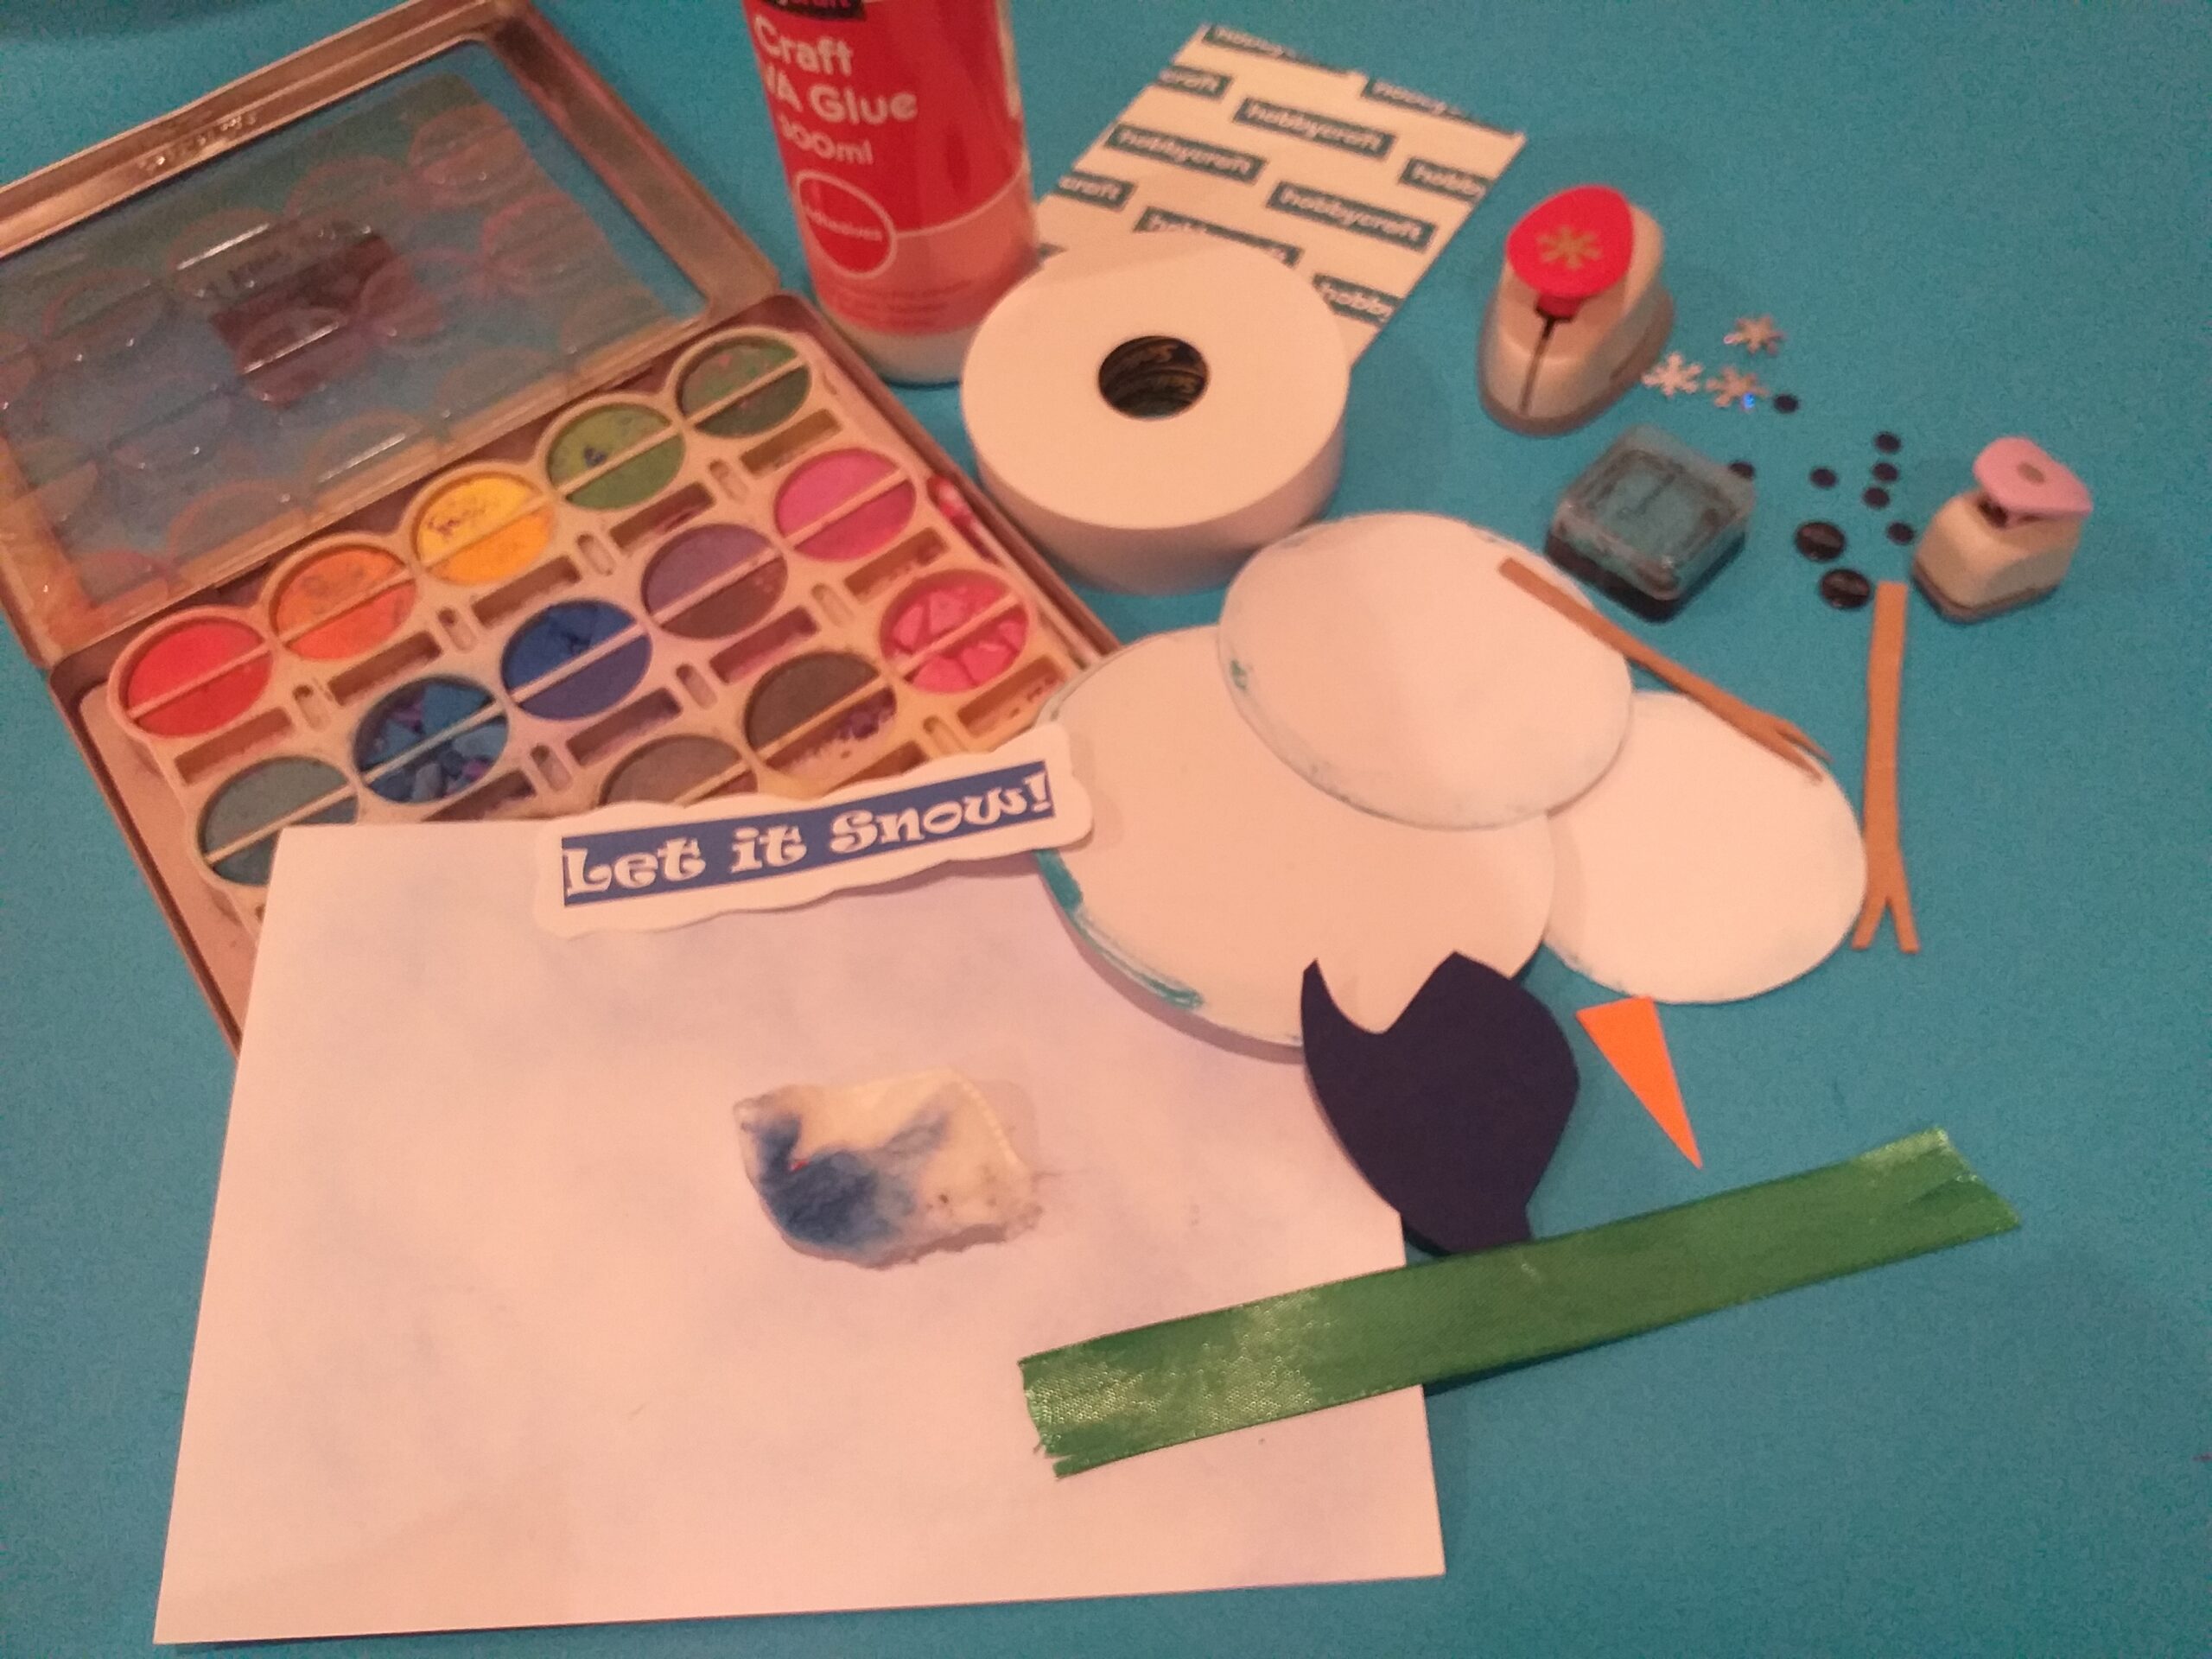
Our snowman will have a hat, scarf, twigs for arms, buttons for black eyes and a bit of sparkle, which would be snowflakes and glitter around some wording. You’ll need a white A4 sheet of card to cut out the circles and another one to fold in half and do our snowman design, and some envelopes, depending on how many you are going to make.
Of course, you will need various art resources to complement and colour your snowman!
MY CHOICE OF COLOURING TOOLS!
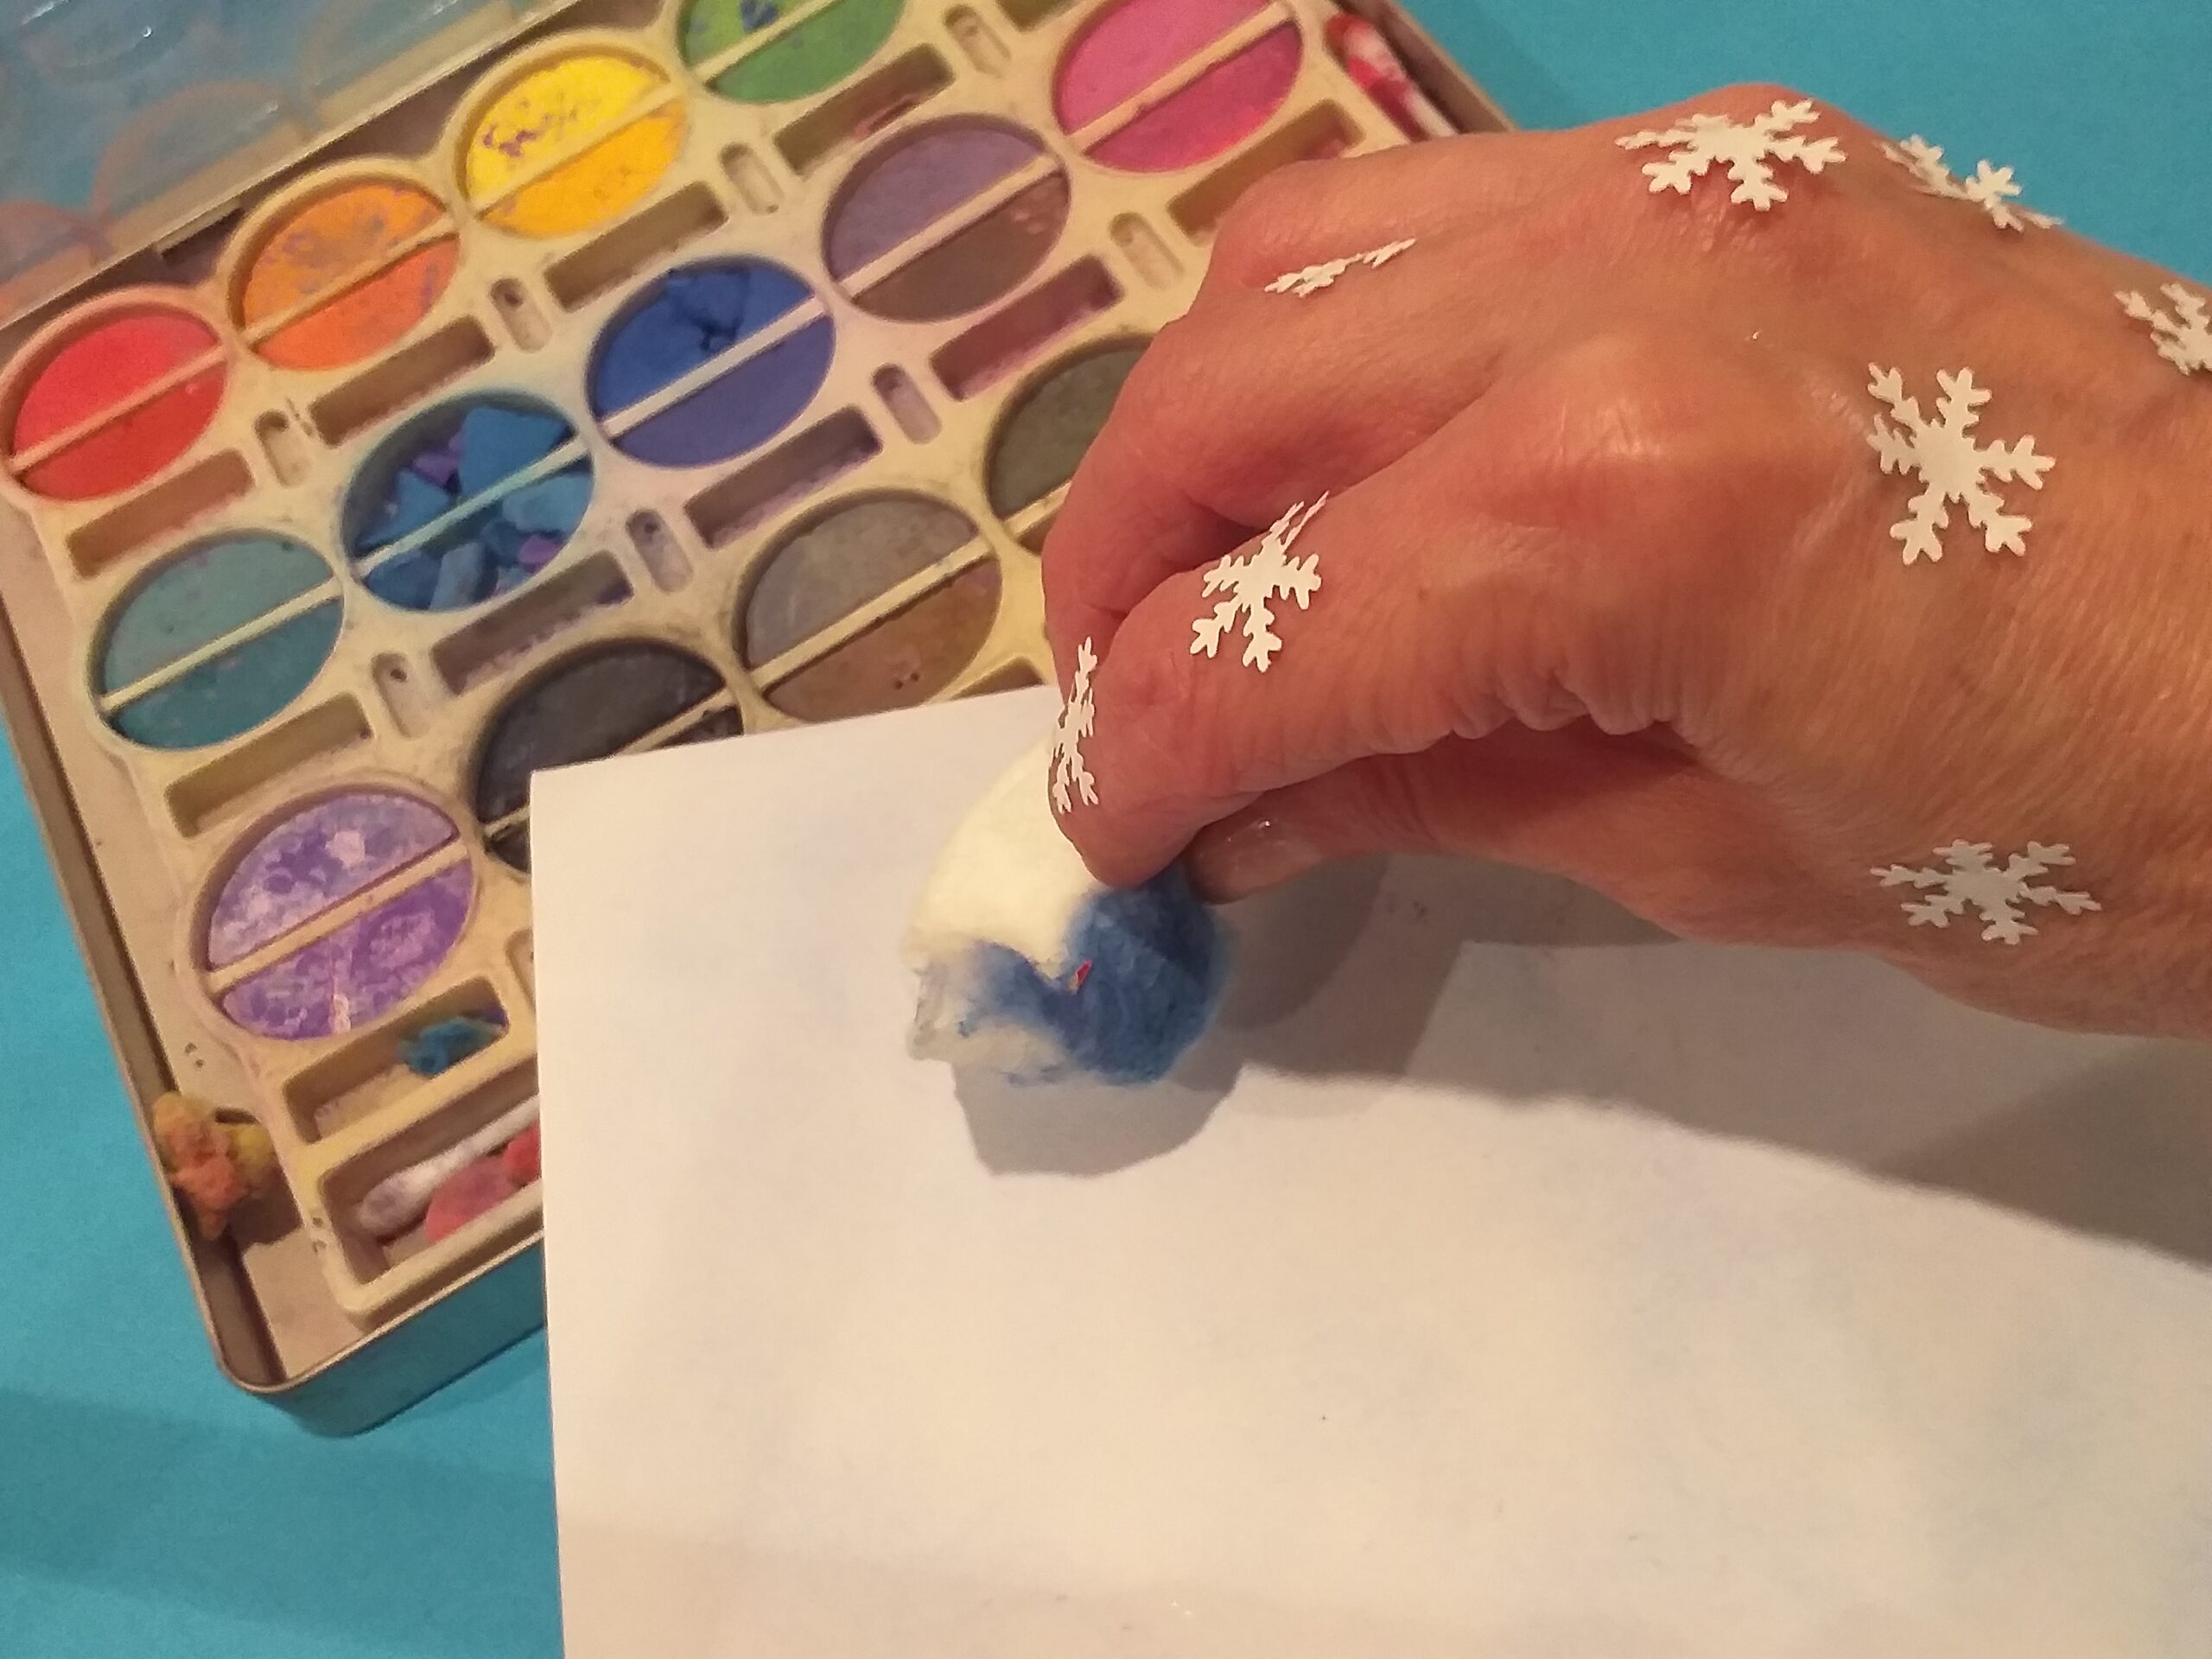
I chose from a chalk palette blue shades of chalk, which I use to buff up the front of the card to give it a bit of depth. This is easy to do and very hands-on; if working with a child, they would learn to use coloured chalks and discover different ways of being creative.
MODEL CHALKS FIRST.
You could model this first on another piece of card. In this instance, I used cotton wool and applied it in circular motion, swirling it round and round. This effect tones the white background down and gives the feel of snow.
See in image (1)
ARE YOU READY TO MAKE YOUR SNOWMAN CARDS?
RESOURCES
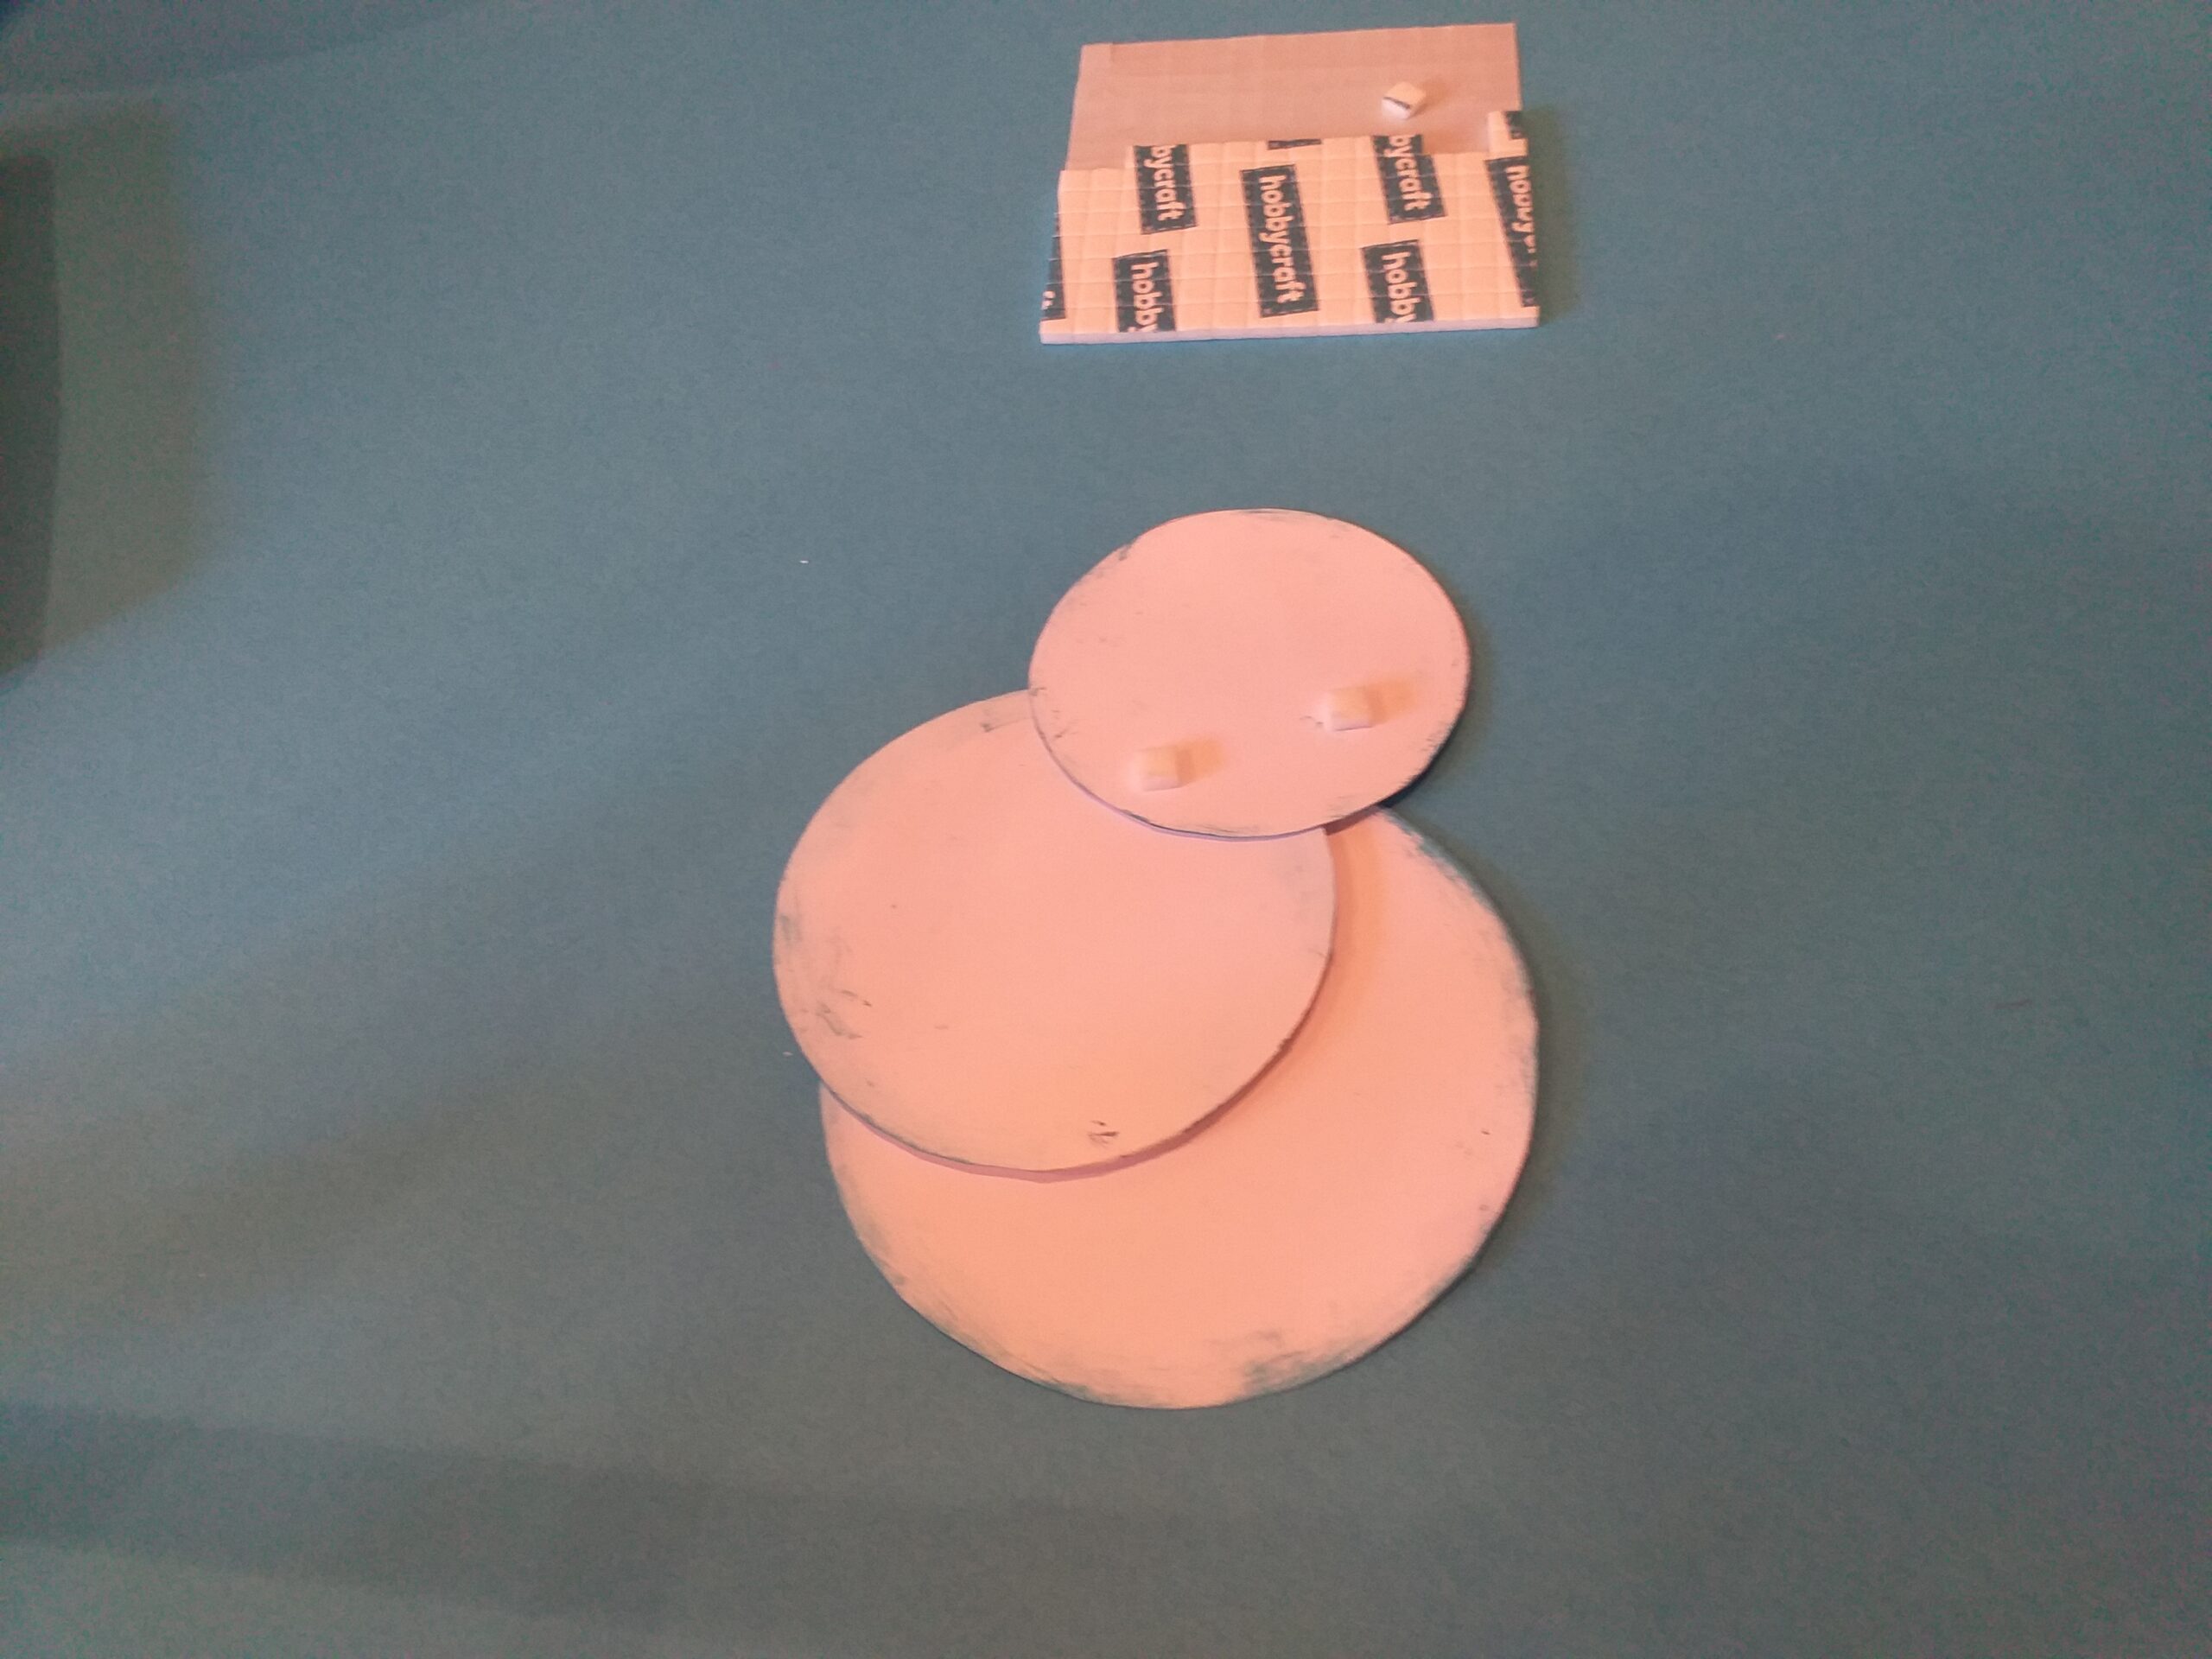
3 decreasing circles in size cut out of white card.
Double-sided sticky pads or a roll of 3 mm depth
Small black buttons 10-12mm wide.
Coloured chalks/pastels/blue ink pad
Some green/patterned ribbon
Small piece of orange/black card. Already cut carrot nose and black hat.
Small piece of brown packaging card./for arms.
Small circle Puncher/smaller than the size of the eyes.
PVA glue/Star puncher.
Label with ‘Let it go’ as a banner. (already glittered)
LET’S START THE SNOWMAN RECYCLED CHRISTMAS CARD!
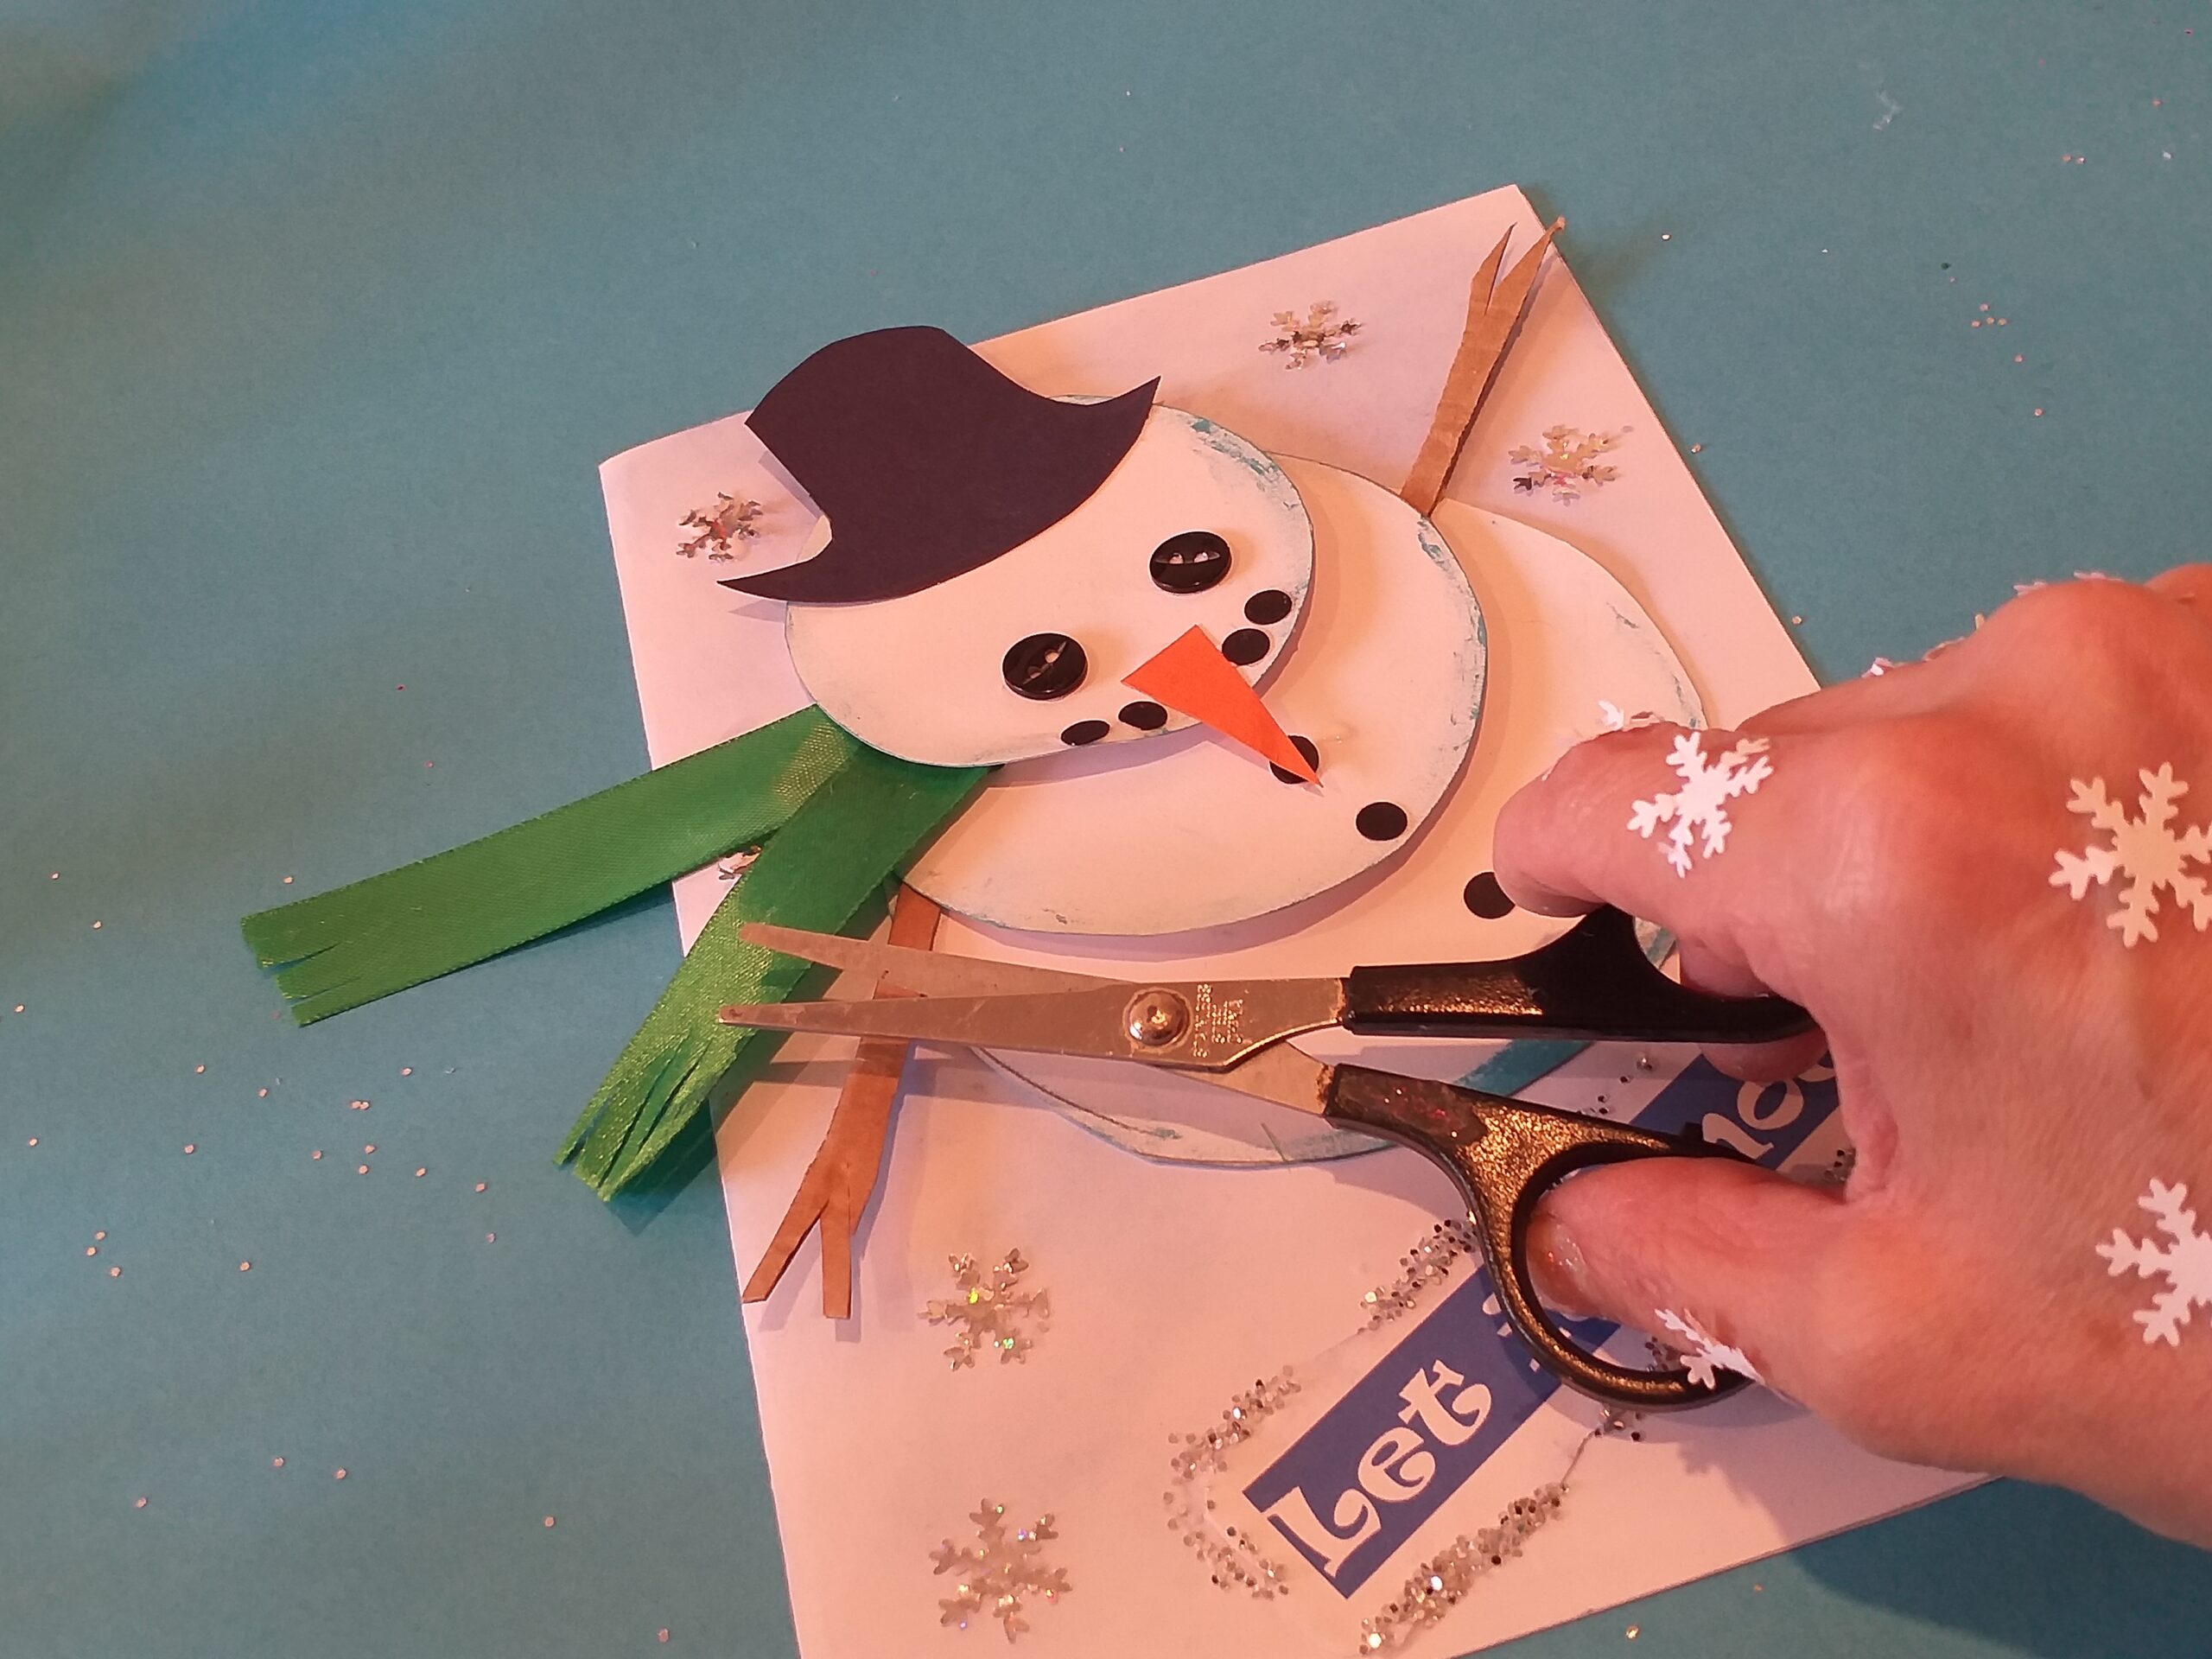
1) Chalk up white A4 card in Smokey blue.
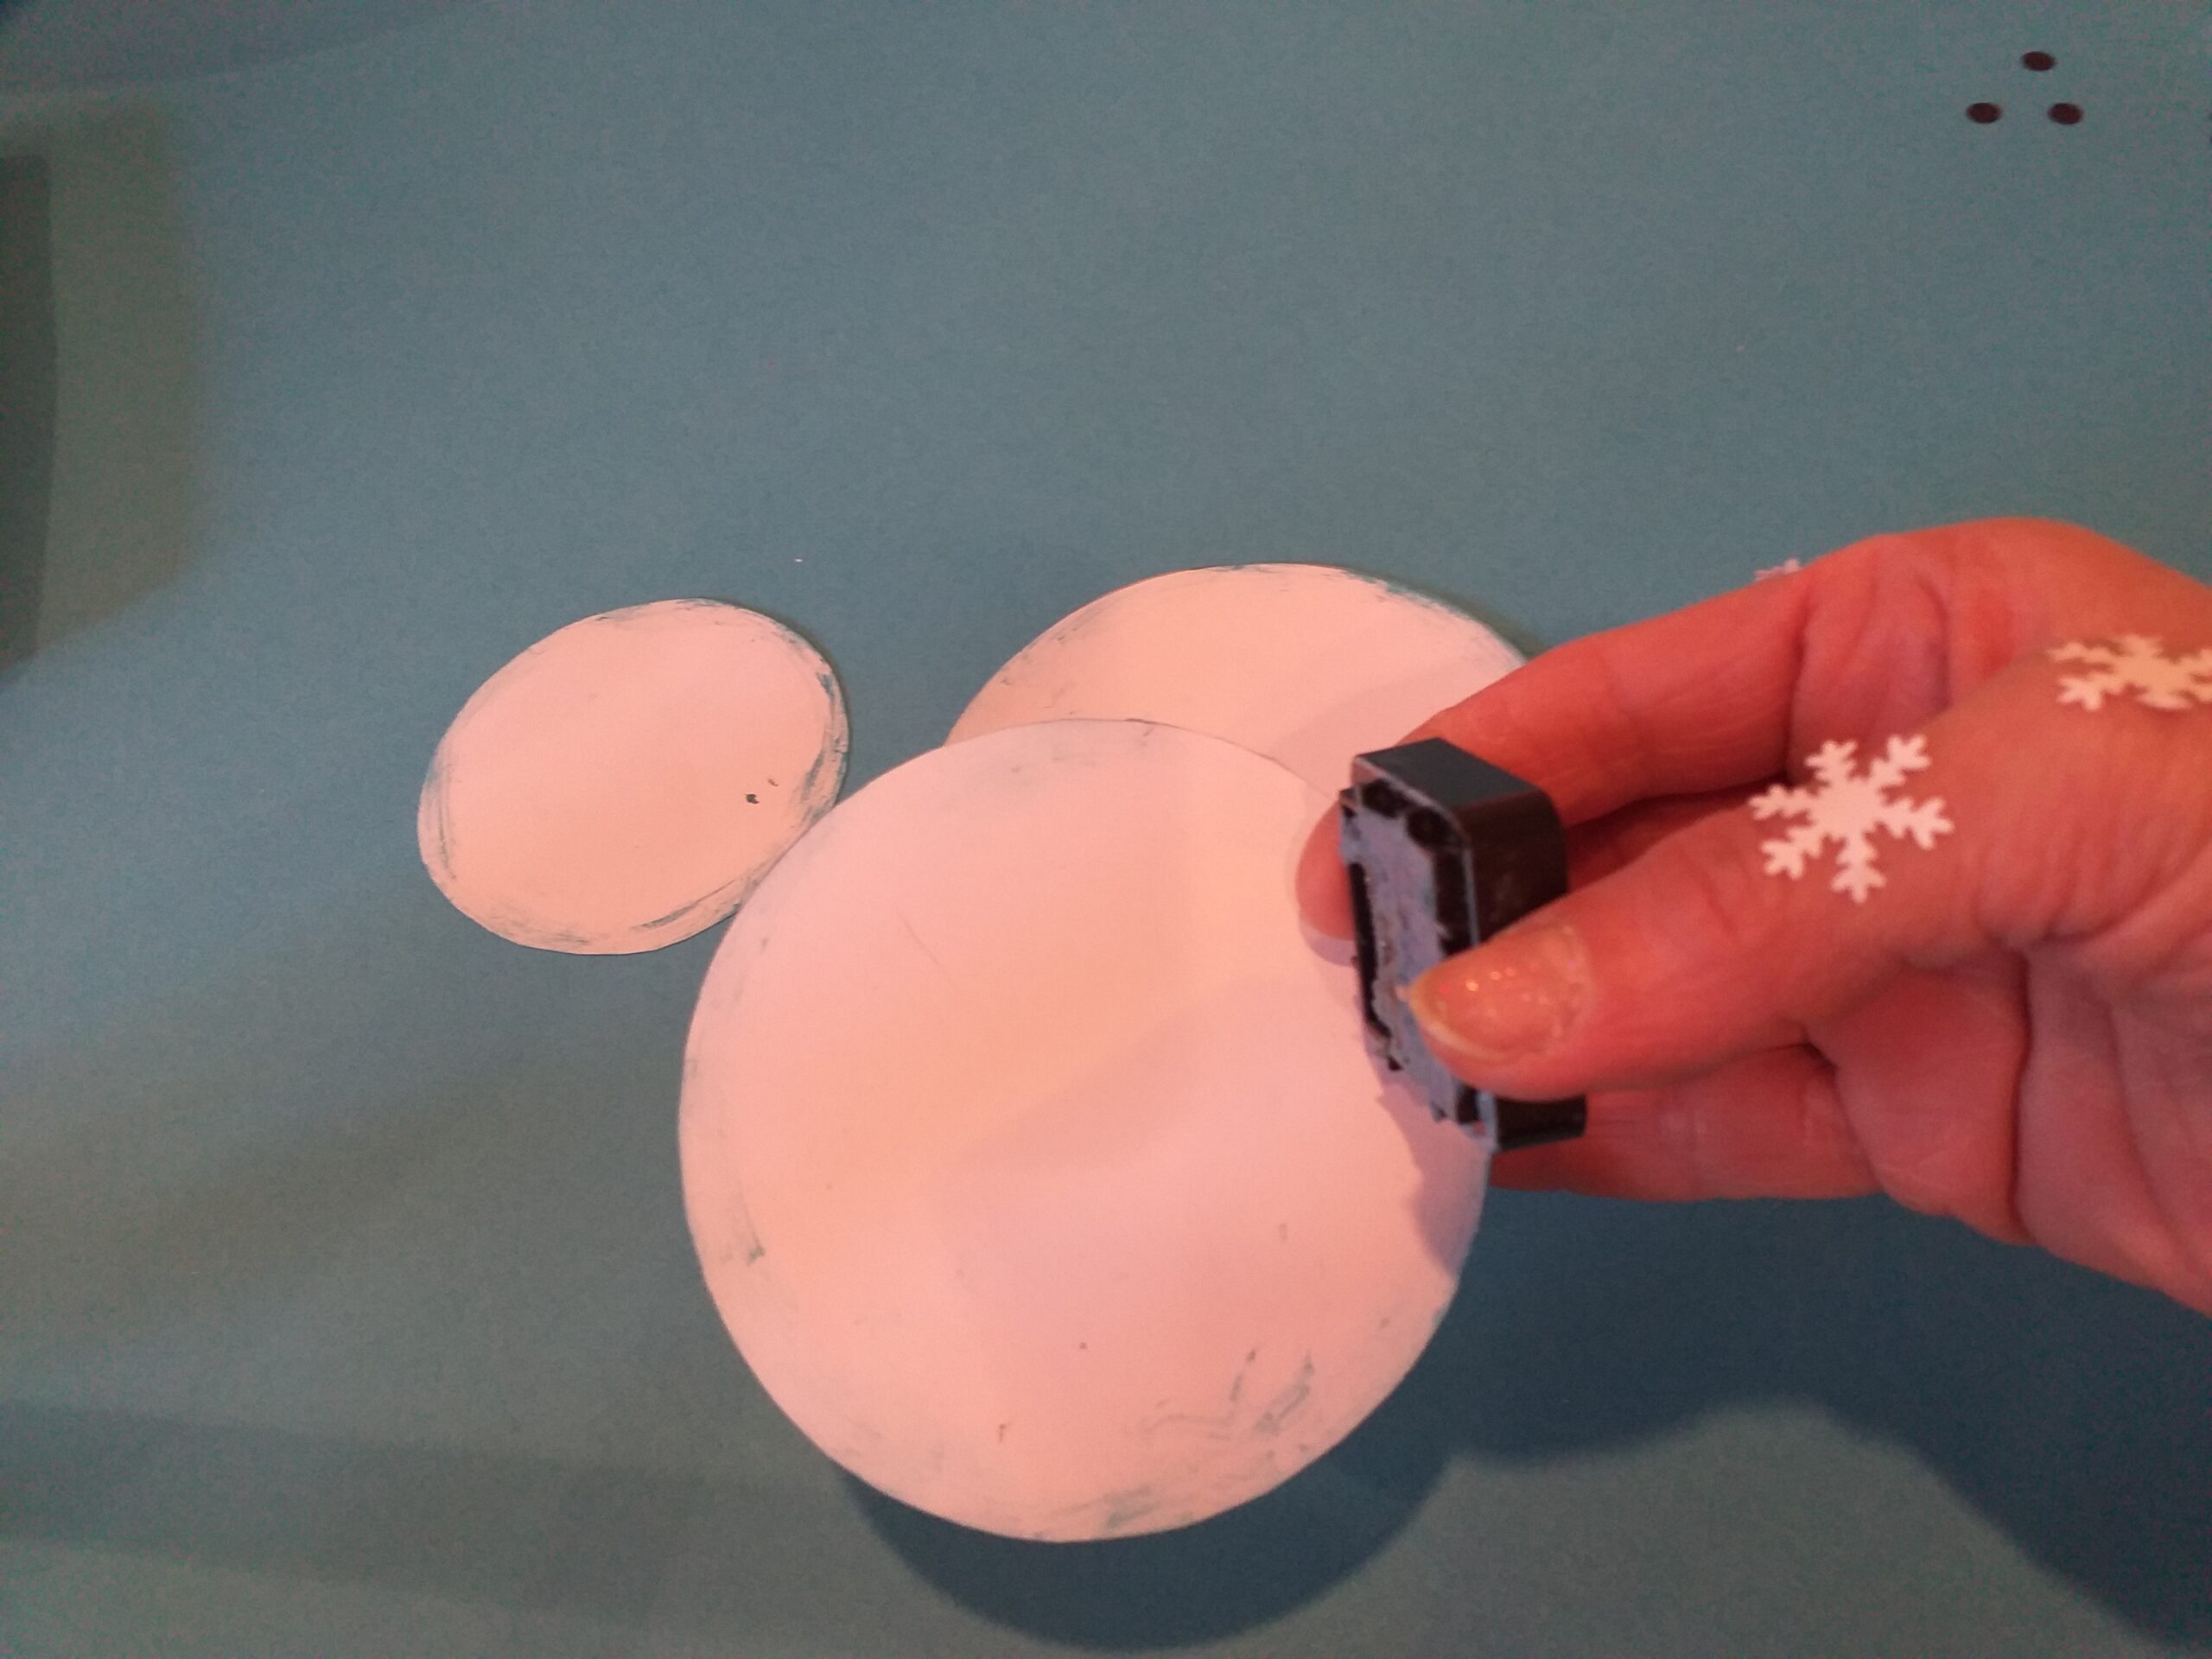
2) Cut out 3 circles decreasing in size out of another white A4 card and with blue ink pad rub around the edge of each circle.
3) Once you have inked up the 3 circles start to add sticky tabs on the back.
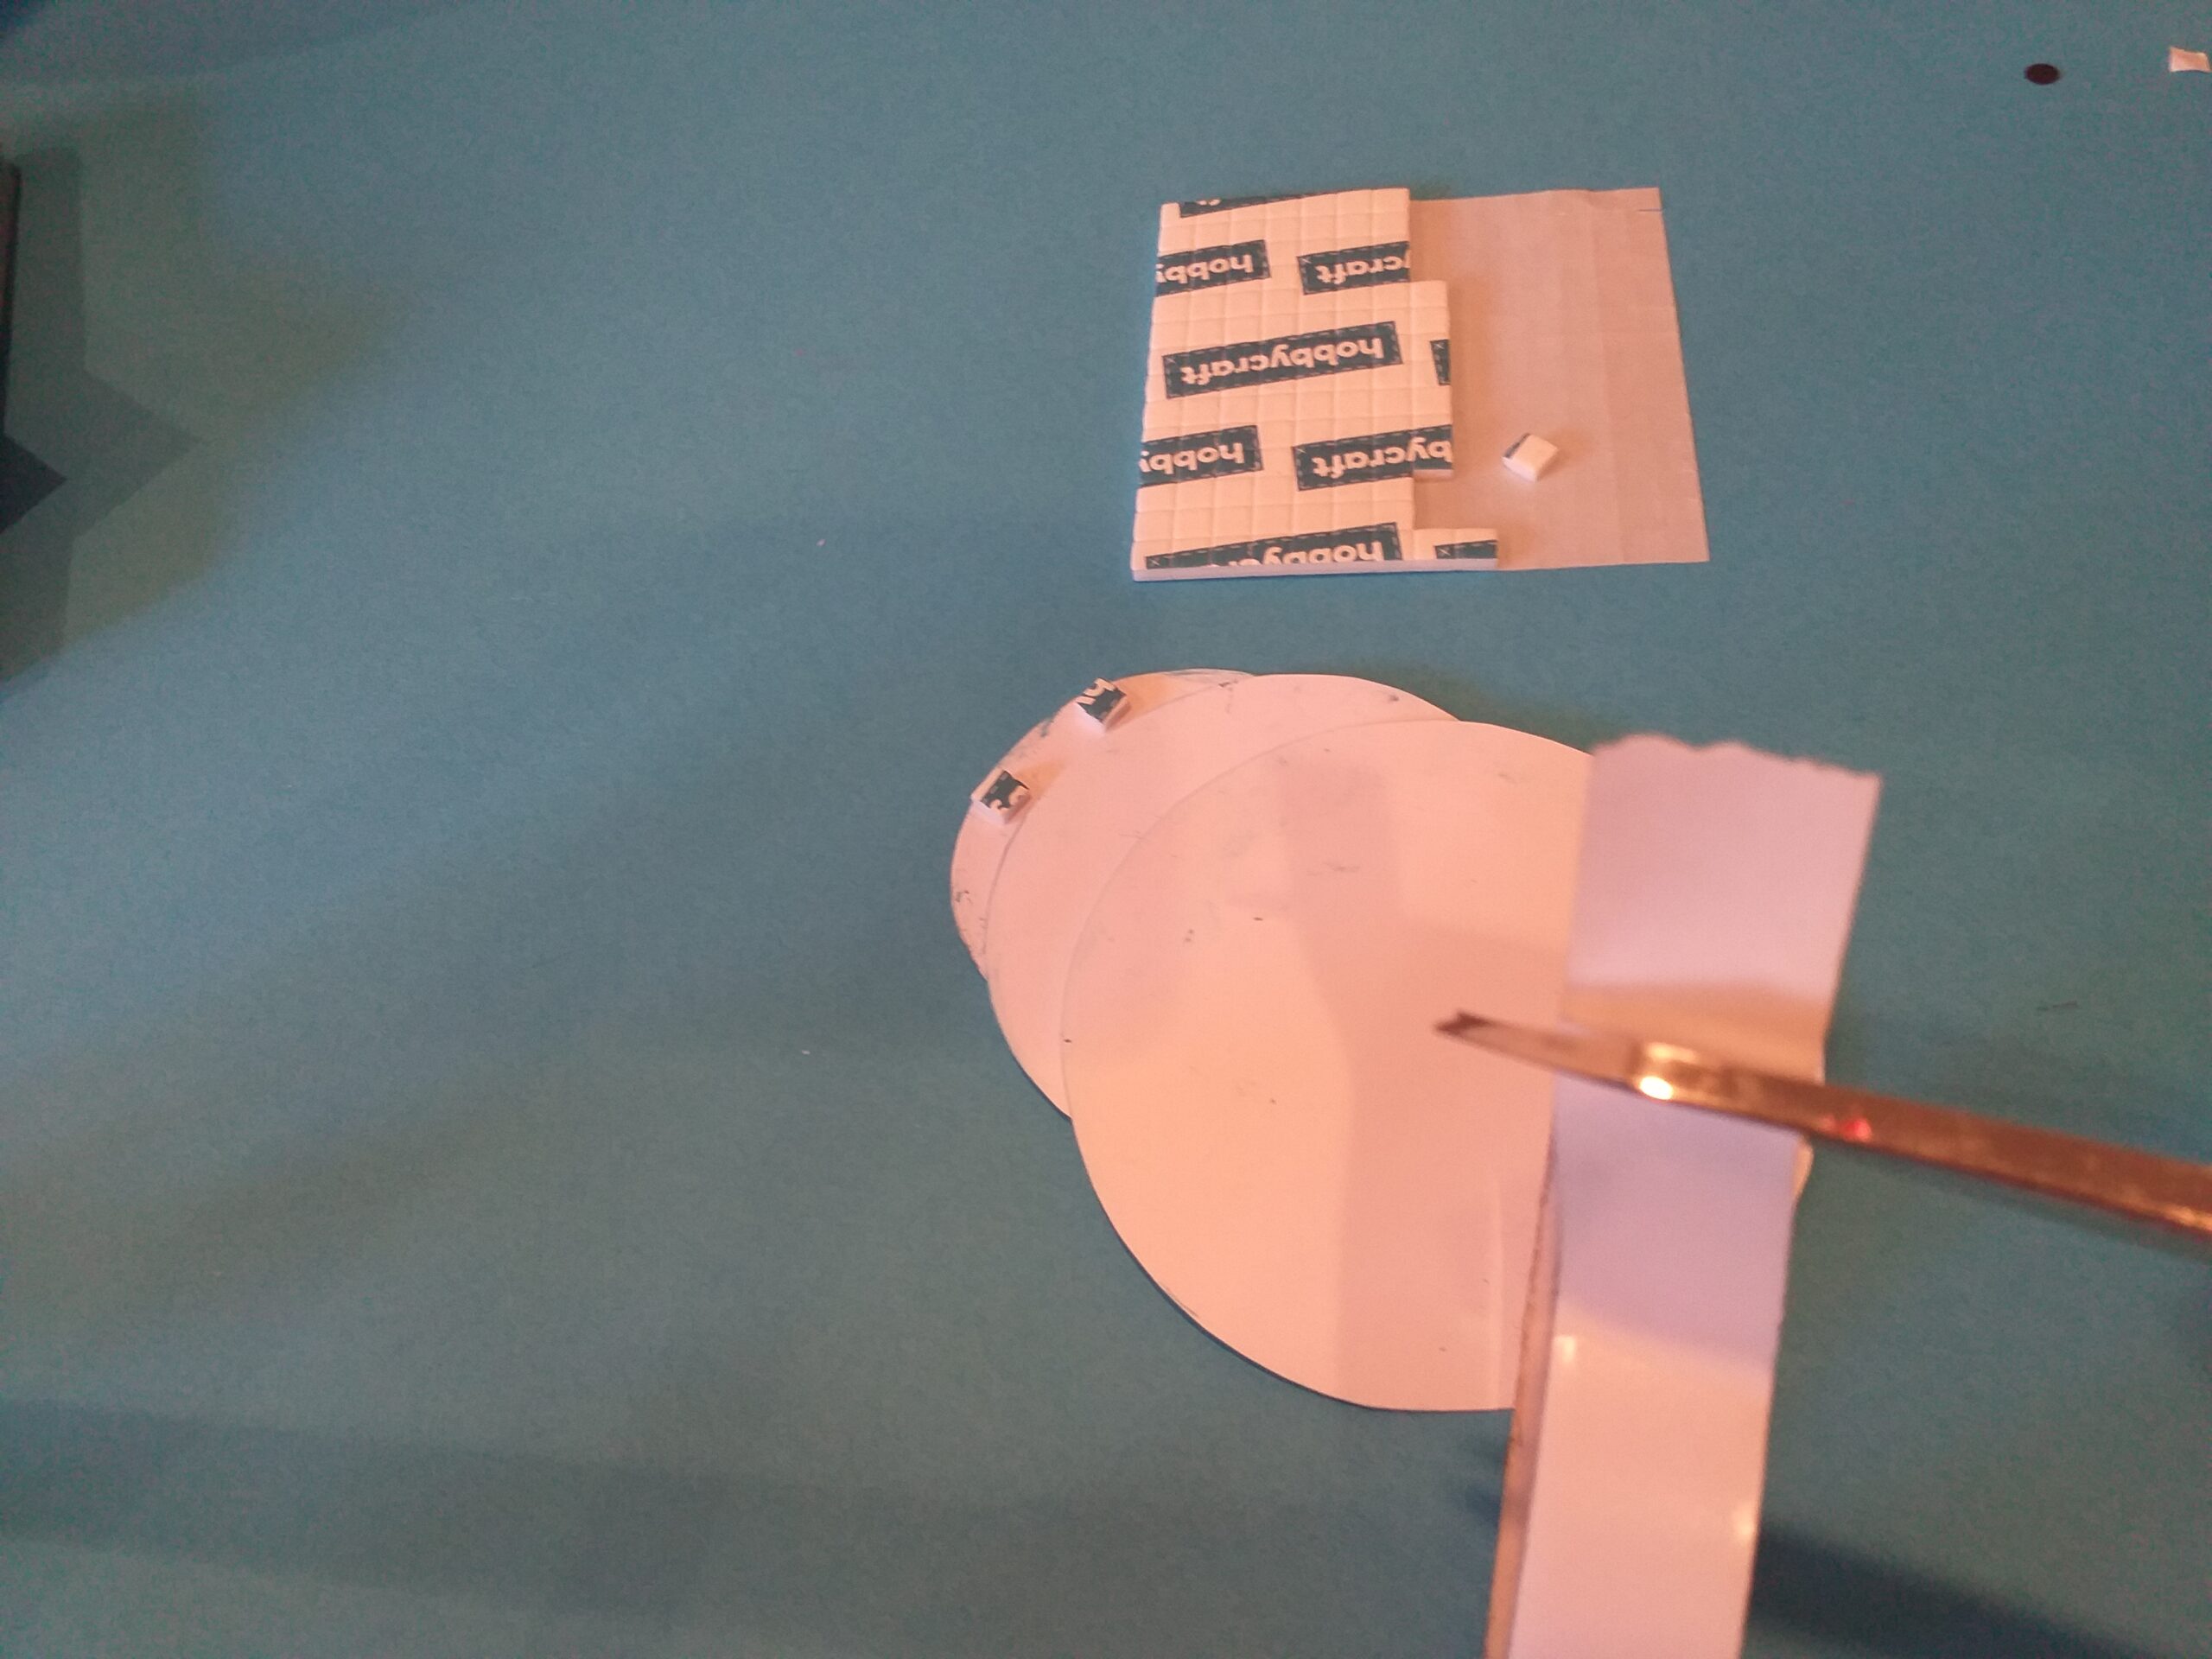
4) Add foam tape on the back of each circle.The 3mm sticky tabs or foam will elevate each circle, so it gives a 3D effect.
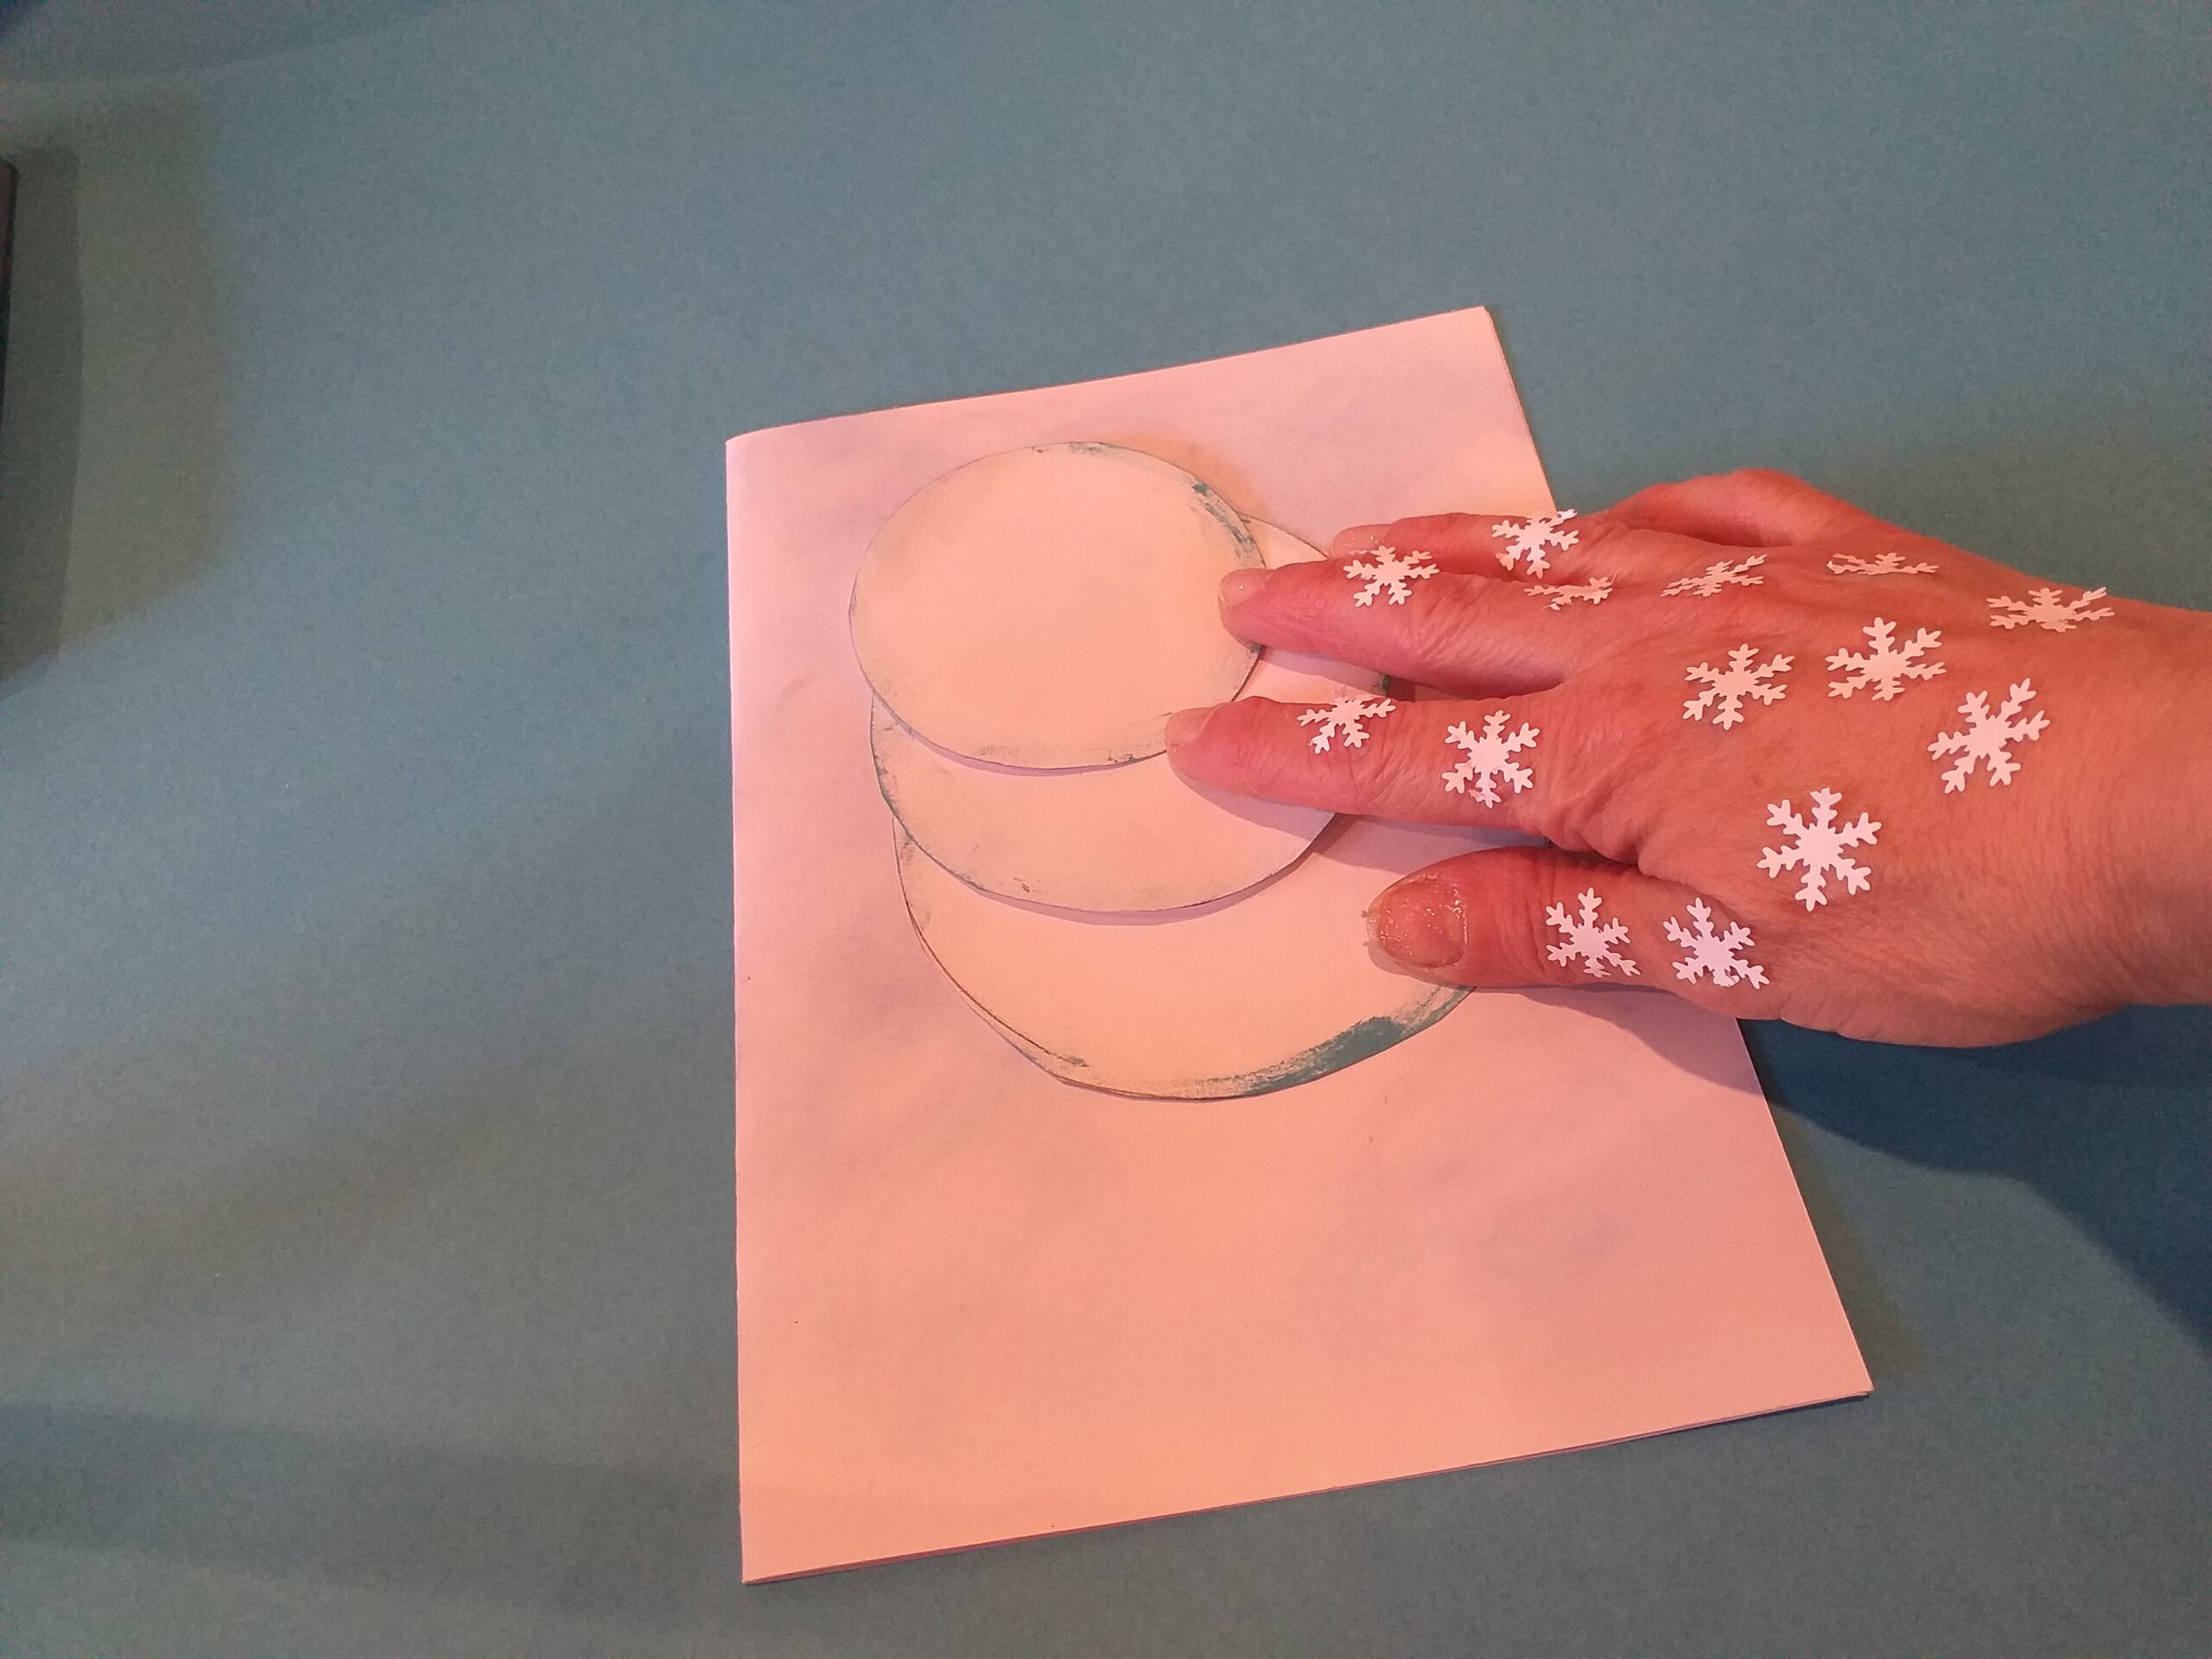
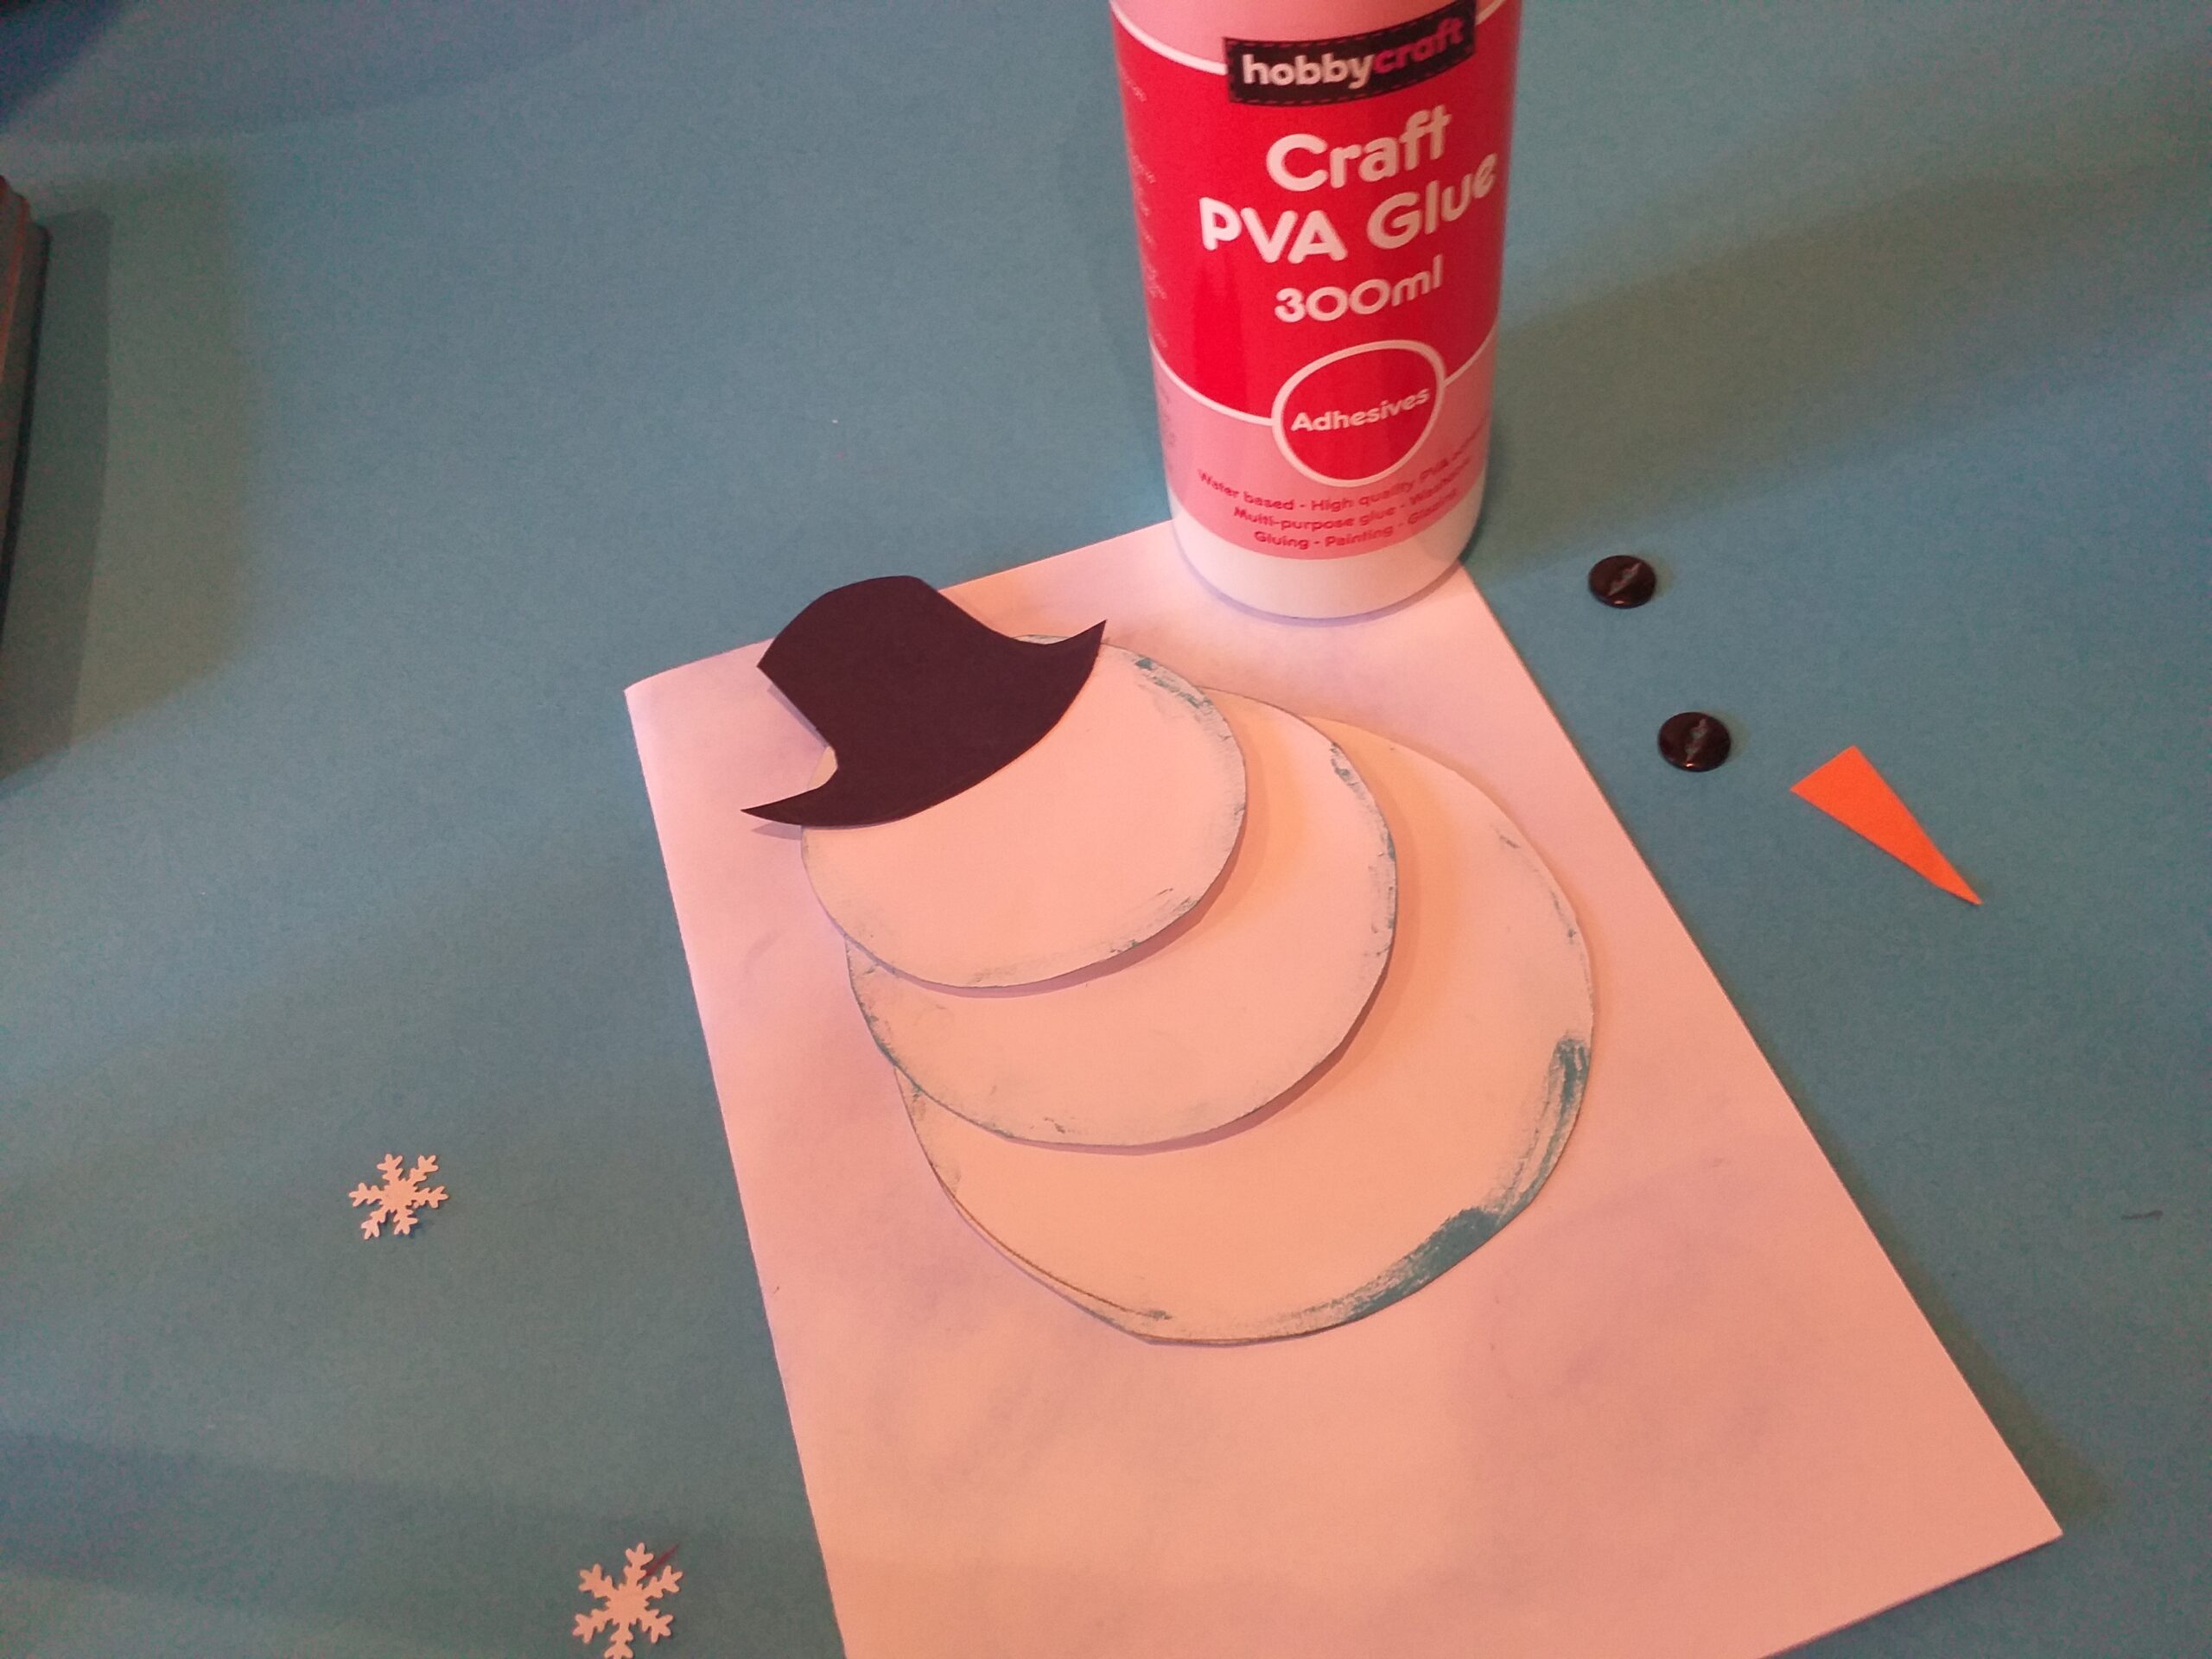
5) Fold the chalked A4 white card in half. Layer and stick on top of each other about half way down each circle the larger circle first, then the middle size, end with small circle on the top.
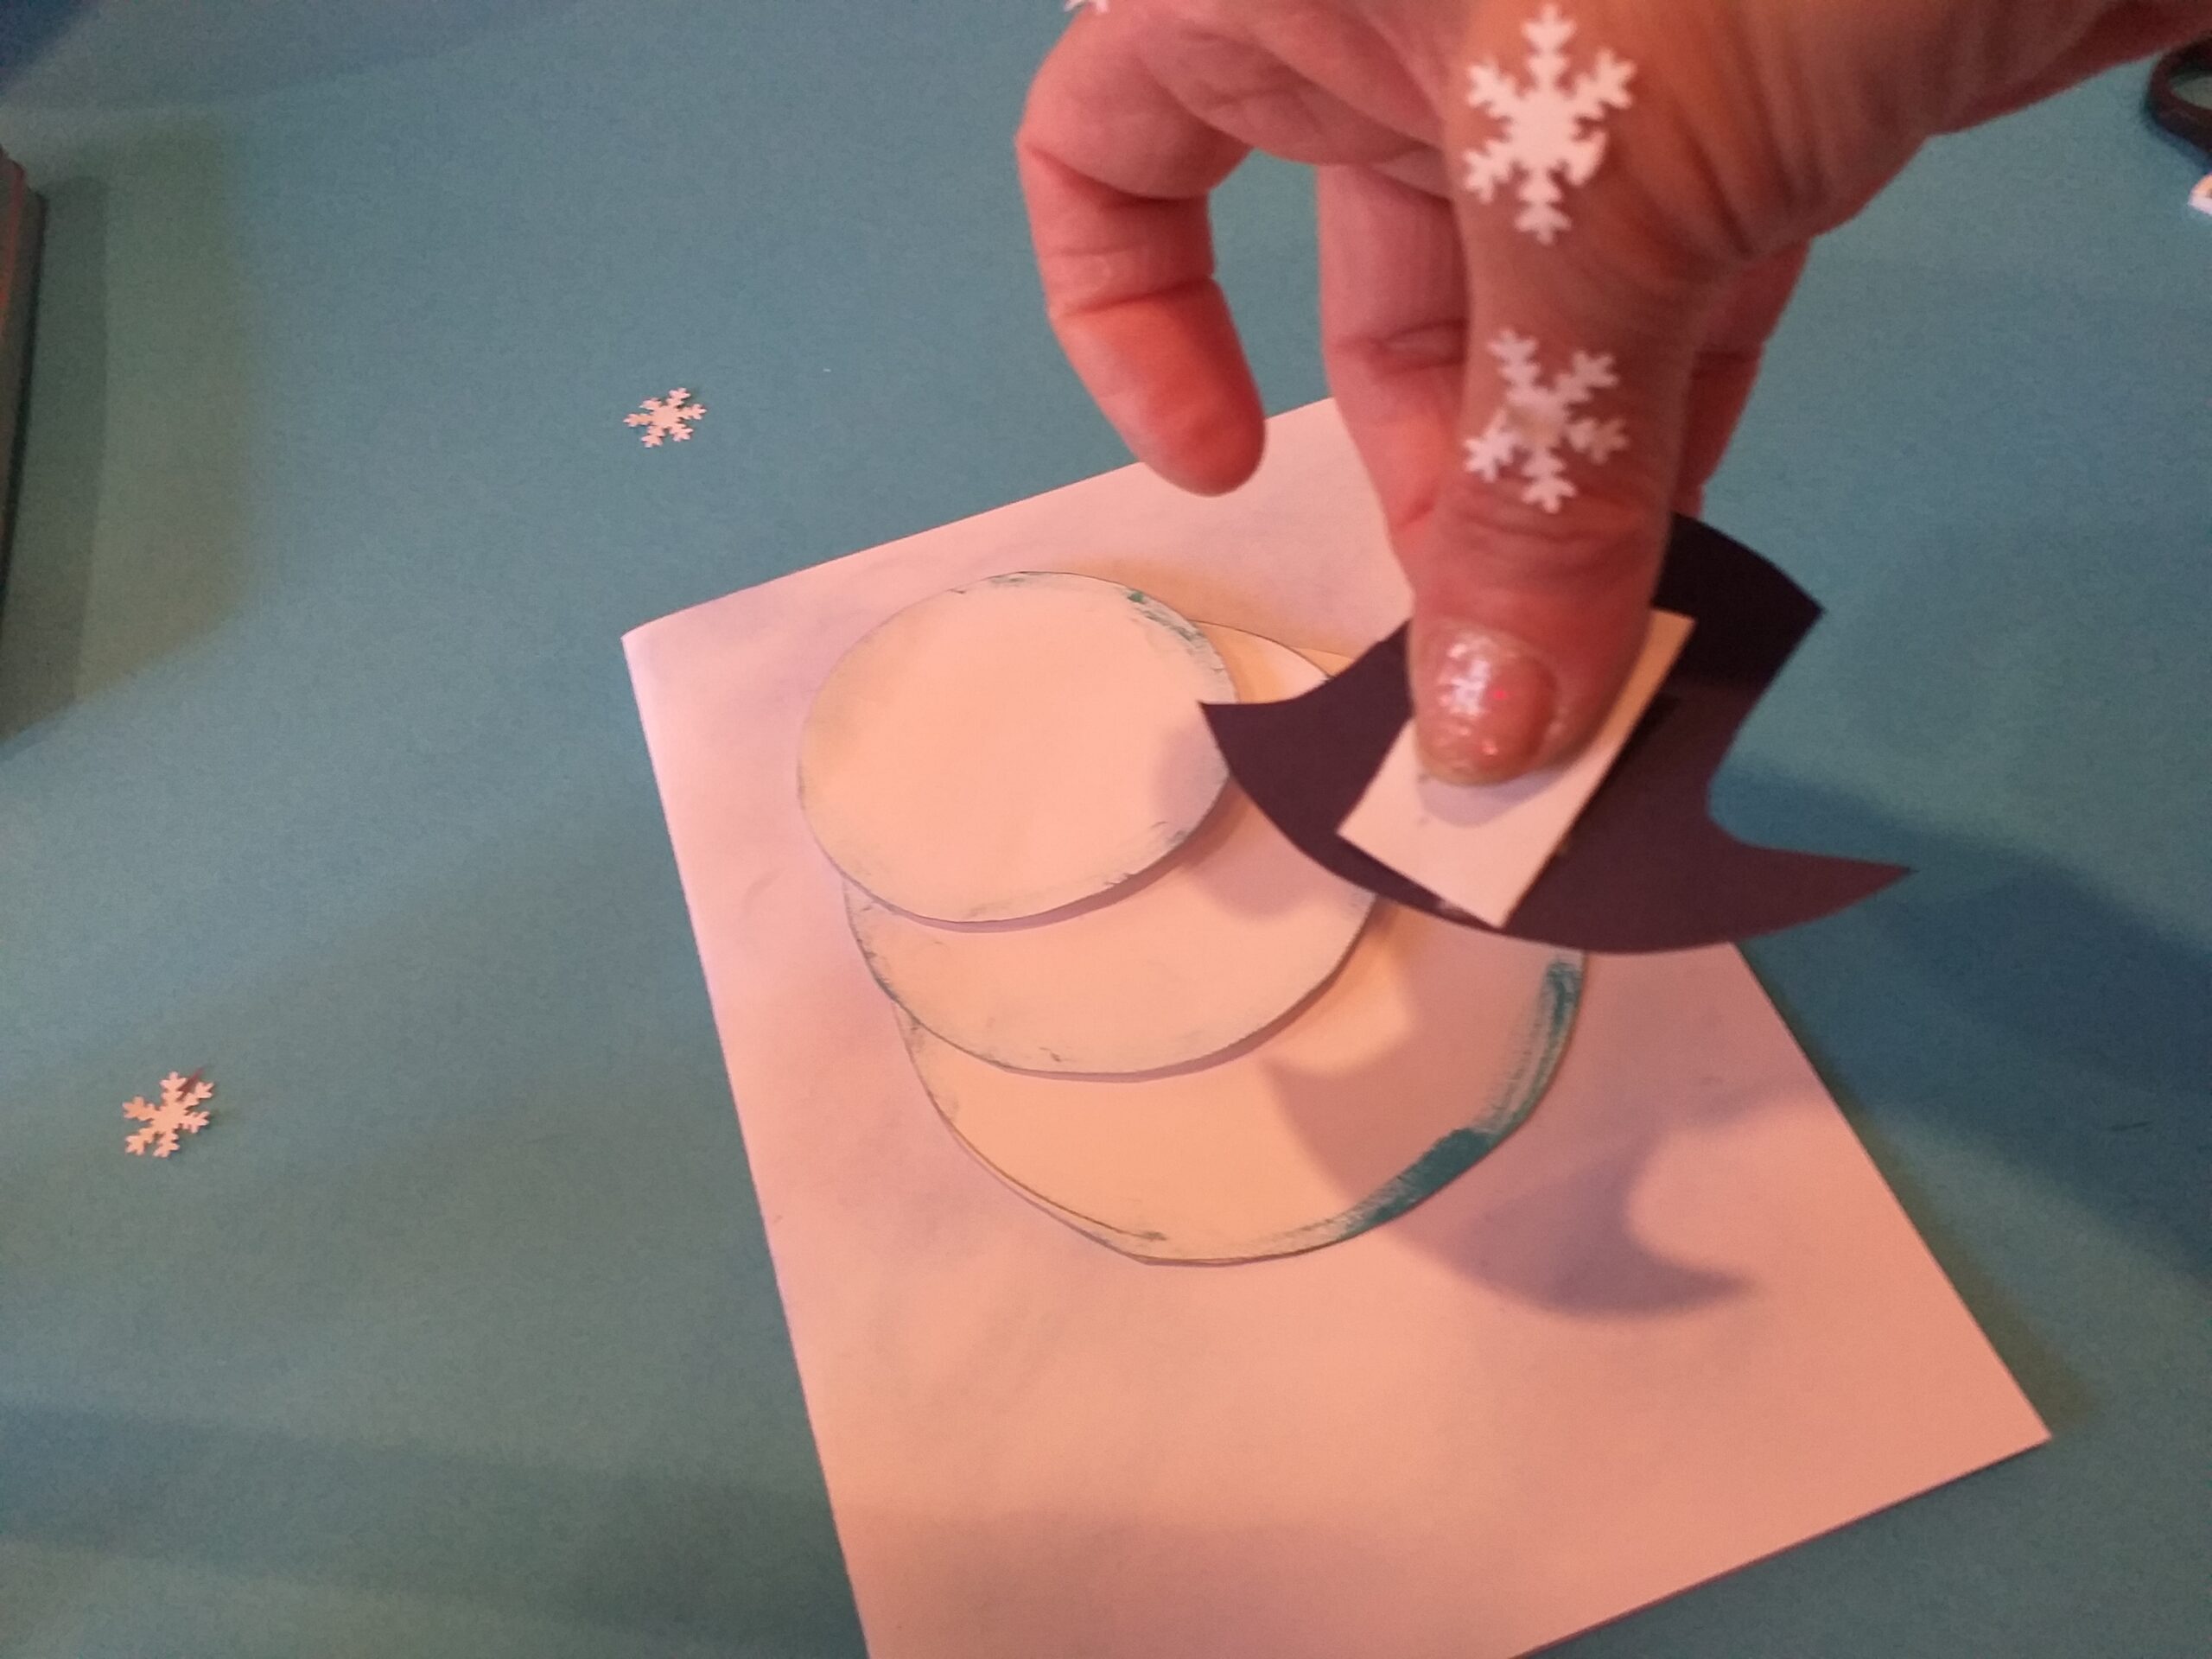
6) Cut out a top hat to size out of black card.
7) Add double sided tape on the back of hat.
8) Stick on to the top smaller circle. Cut out a carrot shape nose out of orange card.
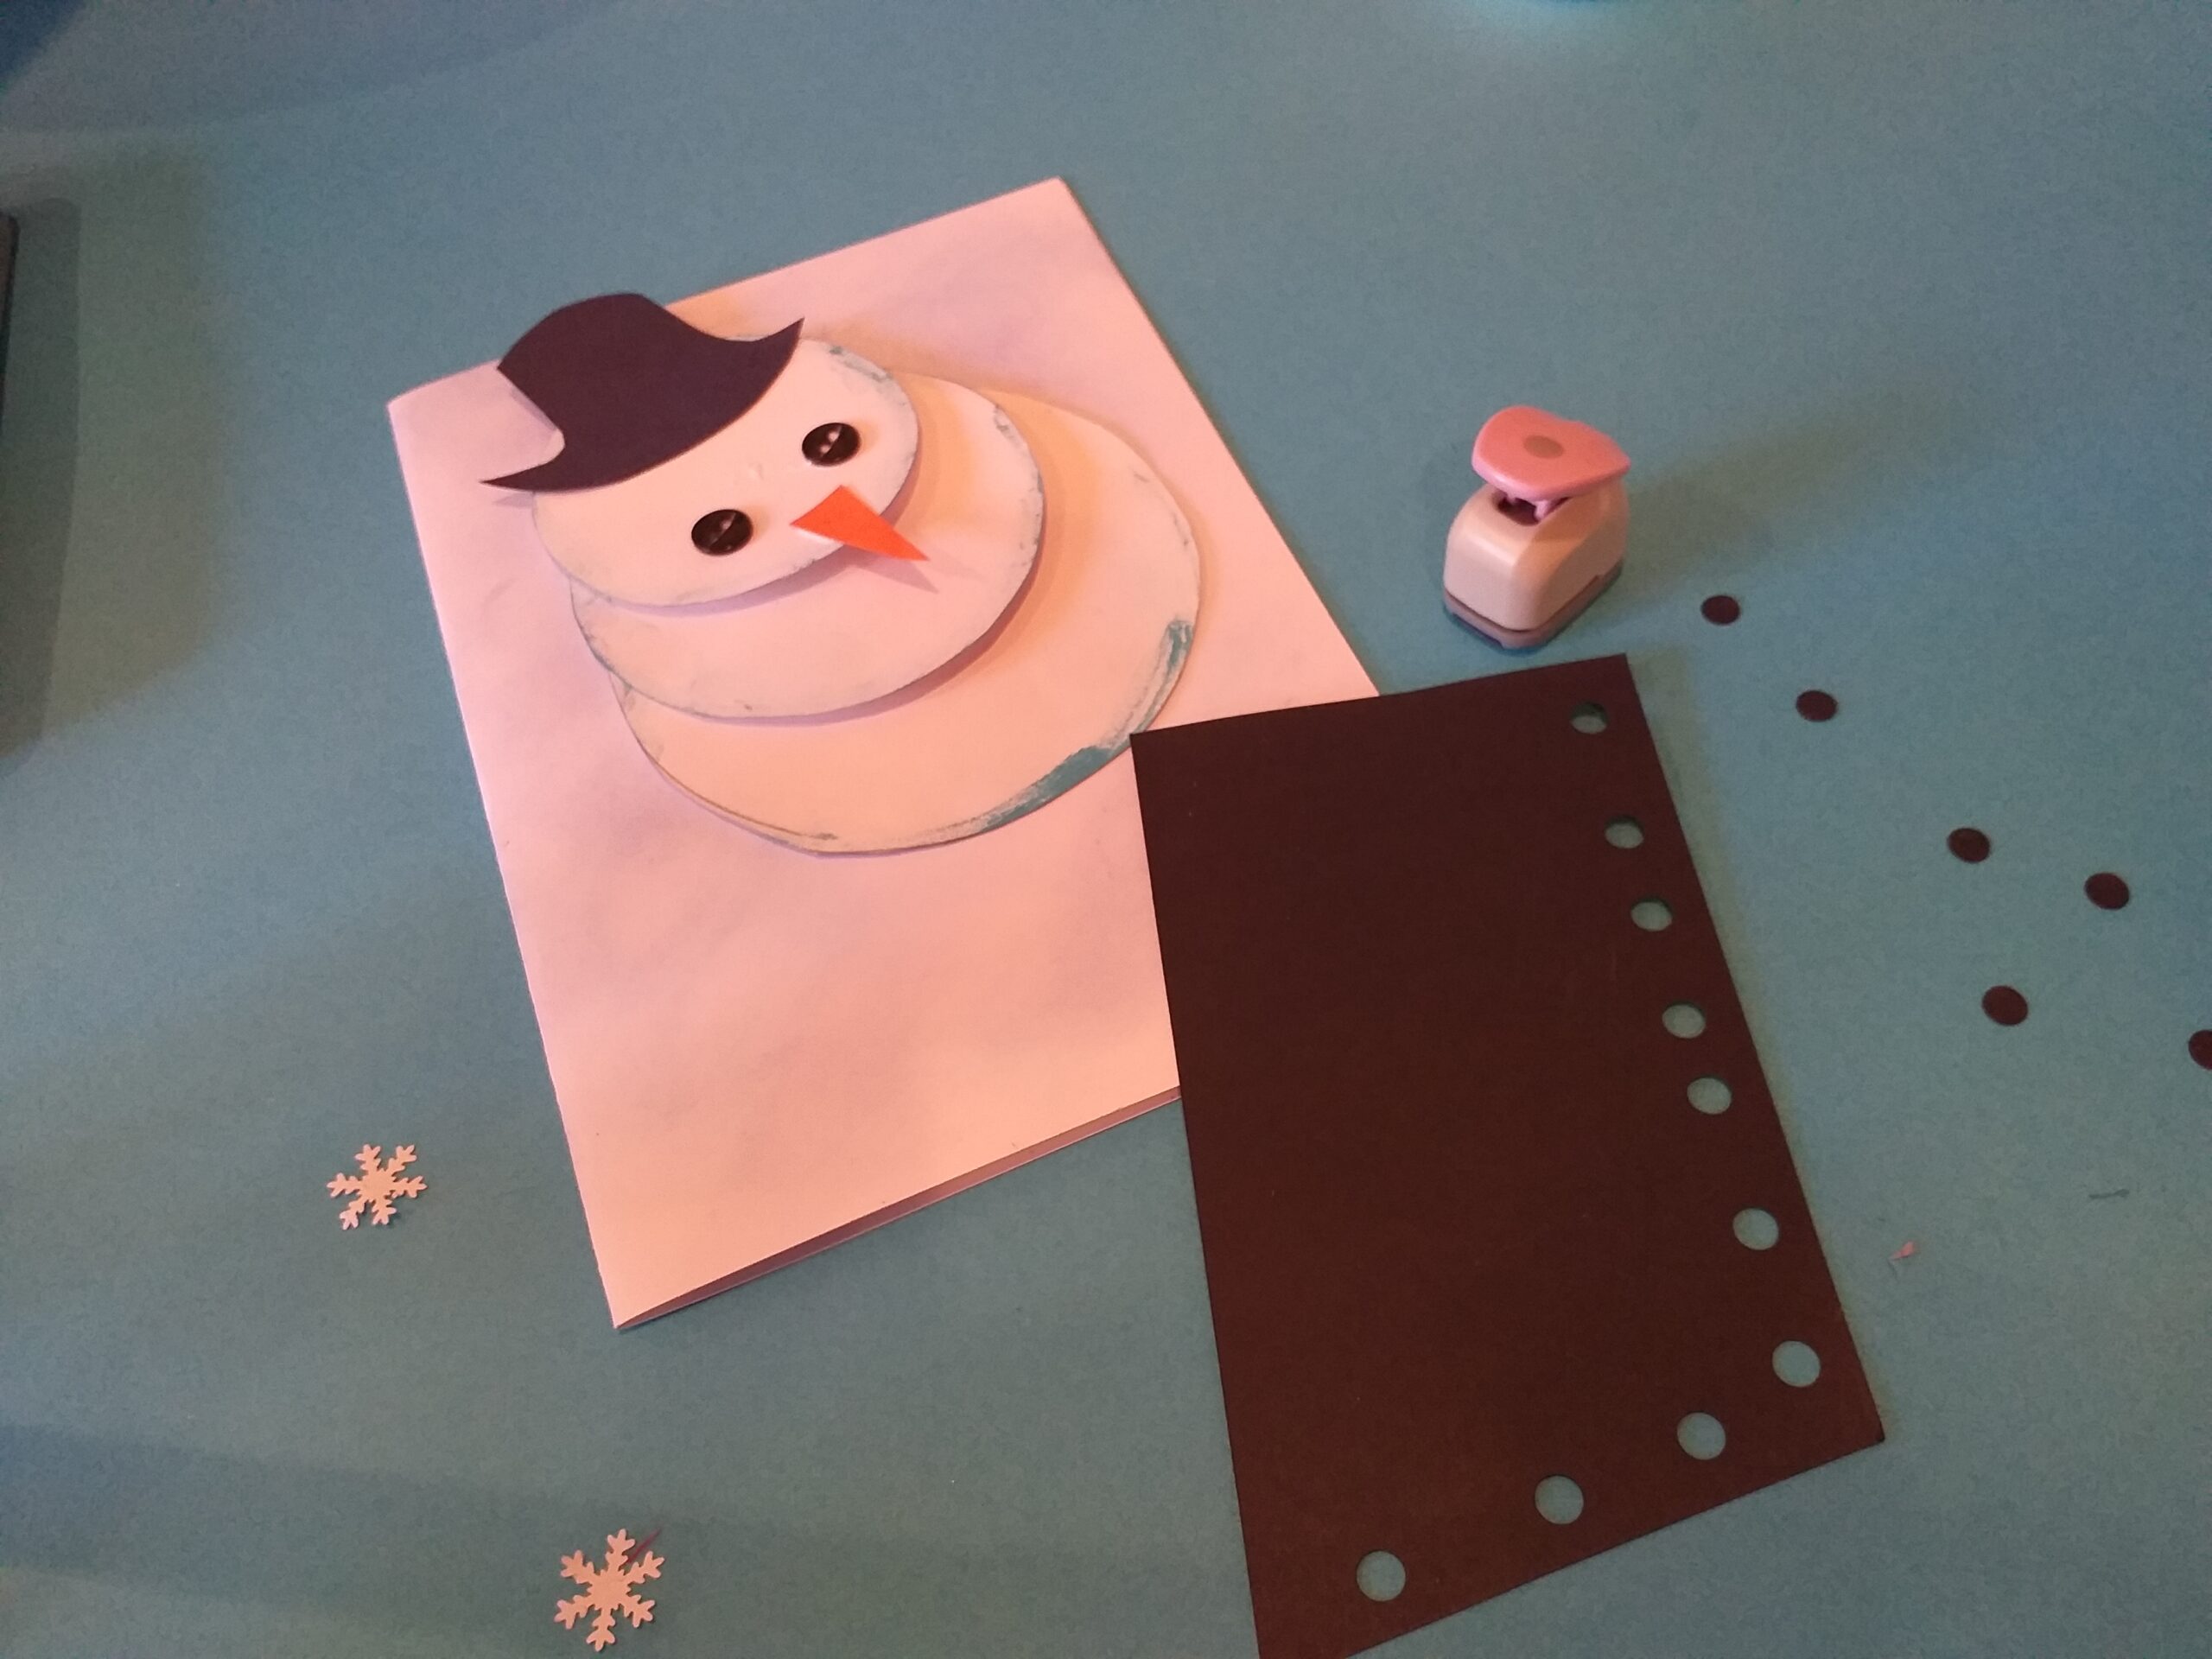
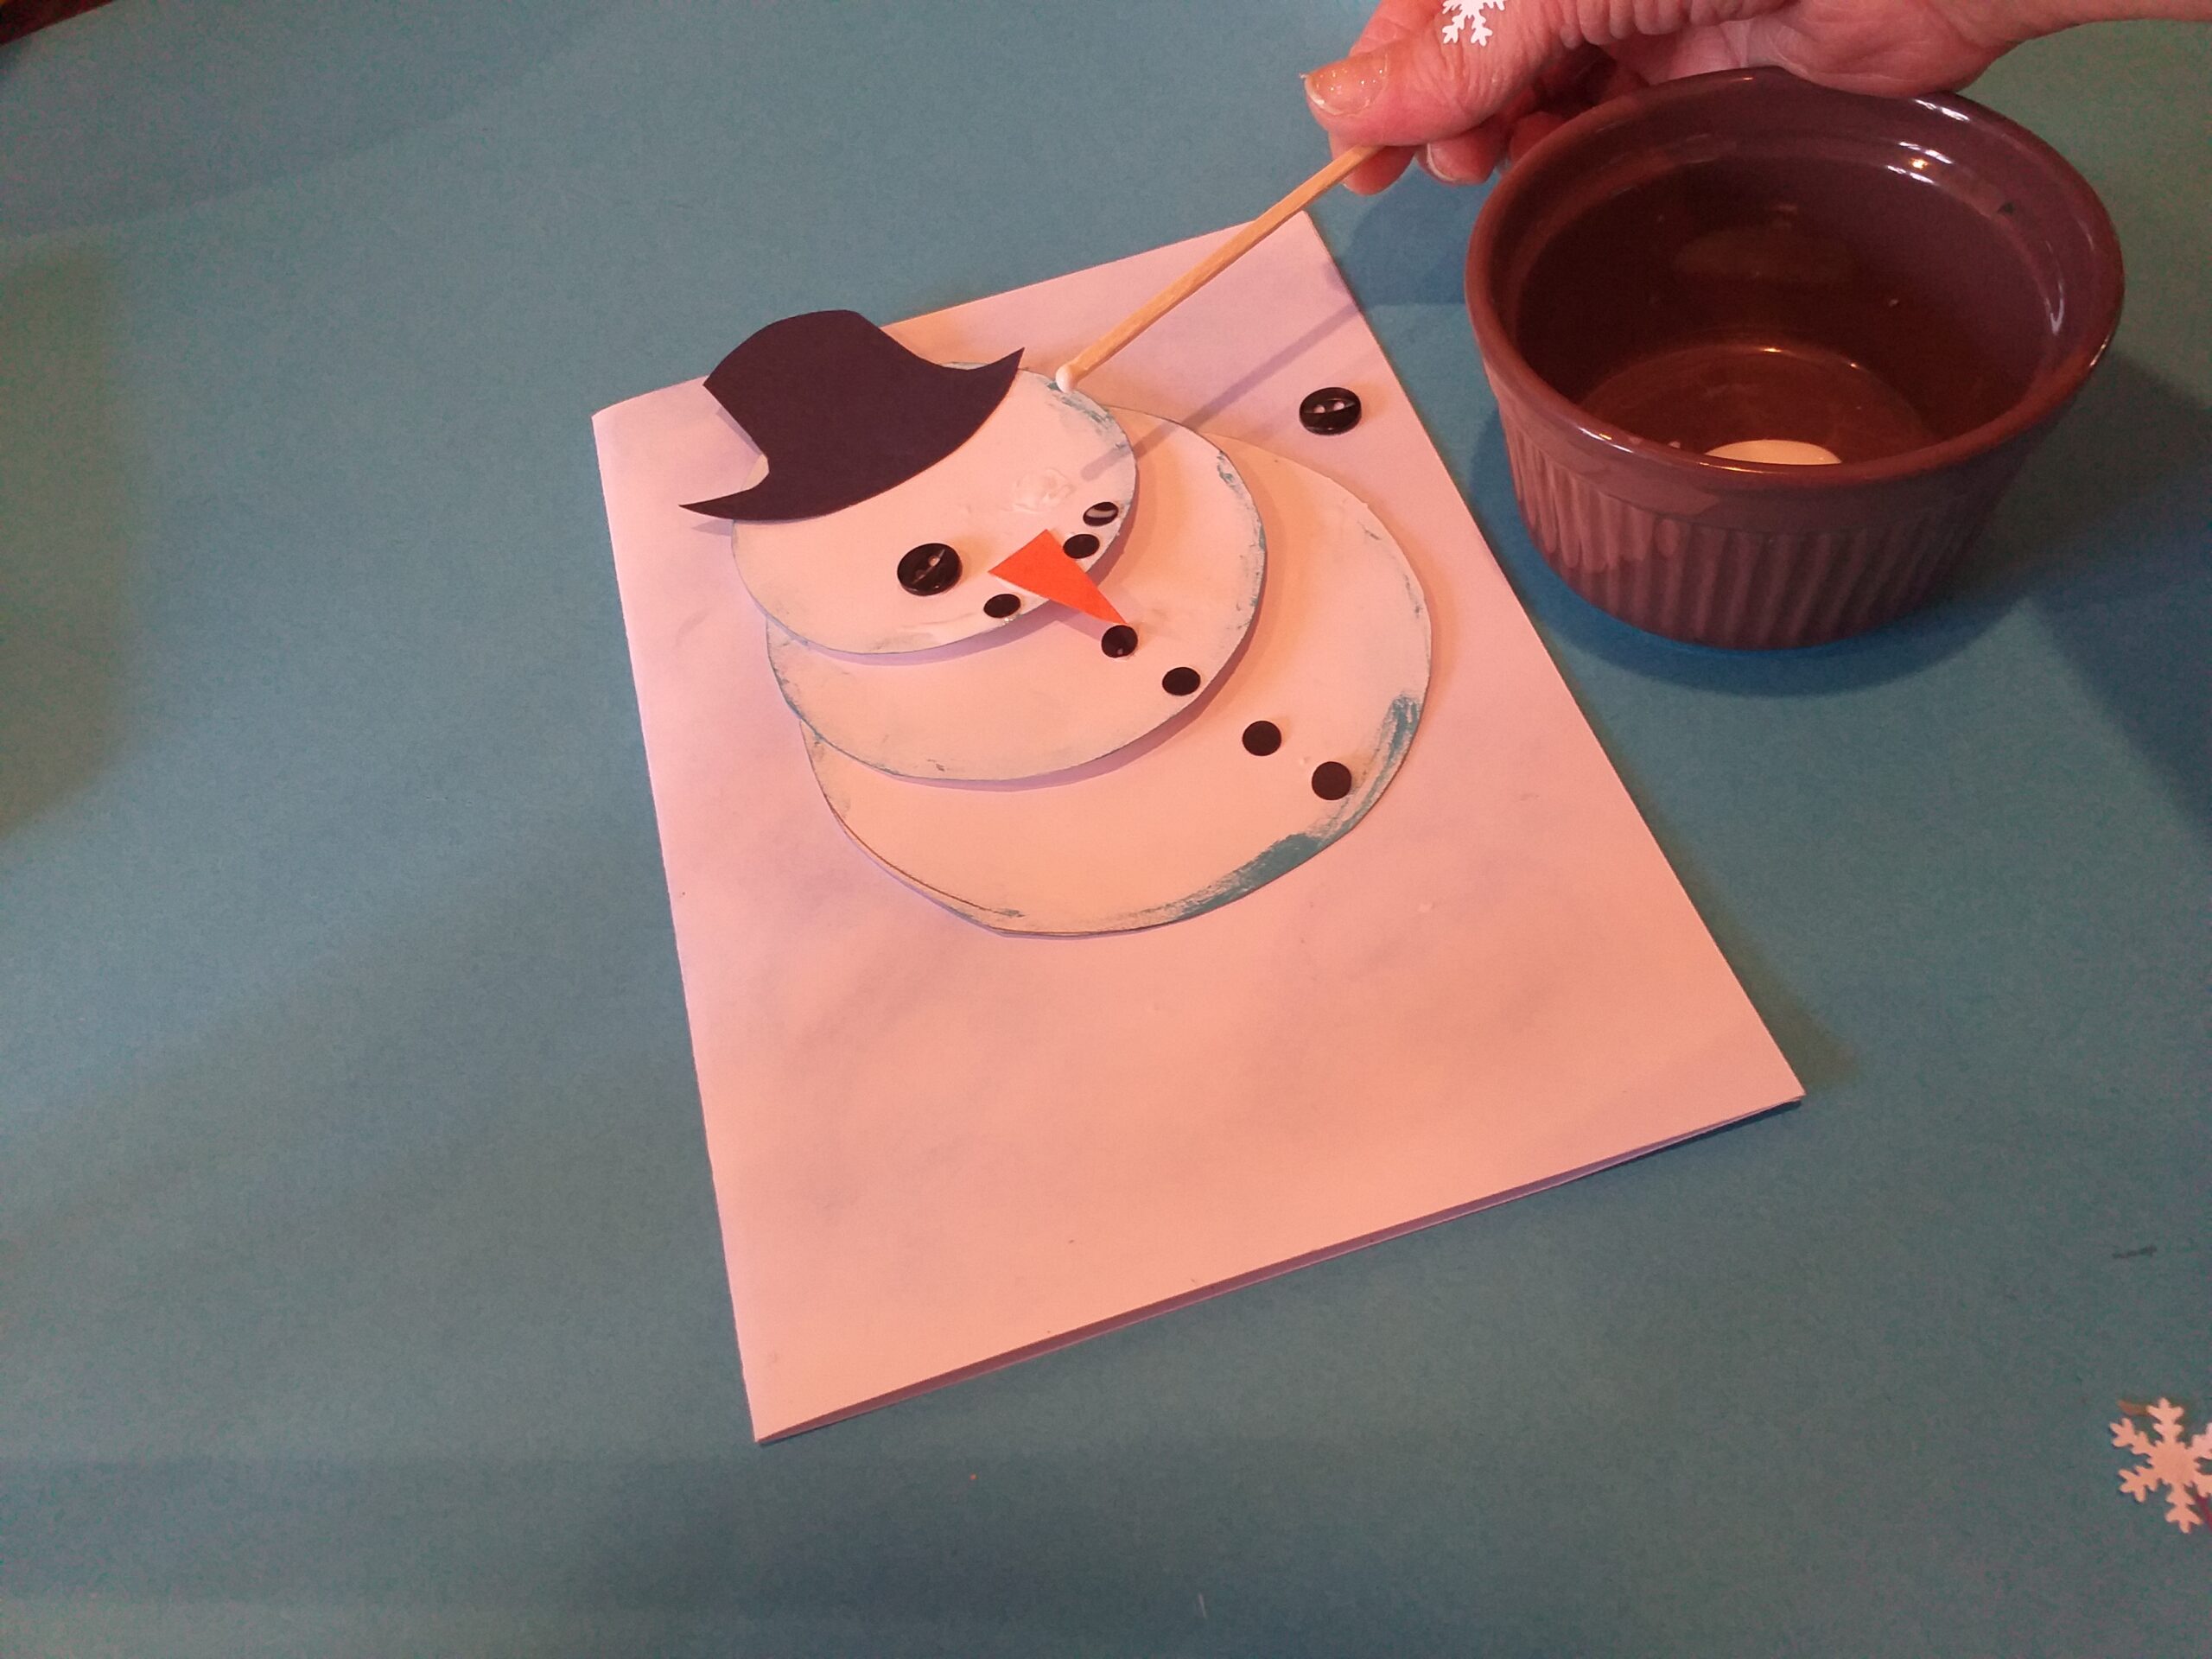
9) Position and glue on with PVA glue black buttons for eyes. Punch out smaller circle for buttons, and add carrot shaped nose with glue onto snowmans’ face.
10) Once happy glue eyes on, then glue on buttons into place with PVA glue. Now cut brown card into 2 twigs for arms. Punch out little dots for the smiley mouth, and glue on under the carrot nose.
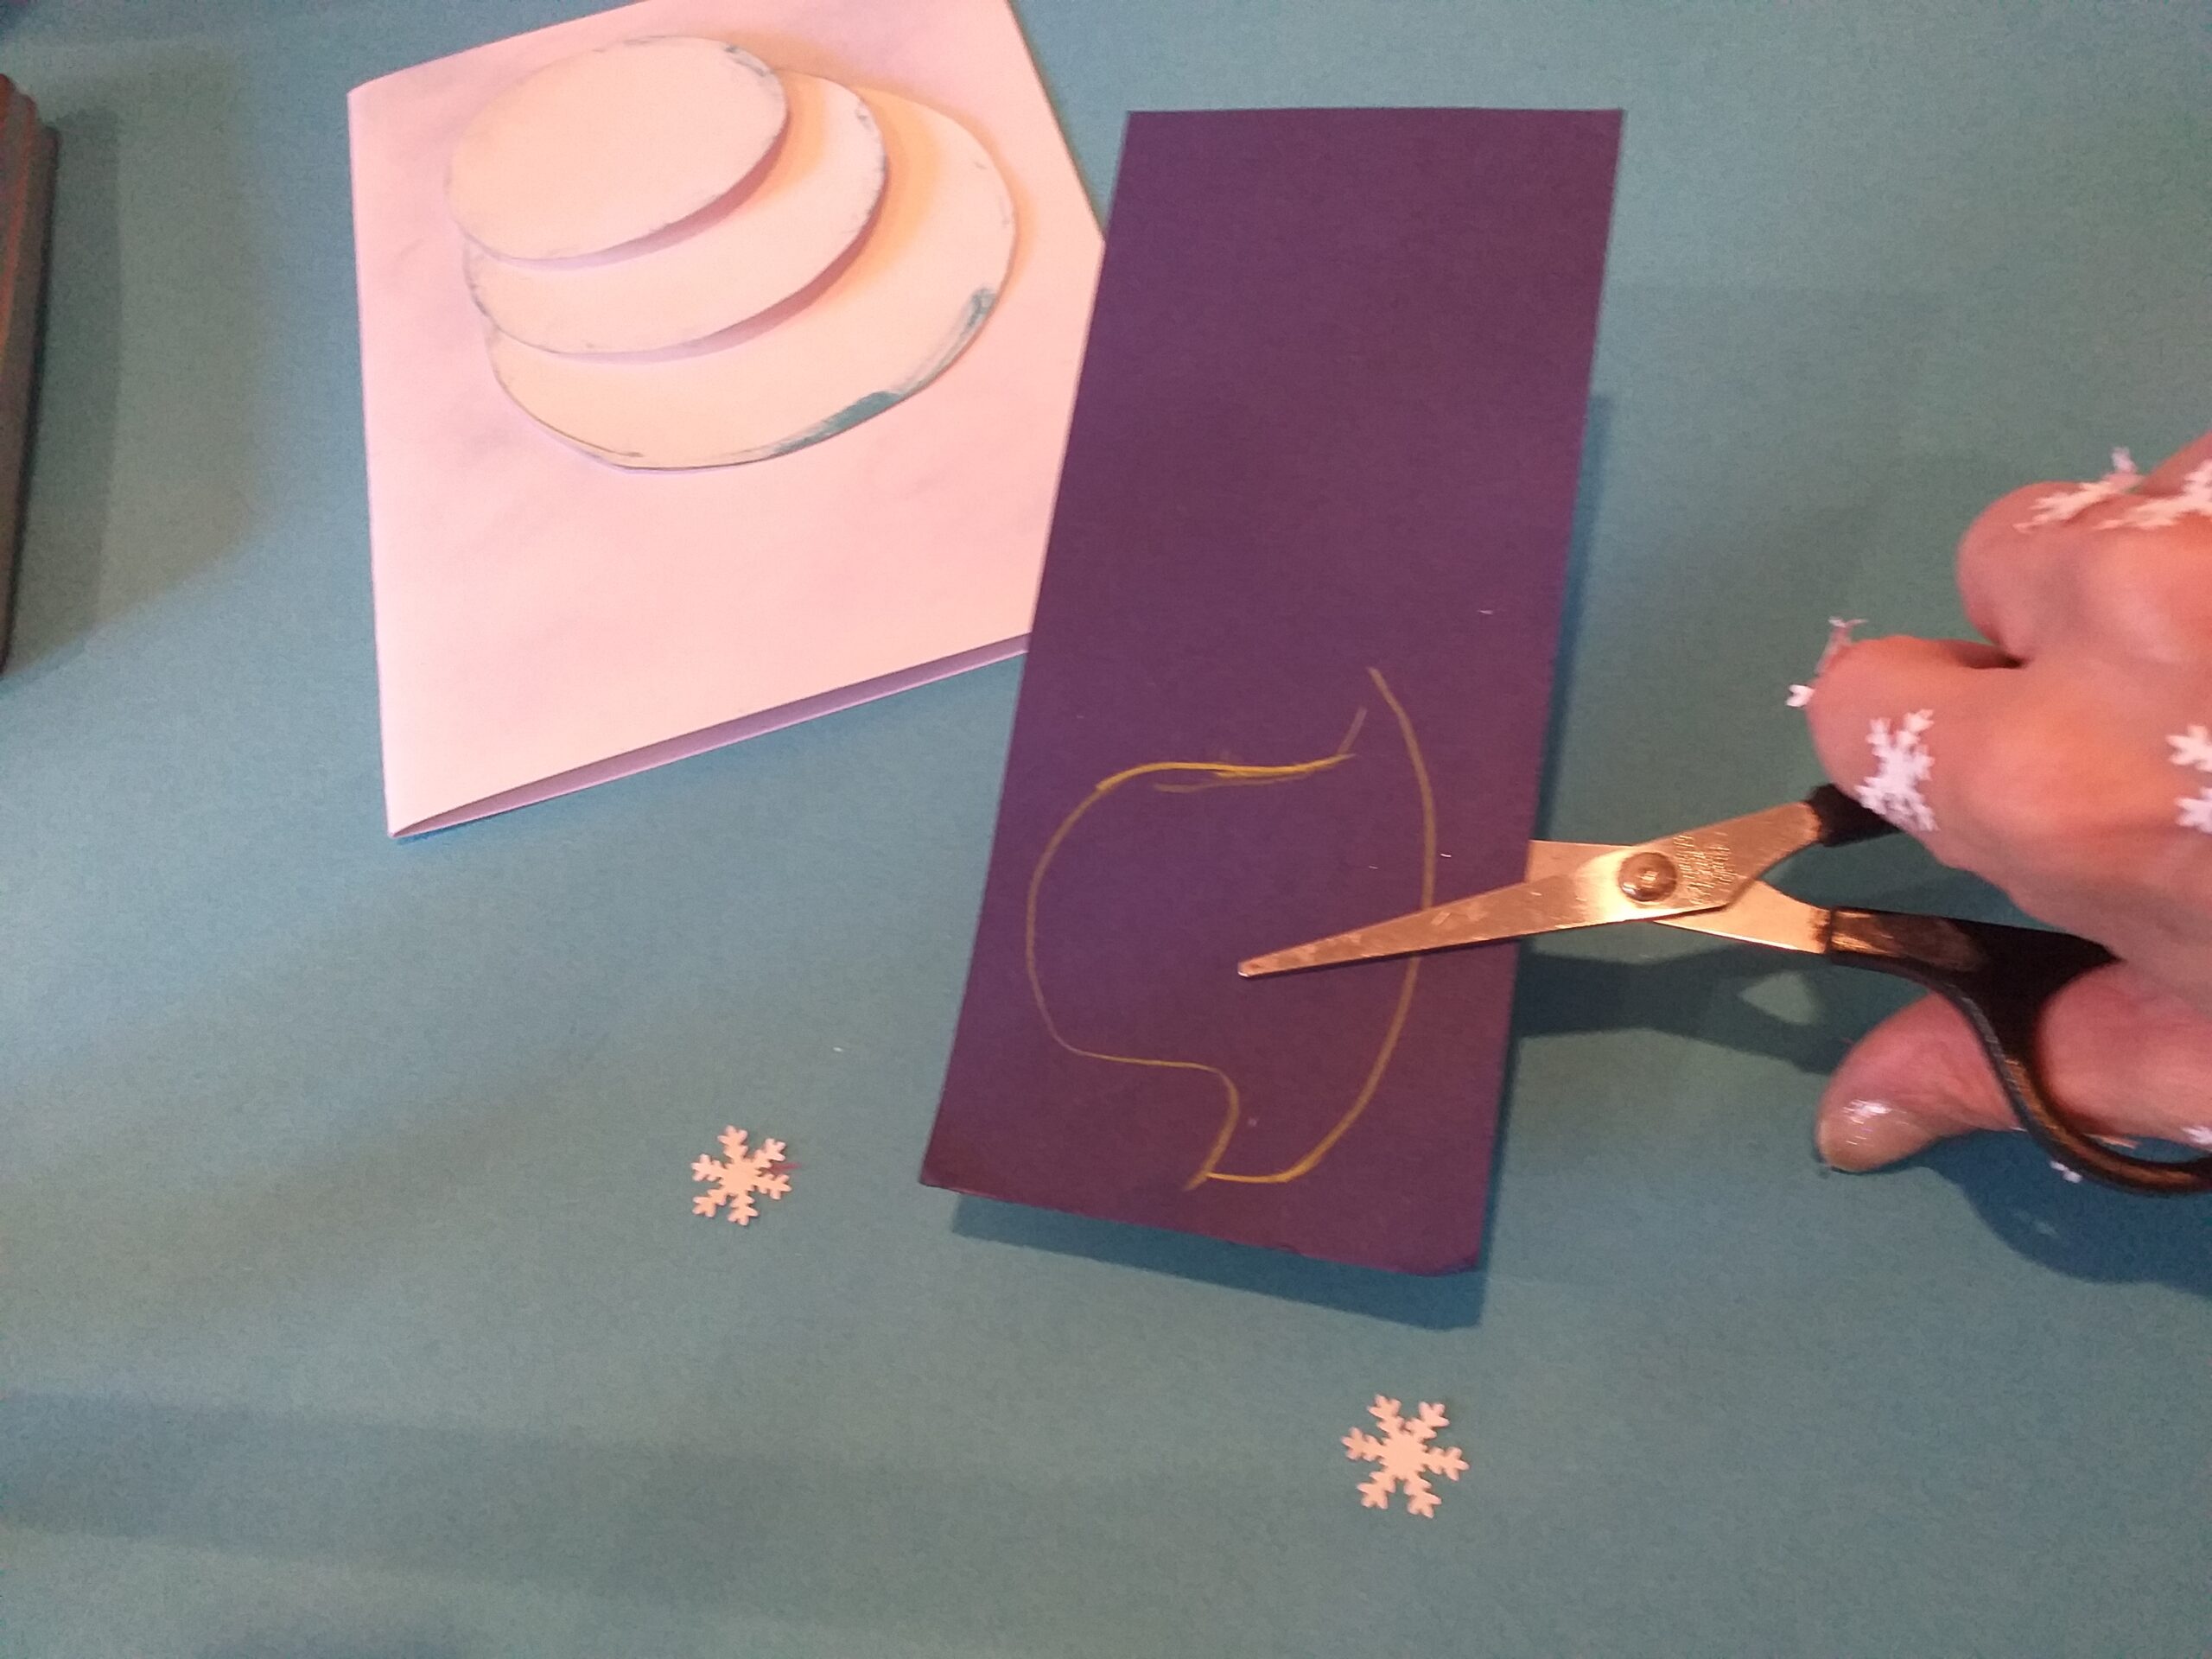
11) Cut out green ribbon for scarf, about 10mm wide x 70mm in length. Cut scarf to size on card. Add little twigs for arms use PVA glue.
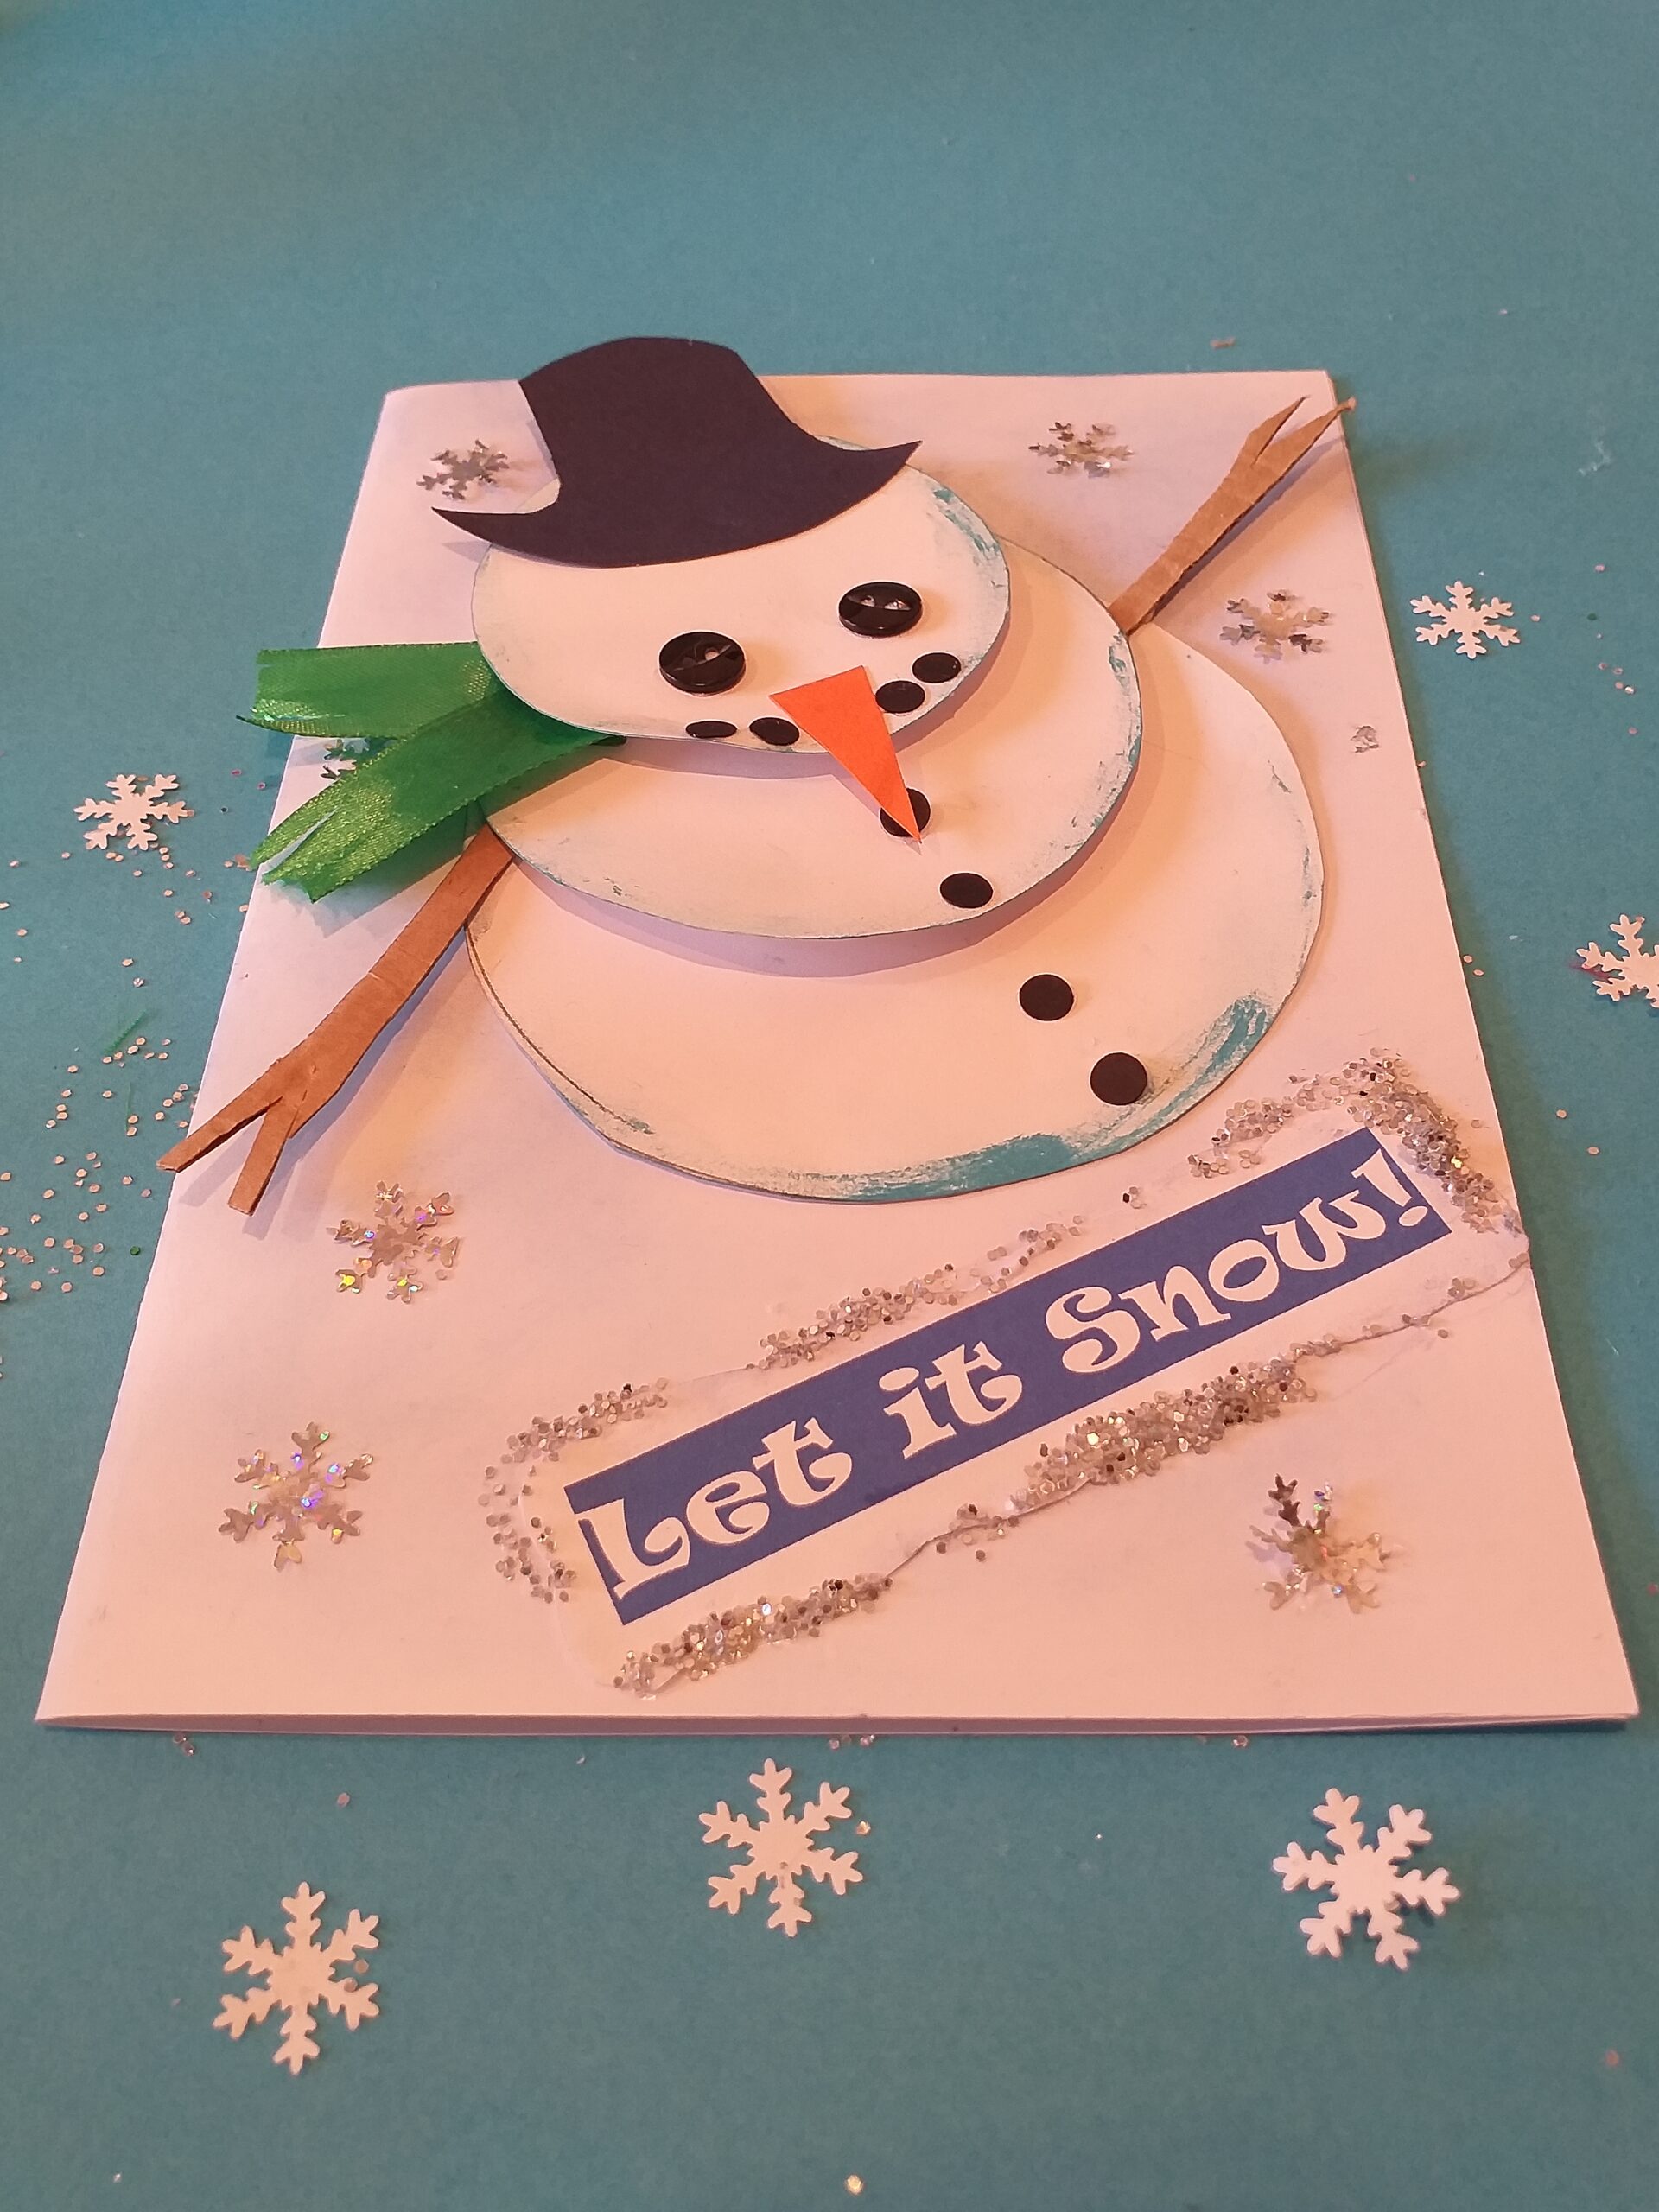
12) Glue on the banner below snowman. Now glue on the stars. Glitter the banner on the edges. This is the finished ‘Let it snow’ layered snowman.
SOME TIPS!
LAYER AND ELEVATE.
Using 3mm or much thicker double-sided sticky pads once stuck on the back of the circles and layered gives the snowman a 3D effect, so it stands out of the card.
CIRCLES & SNOWFLAKES
Find a small circle puncher to punch out black circles to make the black buttons, or use a normal punch to do this.
Find silver snowflakes, which are readily available or punch these out if you have a snowflake puncher.
COLOUR CIRCLES
You can use a blue ink pad to darken the edges of the circle that make the body, or use chalk or pastels to darken the outsides, which gives the body depth.
SNOWMAN’S NOSE
Cut out a carrot nose out of an orange piece of card.
SNOWMAN’S SCARF
Use any colour ribbon or even fabric, approx. 10mm wide x 70mm in length for he scarf and fray the ends.
THE EYES
Find odd buttons in black for the eyes or cut out round black eyes from a card, between 10 mm and 12 mm wide and glue on with PVA glue.
THE ARMS
Grab the piece of packaging card, draw and cut out 2 twig-like arms in proportion to the snowman’s body, then glue them on under the second circle.
SNOWFLAKES.
Glue on snowflakes around the snowman; this gives a real starry effect.
SMALL BLACK BUTTONS.
I recycled very small black buttons I cut off an old shirt, they came in real handy!
THE BANNER?
When deciding on the style and text you would like to use, to make your Christmas cards festive, you can use any fonts already installed on your computer in Word, such as Arial, Calibri, Times New Roman, or a fun, bold or script style to make your greeting pop!
HOW TO PRINT!
I printed the ‘Let it Snow’ white out of blue, to give it that snowy feel, although you will use a bit of ink doing so, but you can print off an outline and just colour around it in blue, which will give the same effect.
BE AWARE!
I would recommend you use fonts already on your computer or download festive fonts only from trusted sources. Check licences carefully – some are free or personal use only!
ADDING GLITTER!
To add glitter around the banner, run a thin layer of glue around the banner, sprinkle glitter and shake it off onto some paper and pour it back into the glitter pot.
Allow to dry before glueing on the bottom of the card.
POSTING CARDS!
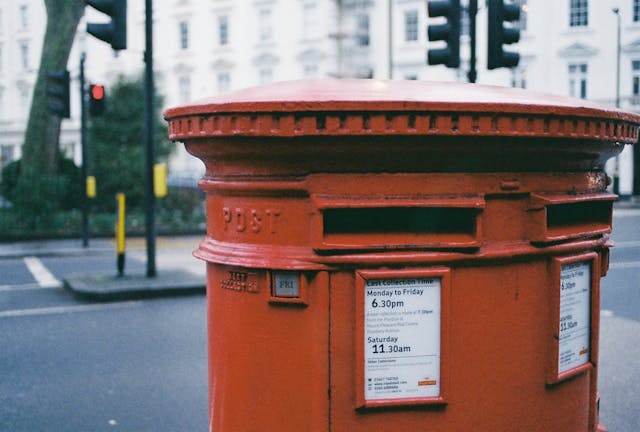
Remember when posting your cards, they are not too thick in depth. This would make it difficult to post them through a typical postbox. As these are handmade, it might be nicer to hand-deliver them. So keep in mind how thick your cards are going to be before posting!
A typical red postbox. Picture from Pexels.com by SL Wong.
I RECOMMEND!
If you are making a lot of cards, allow them to dry overnight before sending, so that any PVA glue can dry out!
With an A4 folded card, you will need a C5 size envelope for posting, any envelope that holds an A4 size folded card.
HOW MANY CARDS?
I managed to make 35 cards in total, so you will need to gather all your resources to cover the number of cards you want to make.
Once you have made one card as a trial run, then you can work out how much of every part you will need to prepare to make all your cards.
HERE’S A RECAP!
Chalk up all your cards; the card weighs 210 gsm.
Fold all A4 cards in half.
Cut out all your circles.
Buttons and black dots.
Carrot noses.
Arms.
Hats.
Stars.
Cut up all your sticky pads and stick on the circles, for a 3D layered look, then you are good to go!
Here is a lovely cartoon about The Snowman-Walking in the Air, by Raymond Briggs. This animation never dates, and I thought quite fitting to follow our Snowman activity!
Hey there, when you click on links in this post and you make a purchase, I may earn a small commission that l can use towards resources (other than throw-outs) for project making within my website😀
If you are looking for more fun Snowman activities, to keep your kids busy over the cold wintery nights, then take a look at what Etsy have to offer!
Etsy also stocks a great range of coloured pastels and chalks, a great art resource to help colour up your snowman activity, and to add to your art collection, which you will use time and time again! Jump in and check them out now!
In this post, I show you how to make a 3D styled snowman card, which you can craft to gift friends and family.
USE WHAT USE HAVE!
I used whatever resources I had to hand, some recycled parts, card, buttons, and ribbons.
HOW MANY CARDS?
Decide how many you are going to make, gather all your resources, lay out and get ready to start your conveyor of Christmas cards!
HEADS UP!
This is time-consuming, so put some extra time aside and start early in the making, so you enjoy this activity. But they are also made well ahead of Christmas!