Hello Autumn lovers, once again we find ourselves in our Autumn season and how glorious it is!
It is such a beautiful, colourful time and one I always look forward to.
As our climate starts to get colder and the Sun starts to disappear behind clouds, so sunlight becomes more and more random and leaves are deprived of their nutrition, we get this amazing transformation.
In a previous posts I show other Autumn leaf crafts for kids and what wonderful creations the children came up with, just by using resources and leaves they gathered up.
I will leave the links later on for you to jump in and check them out for more ideas.
For now, when you think there is nothing more you can make with your chosen leaves, then I have a really nice project for you to try out.
As the Autumn season is rapidly moving on and the Winter month is nearly upon us, I still wanted to do something with the leaves I managed to collect.
So how to keep them as fresh as possible, before they dry up and crumble.
HOW TO KEEP LEAVES LONGER.
These are the techniques I have used:-
PVA GLUE. Paint PVA glue on both sides of the leaf. Make sure one side dries up first, before turning over to do the back of the leaf. This technique allows the leaves to stay 3-dimentional and close to their original look,
DRY AND FLATTEN. Lay leaves flat and seperate on one sheet of kitchen towel then cover with another piece. Next place a heavy book on top for 24 hours. Then remove from inbetween towels and the leaves will be flatter and moisture will have been blotted out, now ready to laminate.
LAMINATE. Space out all the leaves inbetween the laminating sheets and run through the machine. This technique is lasting and the leaves retain shape and their colour.
Let’s take a look on how they would look.
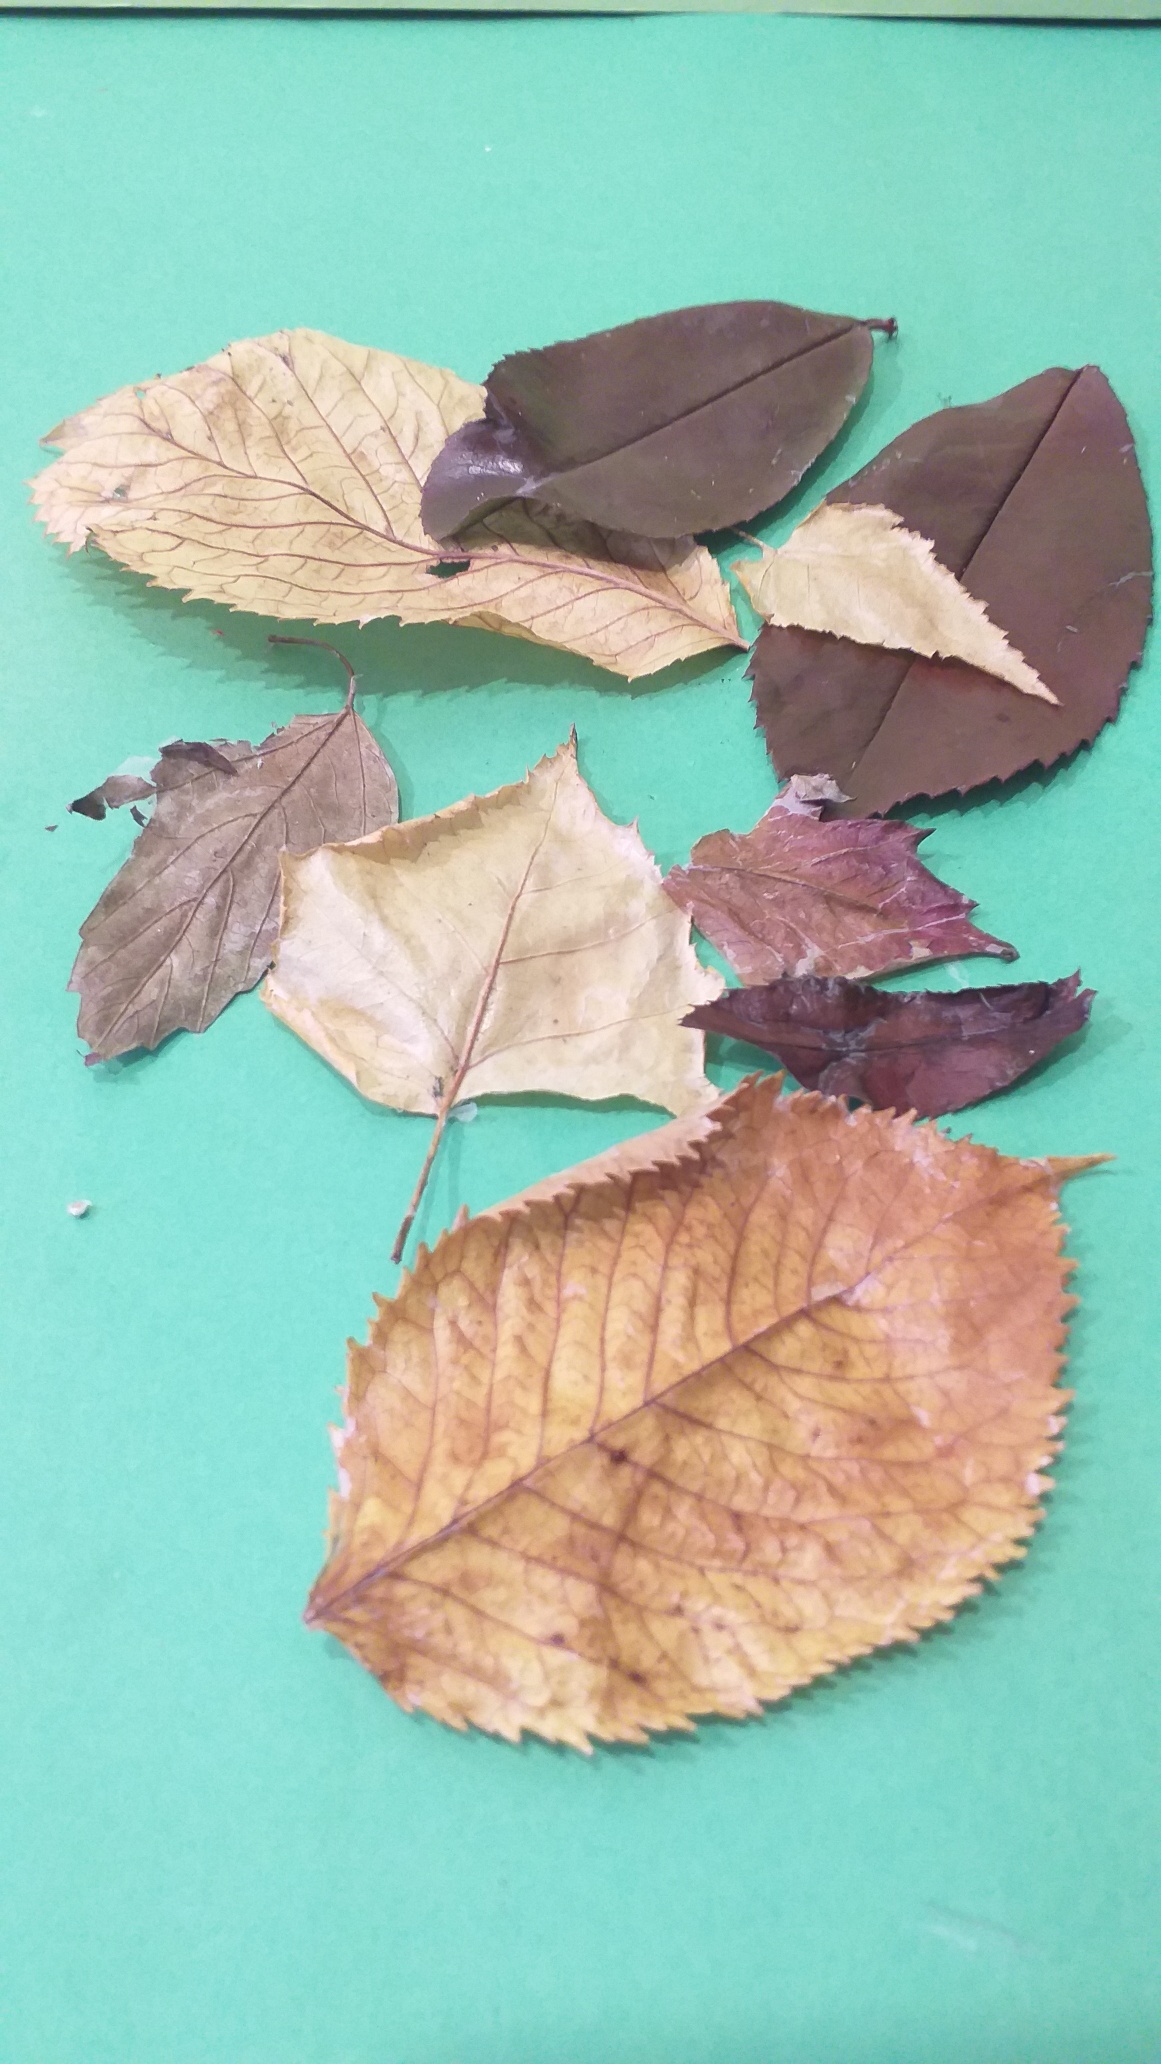
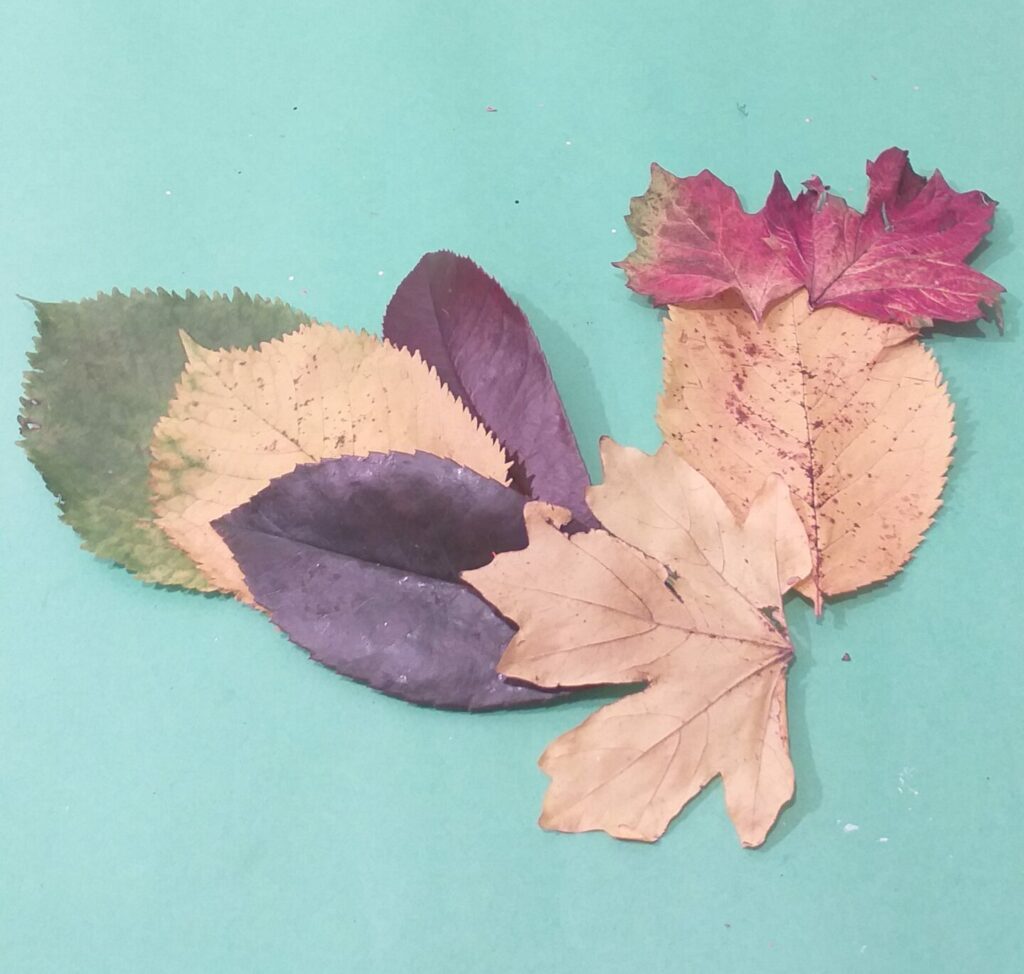
Choose different leaves.
Painted with PVA glue.
Dried inbetween kitchen towel.
Laminated leaves.
You will need to act quick as time is sadly running out and all fallen leaves will dry out and eventually get blown away or remove.
So what do I have in mind for our next project for our Autumn leaf crafts for kids?
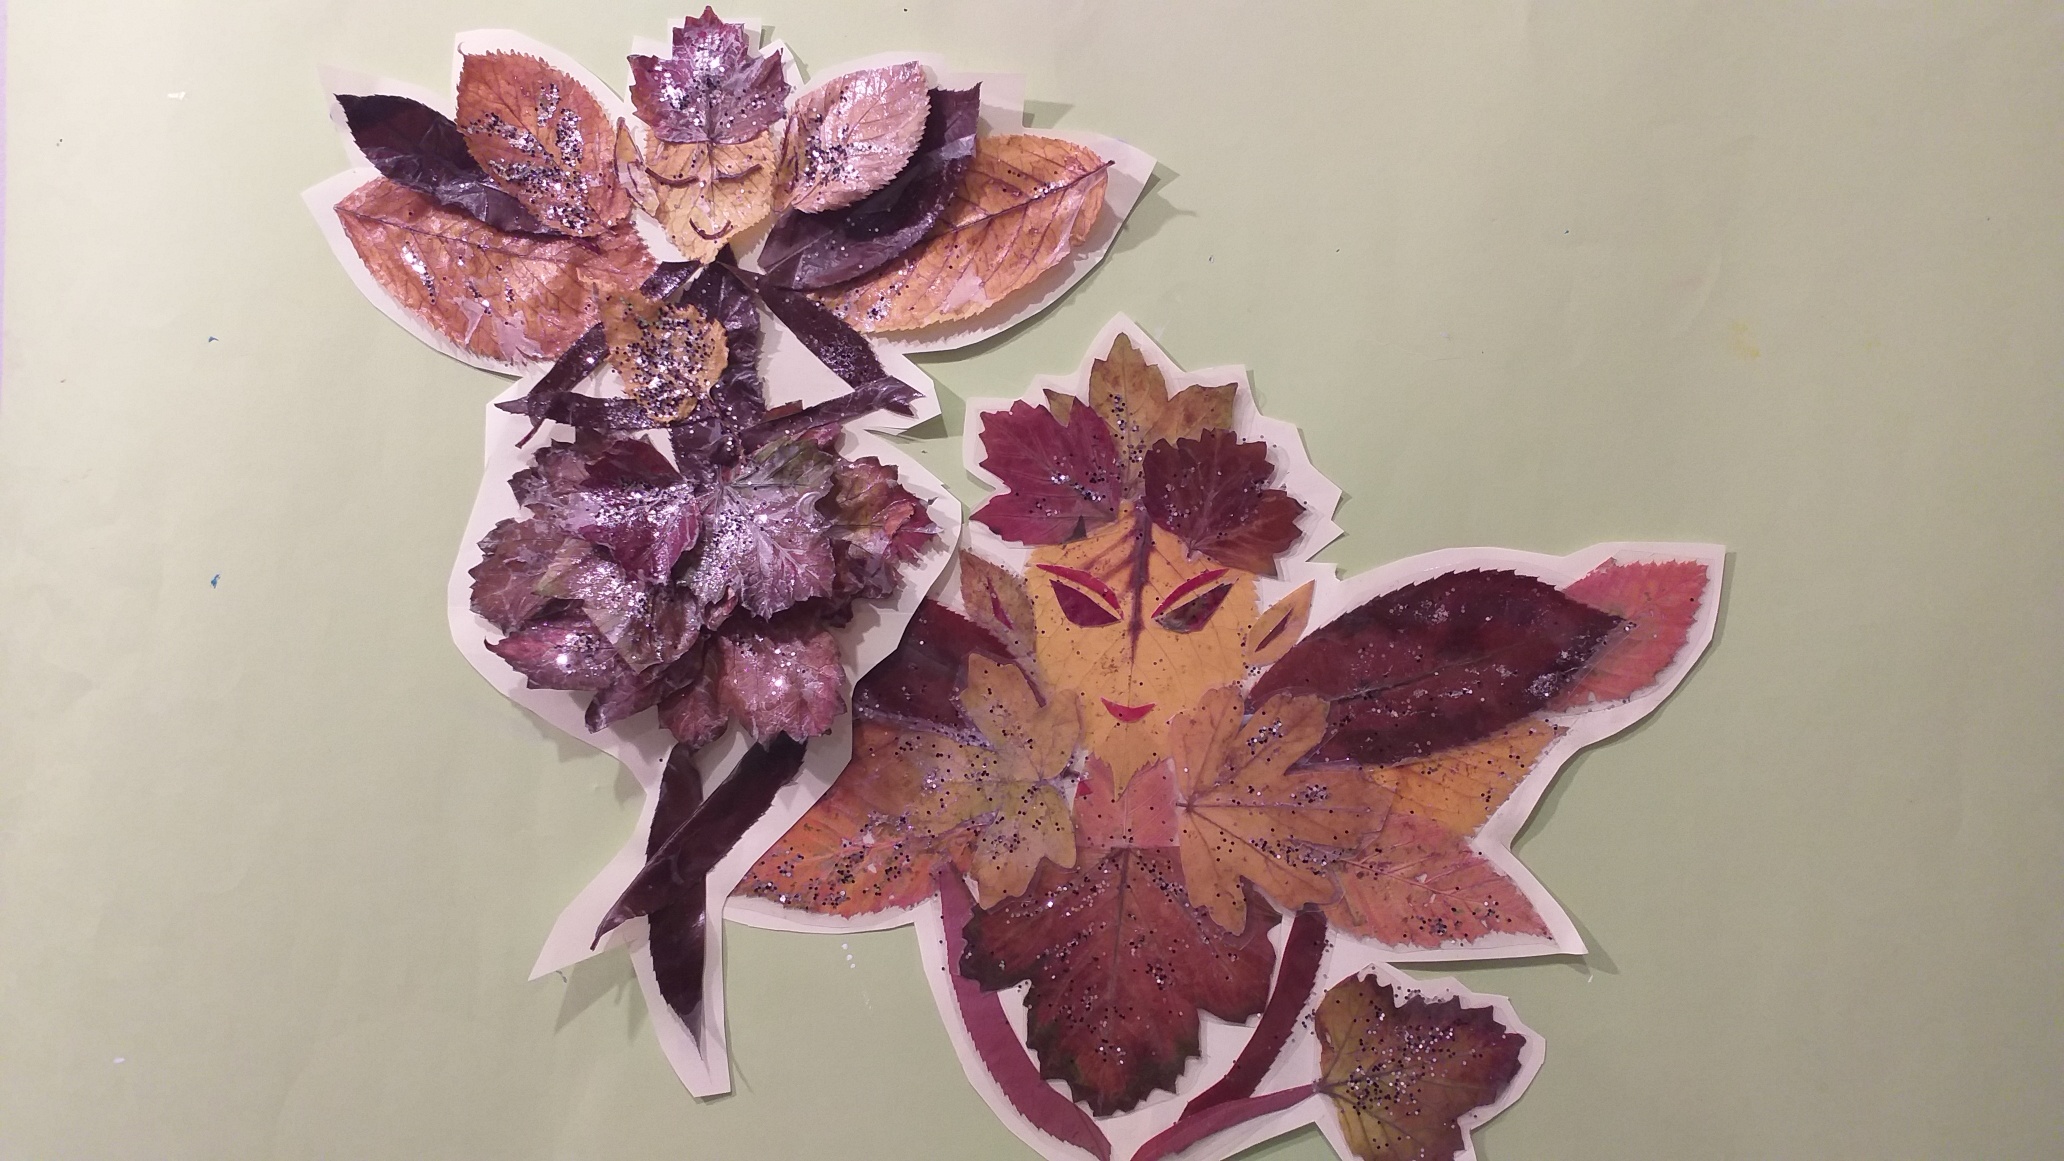
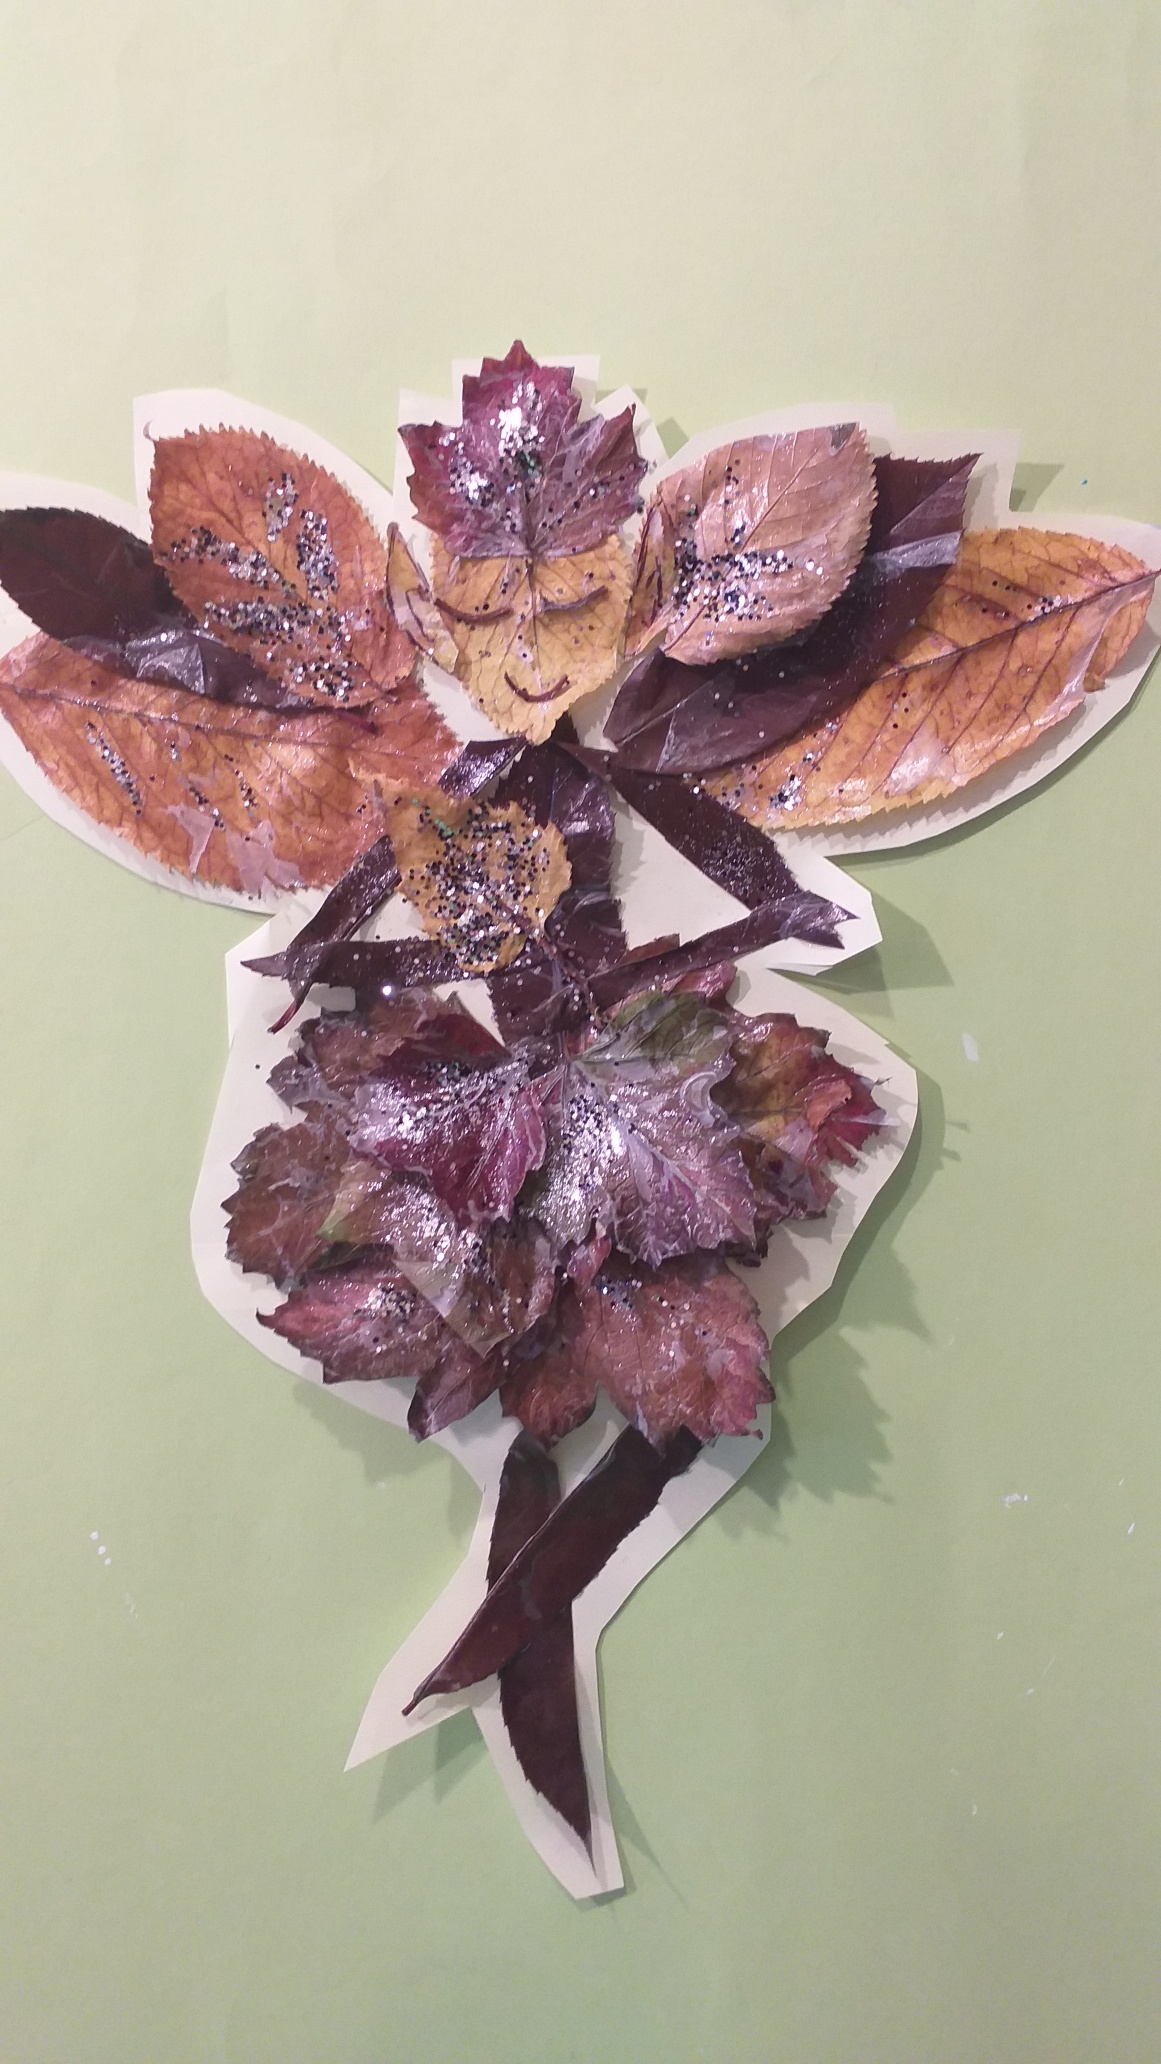
How about a forest fairy!
This process is quite straight forward, it’s simply layering your chosen leaves spreading them in lines and over lapping some to create your fairy. Check below the finished examples.
To make your fairy, you will need a fairy head, wings, a fairy dress and a wand. and cut up pieces of a leaf to make the detailed features.
You decide what finish you prefer, a 3D look, or a flat look and grab your resources.
3-DIMENTIONAL LEAF FAIRY
3-DIMENTIONAL LOOK
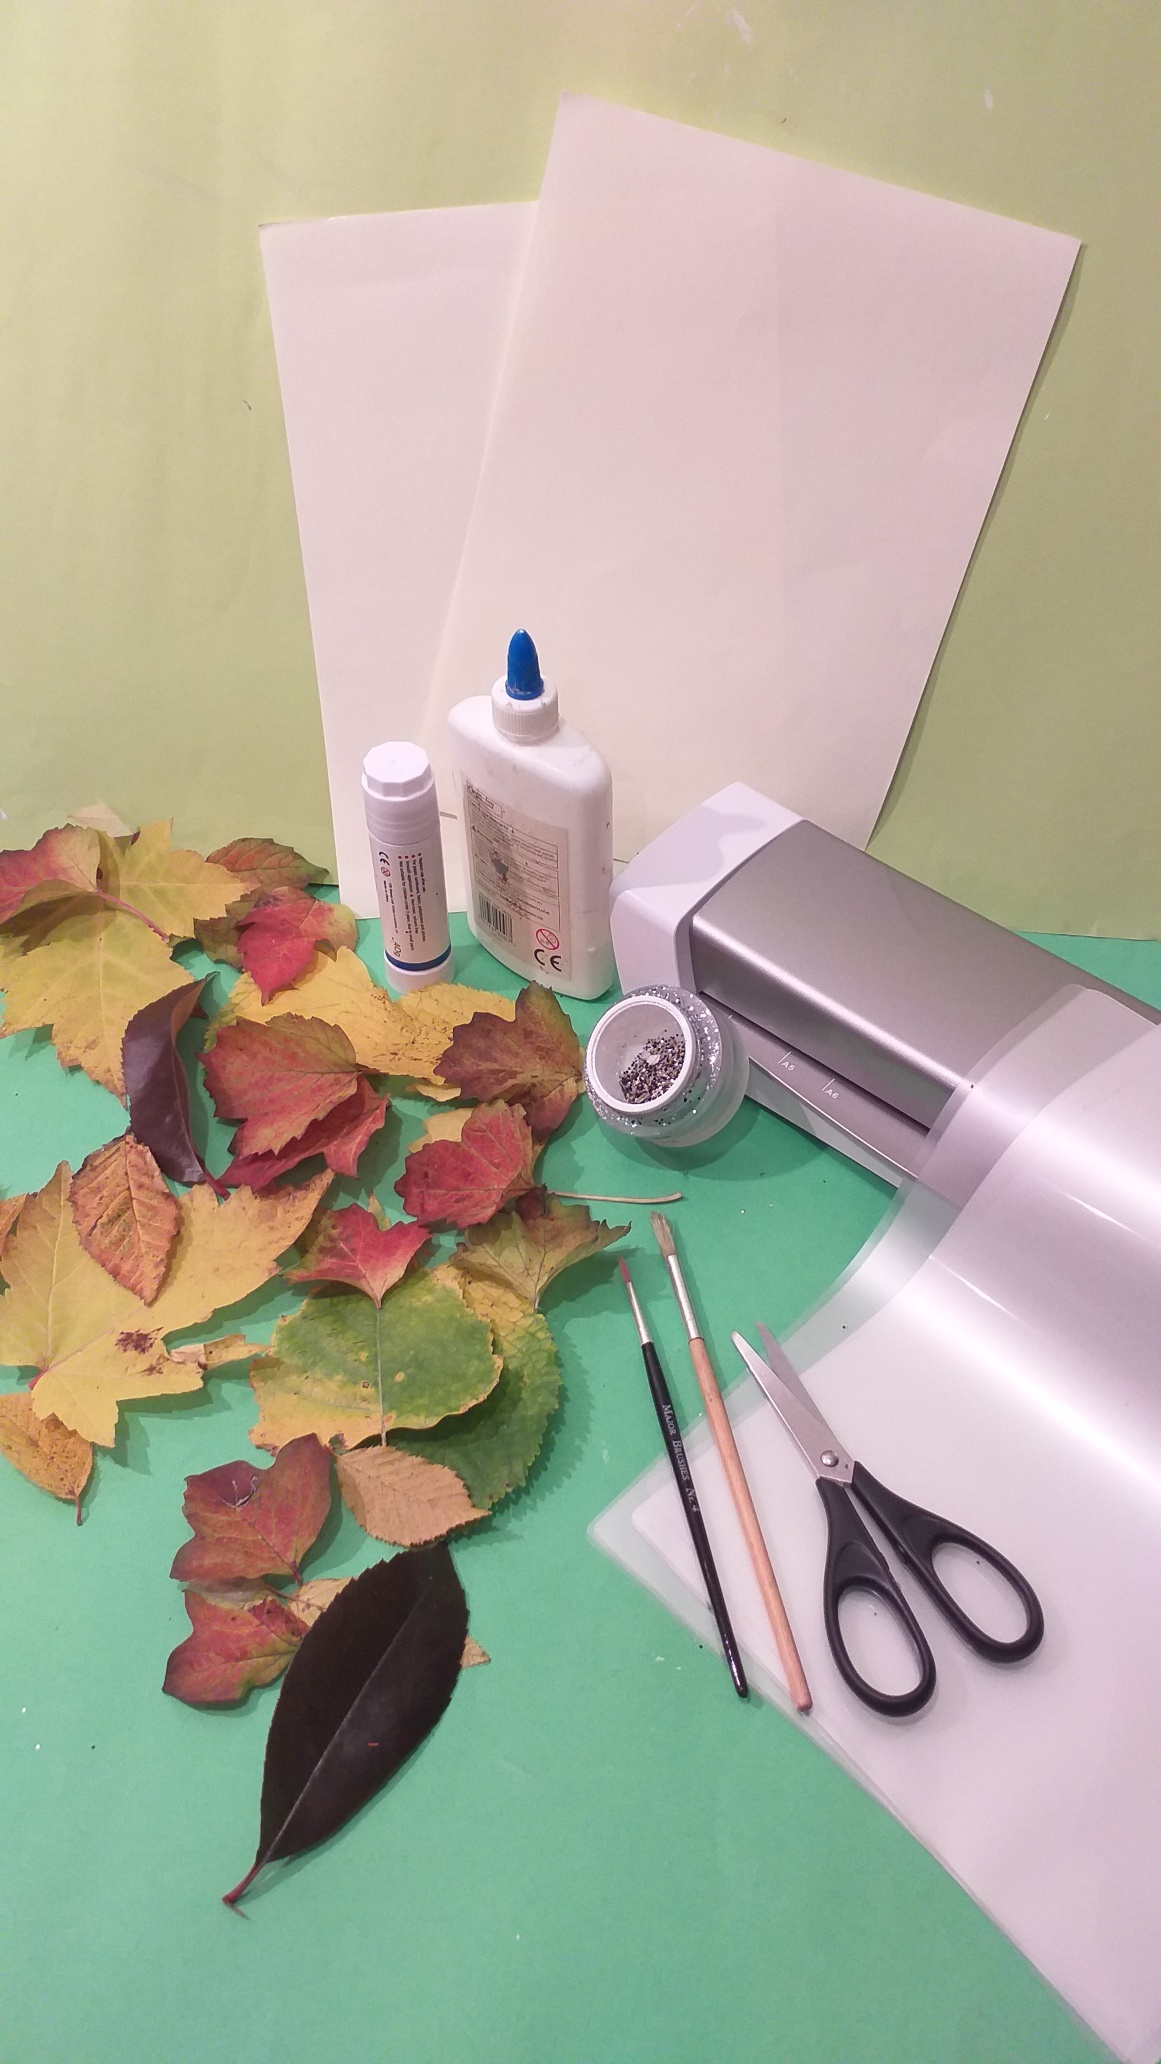
RESOURCES
A selection of different leaves.
PVA glue
Empty tub for glue
Small paint brushes
Scissors
Glitter
A3 or two A4 coloured paper.
Here is how you can layer the leaves and when you think it’s just right you can use the glue stick to secure the design, so the leaves don’t move out of place.
Leaf fairy with her wand. Using PVA covered leaves.
In this version, select leaves and arrange them on the coloured paper, as shown above.
When you are happy with the final look, stick them down carefully with the glue stick on to the paper.
Cut up pieces of a leaf to do eyes, mouth and ears.
Then apply PVA glue with a fine brush where you want the glitter to go. Shake glitter off, allow to dry and cut fairy out of the paper.
LAMINATED LEAF FAIRY
LAMINATED LEAVES
RESOURCES
A4 laminator, A4 laminating sleeves.
A selection of leaves
A3 or two A4 coloured paper
Glue stick
Small paint brushes
Scissors
Glitter (optional)
Laminators are availbale at various caft websites, :- Hobbycraft, Create and Craft, as well as Currys and PC world, Amazon and ebay.
Leaf fairy with her wand.
After laminating the leaves, cut them out and arrange them on the paper to create half a fairy. Overlap where required and glue down.
The end result is lovely and it really isn’t that hard to do. It may be a bit fiddley at times, as the leaves may move about easily, but tacking them down with the glue stick will keep them still.
SOME TIPS!
Store the leaves in a plastic bag in the fridge, until you are ready to proceed with the project.
Once PVA glue has been applied to both sides of the leaves and they are dry, they may curl a bit, you can gently straighten them up then you can glue them down.
Cut all the stalks off the leaves, as they will get in the way of layering them over each other.
Laminating is a good way to preserve the leaves and can also make super table mats, but if you don’t have one then sticky back plastic can be another way to seal the leaves up.
When shaking or tapping off the glitter catch it in a A4 folded paper and pour it back into glitter pot, to use again.
Have you ever given some thought on what trees these leaves come from? Check out Britannica kids that gives you more of an insight on different leaves and their life cycle.
TO CONCLUDE!
In this post I offer you some more inspiration on what else you can make with these beautiful Autumn leaves.
I recommend the best time of the year to collect your leaves would be around the end of summer, but you still can collect quite a variety of coloured leaves even around November the start of the Winter season.
I show you how you can put together a very straight forward forest fairy, although you may have a different interpretation,depending on what type of leaves you can get your hands on.
Also I suggest tips that can help you with the preservation of these beautiful leaves.
What are you waiting for, get your Winter warmers on and get out there and start picking leaves for Autumn leaf crafts for kids!
Don’t loose hope, that’s when I concluded this project!
As promised here are the links to other projects kids have participated in and it shows different ways and ideas on Autumn leaf crafts for kids.