Hey, have you ever asked yourself why do leaves fall off trees come the fall or autumn?
Why do leaves change colour and one by one they trickle down to the ground?
Let’s check out this short video, exploring just that.
So now you get it. Later we will be looking at Autumn leaves into kids craft ideas!!
I love to crunch the leaves beneath my feet as I walk upon them. Shovelling and kicking my way through the thick carpet of orange, browns and yellow purple magic.
Yet, on a crisp, chilly frosty autumn morning you can sometimes get a glimpse of the sun, peering down on your face warming you with a smile.
I still find it breath taking when I glance at the trees, over bearing their magnificence and as you walk under their long reaching out branches, absorbing their wonderful array of colours, that line the roads or parks welcoming you with their presence.
So how can we can we enjoy these beautiful leaves and make the best use of them, before they completely deteriorate and crumble before our eyes.
I am going to show you 4 easy craft projects you can choose from for your kids starting from 2-5years old. I am sure older kids would still love to do these too, changing Autumn leaves intokids craft ideas!
4 EASY PROJECTS!
1. Sponging or rolling over leaves with paints and getting an outline of the leaf.
2. Sponge paint/paints over the leaf and make a leaf print.
3. Paint PVA glue over whole leaf, front and back and decorate.
4. Laminate leaves, cut out and decorate.
OUTLINE OF LEAF!
RESOURCES.
A choice of leaves.
A couple of sponges. (old sponges will do)
Acrylic paints. Orange, Yellow, Brown, Red.
Black/White paper.
METHOD
Mix your paints 2-3 colours into a tray. Grab your sponges , with a choice of coloured papers lay your leaf and hold it down.
Now sponge your colour around the leaf as shown in the picture. Try not to move the leaf. Leave to dry.
CLICK ON PICS TO GO BIG!
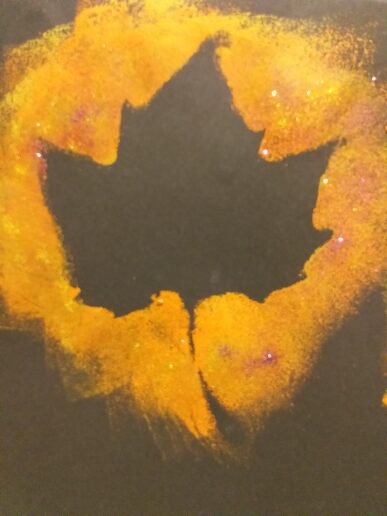
Sponging over a leaf, with autumn colours on to black paper.
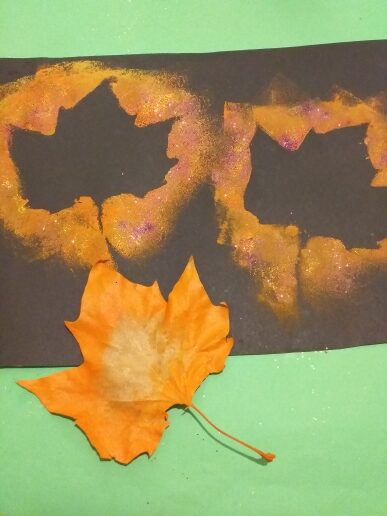
Below are examples on white or black paper and can also be cut out with a thick outline.
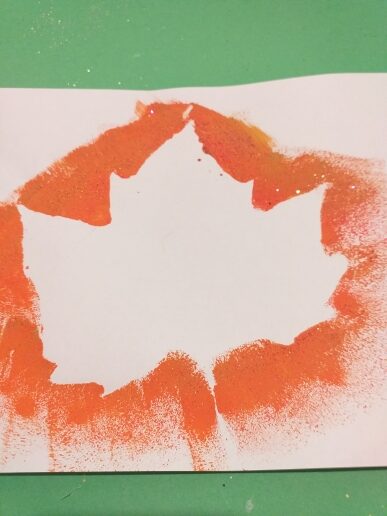
Sponged on white paper.
The leaf sponged on black paper.
3 cut out exsmple.
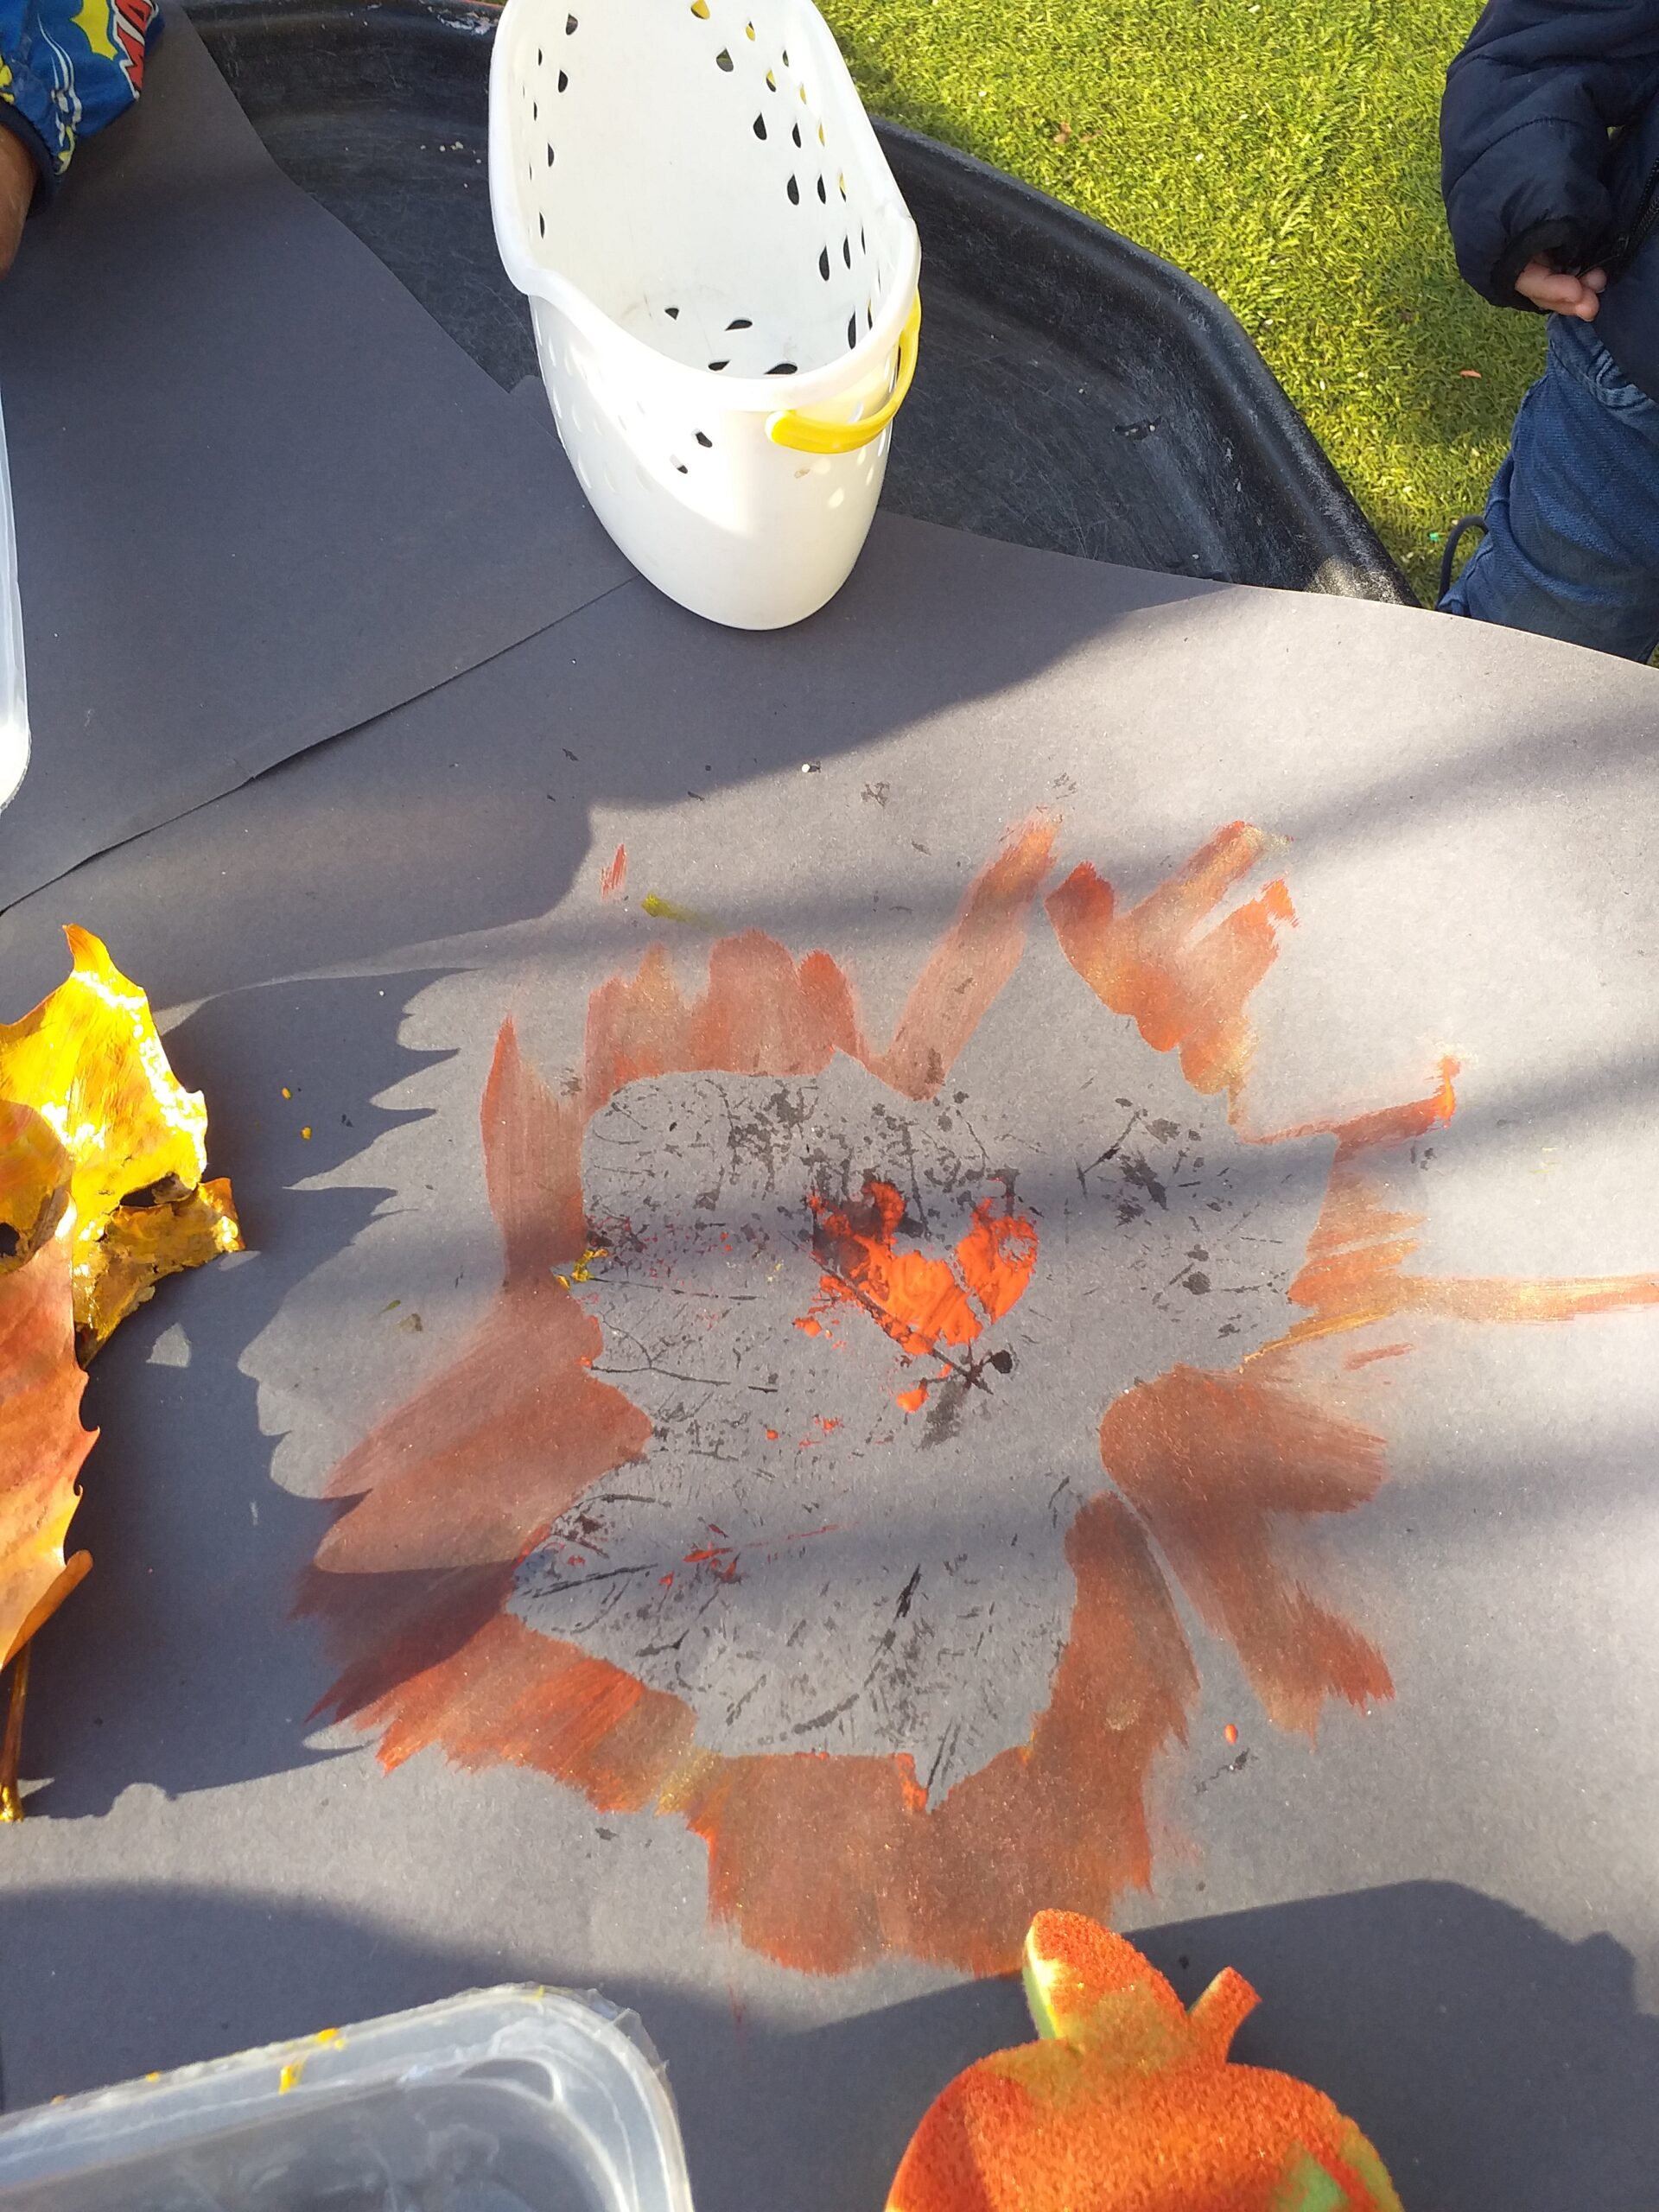
We did this activity with 2-3 year old children and once demoed, they picked it up quickly. This is what we did.
An outdoor tray, for messy play was set up with black sugar paper, two small trays in the center.
One with a selection of leaves and the other with a mix of paints.
The children stood alert with the sponges in their hands.
All children had a go and as this is a free play activity they kept coming and going and making marks on the sugar paper. Later on we kept the leaves to use in our next activity.’ Leaf prints’
LEAF PRINT!
RESOURCES.
White paper. (or coloured).
Leaves (not dry, but still pliable)
Choice of Acrylic paints.
Hands or a roller.
A couple of sponges.
METHOD
Lay out your white paper and take your leaves and sponge over then with the mix of paints.
Turn them over and press down on the leaf or if you have a roller on hand roll over the leaf.
Peel back slowly and you will have a veiny embossing of the leaf.
Leaves used to sponge on.
Different shaped leaves were gathered and use to do the leaf prints. These were the ones uses by the children to do their activity.
1 leaf print on an A4 sheet of white paper.
Varied selection of leaf prints.
Cut out and display. Glitter or laminate.
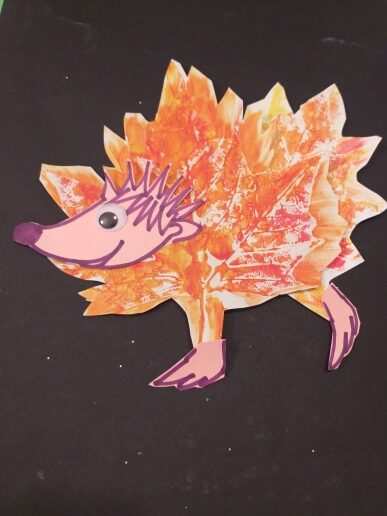
Check out how you can use your leaf prints, once cut out you can adapt them into fun animals!
Leaf prints could be a lions mane.
Or a hedgehog!
DECORATE!
RESOURSES.
A selection of leaves.
PVA glue.
Paint brush.
Glitter. (choice of colours or mixed glitter)
A tray (clean meat tray)
Black paper A3/ White paper A4
Acrylic paints, orange, yellow, brown red green.
Your fingers.
METHOD
Lay your leaf on a well covered table, and paint over it PVA glue with a paint brush.
Pour glitter into the tray and put the glued leaf face down onto the glitter and press it all over.
When glue dries, you can paint the other side of the leaf with PVA glue. Leave to dry.
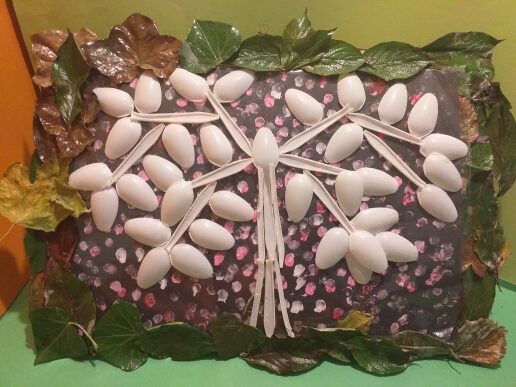
Once you have completed the gluing and glittering and leaf or leaves are dry, these can be displayed on the dotted papers that give the effect of and autumn background.
To achieve this, you dot with your fingers the different coloured paints all over the black and white papers.
Here is a choice of 3 leaves. One has been painted with PVA glue. Another glittered and the last one laminated and then glittered.
Then all glued onto dotted papers.
The leaf is glued.
Glittered.
Finished item.
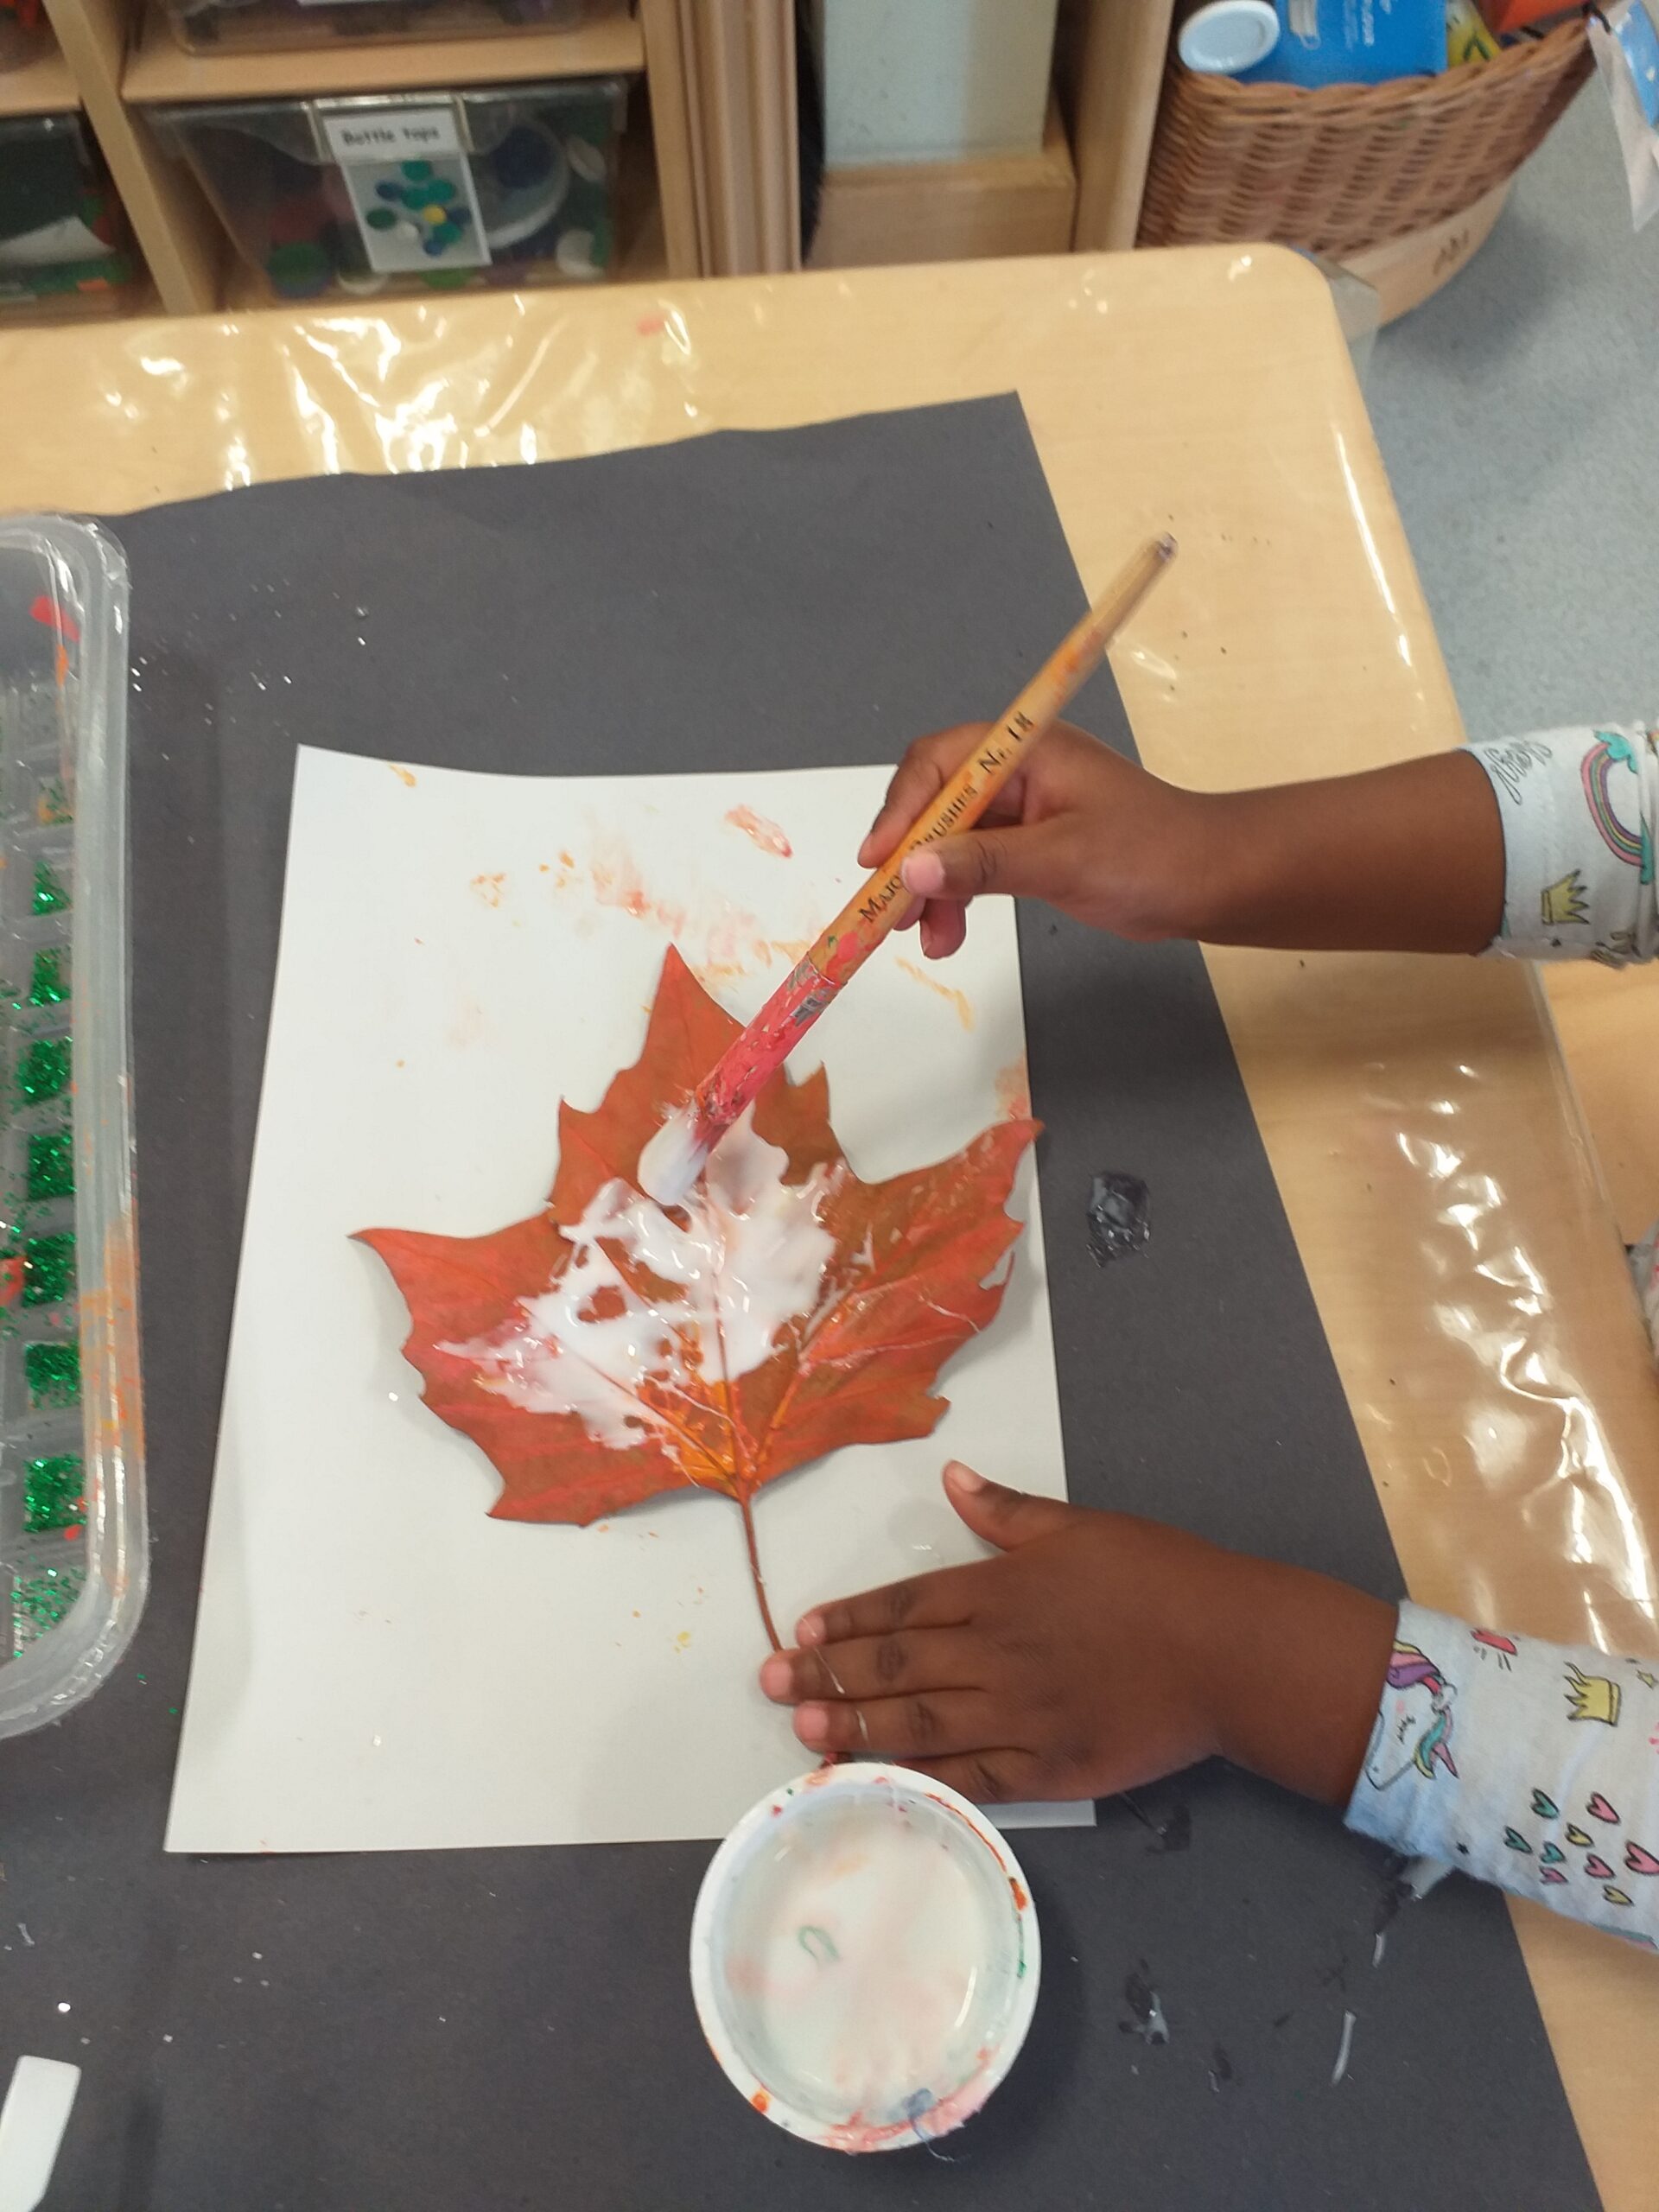
After a short demonstration, here this child coats the leaf with PVA glue and dips leaf into the tray with coloured gitters. Then left to dry.
You can choose how and which type of finished leaf, you prefer to show off.
Display with both leaves.
Or one leaf, glued and glittered.
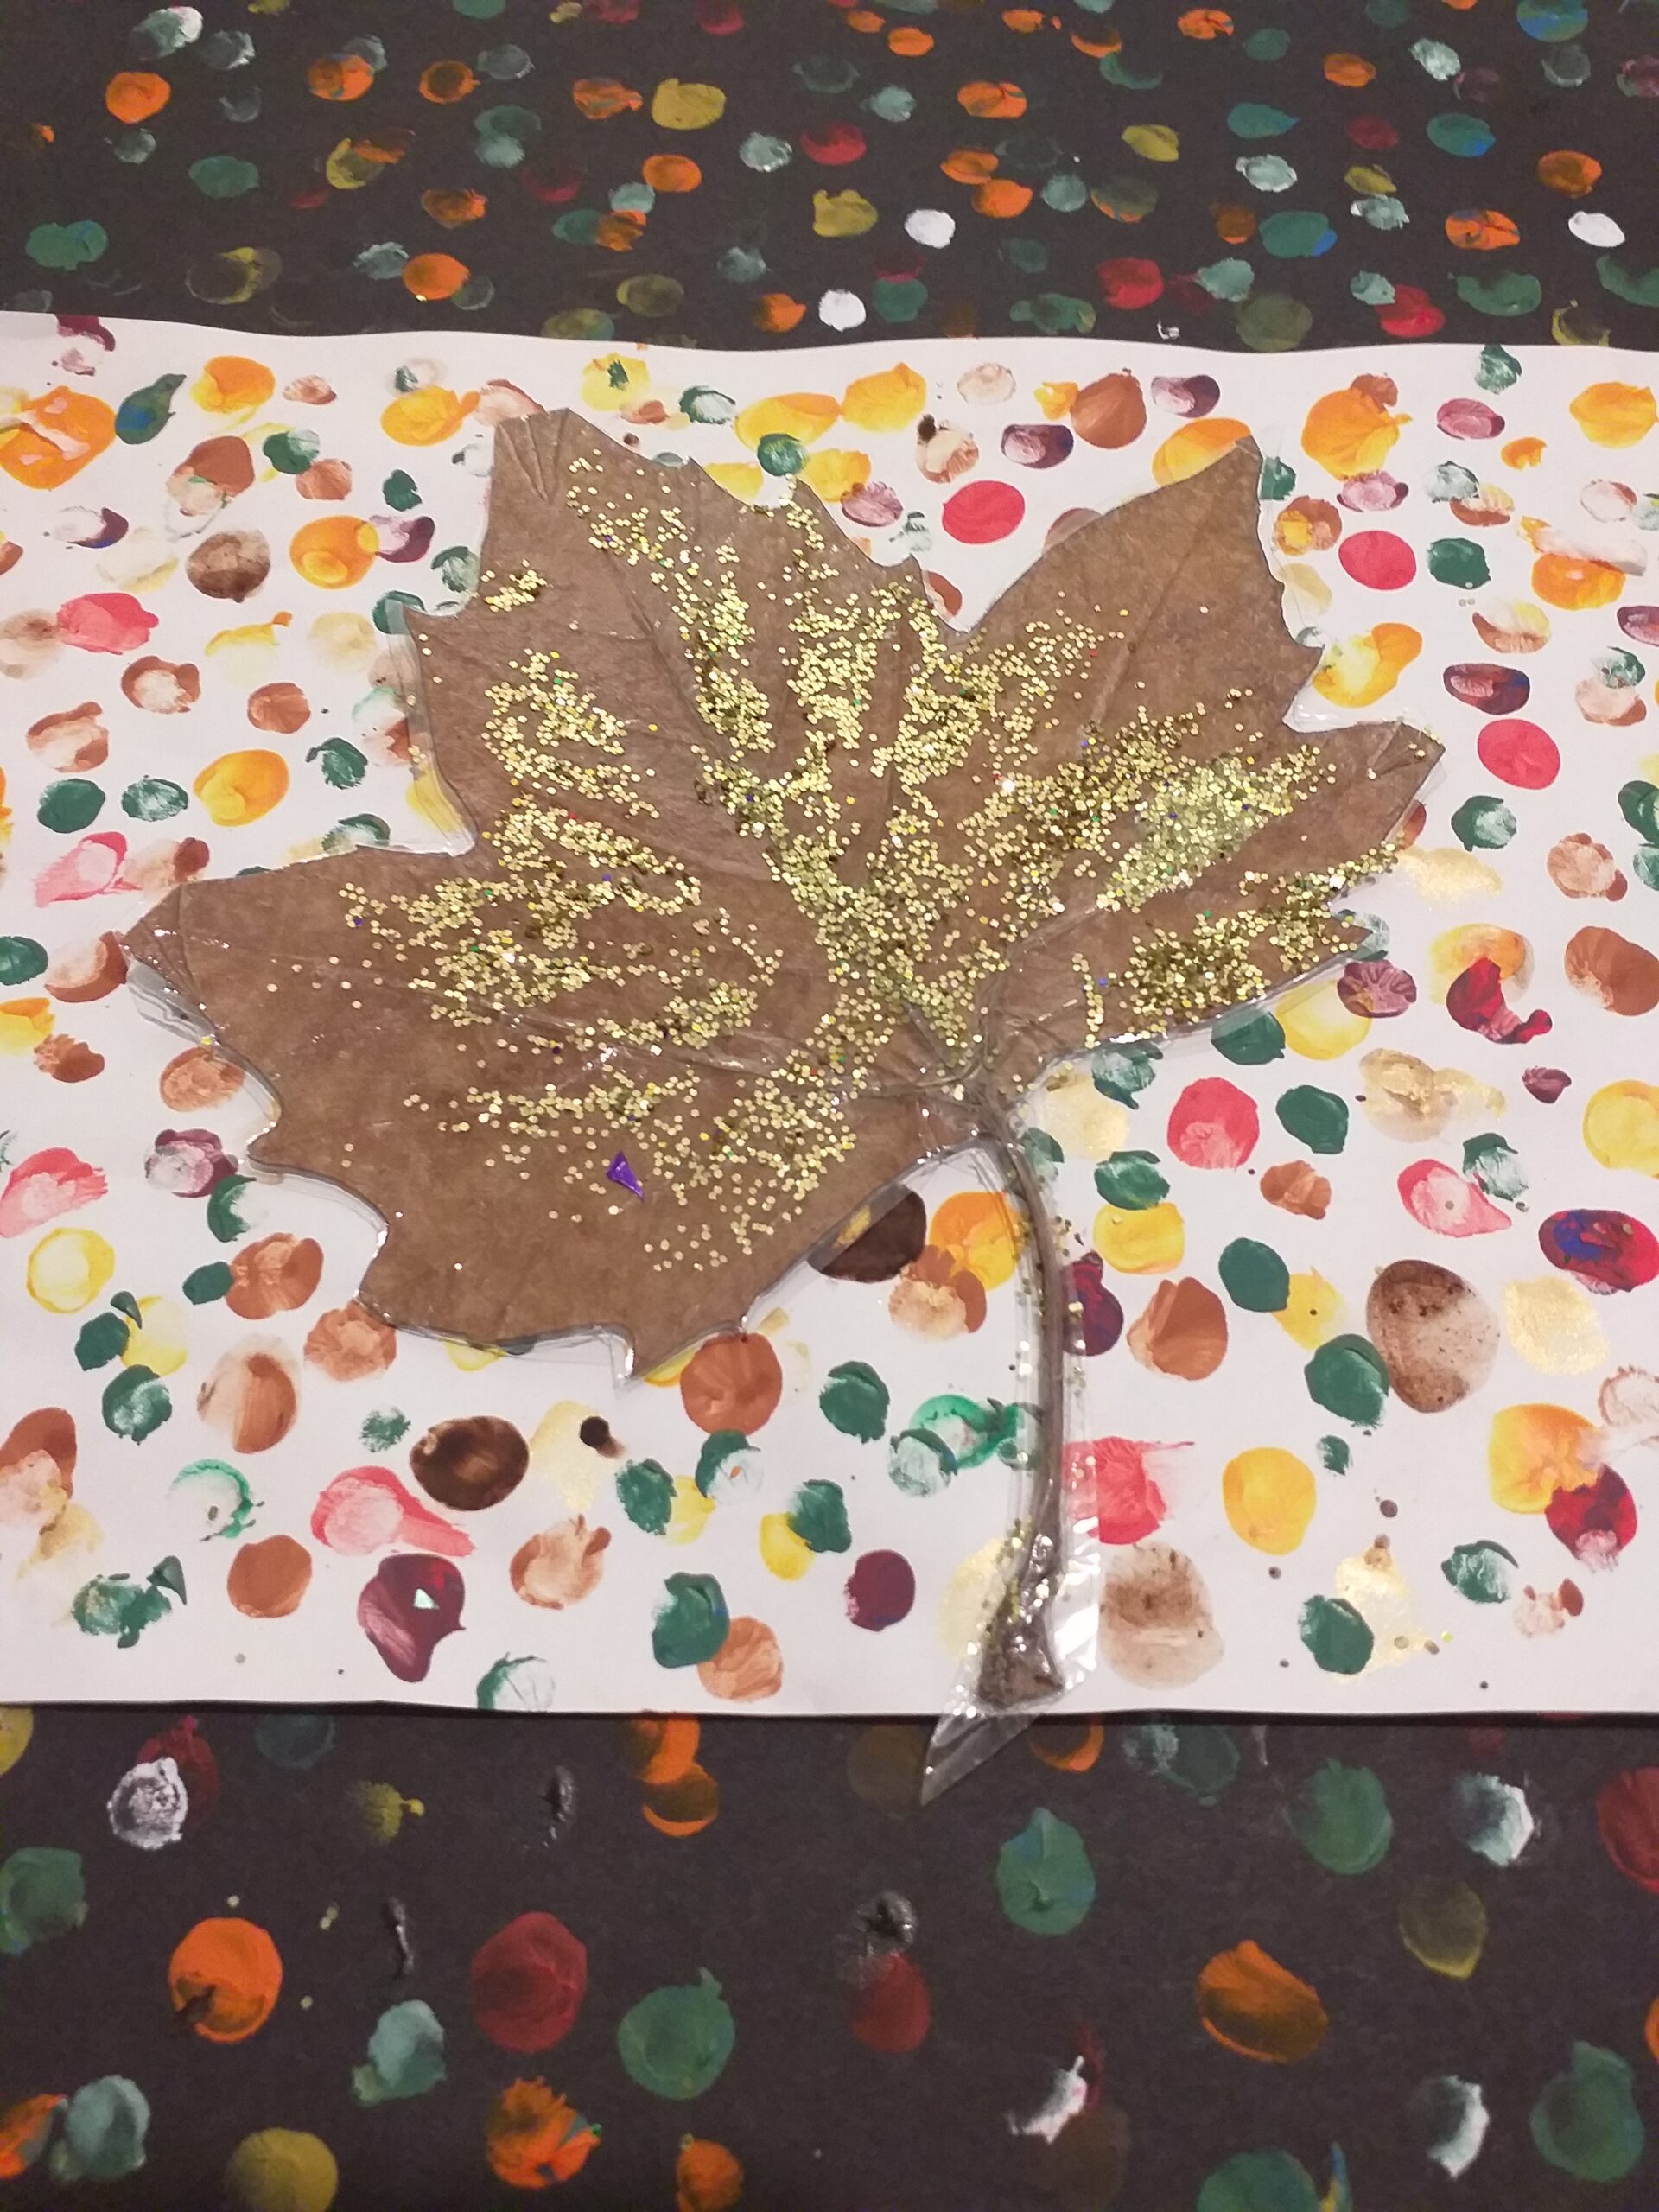
Or a laminated leaf then glittered.
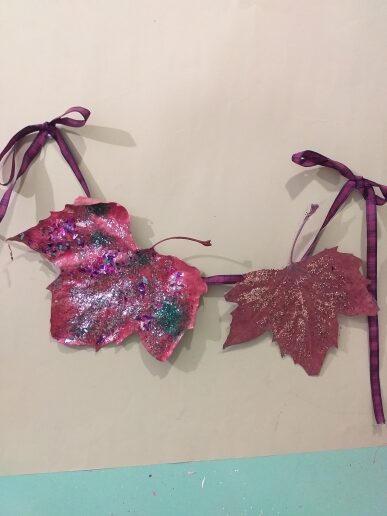
Below are examples of how else you can display your finished leafs. Either mounted on a ribbon and pinned on a wall. Or simply stuck together and if you keep going all the way round like a reef!
I found laminating the leaves were the best option for lasting pieces. This process preserves them for a very long time.
Smaller leaves can be prepared with PVA glue or laminated and stuck all the way round a piece of artwork, providing a beautiful leafy frame, as shown below on the far right.
Also when you laminate a leaf, it becomes more flatter and provides a smoother surface, hence making it easier to decorate how you want.
As a garland.
Or on their own.
Or as a border around a picture. Here all leaves were coated with PVA glue.
LAMINATE.
RESOURCES.
Access to a laminating machine.
Laminating pouch/Sticky back plastic.
A choice of leaves. (not too dry, still pliable.)
Glitter (your choice of colour)
PVA glue/Brush.
METHOD.
Run your leaf through a laminating machine, don’t have one to hand, then you can use sticky back plastic, so as to secure the leaf in a protected film.
Carefully cut out the leaf.
Brush on PVA glue where ever you want the glitter to stick.
Sprinkle glitter over the leaf and leave to dry.
Above I have shown different ways to prepare a leaf.
Here shown again is the laminated leaf. It is flat and has kept its shape, hence glittering is easier to apply.
You can decorate the leaf with what ever you like, because It is protected by the plastic coating.
Laminating machines can be purchase from various websites eg. Hobbycraft, Amazon, Argos and createandcraft.com
TO CONCLUDE!
Autumn is an amazing season, which shouldn’t be taken for granted. We should admire the changing colours around us during this season and embrace it.
I have shown you a few ideas on how you can use the beauty of the leaves around us and create interesting art with them.
I mention how to preserve them and with paint and glitter, renovate a simple leaf into an interesting project to try out with your kids.
Children doing some of these projects are between 2- 3 years old.
The children enjoyed working with the leaves, from scurrying around piles of fallen leaves, to looking and finding different types and sizes, then painting and making artistic patterns!
All this can be quite messy, but that’s how kids learn to apply different mediums experimenting in the process, working with textures, colours and shapes forming their little masterpieces.
Let’s keep kids imaginations free to try and experience the joy of creation!
So drops us a line, I would love to hear or see what you got up to with your kids!