Looking for something to keep the kids busy during the last part of the summer holidays? Why not make your own plastic bottle water wall using things you may already have at home?
A DIY PLASTIC BOTTLE WATERFALL
I wanted to create something that wasn’t just fun to play with, but would also give children the opportunity to experiment and discover how water flows.
So I put together this DIY plastic bottle water wall for kids using recycled plastic bottles and a garden trellis — and then my grandson put it to the test!
In this post you’ll discover:
♻️ How I turned plastic bottles into a water wall
🌱 How I used a garden trellis to hold everything together
🛠️ What materials I used
💧 How I designed the water pathway
🎥 My grandson testing the finished water wall
🧪 Simple STEM experiments children can try
🤔 Ideas for changing and expanding the design
💡 Tips from what I discovered while making it
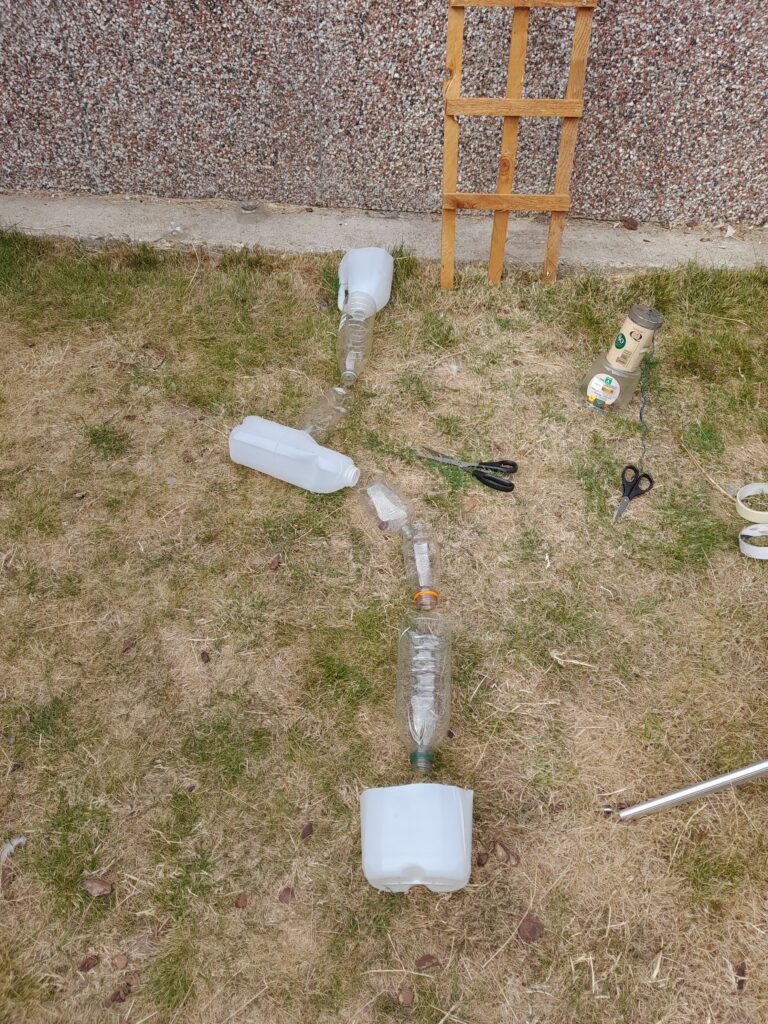
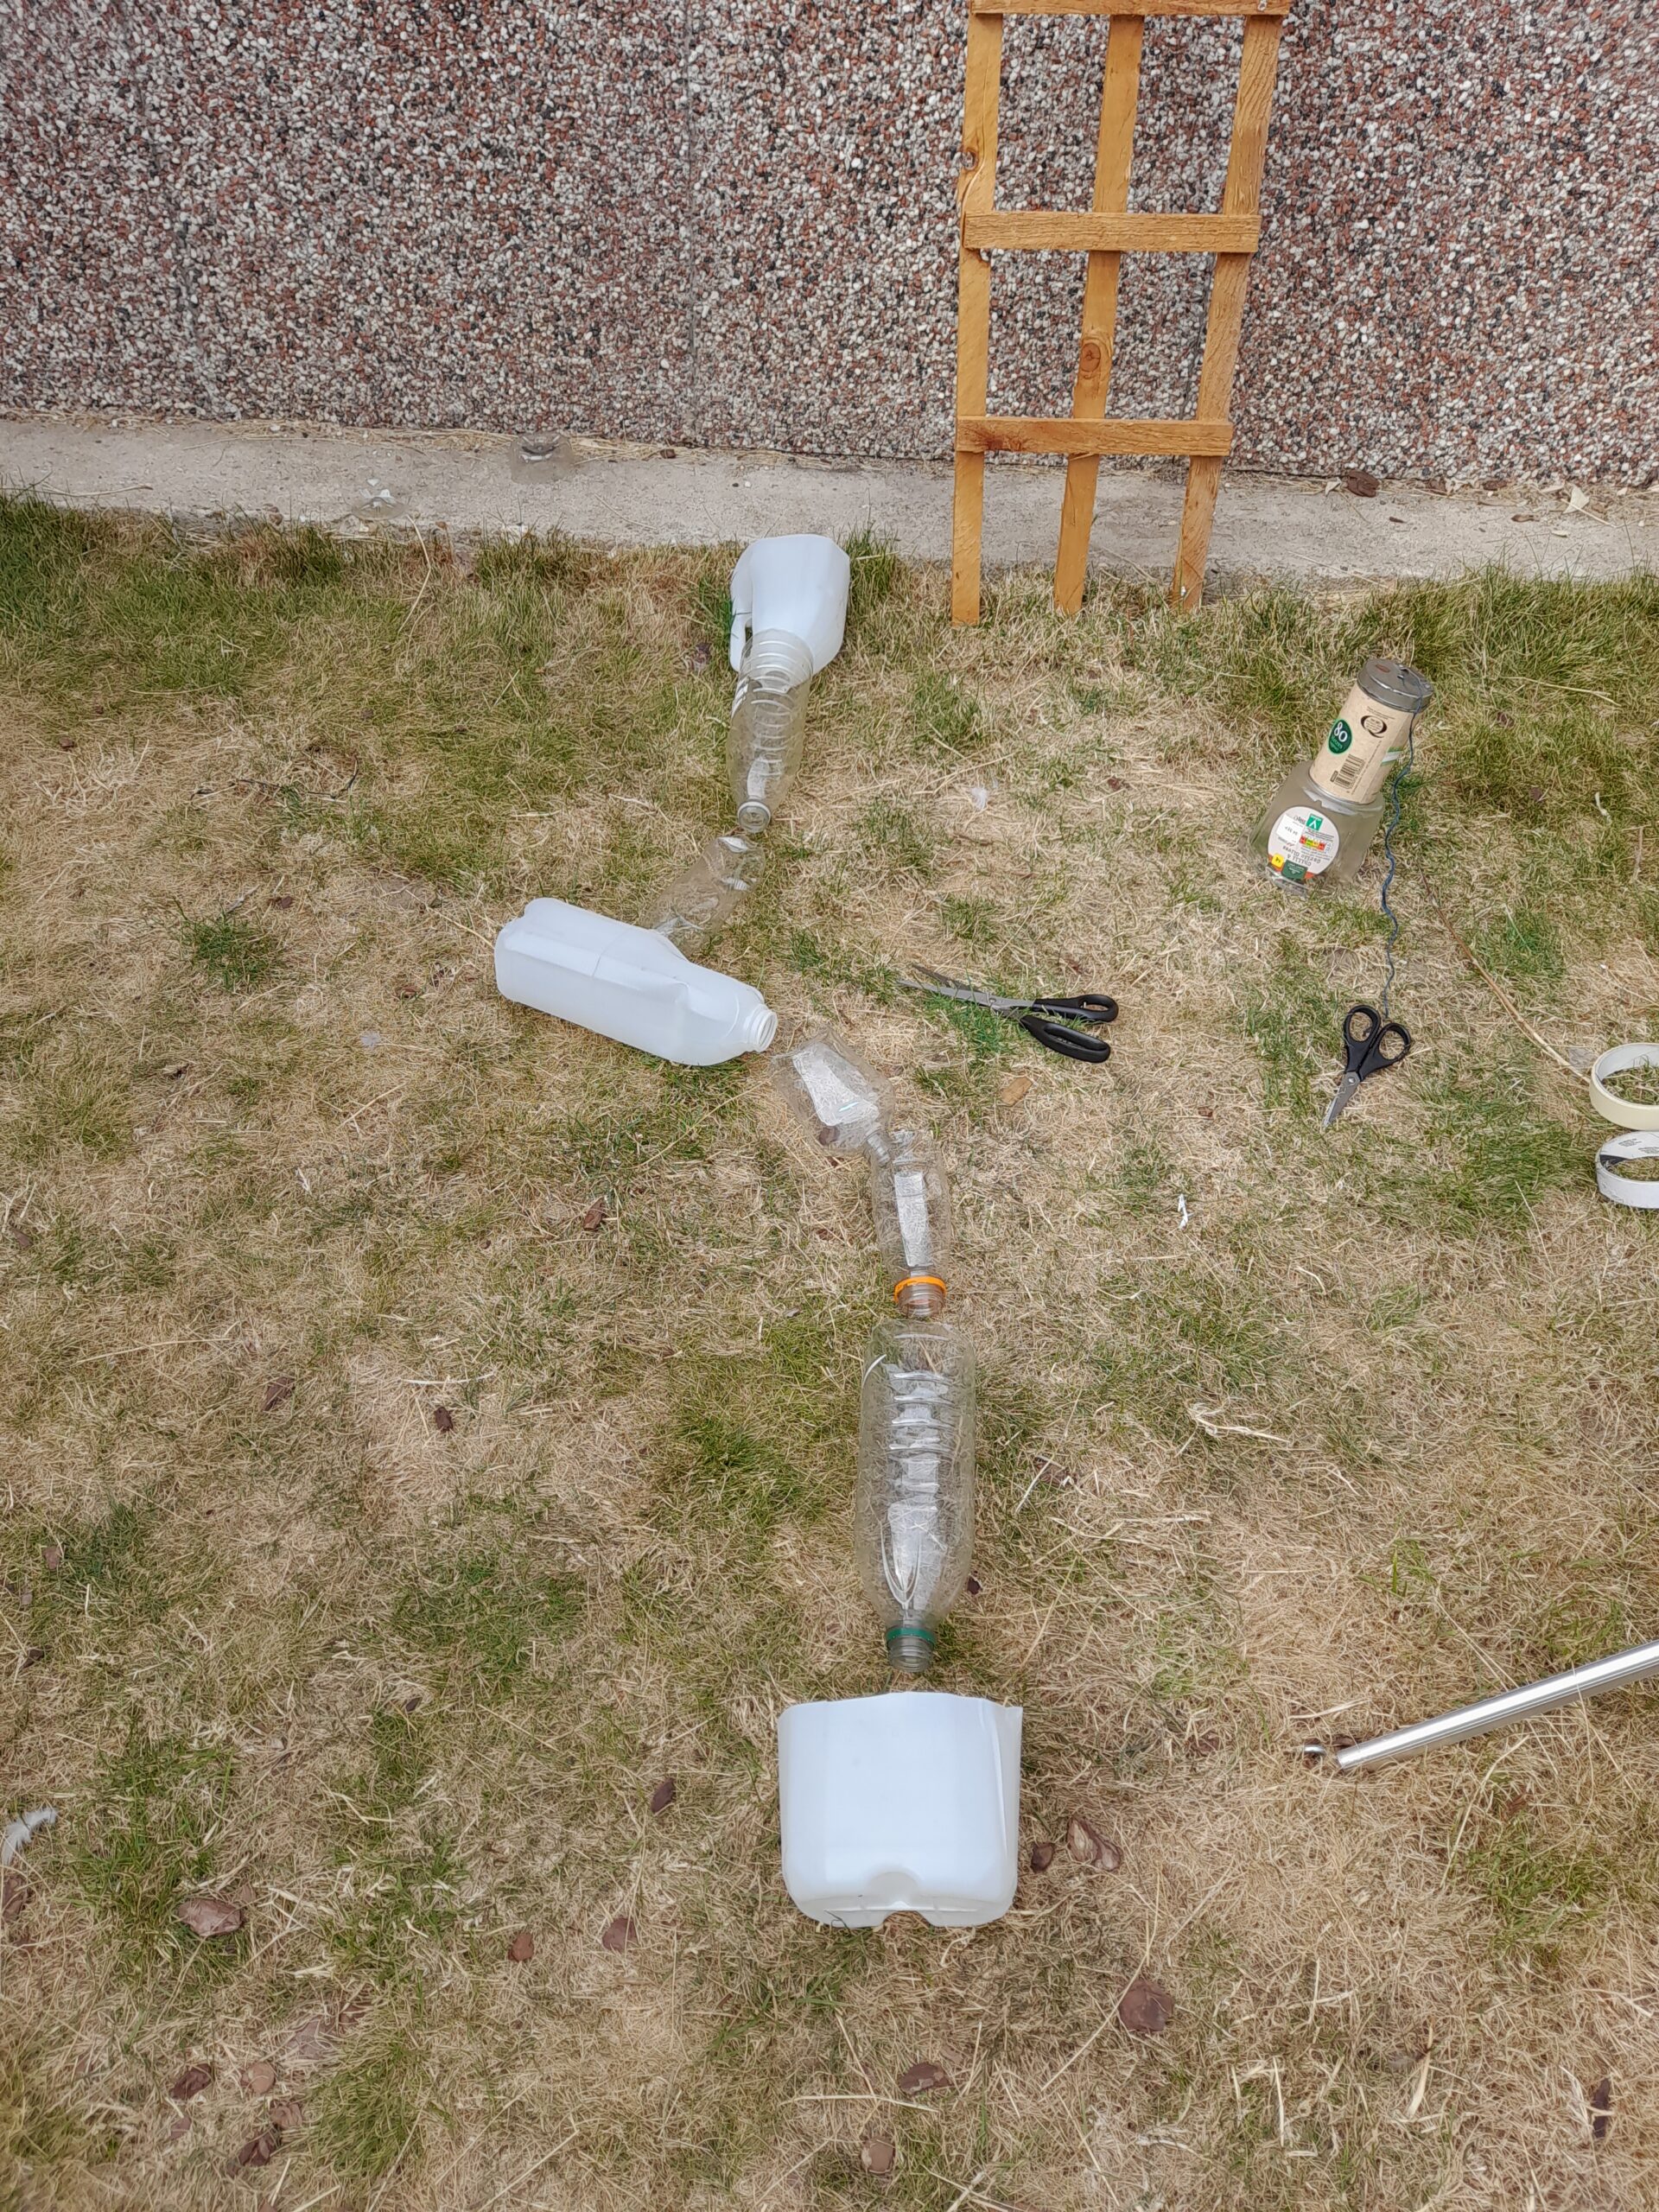
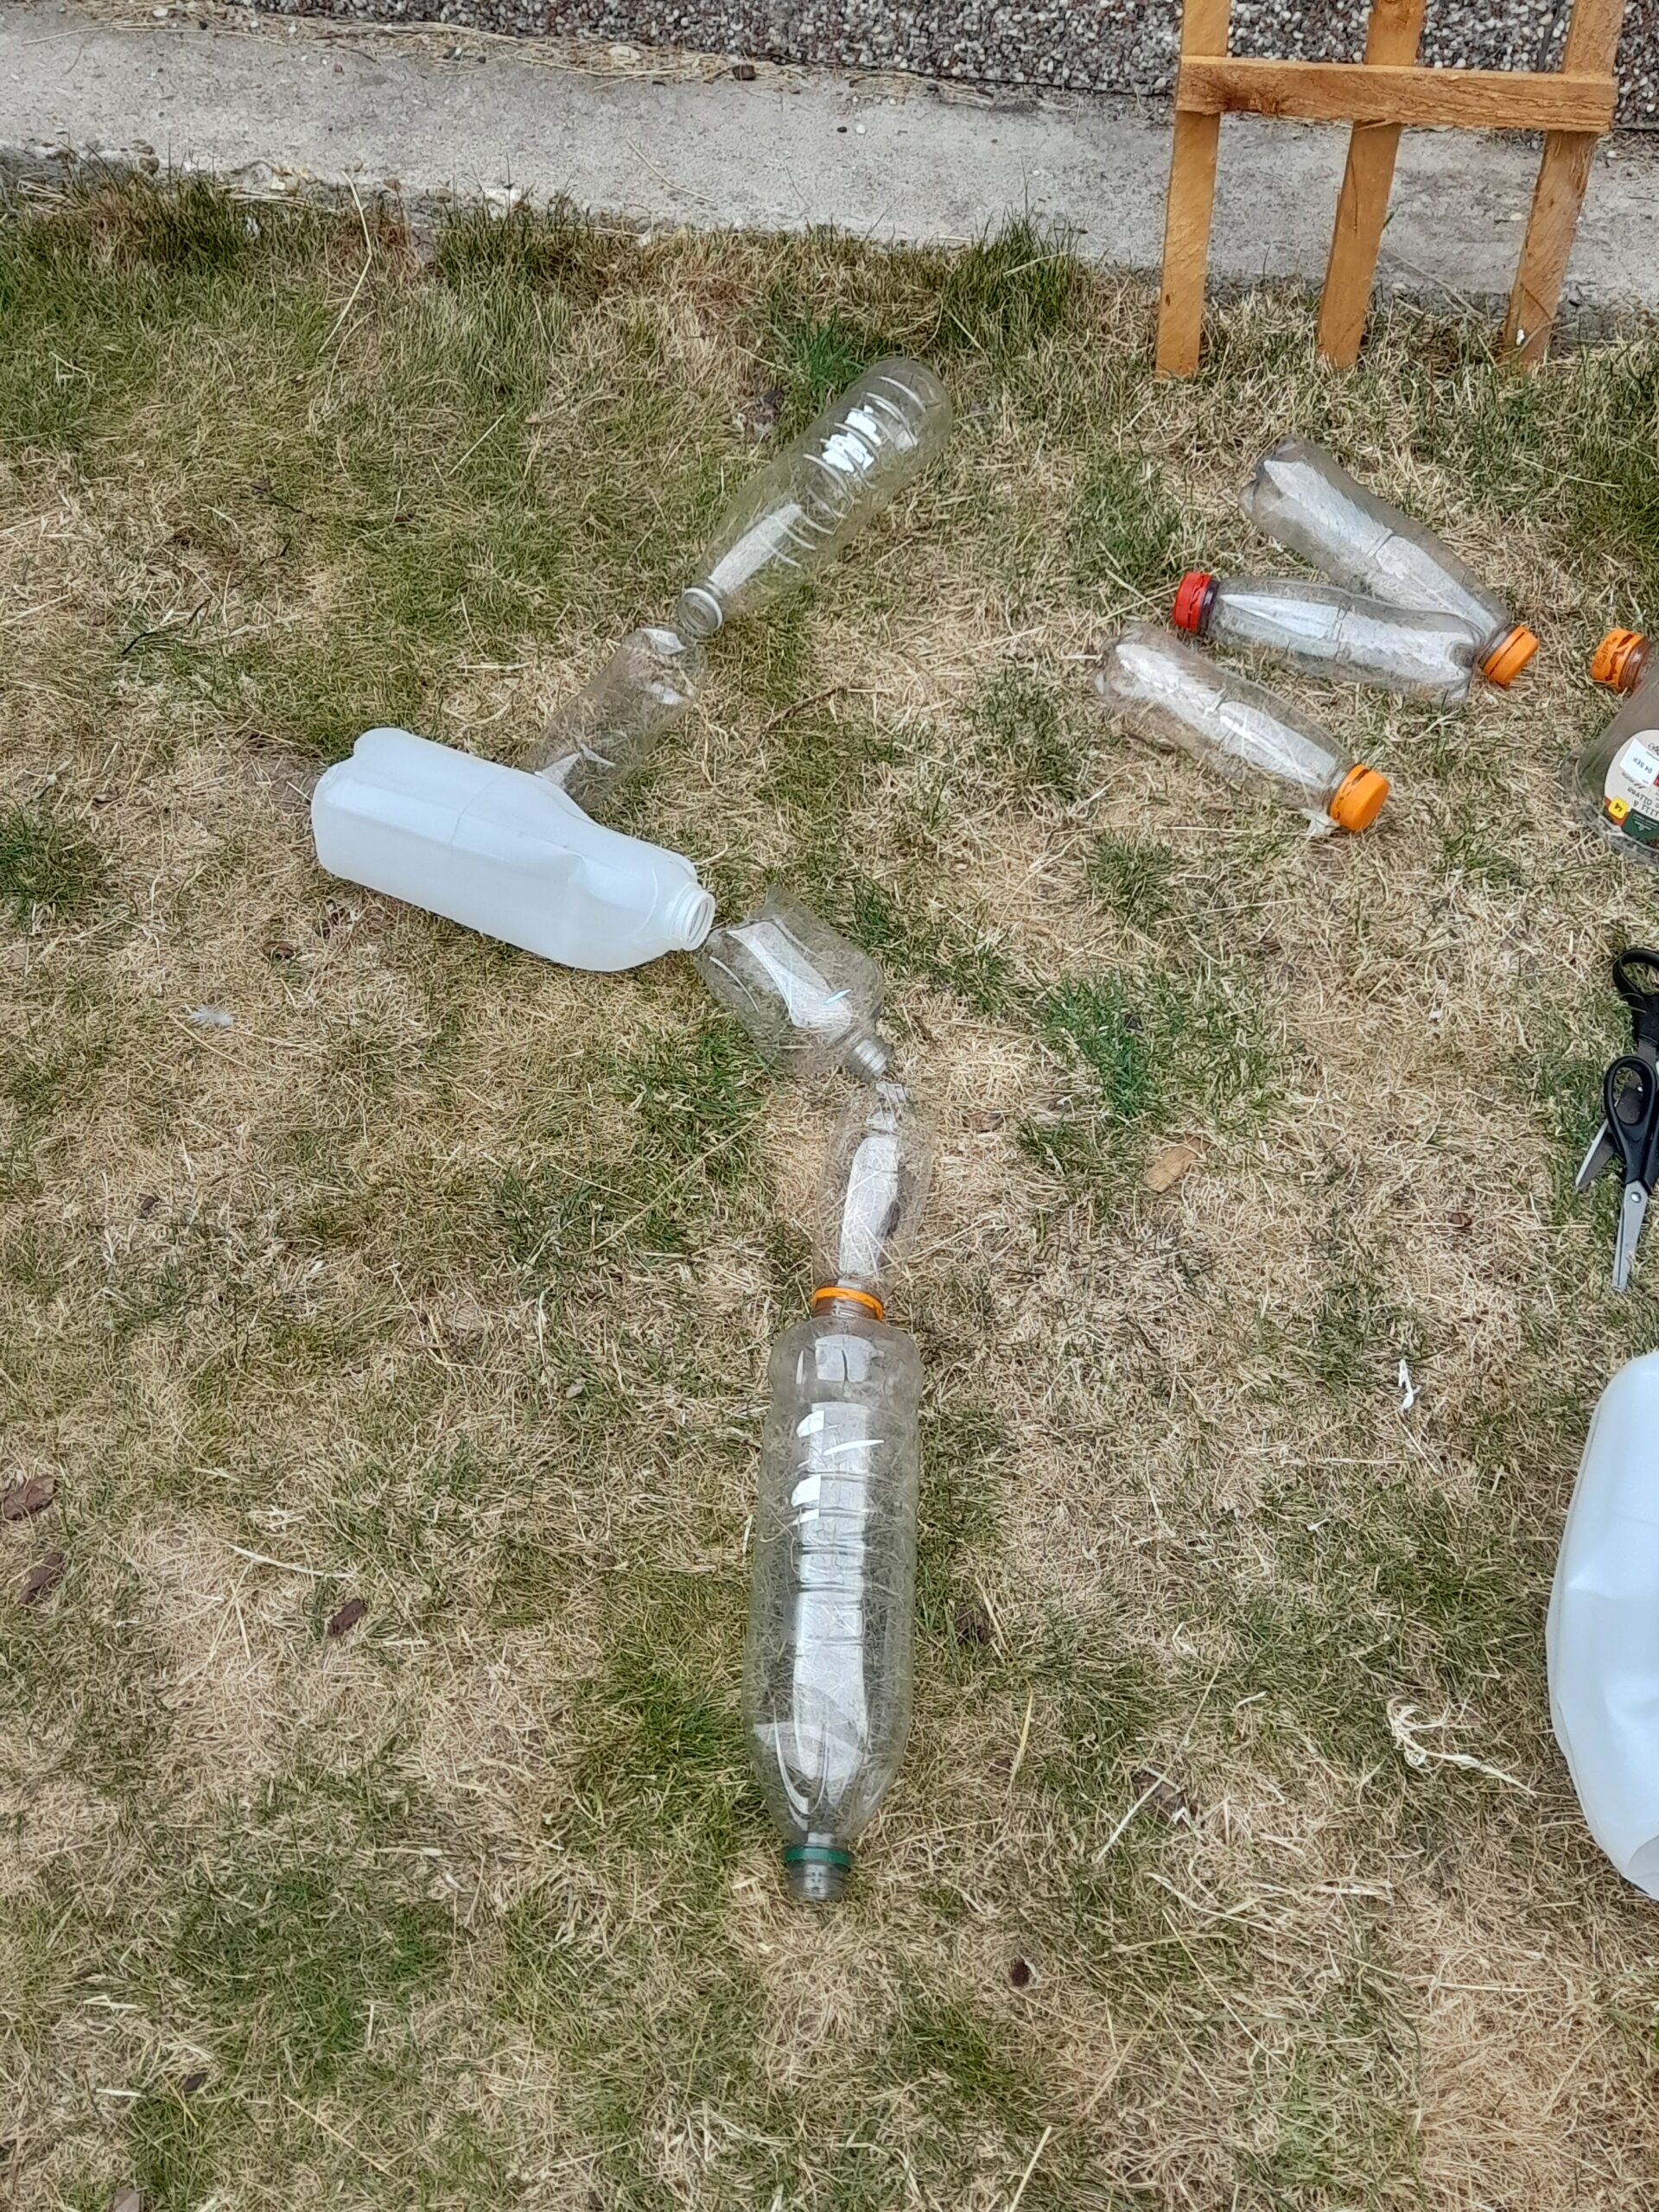
Lay out your design on the ground.
Once you have gathered your bottles, lay them on the ground following a pathway from top to bottom.
In this way you or your child can work out how the water will fall, and where to make the holes in the bottle. Angling each bottle in a diagonal and straight pattern, but also keeping in mind the trellis was not very wide, hence because of this it would only allow one bottle at a time, to follow through.
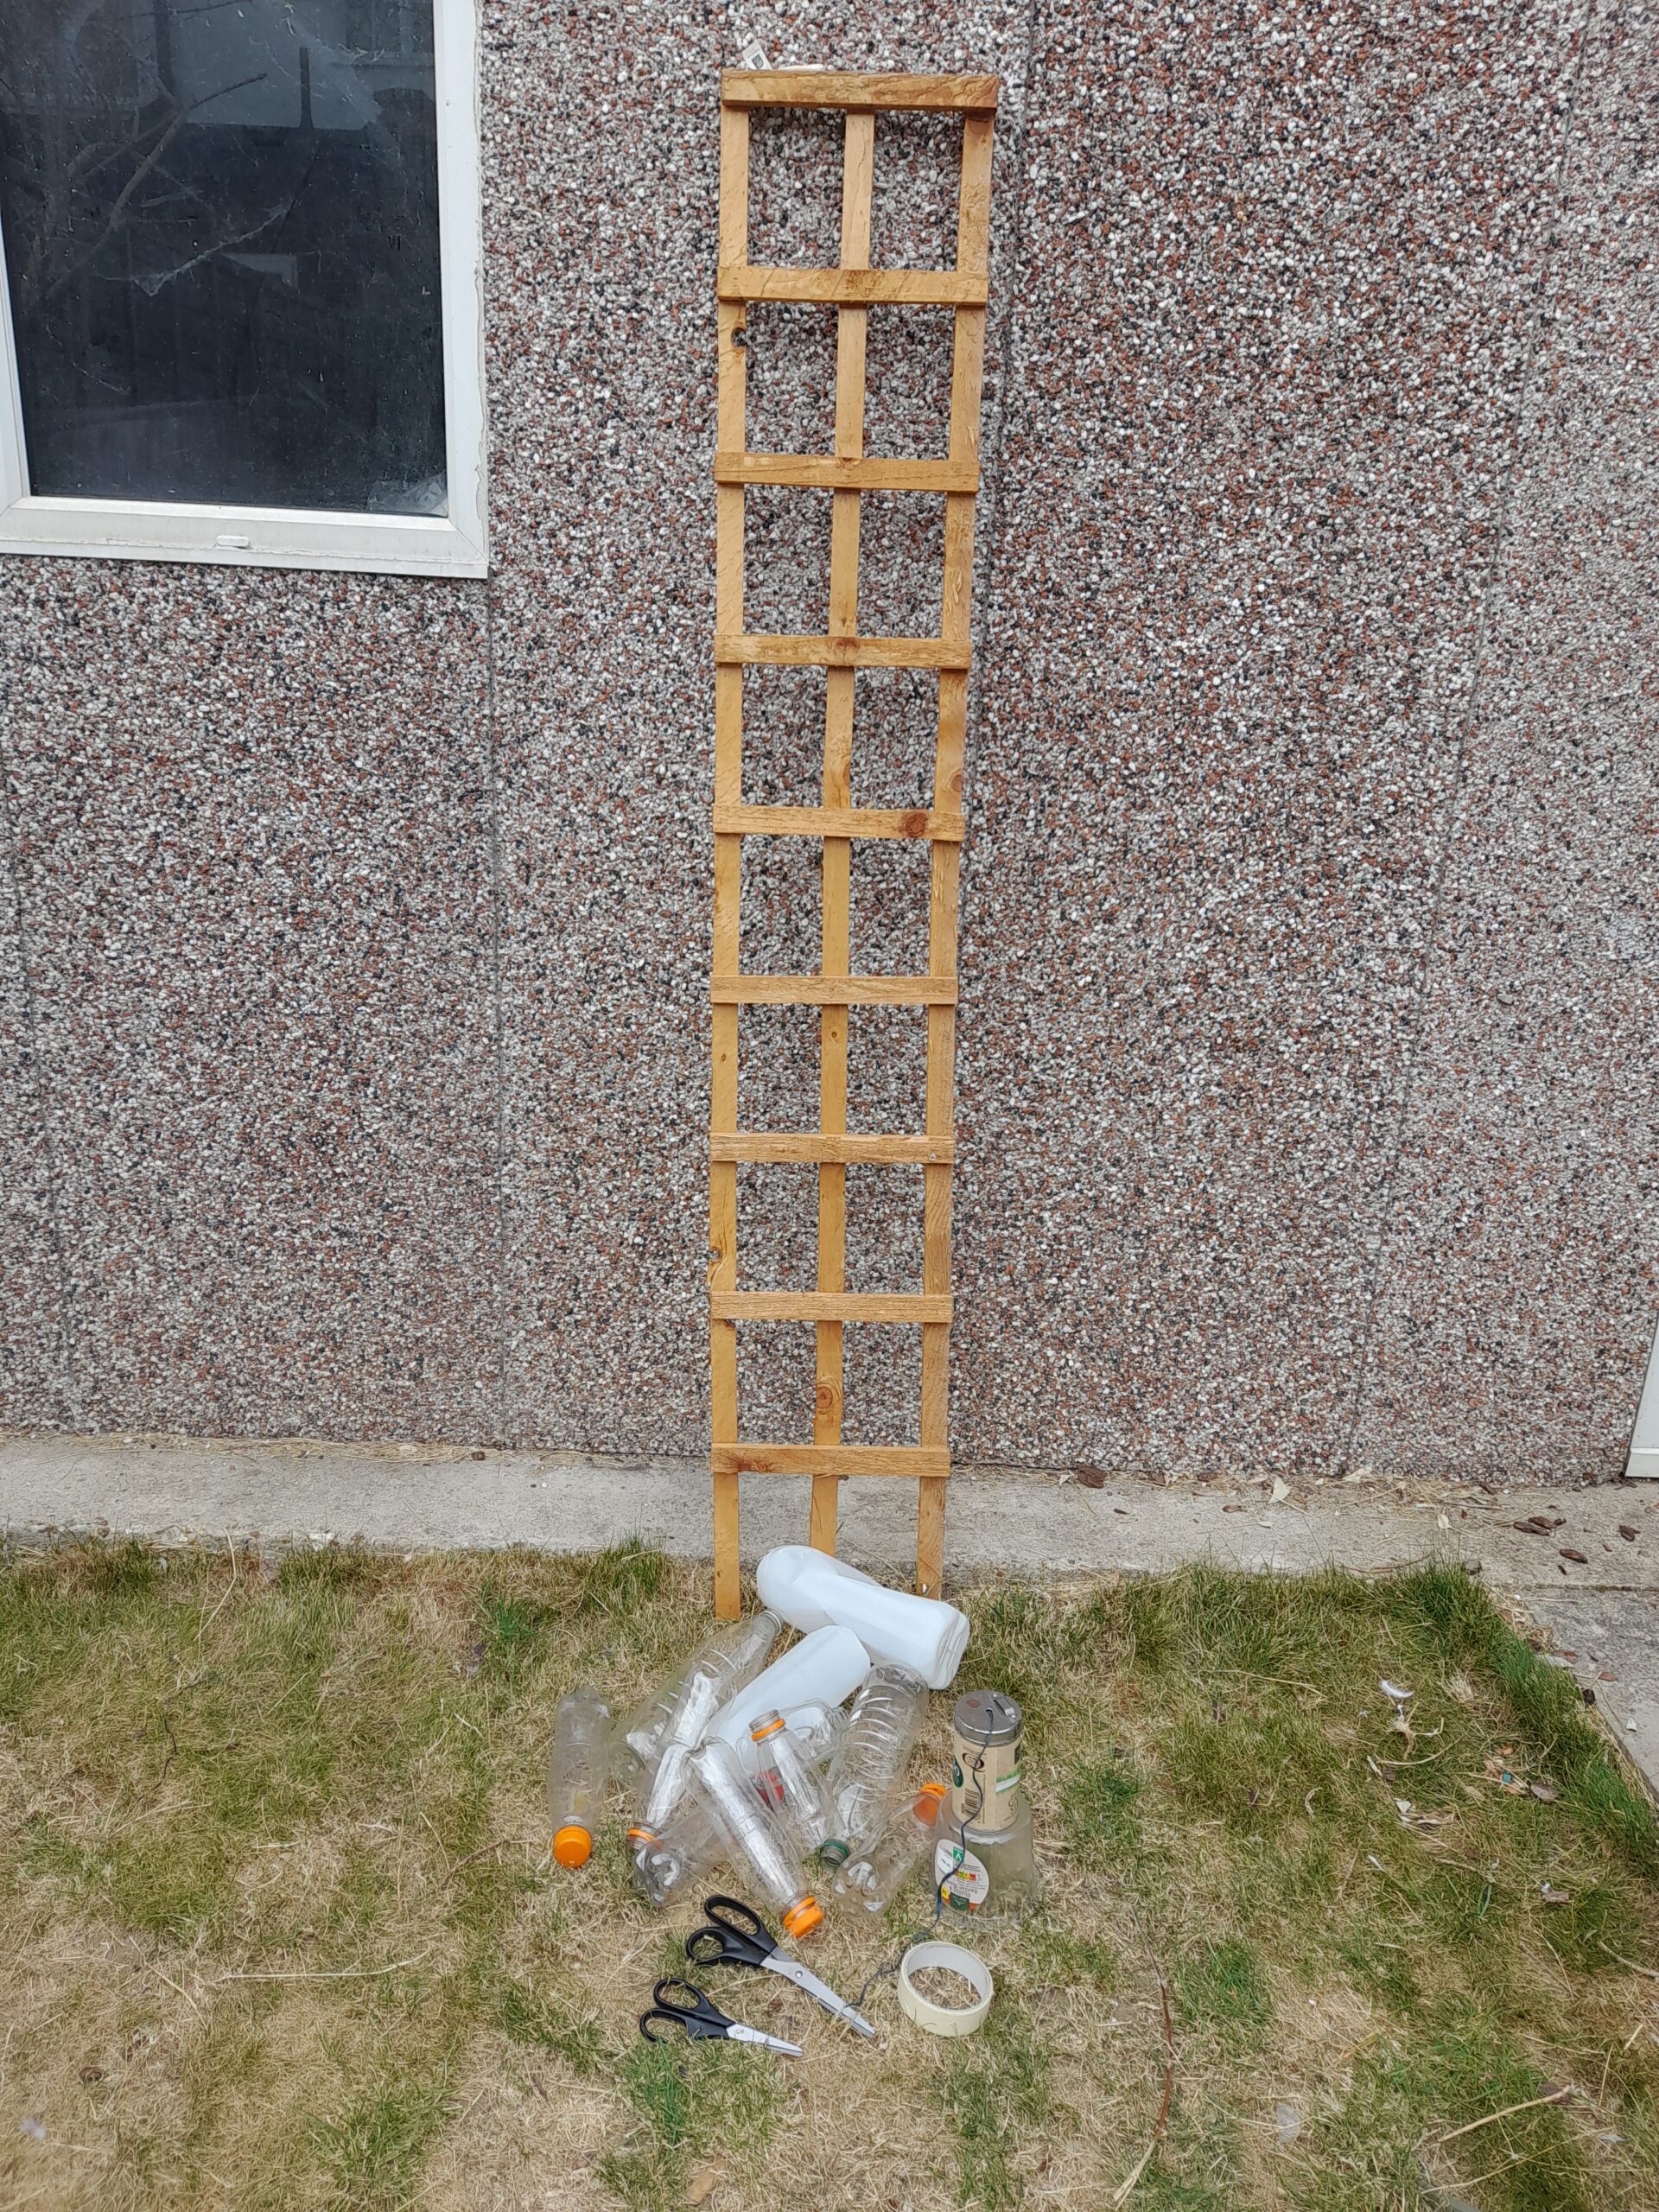
I found a spare garden trellis which I thought would be a great help to hang the bottles on.
Other than that I’d have to somehow glue the plastic bottles using sticky tape, velcro or something that could hold them against a wall. As this wall was a pebbled one, anything I’d use would be difficult to attach them to it.
So, the solution was to find a backing board or like in my case a trellis with slats going across, thus making it easy for me to tie the bottles to it.
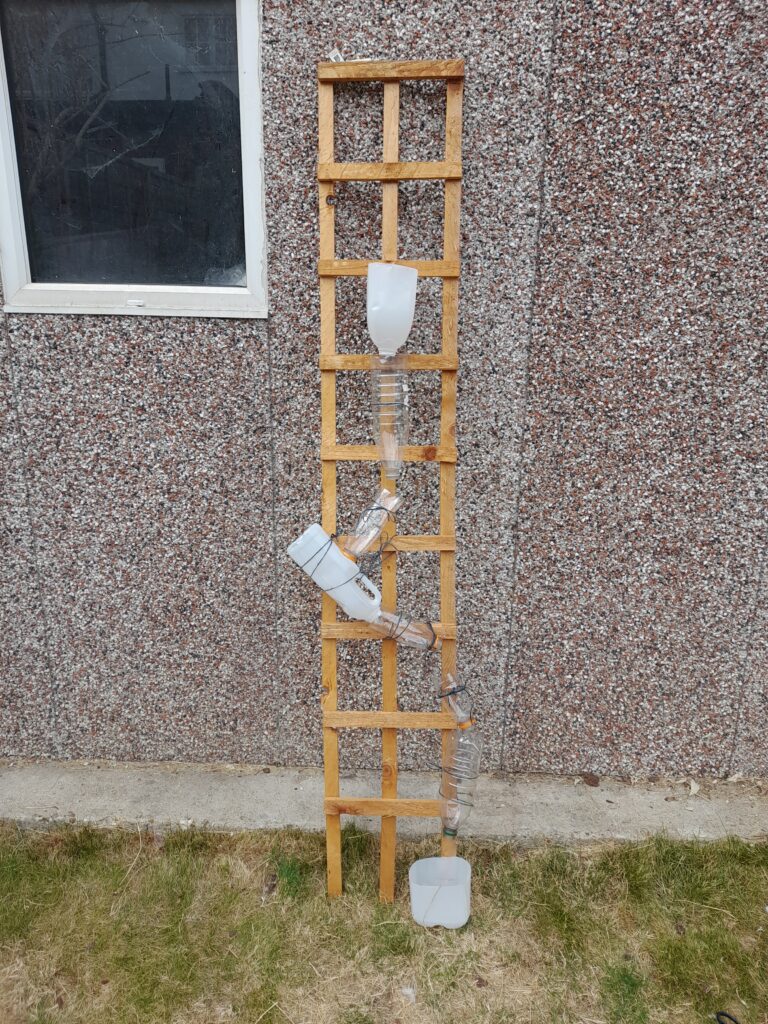
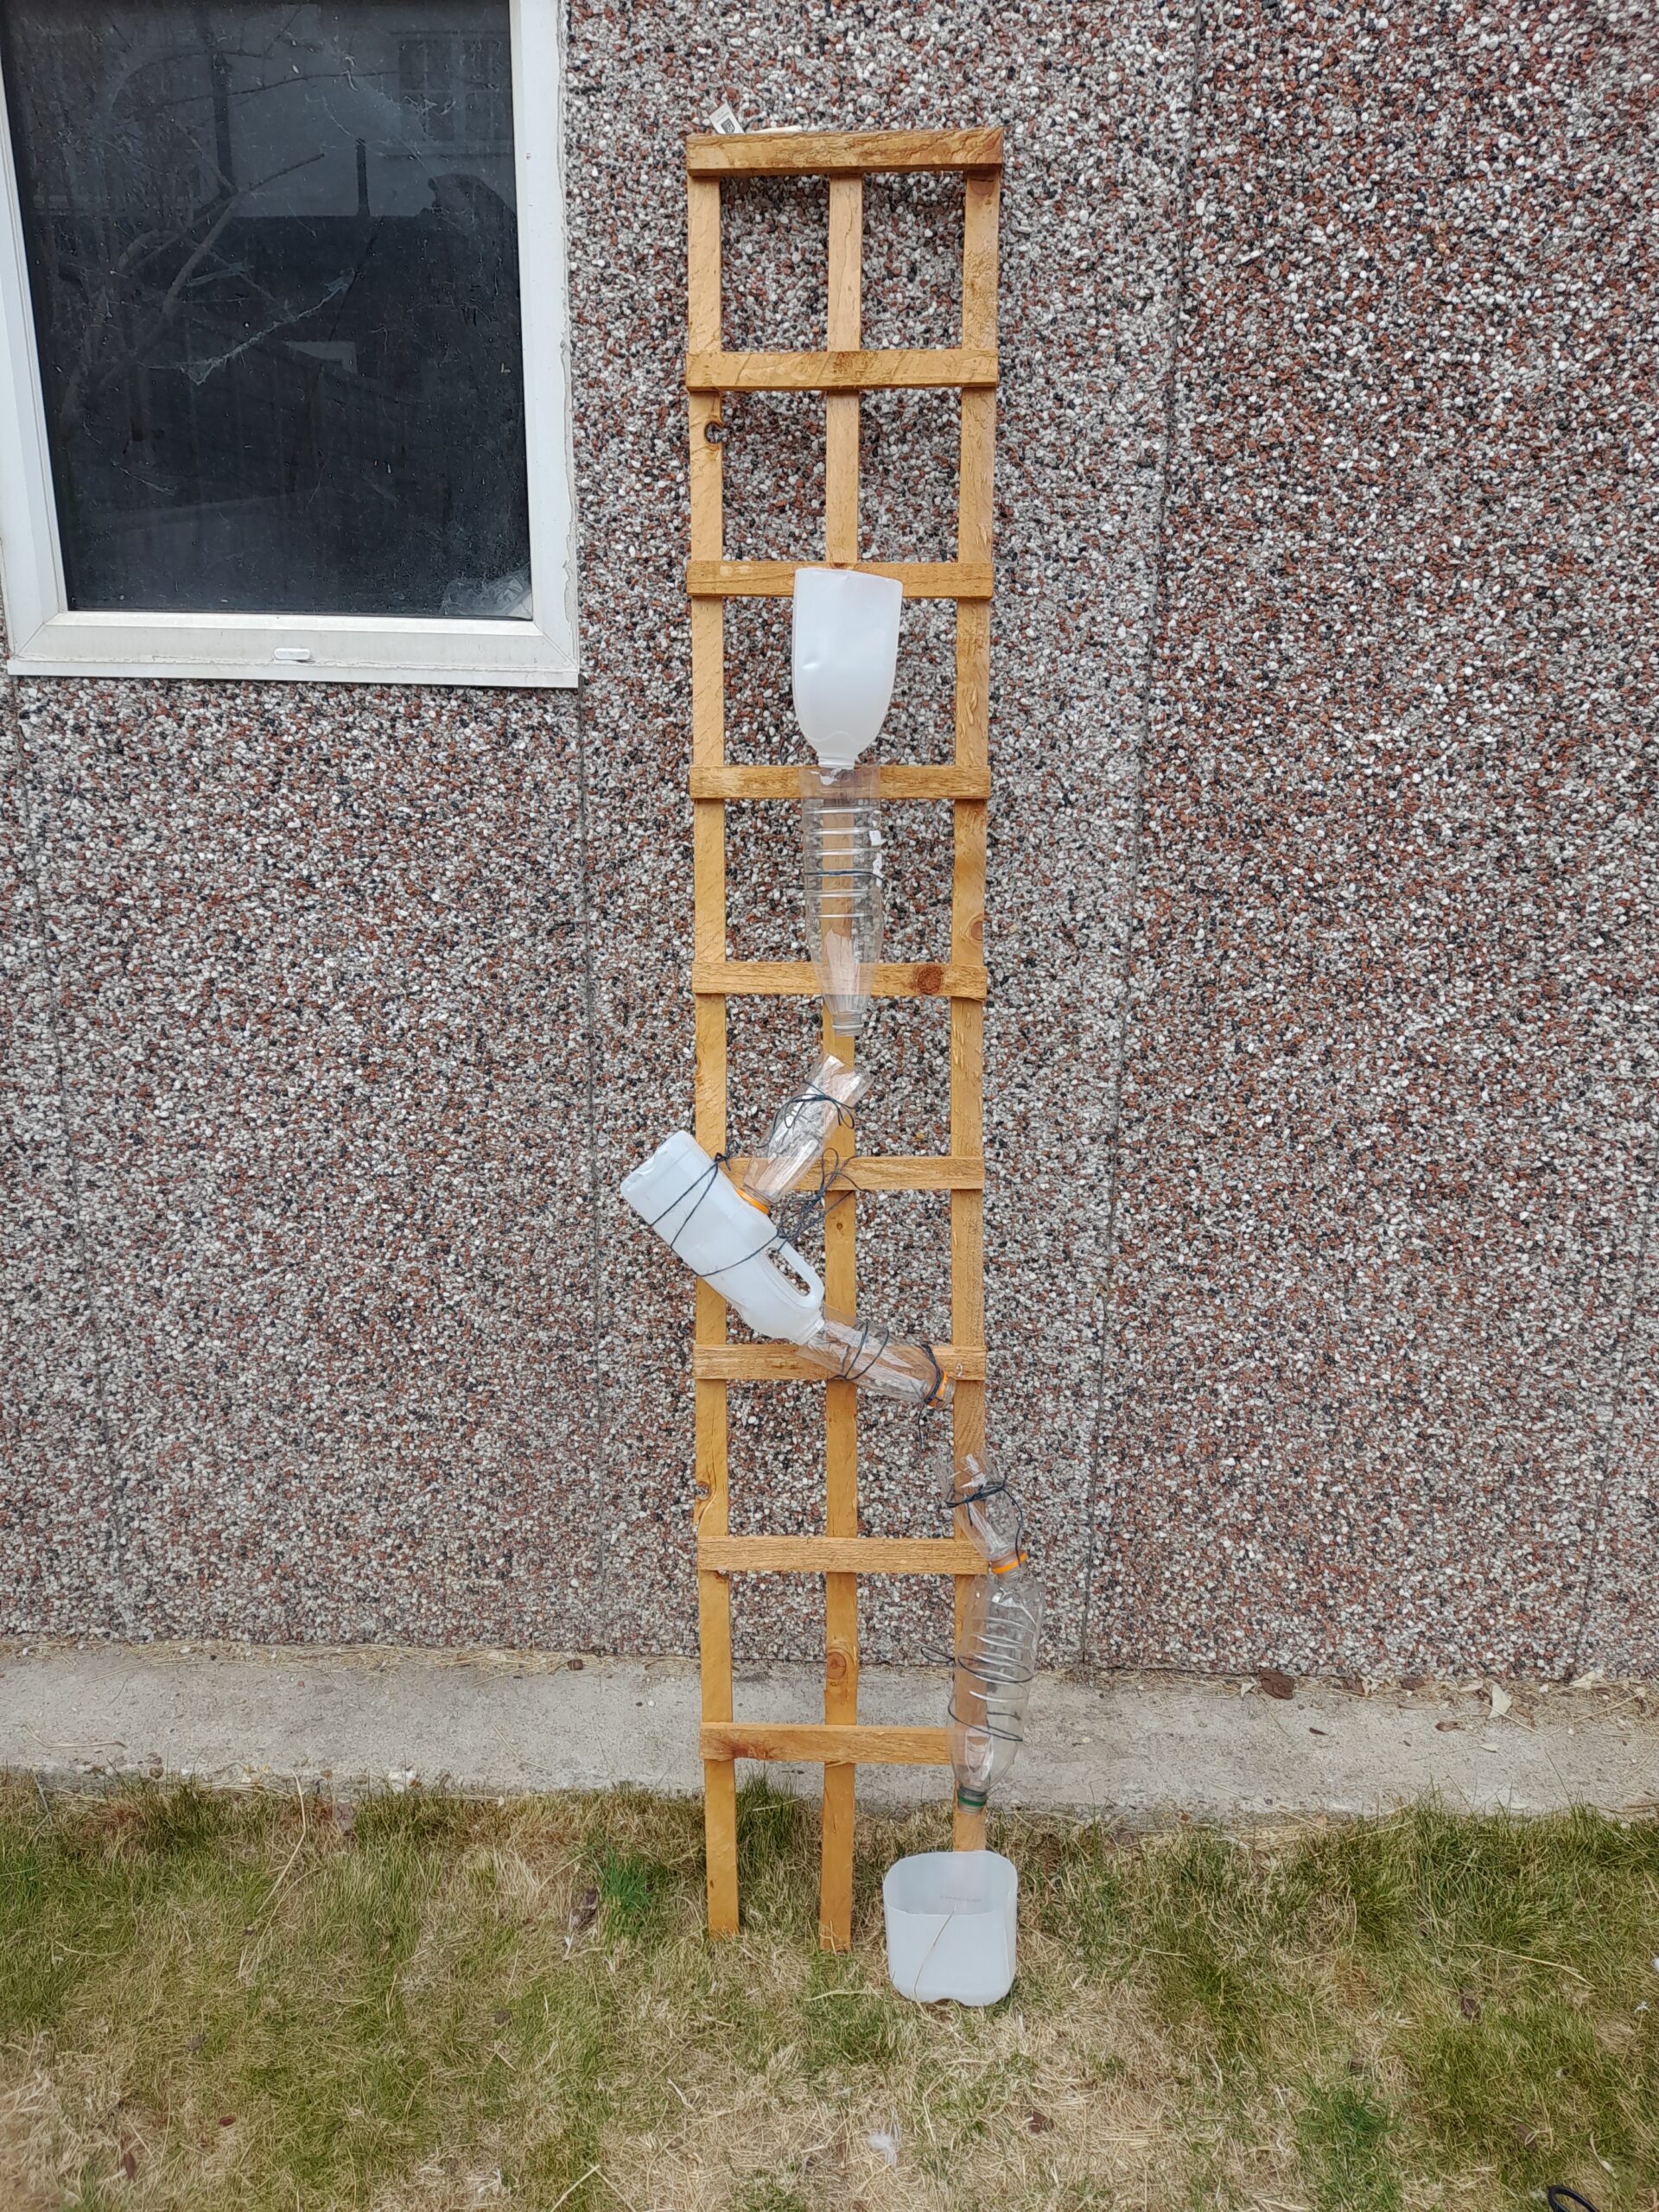
Plastic bottles arranged on the trellis.
WHAT MATERIALS I USED
My intention, was not to have to rush out and purchase items to do this activity, instead to find what I have around me, and what I could save and gather together to do this activity.
Within my recycling bag I discovered numerous plastic bottles of different shapes, and different type of plastics, we had accumulated, due to the hot weather and thought how else could we give these plastic bottles a new lease of life, and upcycle them in a useful way?
It would be easier to set this up as you go along, and it’s pretty easy to set up, find items, lay on the grass then fix onto the trellis.
LET’S START THE DIY PASTIC BOTTLE WATER WALL FOR KIDS!
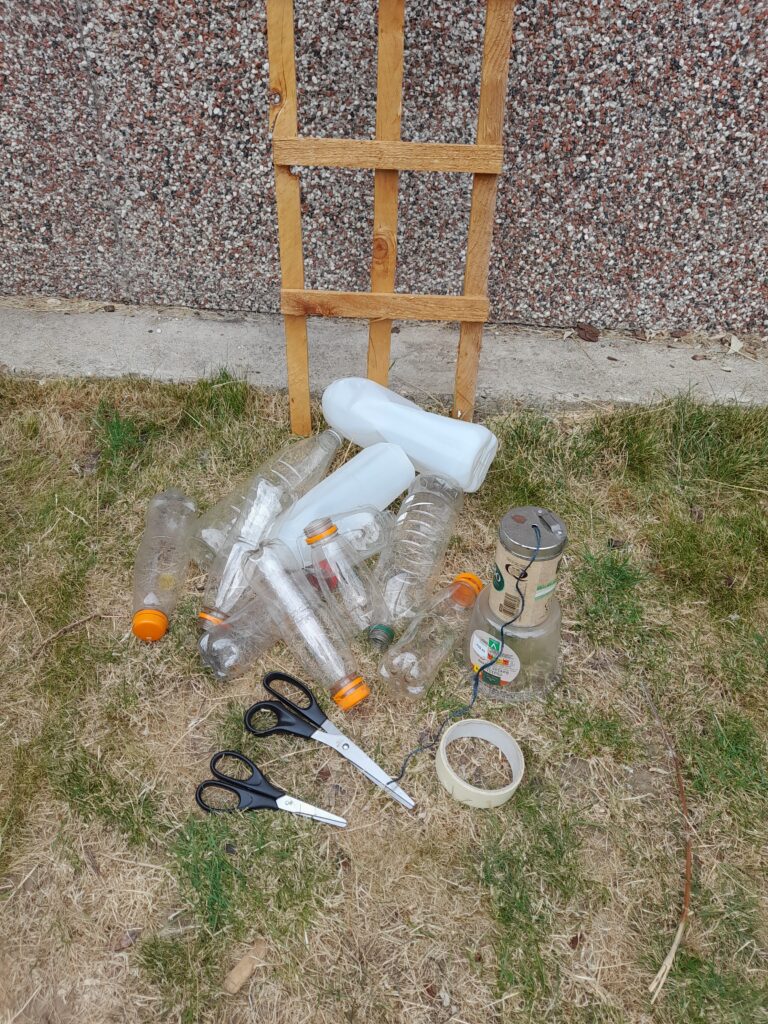
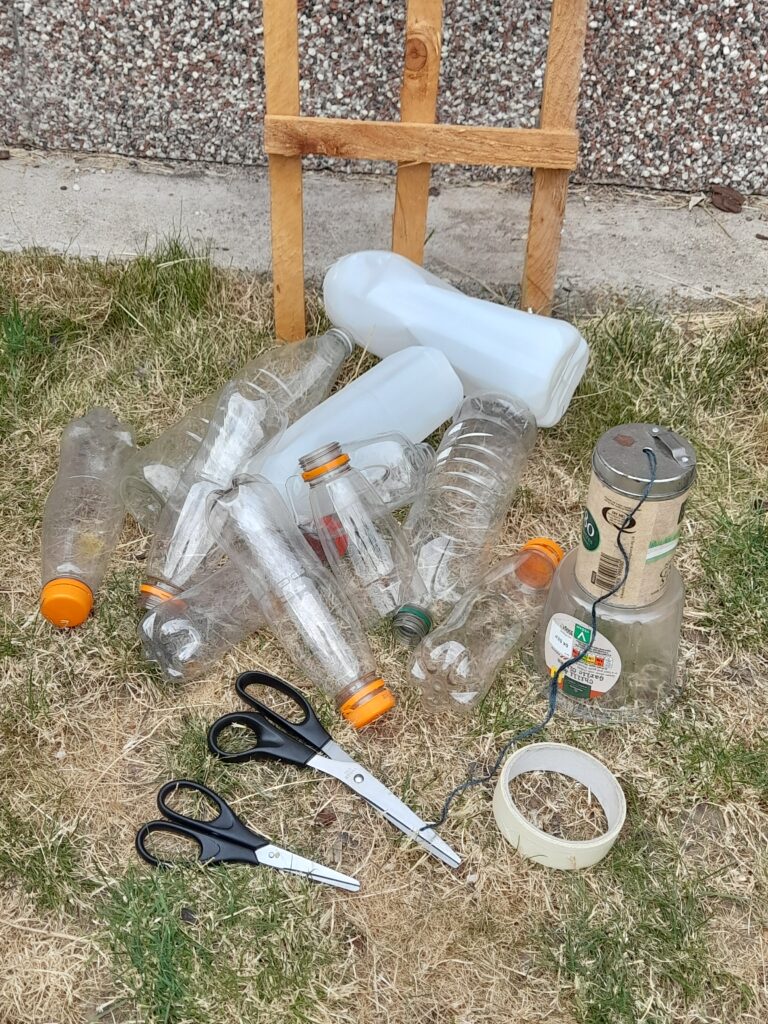
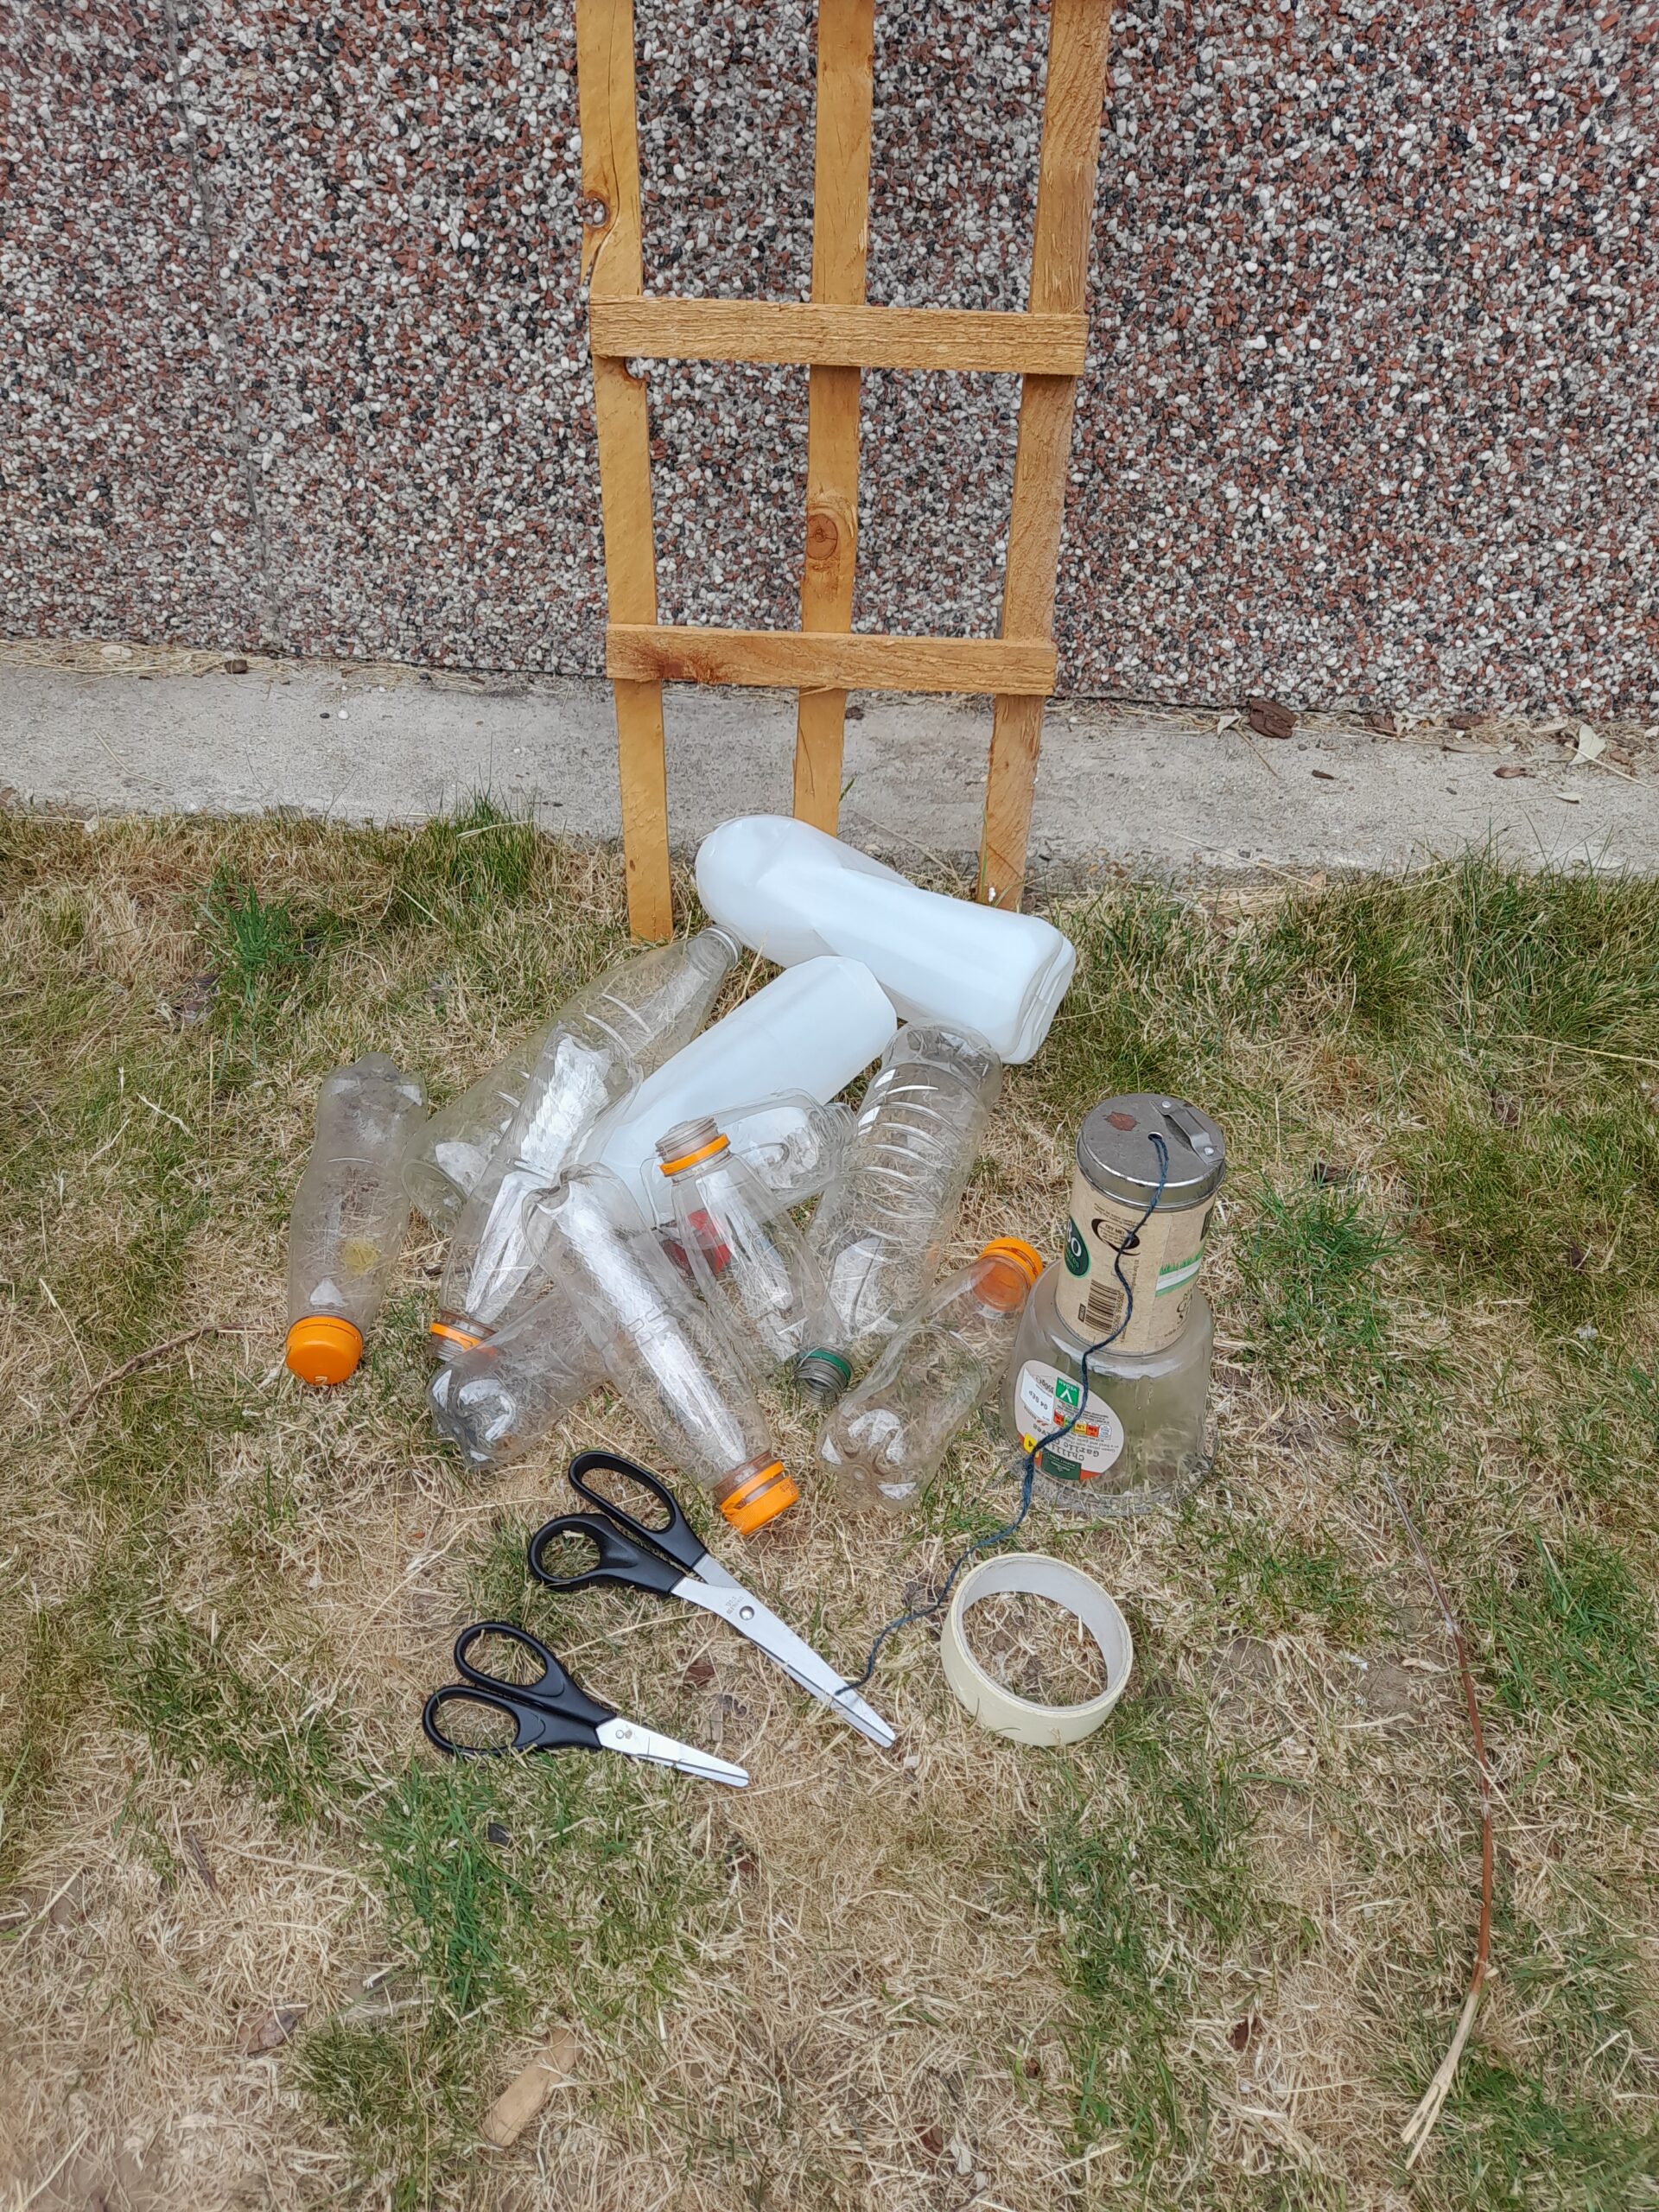
All the resources used to make the water wall.
RESOURCES
A garden trellis.
A mixture of plastic bottles.
Scissors.
String/garden string.
Masking tape (if needed to position the bottles on the tellis)
A steady hand.
Patience.
1) Gather and set up your resources for the water wall.
2) Place the garden trellis where you want it to go.
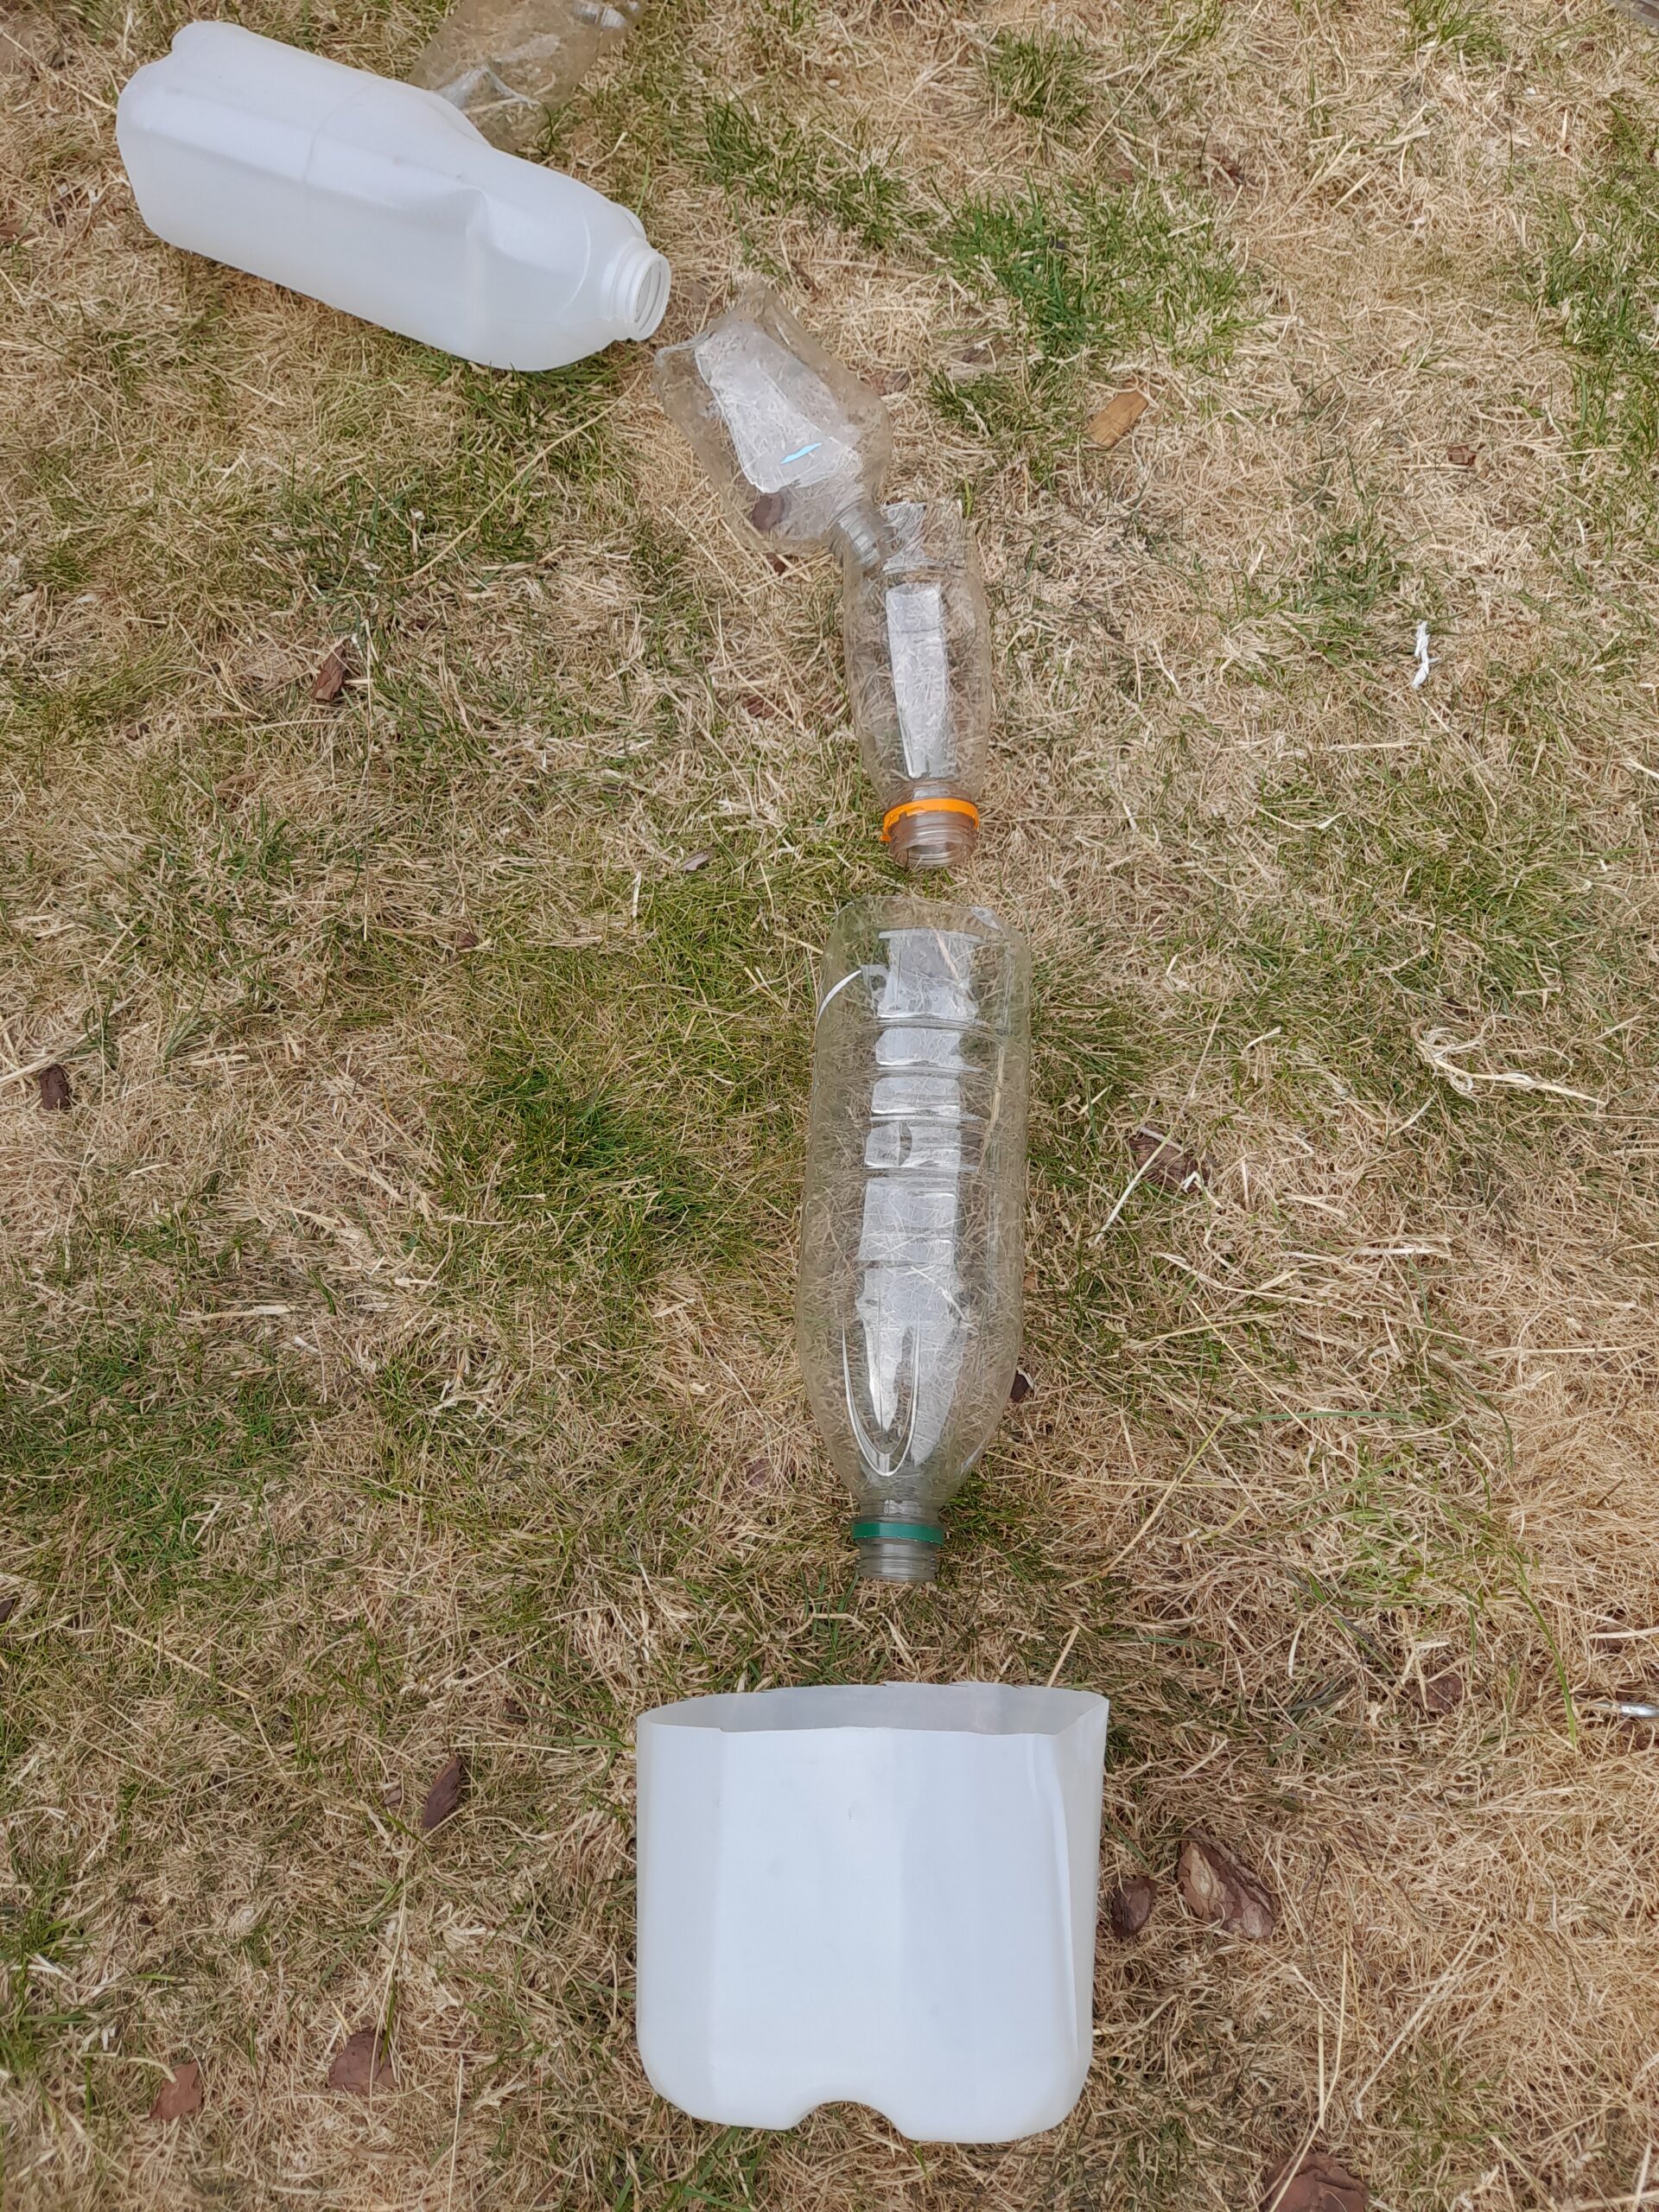
3) Angle the bottles on the ground, how they would be attached on the trellis.Start off with a funnel shaped bottle at the top to pour the water in.
4) Make sure there is a large cut out plastic bottle at the bottom to catch the water.
4) With the bottles still on the ground, cut out bottom parts of each bottle for water to drain out, or go into it.
5) Now attach the plastic bottles on the trellis using the string tie tightly so bottles don’t move, and angle them so each bottle meets the other one. Here is the finished water wall.
HERE’S THE WATER WALL IN ACTION!
The model is my grandson, he loves experimenting with me.
He couldn’t wait to try it out. After I filmed him, he couldn’t stop pouring water, down the bottles, again, and again and again!
SOME TIPS!
This activity is straightforward. As long as you can gather a number of plastic bottles, and find something to attach them to, then your done!
FIND A TRELLIS OR SOMETHING SIMILAR
Once you have something to hang and attach the bottles, then begin to design how the water will fall, and follow through each bottle.
ADULT TO HELP TO CUT THE BOTTOMS OFF
An adult will have to help or cut the bottom or make holes when using a scissors. as they may slip and you will need a steady hand. It’s best to pierce a hole or slit the plastic so you can continue to cut all the way around the bottom of the plastic bottle.
UNLESS YOU USE SAFTEY SCISSORS
It’s easier to cut the bottom of the bottle, if an adult assists, then the child can take over with their safety scissors.Once bottoms cut away, the spout can be placed into or over the cut bottle and water will fall into it.
TYING THE STRING
This is the tricky part, and very fiddly. Hold the plastic bottle tightly against the backing, and pass the string around it a few times tying it into a knot or tight bow. Make sure the bottle doesn’t wobble or move.
KEEP ADJUSTING THE BOTTLES
The water will stream down, and may push the bottles slightly, so they are not directly over the holes. so you’ll need to move them back into place.
USE THE SAME WATER
Once all the water has collected at the bottom in one of the cut-out bottles, use it again, and again and again!
GETTING WET!
Cover up or get wet. If the weather is warm then it will keep your child cool, or wear a plastic apron, but if the weather is cooler your child can wear a waterproof jacket, although my grandson played nicely and didn’t get wet at all!
LASTLY
Have fun, your child will be enjoy playing with with this water wall, and you can ask them questions, like, ‘what happens if you add another bottle here?’ or ‘how will the water travel if you change the angle of the bottles?’..’or could you design two lines of bottle?’ and so on.
STEM RELATED
This is an excellent activiy to do with your child. No matter what season it is, whether hot or cold once you have set it up, against the wall it’s there to be used when you feel like a fun water play.
If you can put one together then that alone demands concentration, and skill to set up and work out how the water will travel, to where, how and what to use, and if it will work.
AN OPPORTUNITY TO EXPAND THIS ACTIVITY!
You can expand this activity by checking the way it’s put together and how else it could work, and in doing so, there is a bit of decision making to be made.
By re-arranging the design hence to improve how water falls, that in itself can be quite challenging, and if they feel defeated, then there’s always tomorrow!
LET’S EXPLORE WATER PLAY
Water play is much more than simply splashing about — it’s a lovely hands-on way for children to explore science, maths, language, creativity and problem-solving without it feeling like formal learning.
💧 We have addressed ways children can explore and learn through water, by simply making a water wall, and having fun at the same time!
🧪 Experimenting & science
Explore water flow using bottles, tubes, funnels and cups. (this is our project)
Change the angle or height of containers and see how the flow changes.
Make a simple water wall and experiment with different routes.
🛠️ Building & problem-solving
Can you build a water pathway that gets water from A to B?
Use tubes, funnels and recycled bottles to create a water run.
Experiment with different bottle positions.
Try to solve a “leaky” water system.
Change one part of the design and see whether it works better.
QUESTIONS YOU CAN ASK
What do you think will happen?
Where is the water going?
What could we change?
Can you make the water go another way?
What happened when you changed the angle?
This encourages children to predict, observe, describe, compare and explain.
I hope I have given you some ideas on how to expand this activity, addressing STEM related questions and see how your children can work it out for themselves by talking about the water wall activity.
When you click links in this post and make a purchase, I may earn a small commission at no extra cost to you. This helps support the craft projects shared on this website.😀
If you are still looking for some more fun water activities, then may I recommend TrueToys!
They have many affordable water toys. From quick grab and go to more structured water/sand activities.
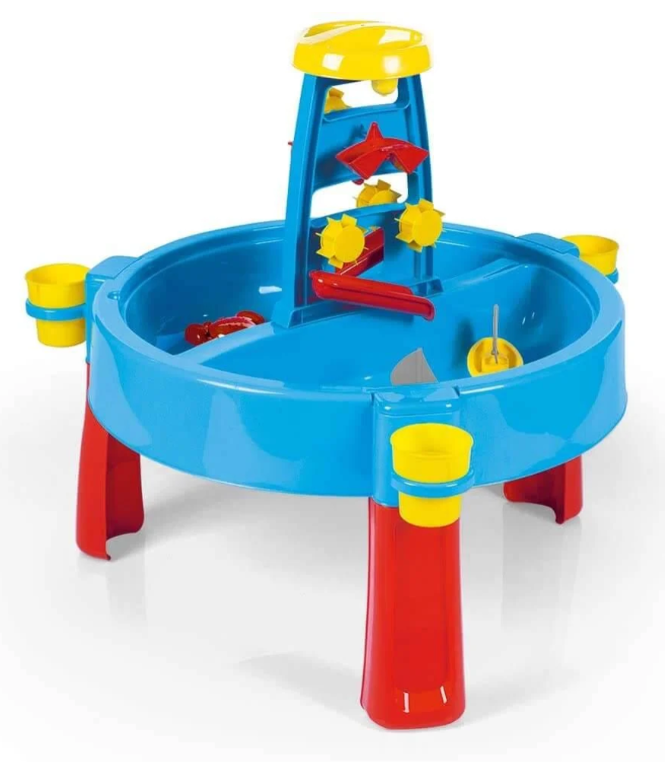
I particularly like the range by Dolu 3-in-1 and/water creativity table. It adapts from sand, to water play with lots of accessories or add the lid to make it a creative table!
Alternatively the second in this range Dolu 3-in-1 sand and water activity tableoffers even more water accessories that reminds me of our water wall. Just like the first Dolu 3 – in-1 I recommend, this too can be converted in many ways than one!
OR A COMPLETE WATER CAROUSEL?
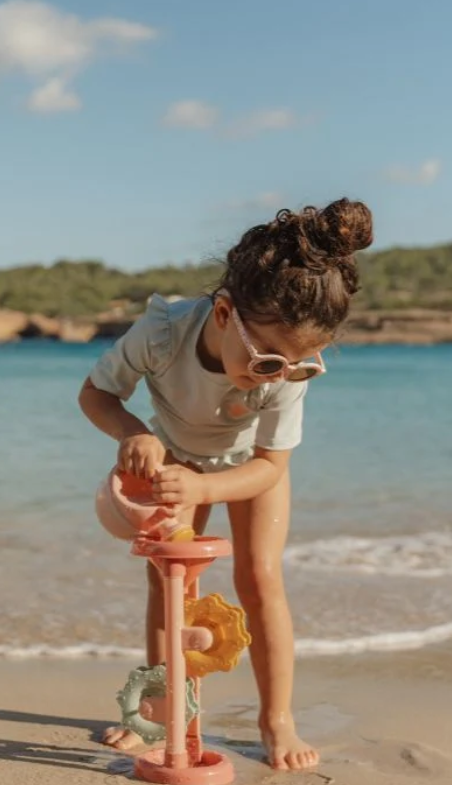
A child playing with 'Little Dutch Toy Sand Mill, pouring water into the funnel.
But if you prefer a complete water fountain themed water activity, then The Kid Collective Ltd have this cute on-the-go water like carousel, it’s a ‘Litte Dutch Toy Sand Mill’
Your child adds water or even dry sand, and watch those wheels turn!
This, and the other water toys that I recommend are great toys they address:-
Fine motor skills.
Cognitive development.
creativity.
On top of that, they are alot of fun too, and can be played on the beach, garden or even at the school playground!
TO CONCLUDE!
I show in this post a fun DIY water wall activity, using your recycled plastic bottles to help set it up!
This is a great summer activity, and giving plastic bottles a second lease of life, by upcycling them this time, instead of holding water, to release water!
It doesn’t take long to make, and it’s still a great way to enjoy the sunny weather partly keeping cool and enjoying the process!
I have another fun project for your kids to do with a water theme. This time it’s a fishy activity using your old CD’s! and transforming them into colourful fish! Click on the button below!
I appreciate your comment! Sure thing, it’s not about kids just sitting on a chair in class, but getting kids involved in fun and interesting activities, that not only address creativity, but also to be active and enjoy what they do!
Thanks for dropping by.
Julia.😀

It’s nice to see you’ve so many ways to motivate kids to be engaged with creative, physical activities.
Let this journey of yours assume a full swing.
Best wishes.
I appreciate your comment! Sure thing, it’s not about kids just sitting on a chair in class, but getting kids involved in fun and interesting activities, that not only address creativity, but also to be active and enjoy what they do!
Thanks for dropping by.
Julia.😀