This post was originally published earlier and has been updated with new ideas and resources.
Check out this Milk Carton Sail Boat! Have you ever thought of up-cycling your milk or juice cartons into fun, kids’ sailboats?
Let’s Make a Milk Carton Sailboat!
When you think of summer, do you imagine sailing a boat, to and fro on the ocean waves?
HOW DO WE CREATE THAT BOAT?
Hold that thought……when it comes to our kids, we need to entertain them, being in a boat is fun, but how about making a boat?
I don’t mean for real, but to get your kids to craft a straightforward boat.
CHECK OUR RECYCLING?
There are a few different ways to do this, but in this instance, we will utilise our throw-outs and up-cycle them into something fun! How about a ‘Milk carton sailboat’?
But, before we start, here’s a quick look at the alternatives!
LET’S CONSIDER WHAT WORKS IN WATER.
EGGBOXES
I looked at an egg box, and this could be an obvious option, but it will sink as it’s made from composite paper. It would only work if it were made as a showpiece, but on makeshift waves.
Regarding this, egg-boxes or cartons are not made from a material that works well in water only on dry surfaces.
POLYSTYRENE
Then let’s consider polystyrene. I found various moulds used for packaging that can be cut down into long types of vessels. This kind of material will float and can be decorated.
So polystyrene could be an option.
PLASTIC FOOD HOLDERS
I looked at ordinary plastic food holders. Some of these holders are shaped like boats and can easily float on water, althoughsomewowrk willbe needed to attach a sail and make it look boat-like.
Having checked them out, these clear plastic moulds are suitable but need painting and decorating.
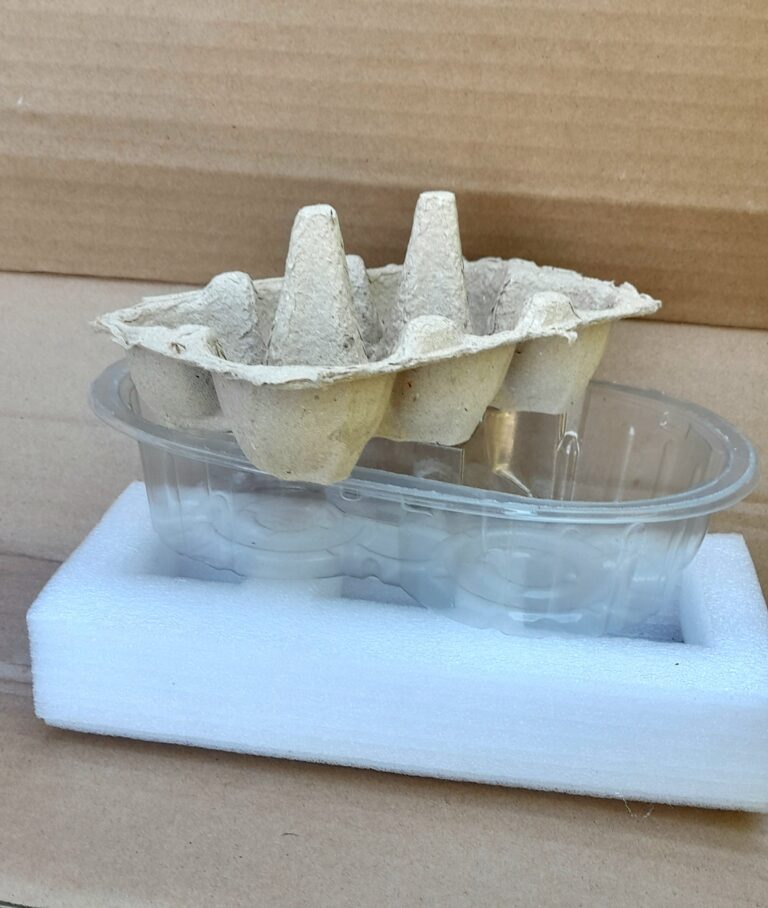
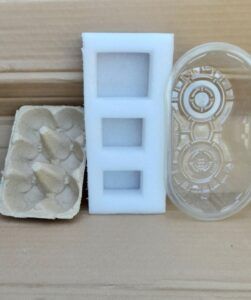
Below are the three packages made of different kinds of materials, that I mentioned above, they are possible options to turn into boats, but in this project, we are working with cartons!
Side view of an Eggbox, plastic and polystyrene packaging.
Here are the sides and inside view of an eggbox, polystyrene and plastic packaging.
Inside view of the Eggbox, polystyrene and plastic tubs
MILK OR JUICE CARTONS
How about Milk or Juice cartons? Let’s see….I think this will be more challenging as an activity, and who doesn’t have enough milk or juice cartons to practice with? Just put them aside for the activity ahead.
WHAT KIND OF BOATS AND SOLUTIONS? LET’S RECAP!
In my last post, ‘Make paper boats that float!’ I demoed how to use the folding technique (starting 2-dimensional), to make a boat (becoming 3-dimensional), and by preventing it from sinking. I recommend laminating it as an option to keep it dry.
In this post, we start with a ready-made 3-dimensional container and simply up-cycle it into a fun sailing boat.
MORE ABOUT THE MILK CARTON SAIL BOAT ACTIVITY!
As you may have gathered by now….we will be making boats, and yes, we will be using cartons!
MY INTENTION!
We are going to look at making a ‘Milk Carton Sailboat’
This is why I looked at a milk or juice carton; It’s 3-dimensional, and if you put it in the water, it will float, but we need to change it and make it look more like a sailboat.
HOW TO PAINT AND PROTECT MILK CARTON BOATS
ACRYLIC PAINTS
Just acrylic paint does not last well when exposed for a long time to water.
I found it would curdle up. Its composition is to have a plastic-like finish, though it would still need sealing.
PVA GLUE AS A QUICK SEALANT
Now, sealing acrylic-painted boats with PVA glue and allowing it to dry is one option; it will give an instant seal and a nice shiny finish, although not to keep the boat in water too long, but adequate, as an experiment to see if boats float.
To help the boat last longer in water, you can seal the painted surface with a clear craft varnish or polyurethane sealant.
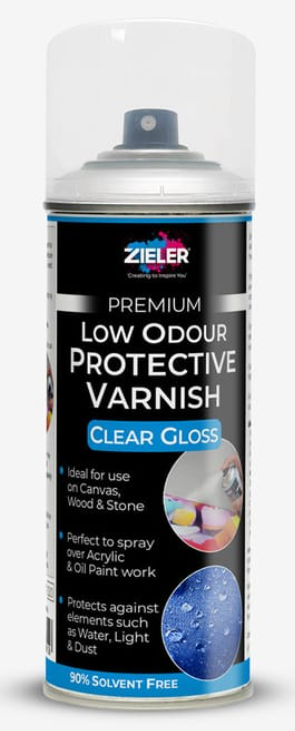
To protect the painted boat, you can spray a clear acrylic varnish such as Zieler Premium Low Odour Varnish Spray
This water-based varnish creates a protective coating over acrylic paint and helps repel moisture.
So the craft lasts longer during water play.
Affiliate product recommendation.
Spray varnish from Crafty Arts.
How to use the varnish.
Paint the carton with acrylic paint.
Allow paint to dry completely.
Spray 2-3 light coats of varnish.
Let it cure overnight before putting it in water
Thin layers work better than one thick coat.
Important features:
Water-based acrylic varnish
Low odour (90% solvent-free) so it’s easier to use indoors
Dries clear and non-yellowing
helps protect artwork from moisture and environmental damage
A simple trick used in many schools is to rub a little candle wax along the bottom of the boat to help repel water. Read on to find out more! ⇓
Wax or candle sealing
After painting the boat:
Rub a white candle or wax crayon over the bottom of the boat
Rub it into the edges and corners
Warm it slightly with a hairdryer so the wax melts into the cardboard
What happens:
wax fills the cardboard fibres
Water cannot soak in easily
The boat floats much longer
Teachers like this method because:
very cheap
safe for kids
no chemicals or fumes
USING PVA GLUE SEALANT
When you remove the carton boat from the water, allow it to dry. It may have a tacky feel to the touch, but just to demonstrate now and again thats fine.
Furthermore, if you decide to leave these carton boats as showpieces, you don’t need to cover them in PVA glue, unless you like the glossy finish.
Update!
After I completed this project, on the ‘milk cartonsail boats’, I decided to have a go at changing these three packages into boats!
I didn’t want to leave you hanging and wondering what these three types of packages would look like, so here they are!
Check them all out!
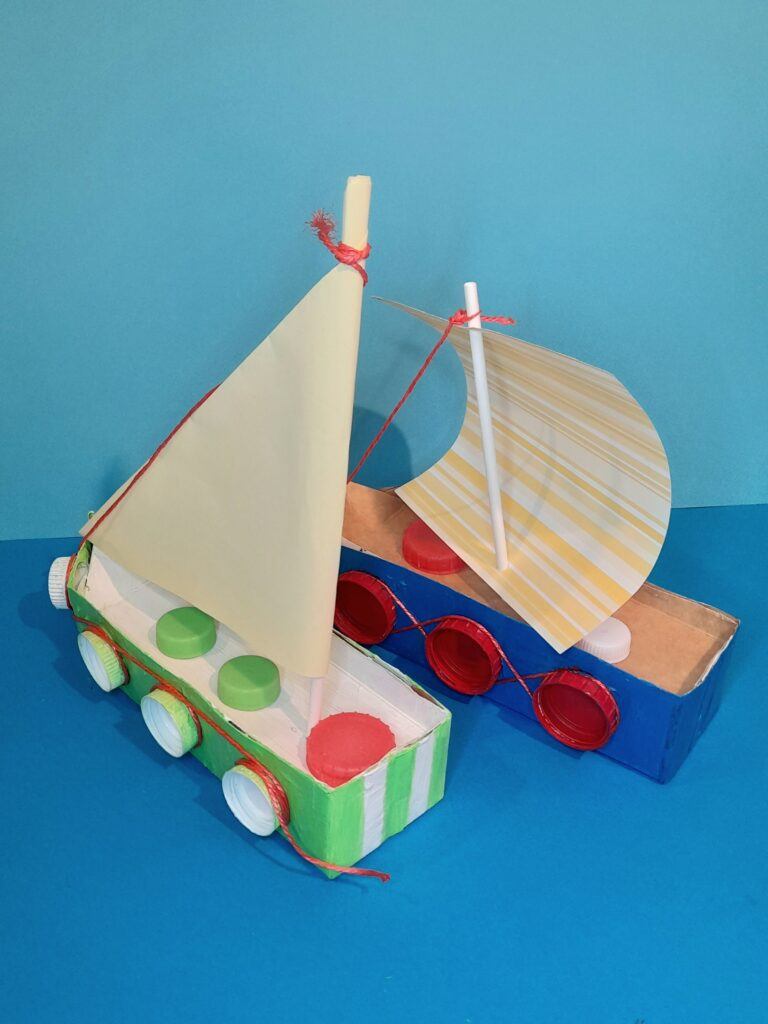
Here are the three examples.
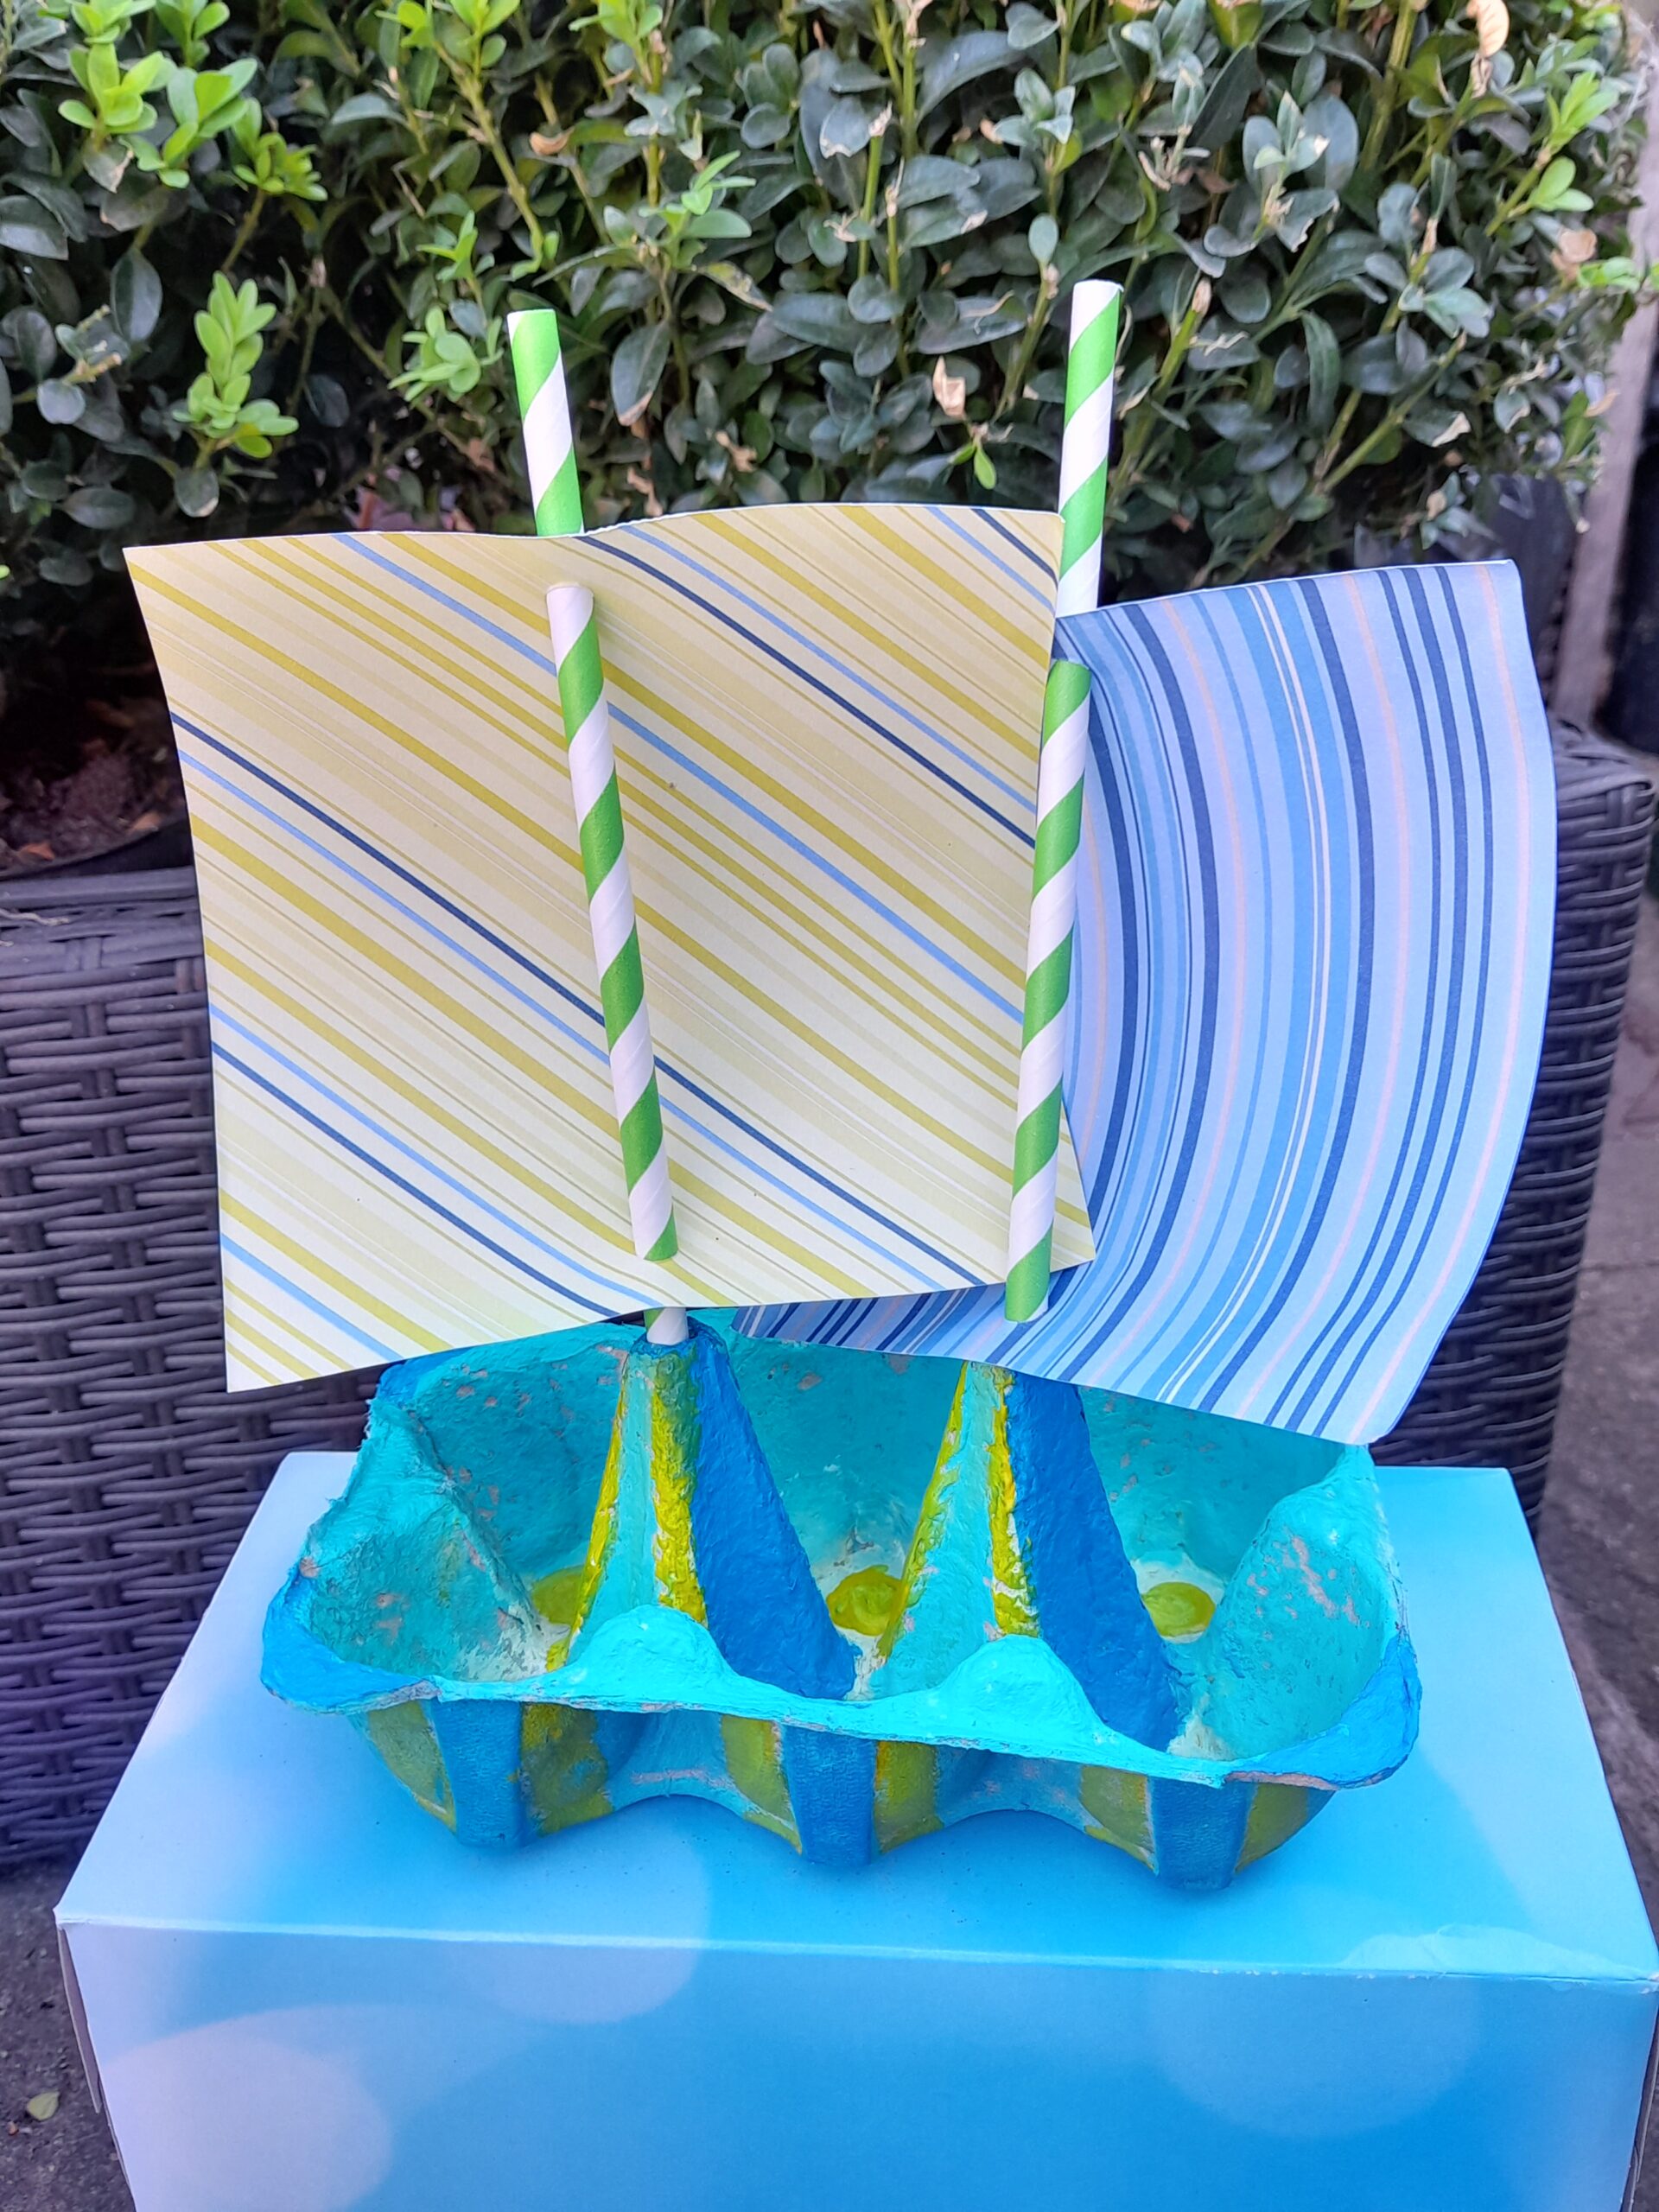
Egg box boat.
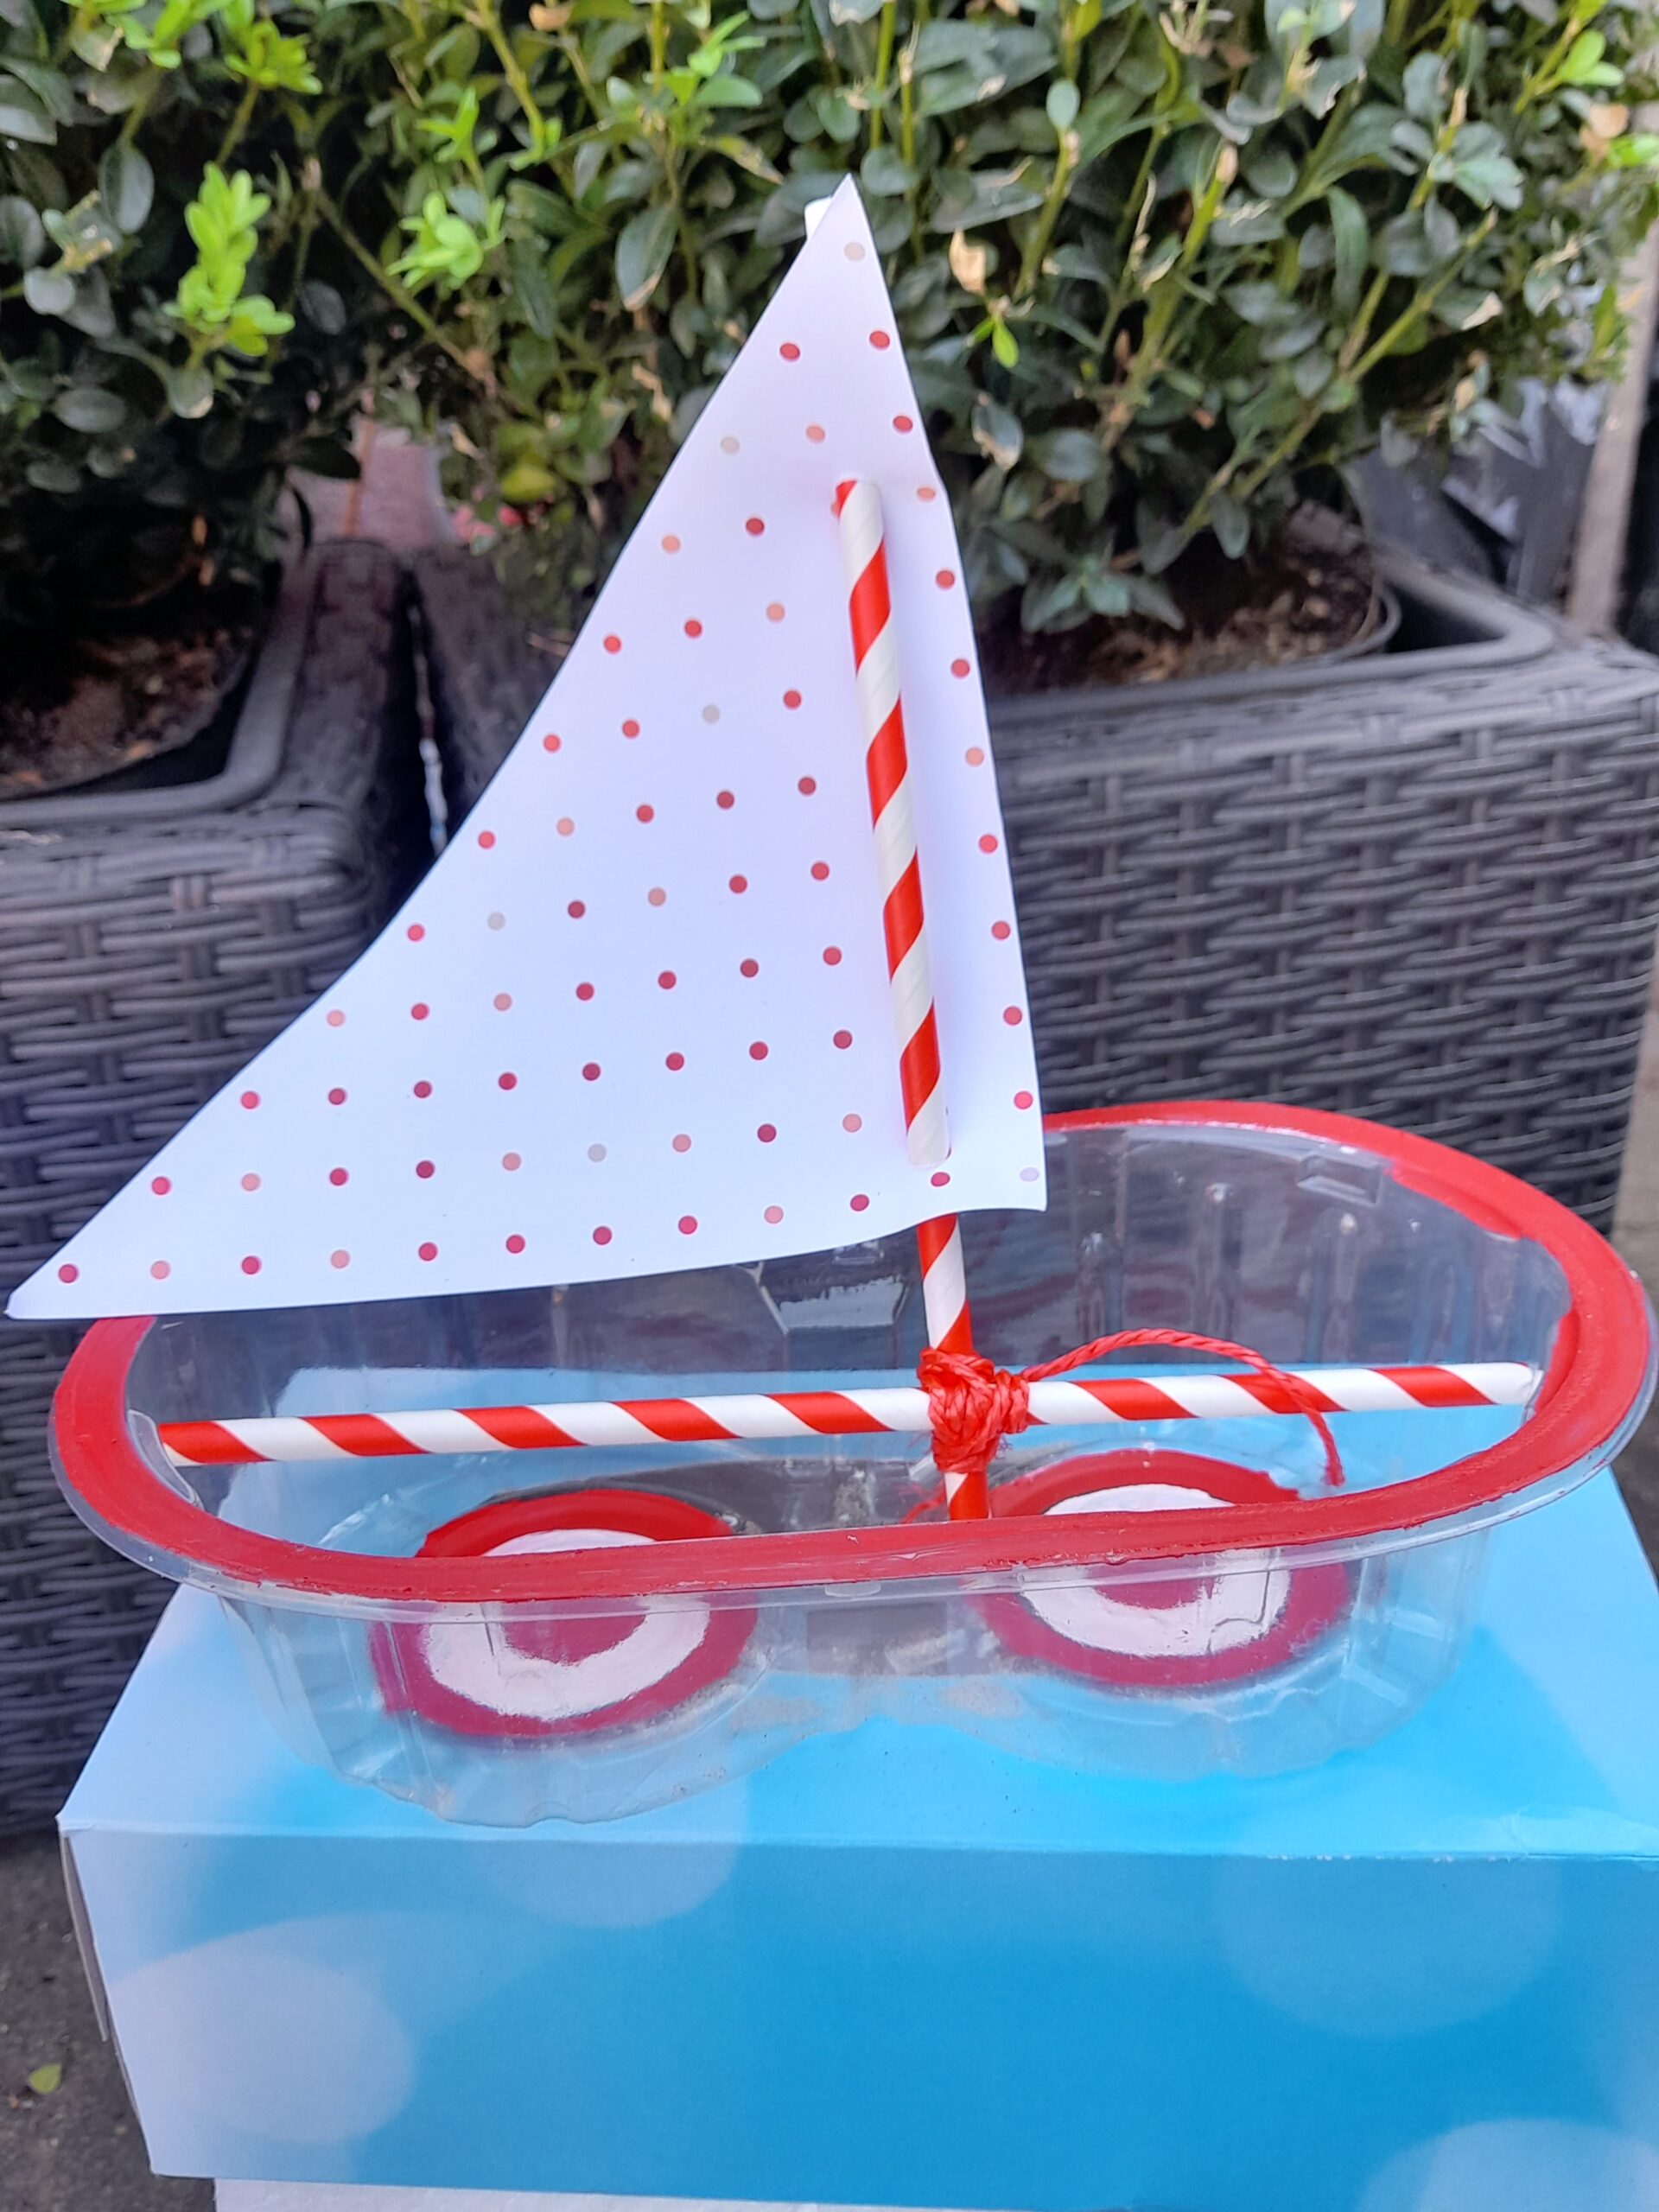
Plastic holder boat.
Polystyrene packaging boat.
You can add small fun characters!
Now you can see how you can adapt each package into a boat!
I hope this helps. Rather than try to visualise it, of course, you can try these out too. It’s really what you can salvage from your recycled collection!
Now you have a few boat ideas to choose from!
👉 A quick review 👈
EGGBOX AND POLYSTYRENE PACKAGING
I found that with the egg box and the polystyrene, it was easy to make quick holes with a sharp pencil and twist or push the straws into the middle sections of each one, as shown in the images above, then you can slide your sail with the punched holes through the straws.
I used split pins to attach the string and push it through the polystyrene.
PLASTIC HOLDER
With the plastic holder or casing, I used a straw and jammed it lengthwise against the plastic wall, and it worked; it held there well, allowing you to tie another straw with some string, so it’s like a t-bar. Then again, you can slide sail through the straw.
JUST TO LET YOU KNOW…
Also, I discovered that it might be easier to punch the holes in a triangular sail and slide a straw through it. This way, it might be less complicated for younger kids to do, rather than roll the sail as I have shown below for the ‘milk carton sailboat’, which we are going to start with next👇
This is what you will need!
So here goes!
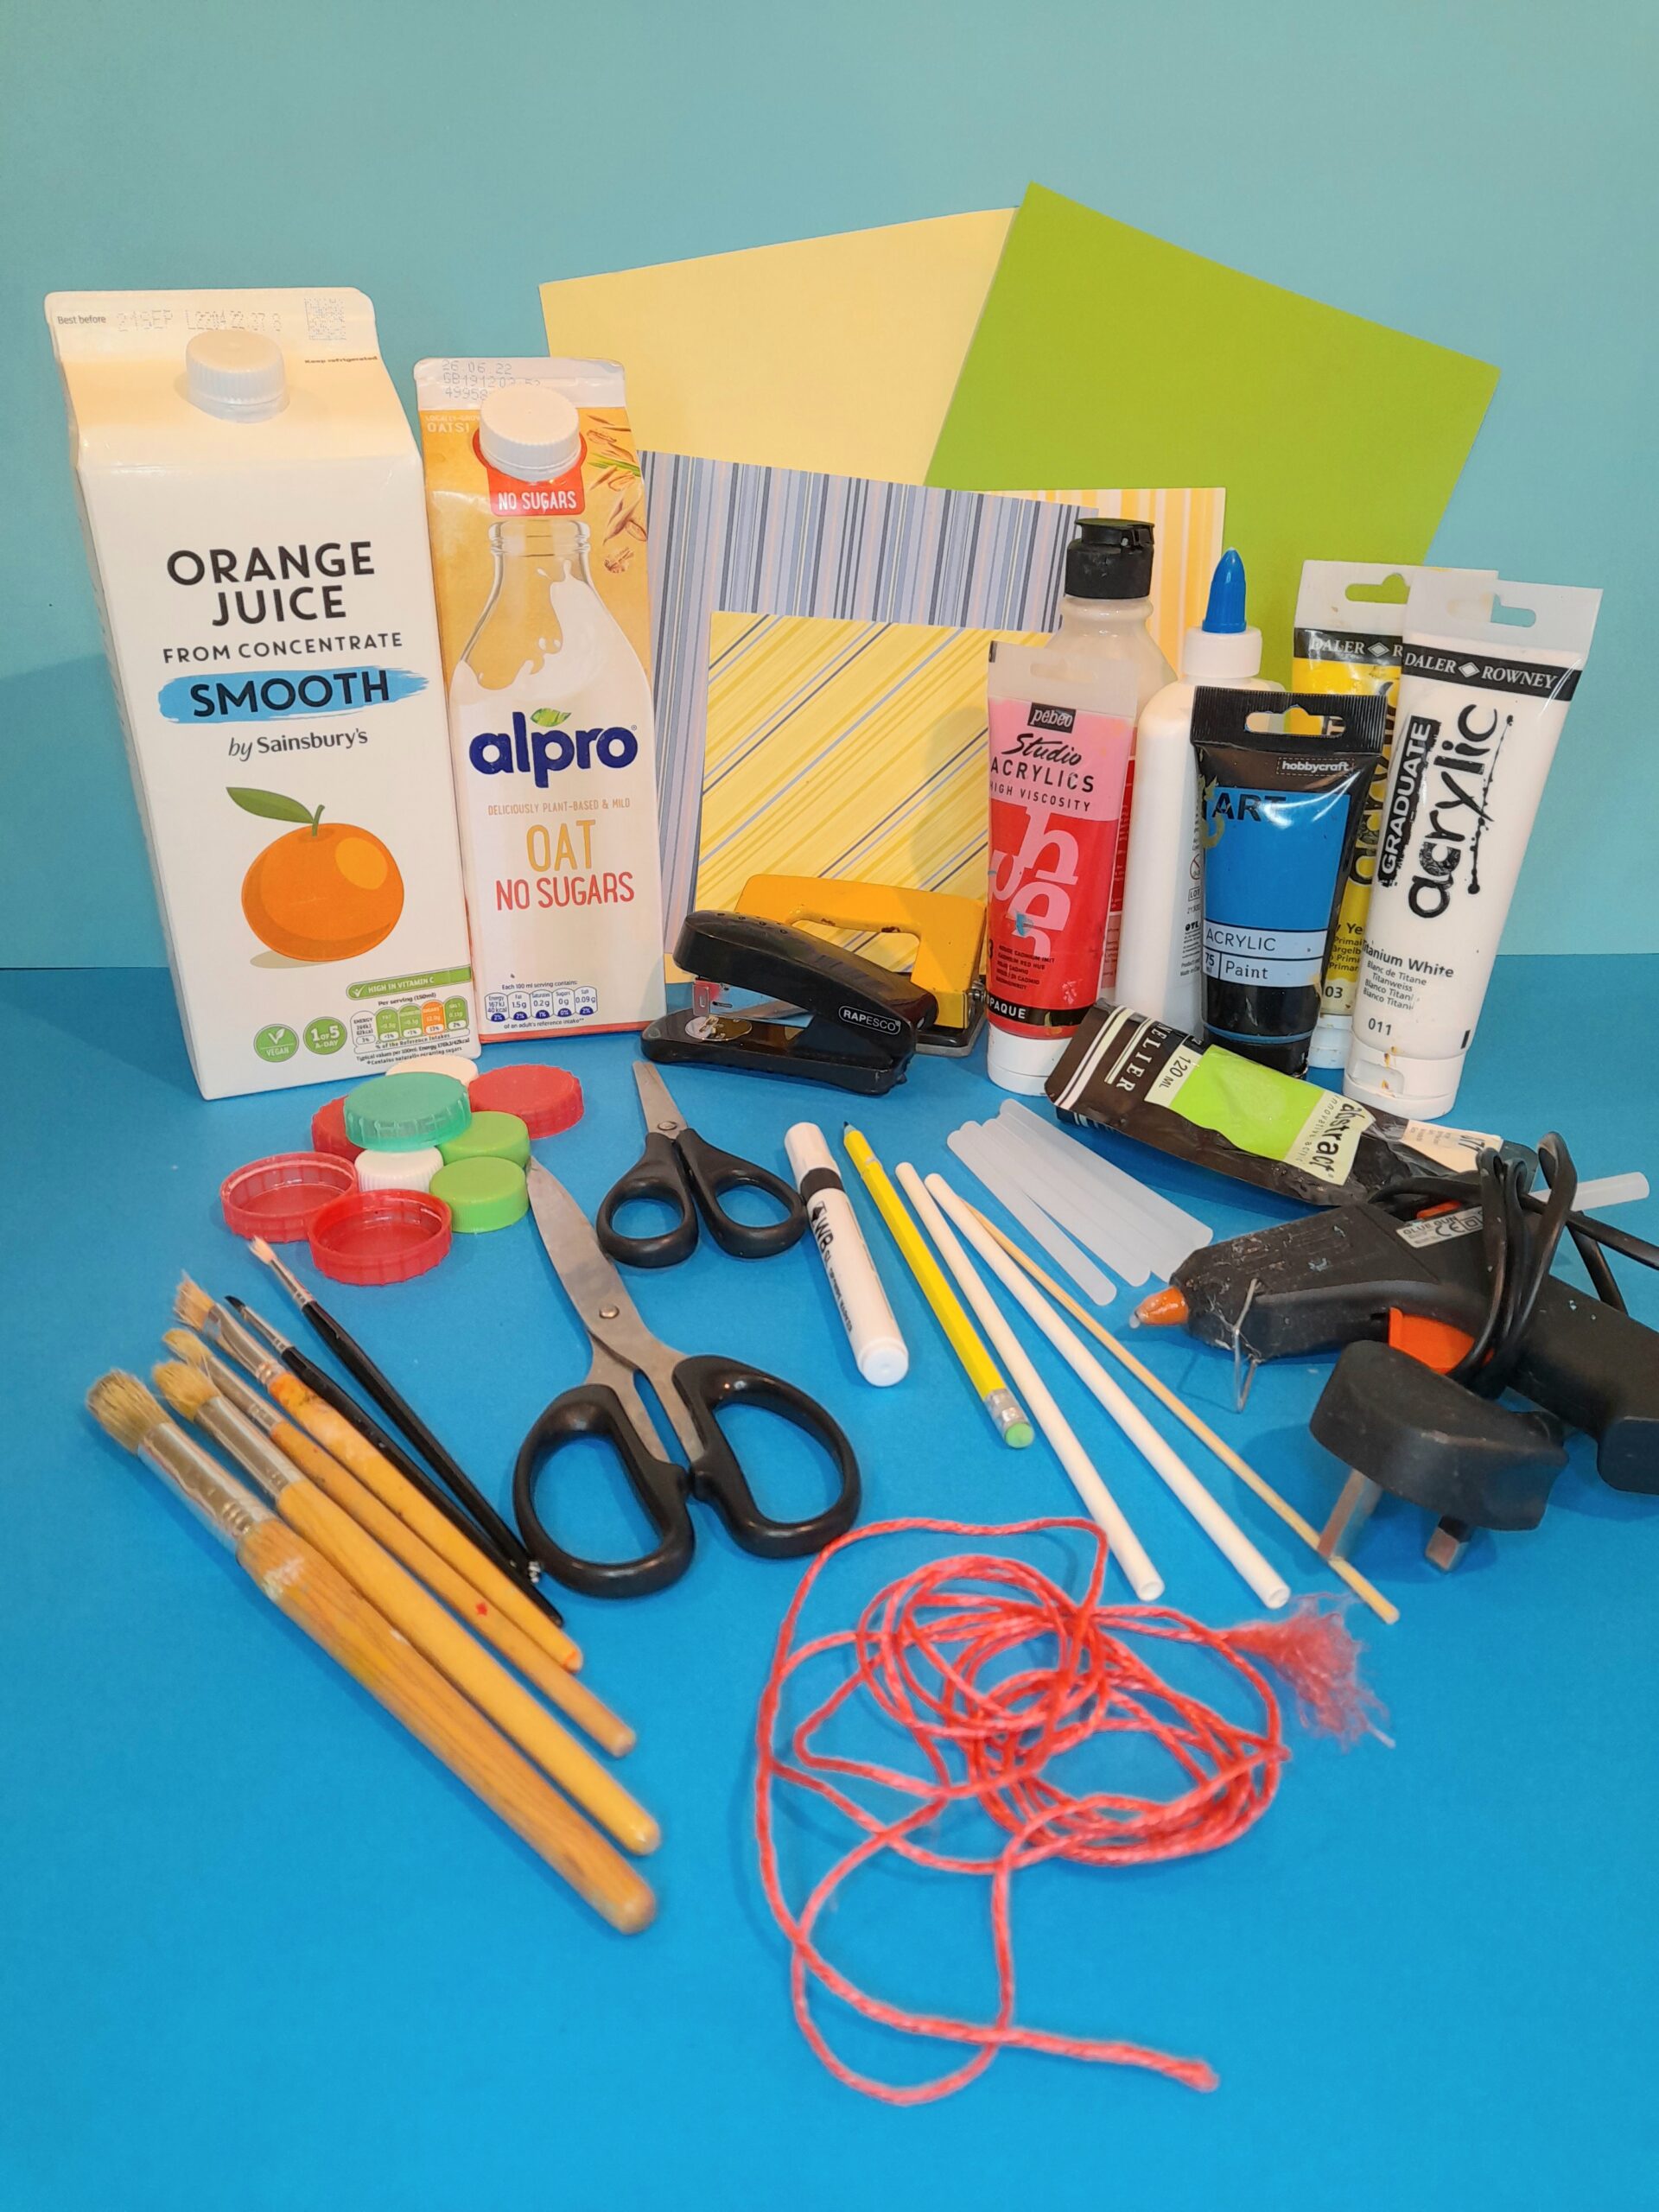
Resources for A Milk Carton sailboat.
RESOURCES
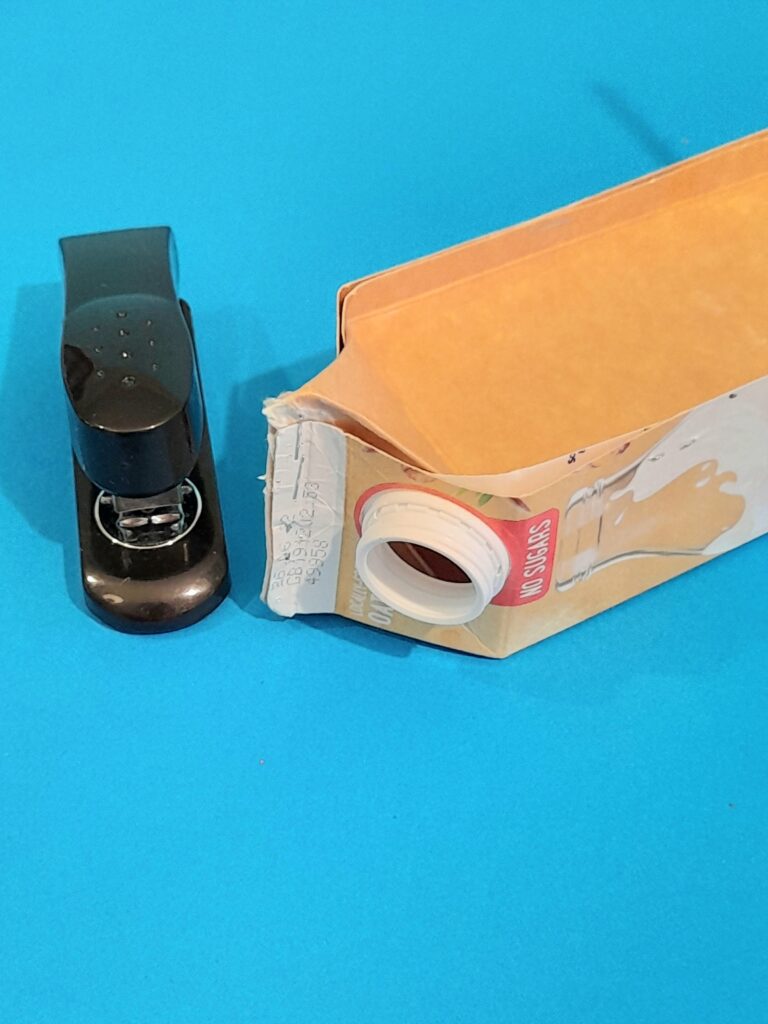
Milk/Juice carton.
Scissors, large/small.
Acrylic paints (your choice)
Stapler/Hole punch.
Range of bushes.
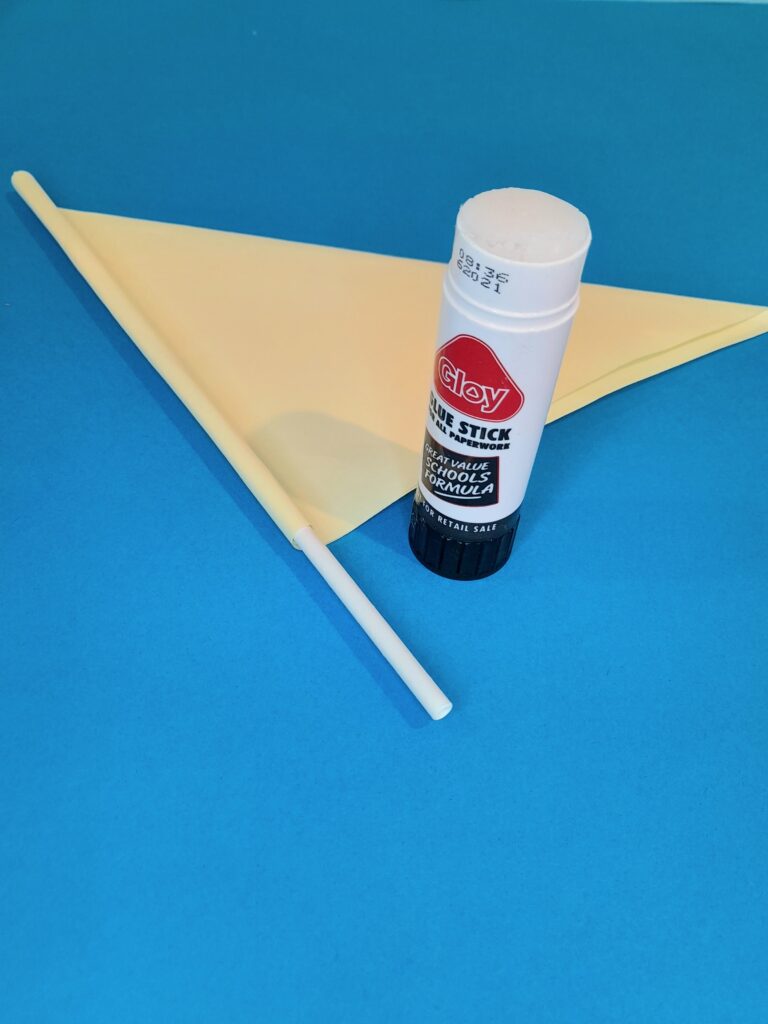
Straw for mast/glue stick.
A few bottle tops.
Some string/PVA glue.
Black felt-tip pen.
Sharp pencil/sharp tool.
Glue gun/wax sticks.
A selection of papers/cards.
ARE YOU READY? LET’S START THE MILK CARTON SAIL BOATS!
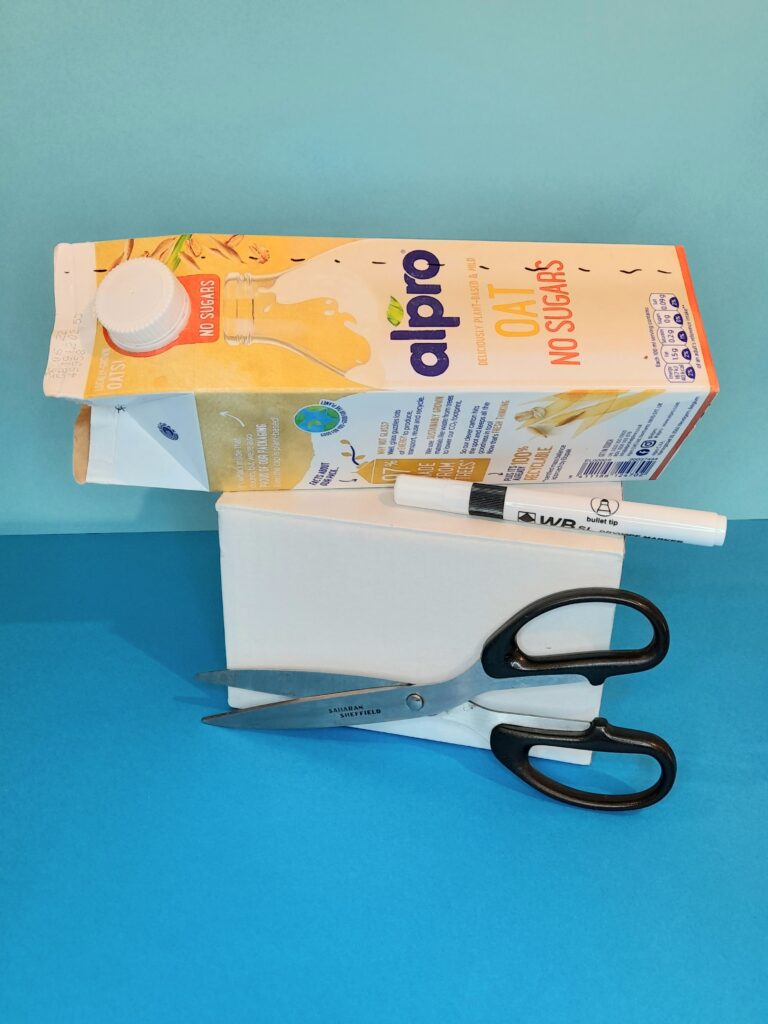
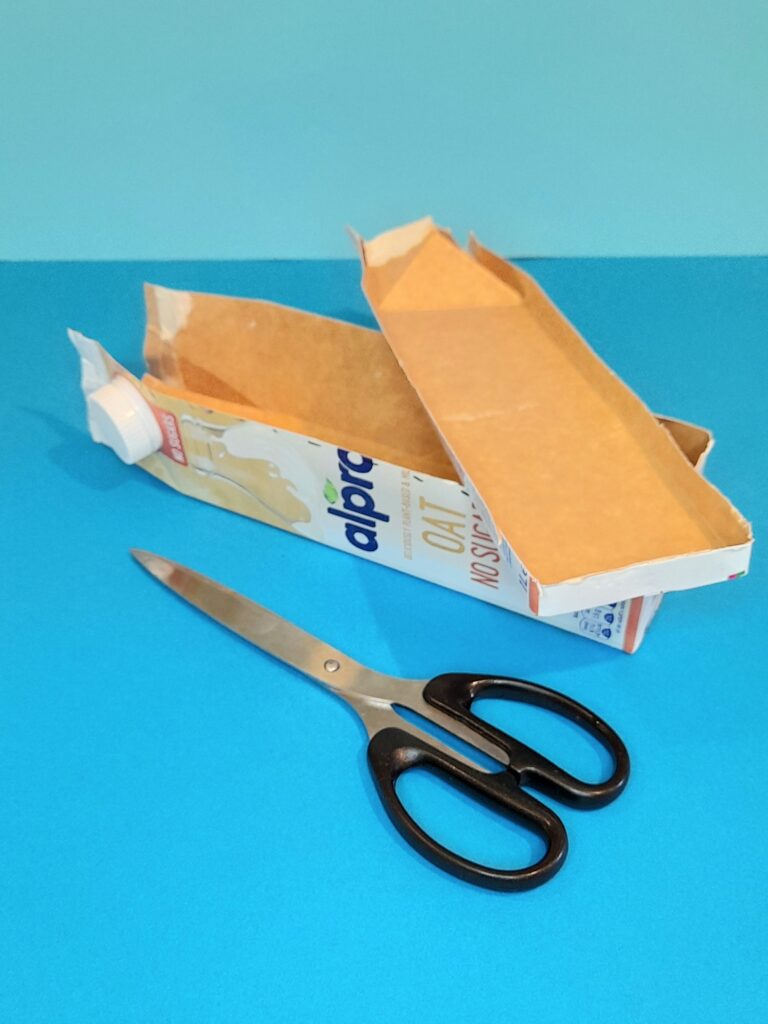
1) Grab a carton and 3/4 way up, just above the lid, dot a line all the way round.
2) Now with large scissors cut along the line and seperate.
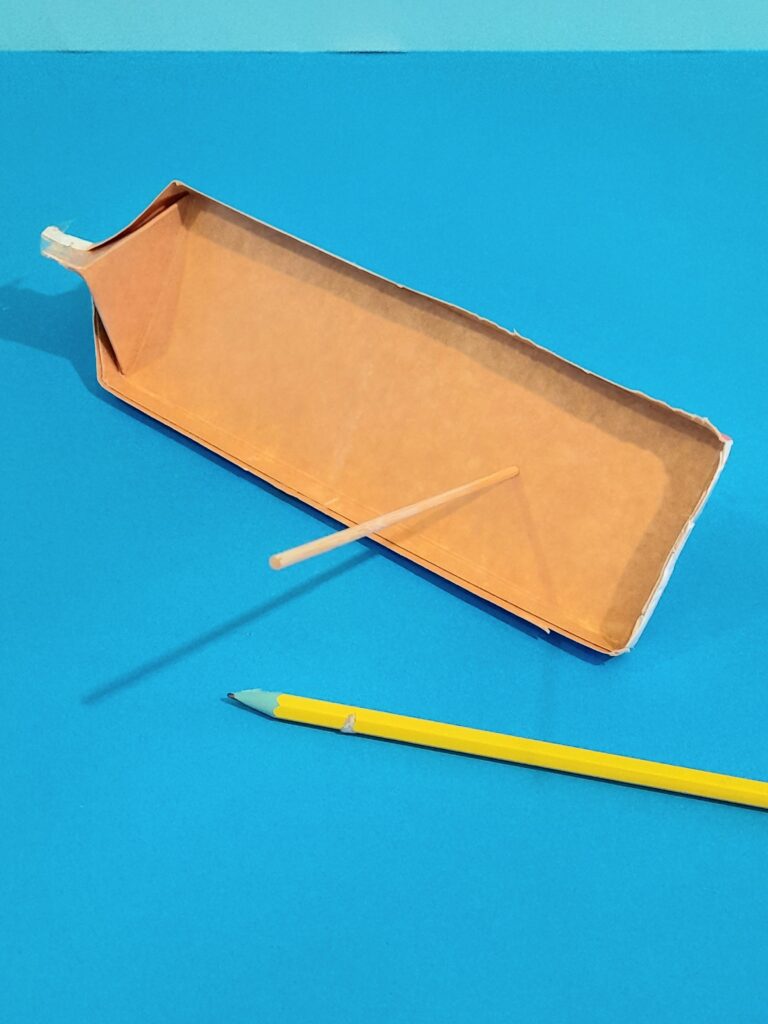
3) Pierce a hole off centre and run a straw through hole. You can pierce 2 hole depending where to position sails.
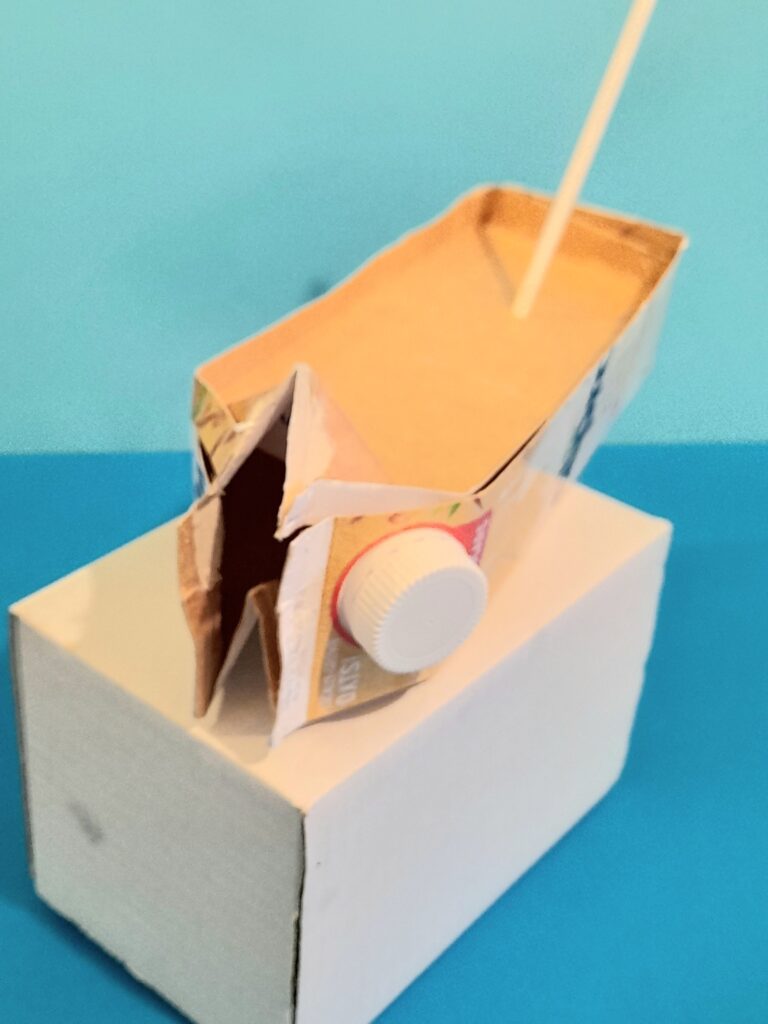
4) Insert thinner section on top and even it together with bottom larger section.
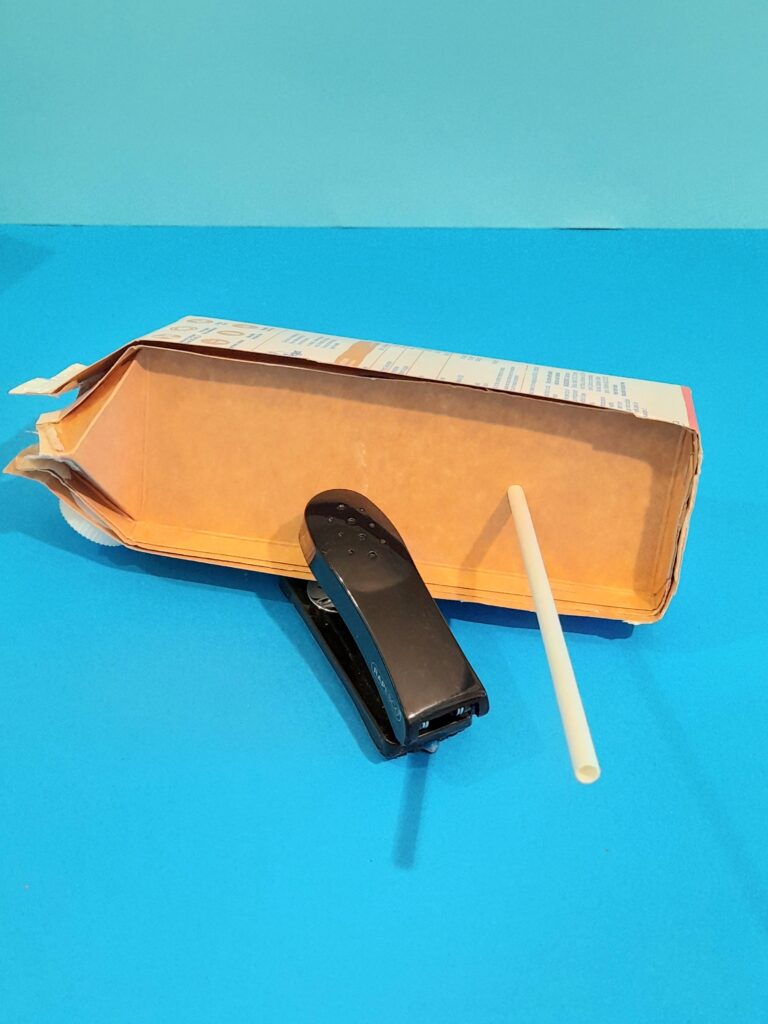
5) Now staple all the way round, draw together the spout ends hold and staple.
6) Two parts will fit together hold fimly and staple. Now you can make 2 types of sails. Next is a square sail.
7) Choose style of paper cut to size you desire, and punch one hole bottom and one hole opposite.
8) Run the straw through the holes.This is what a square sail would look like. For a triangle sail...
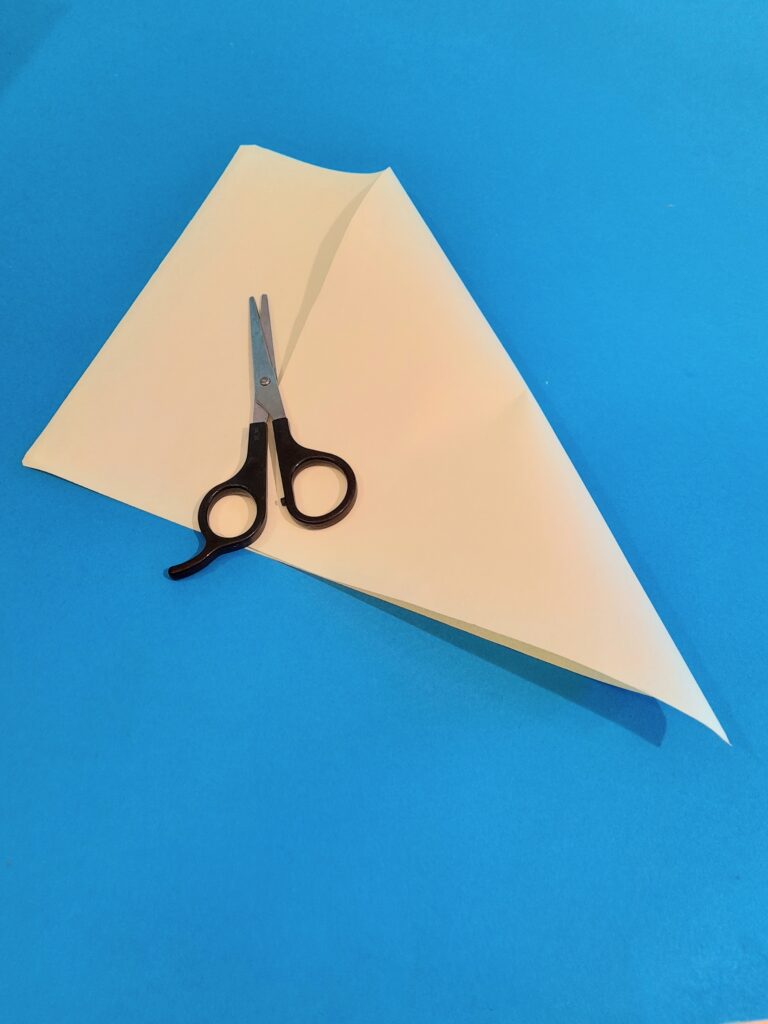
9) Take A4 sheet, fold right corner down to meet the bottom.
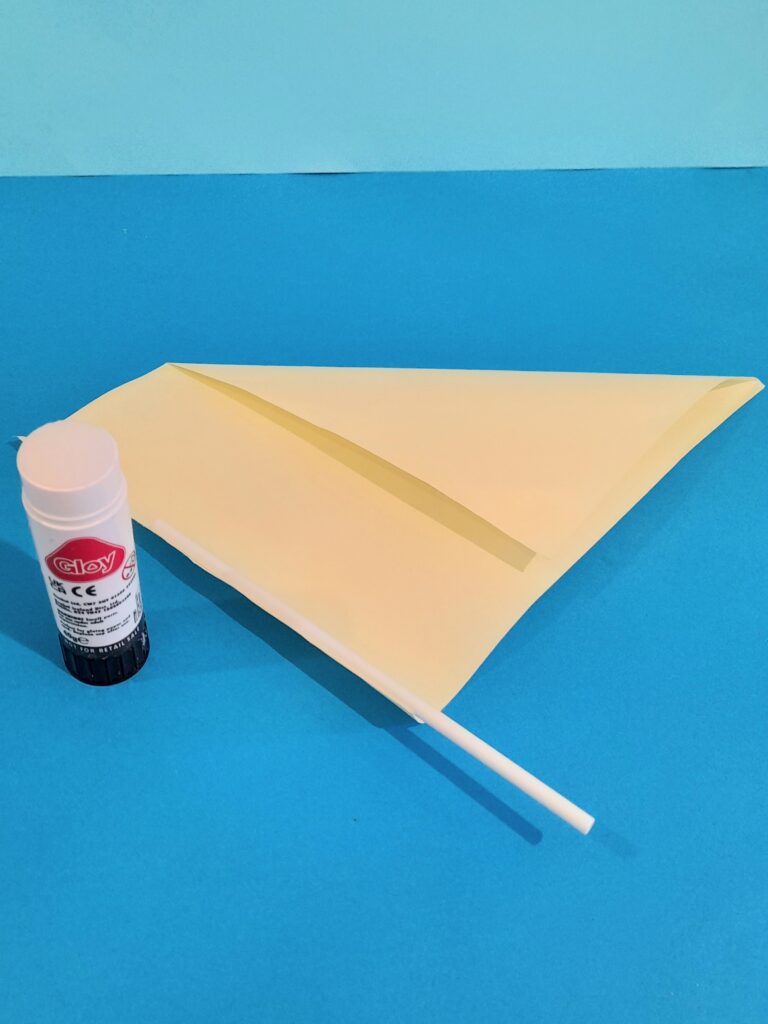
10) Run glue with glue stick along left side.
11) Now press firmly and roll straw to adhere to paper, keep adding glue and roll. This is the triangle sail.
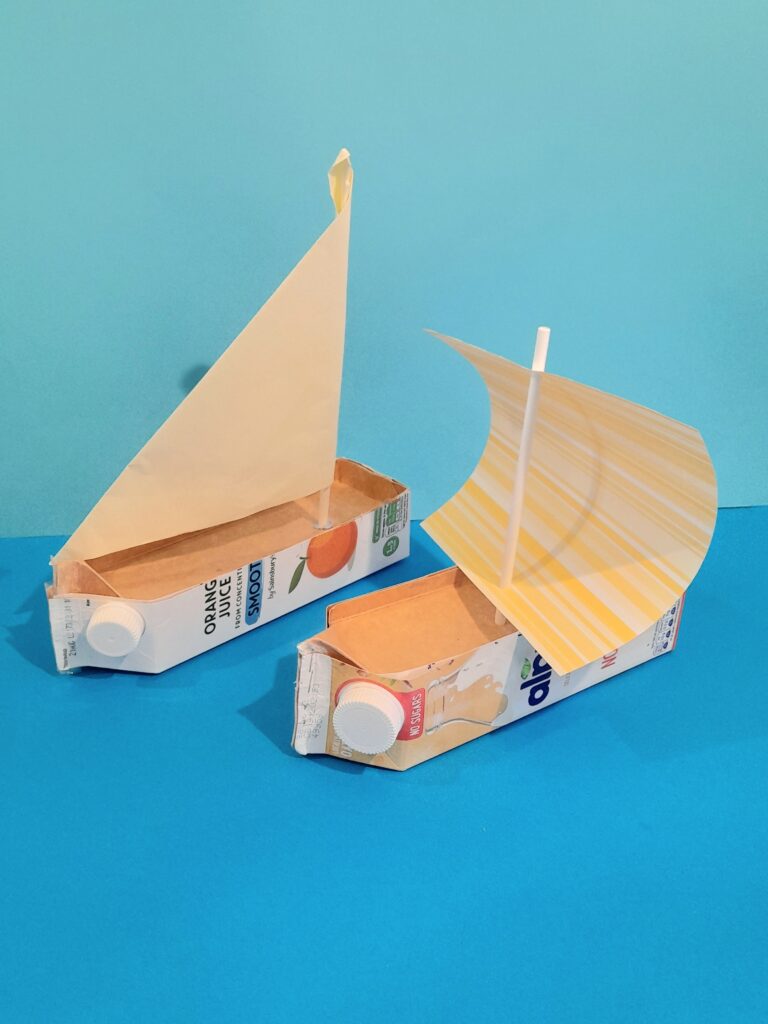
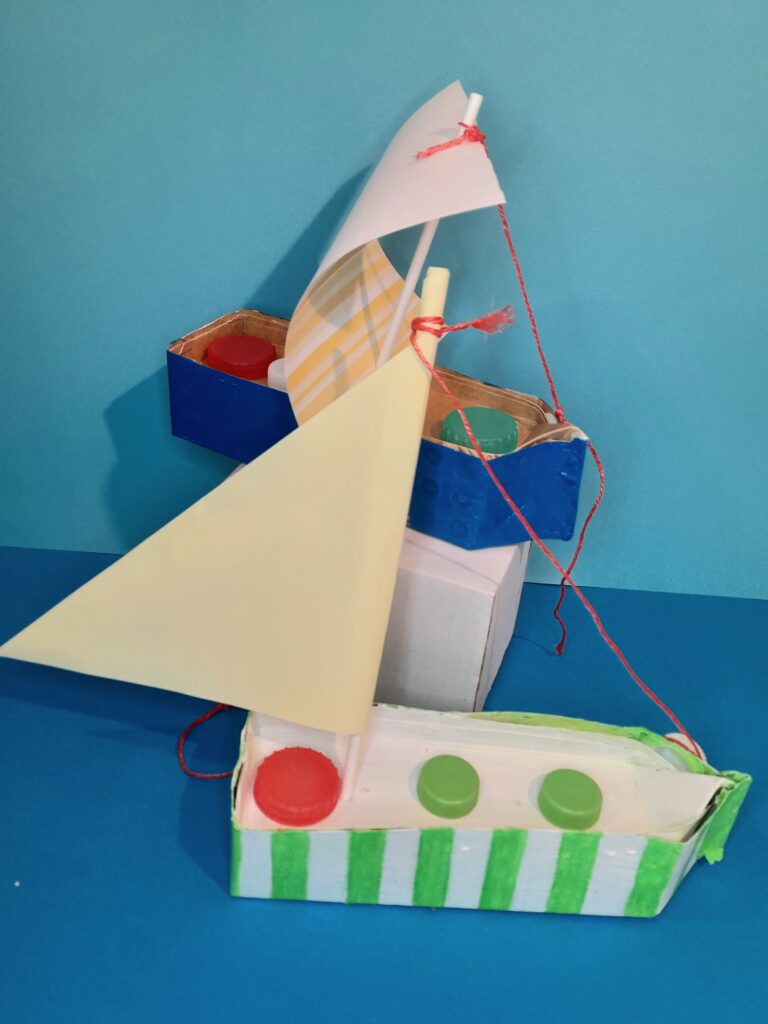
12) Here are the two sails, one like a triangle and the other a square shape.
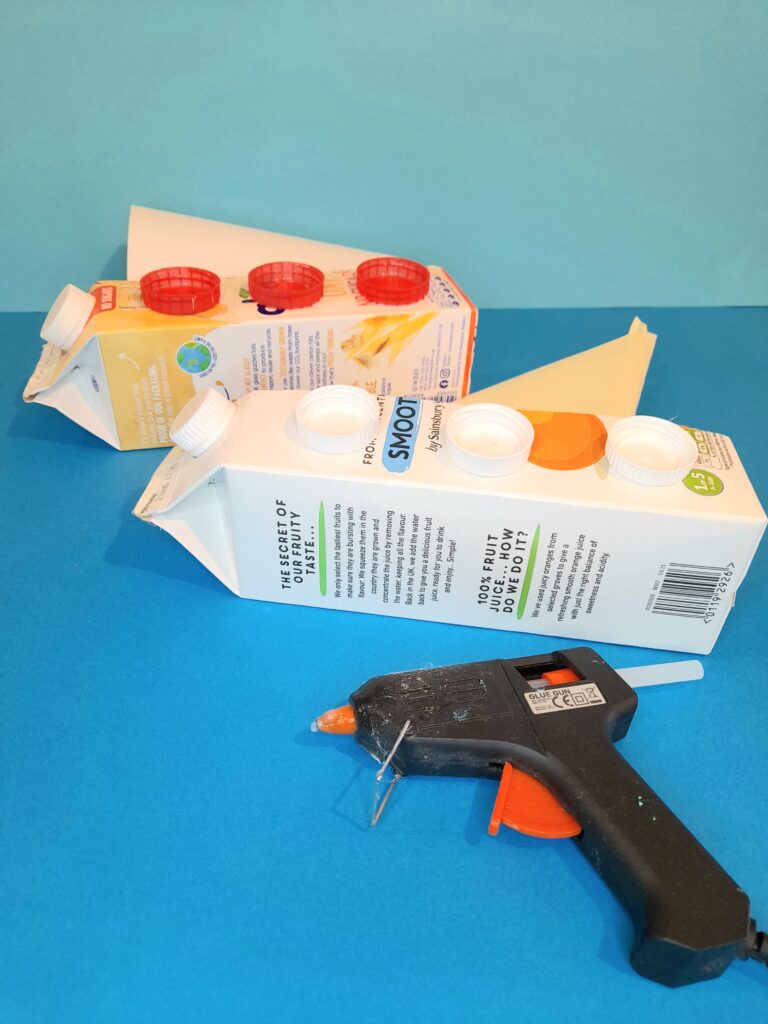
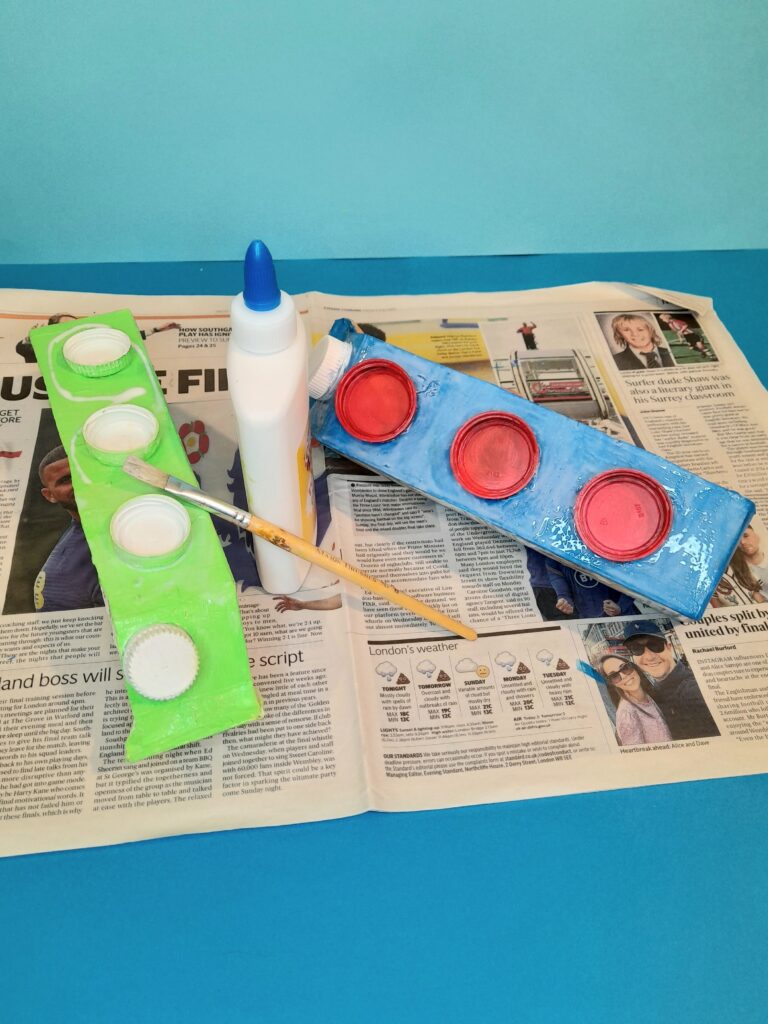
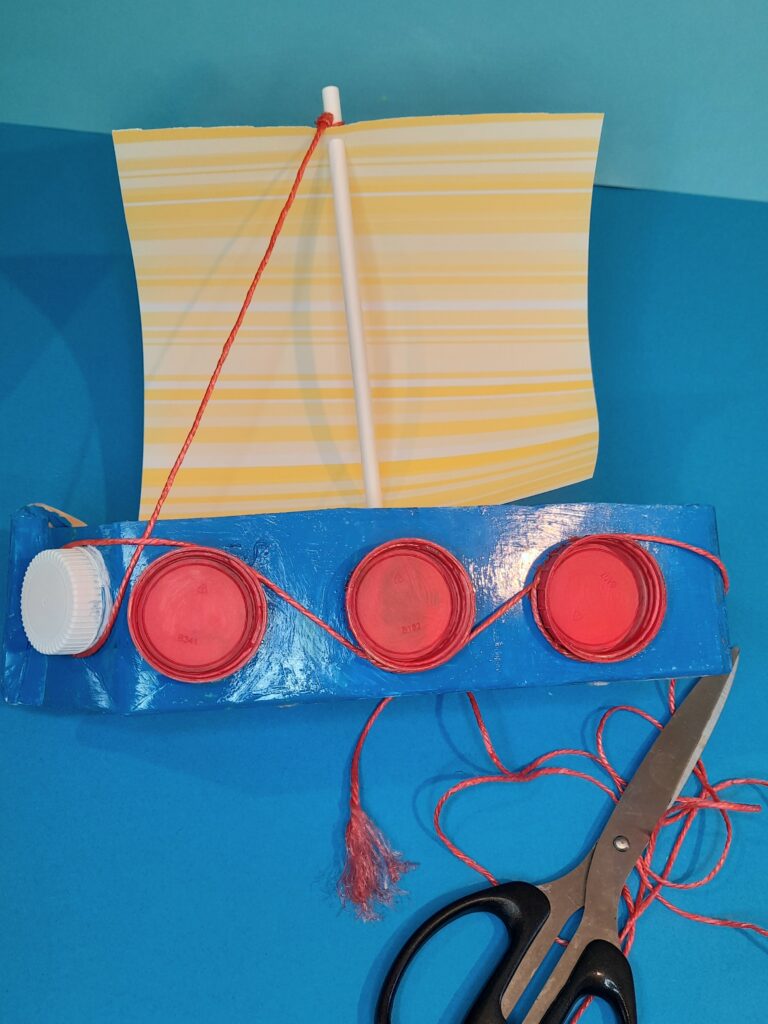
13) With glue gun add bottle tops, glue back of lids so inner parts show.
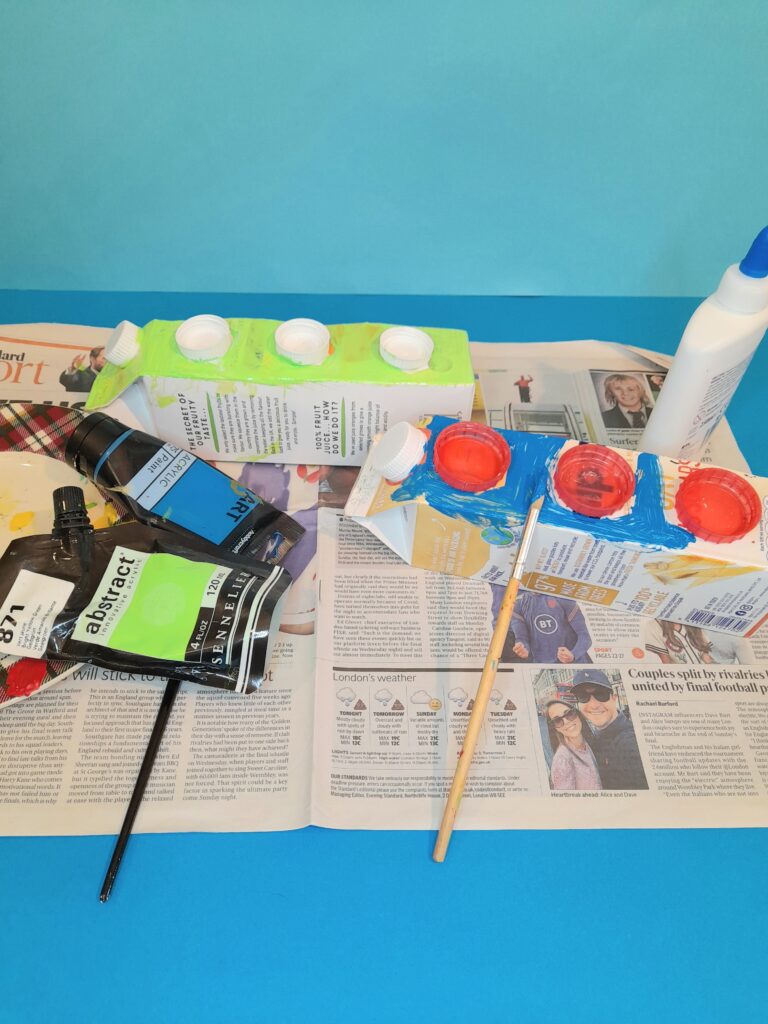
14) Now cartons are ready to paint.
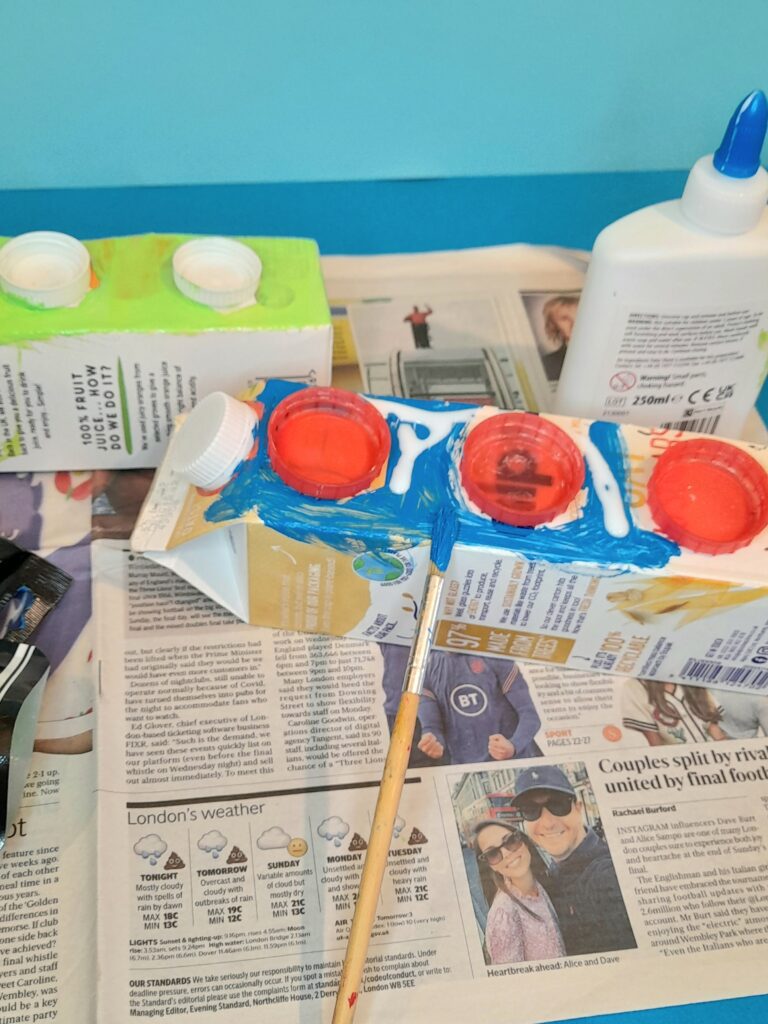
15) Allow paint to dry, then seal paint with PVA glue.
16) Adding PVA with paint as you go along.
17) Allow to dry and cover again in PVA glue. Leave to dry completely.
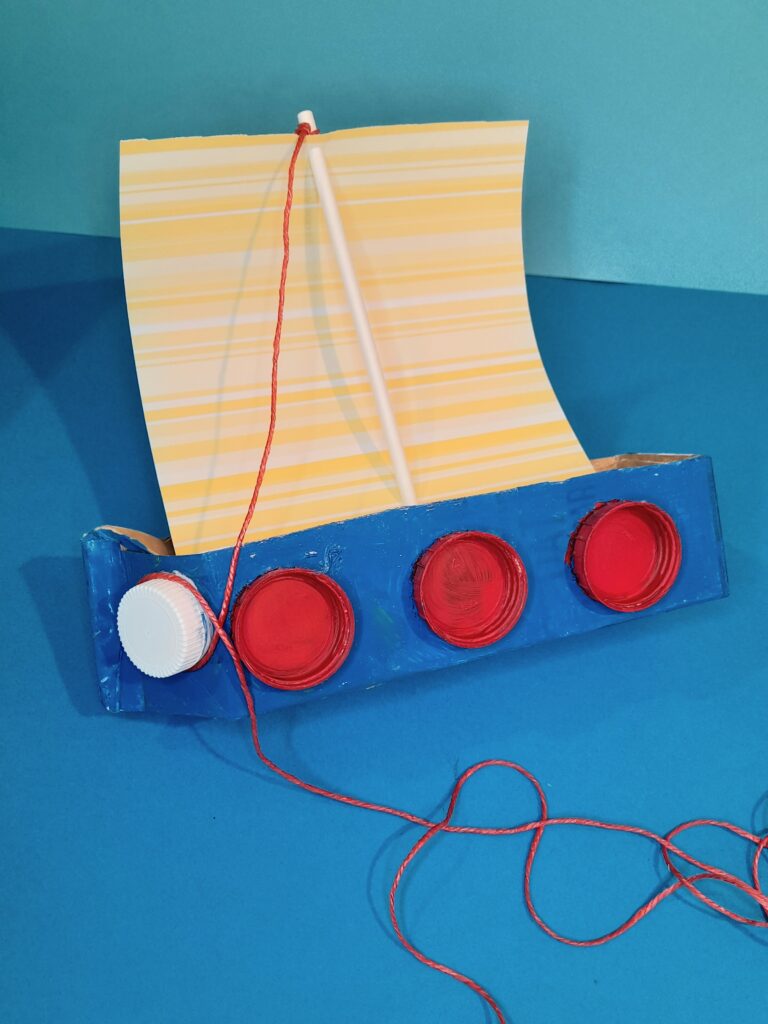
18) Now tie string to top of straw or mast and run it down and wrap around the lids.
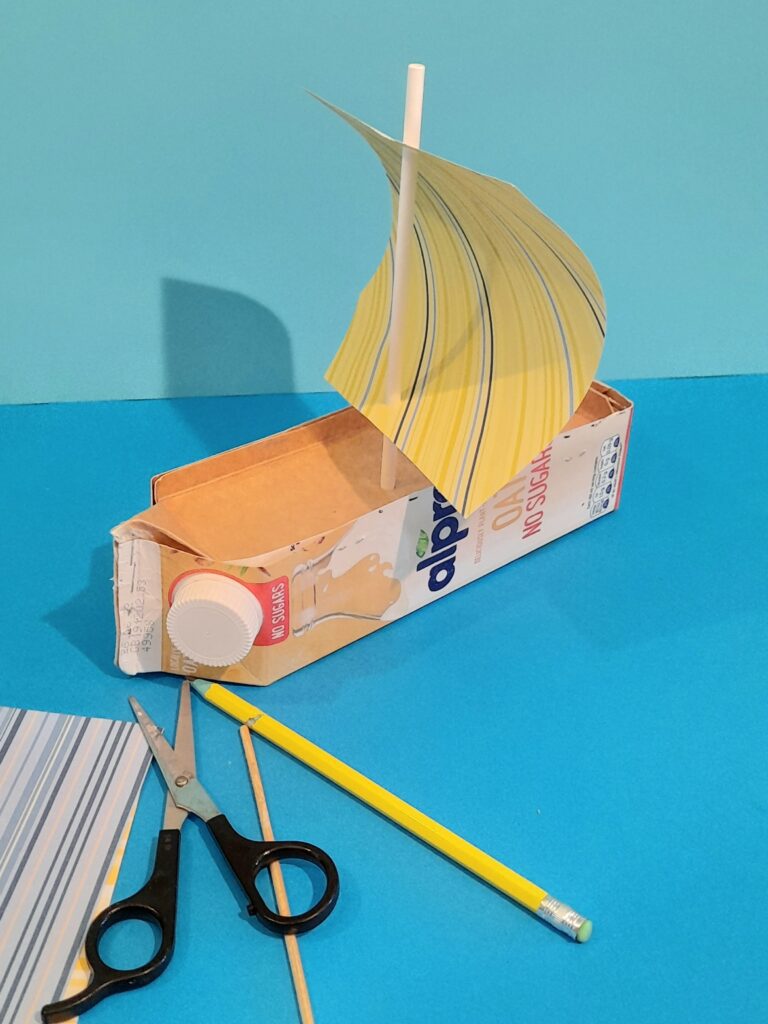
19) Finished boat, trim string.
20) One side has lids to wrap string around, also lids can be added inside for effect.
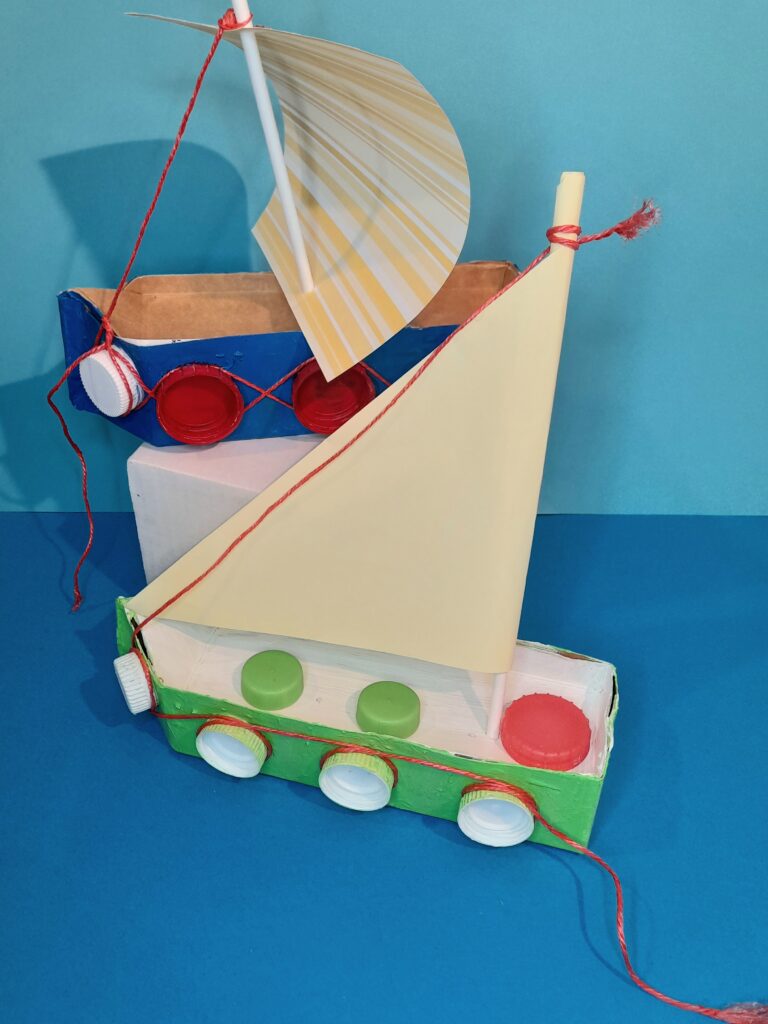
21) On the otherside of carton no lids to the side and sail is facing the other way.
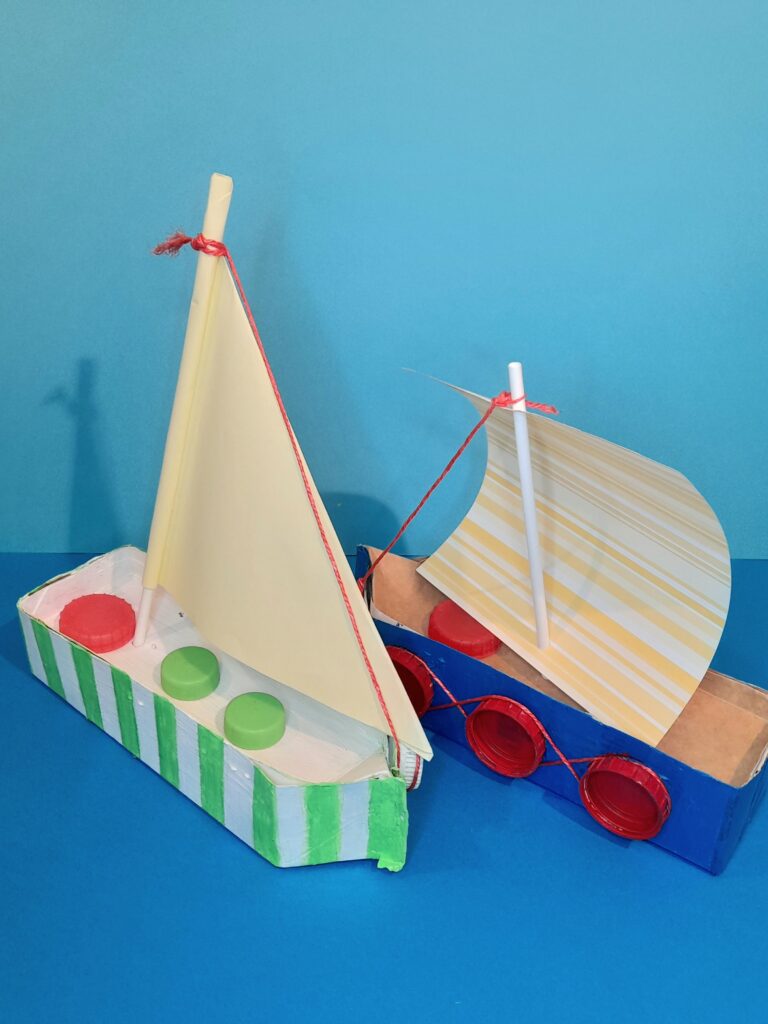
22) Here are the finished carton boats. Each side has a different look.
SOME TIPS!
USING SCISSORS.
When cutting with scissors, try to make a straight line, as it’s quite difficult to neaten it after angling the scissors is a bit awkward.
ATTACHING PARTS.
Stapling two parts together is also a bit tough; it would be easier to hold in the air and staple, or use the hot glue gun instead.
SAIL AND HOLES.
If you go for a triangular sail, then one hole at one end of the boat will be fine. Judge how big the sail will be, then make the hole in the appropriate place. If you are going for a square sail, having a hole off-centre on the deck will be fine.
GLUE ON CARTON LIDS OR CAPS FIRST.
Before painting with chosen acrylic paints, glue the lids so the inside of the lids is facing out.
CONCEALING TEXT.
If using darker paints, you won’t need too many coats, although you may have to paint white as a base to hide all text on cartons, if you are going to paint with lighter colours.
WHEN FINISHED SEAL PAINT.
You will need to seal the paint by painting PVA glue all over.
DECIDE THEN WRAP STRING.
Decide how you want the string to go on and wrap it around the lids on the exterior of the carton.
STAPLES OR GLUE GUN?
When painting the carton, staples will appear as little lamps. Using the hot glue gun to stick sections together instead will prevent this, but if this does not bother you, then stick with staples; it’s quicker.
FINAL TOUCHES!
Finally, I added lids on the inside of the carton for decoration, you can sit a Lego man on deck!
BE RUSTIC!
If you prefer to keep the cartons in their raw state, without having to paint them, that works too, as you are showing how creative you are by up-cycling your milk or juice cartons into a super sailboat!
LET’S CHECK OUT THE MILK CARTON SAIL BOATS!
I put them in my bath and, by gently blowing air, saw our milk carton sailboats drift to and fro.
BOAT CRAFT KITS FOR KIDS!
Many children love building their own boats, and craft kits can make the activity even easier.
On Etsy,you’ll find a wide variety of sailboat craft kits designed especially for kids.
These kits often include pre-cut wooden pieces, sails, paints, and simple instructions, making them a fun hands-on project for families or classroom activities.
They’re a great option if you’d like a ready-made craft idea without having to gather lots of materials yourself, and they can also inspire children to learn more about boats, sailing, and water play while creating something they’re proud to launch, as well as developing their fine motor skills and their concentration! ⇓
So why don’t you check out these super boats on Etsy, which are great alternatives at your fingertips!
When you click links in this post and make a purchase, I may earn a small commission at no extra cost to you. This helps support the craft projects shared on this website.😀
In this project, I show you another way of making fun sailboats by up-cycling your ordinary milk or juice cartons and when completed, you can sail them in some water. All you need to do is help them along with plenty of puffing and blowing!
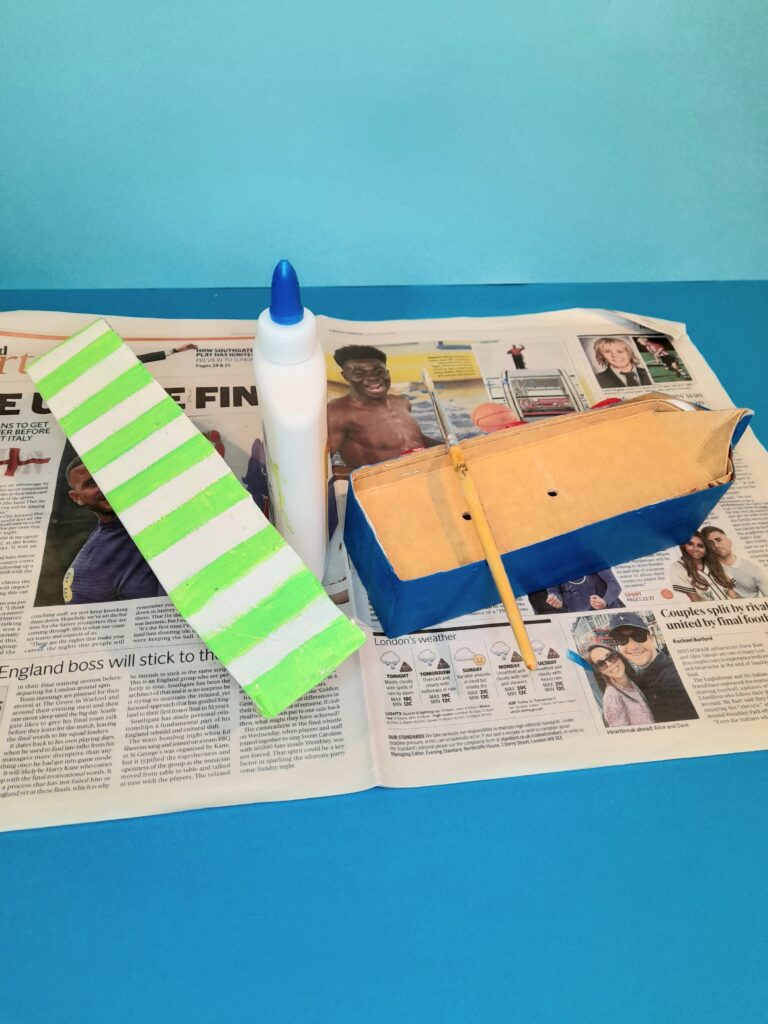
TRANSFORMING!
Once you divide and separate into two parts, flipping the top part over makes the boat look like it has a deck, and then you are on your way!
Then you can paint and decorate a design of your choice, and finally, after you have added a sail, you no longer see the original milk or juice carton you started with, but a superduper sailboat!
KIDS CAN BE CREATIVE!
Finally, how did you like working on this project? Kids love to create and make things out of throw-outs, and no matter how it turns out, their interpretation is great, and we love and adore them for it!
So what are you waiting for? Hold on to your cartons, as this is a super summer or anytime project for your kids to participate in and enjoy sailing those boats!
As a treat check these two short videos out!
After endless searches to find the right Row Row Row Your Boat nursery rhyme, here is what I liked!
The first is the familiar one we sing at school, but I prefer the second one, short, simple and quite amusing!