What is it about kids that love anything scary, spooky or MONSTERS related? They love to roar or growl, show them a dinosaur and it changes them into a non-human being!
Working in an early years environment, I get it all the time, it’s almost like their eyes go green they shine their teeth at you and start hissing and growling. Yes I know it’s not normal behaviour, but a child can get away with it, but if I did it, or any other grown up, they would get a restraining order and either taken to A&E or sectioned, as a danger to society.
Well I am only joking 😄, but you know what I mean. I love how little ones react and do things spontaneously. They are free spirits and we should allow it, their innocence is adorable.
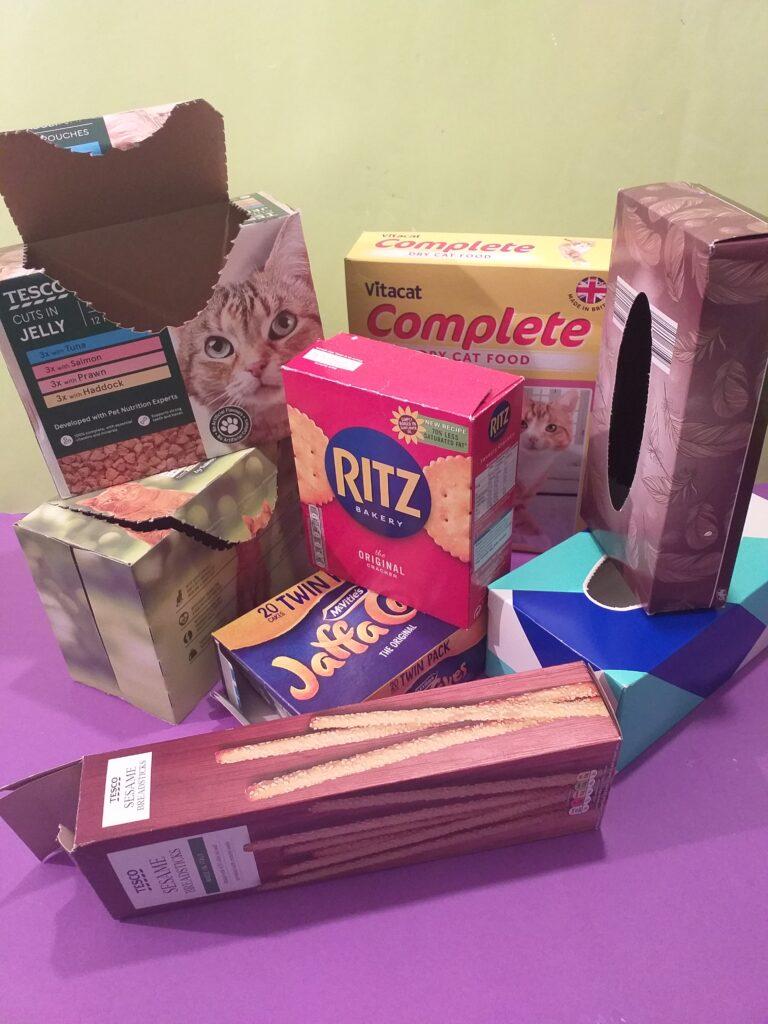
Our subject is ‘MONSTERS’ and what shall we use to make them with…….I had a look in my recycle bag and I found many boxes of different shapes and sizes. Keeping in mind monsters, and what looks like a monster.
As you can see I found quite a few boxes which I could transform, but the 2 that stood out the most were the ones below.
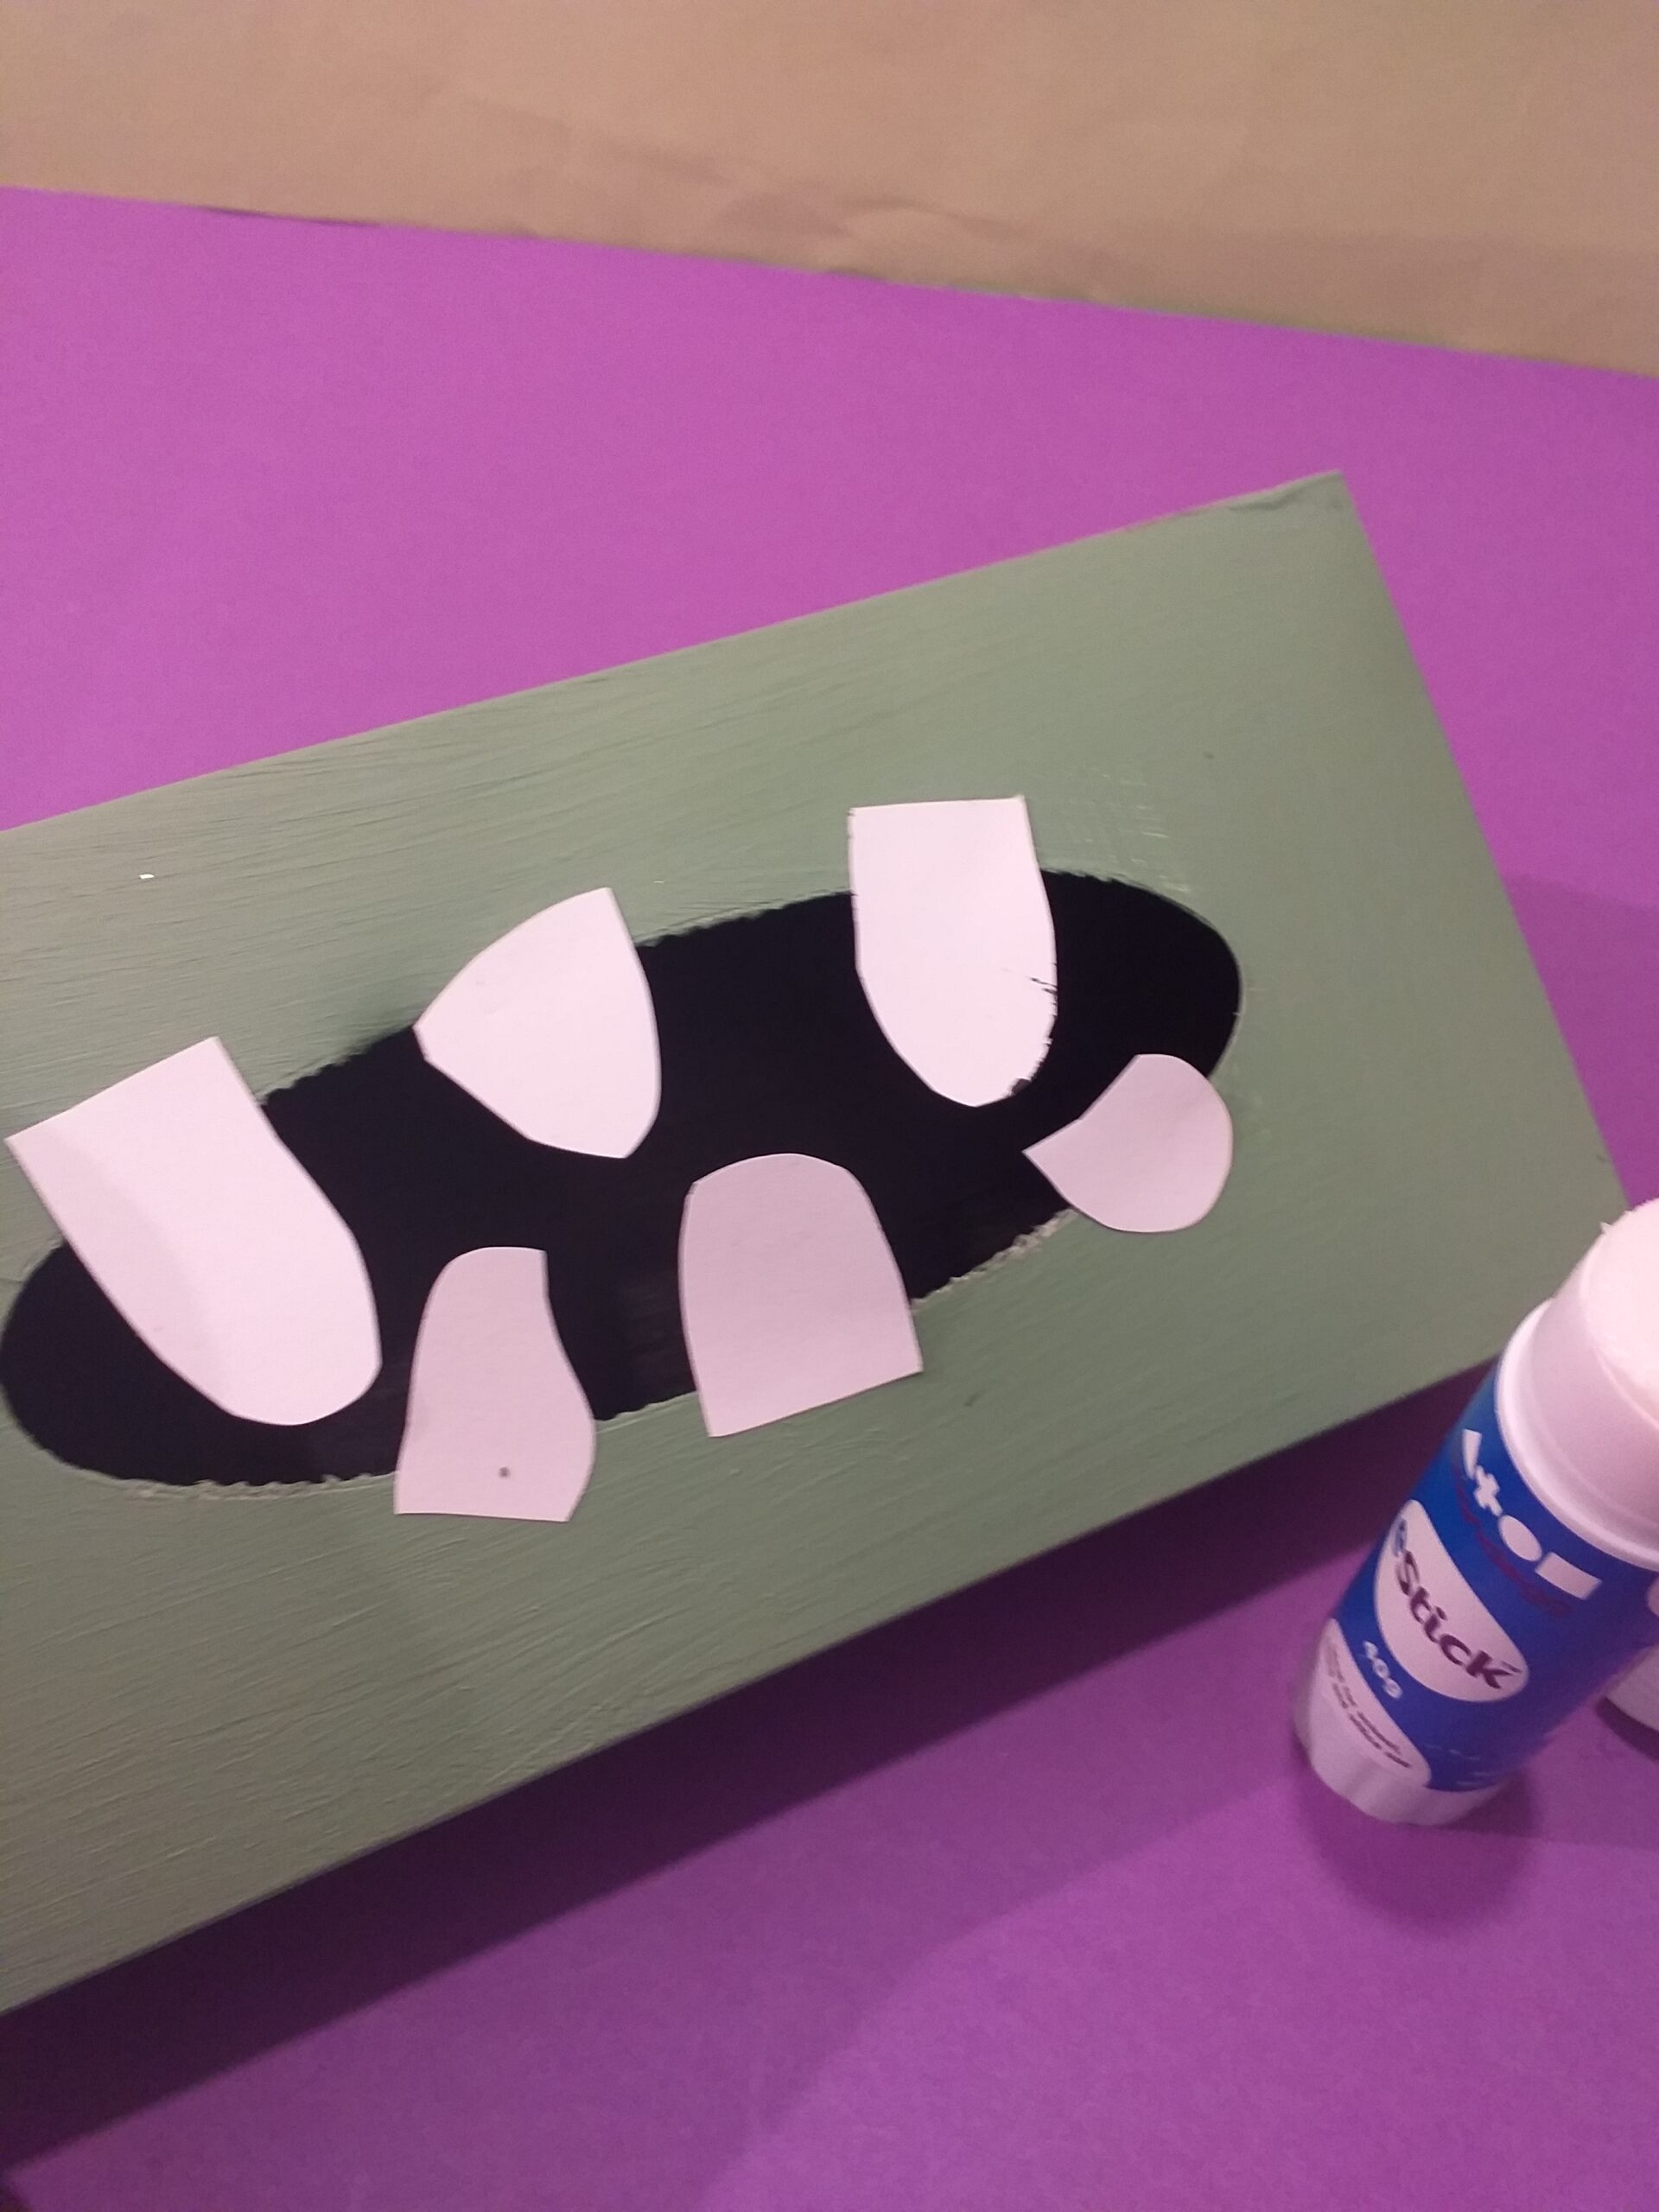
I chose a tissue box, why you may ask, well the oval cut out looks like a mouth, don’t you think? We can transform this into a Monster!
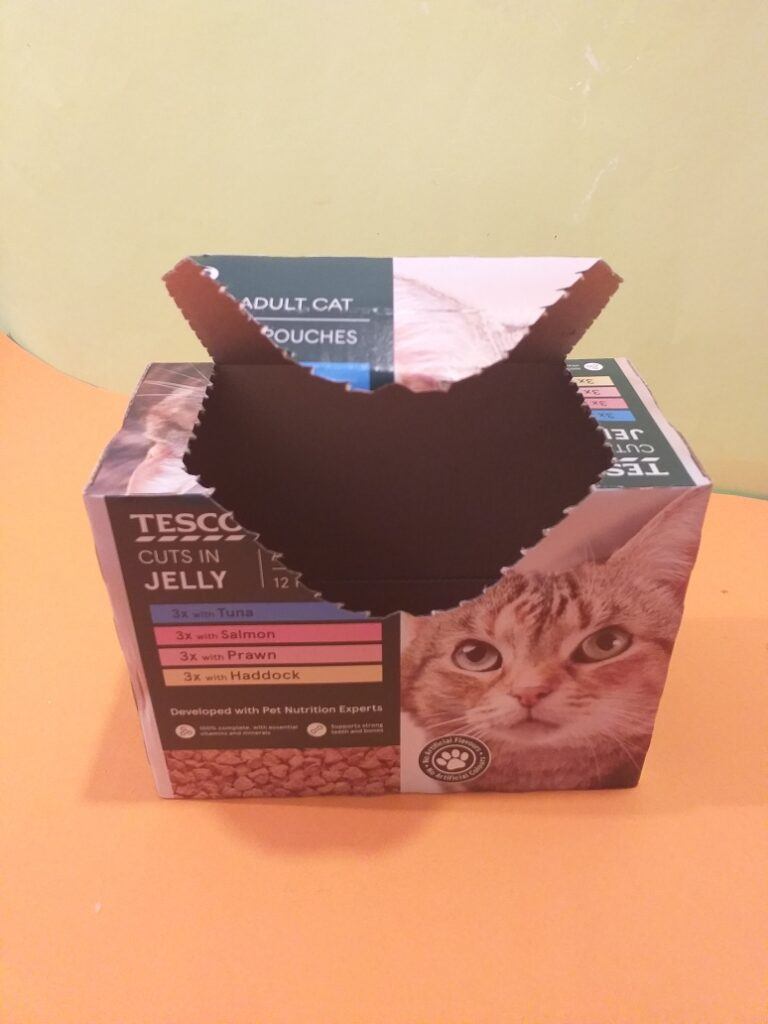
Amongst the different shaped boxes, cartons, cereal and cat food boxes, the other box that stood out to me was the cat food box, it had a lid that was like a flap, that you can open and shut and that would represent the mouth.
This is the cat food box with a flap that goes up and down. Super I thought a mouth that opens and shuts, where you can put things in it, or take things out ouch!
Before we start our monster projects, I thought to show you this classic monster cartoon. My kids use to watch it on Nickelodeon.It’s called…….
Real Monsters!
Has that kind of inspired you with some monster ideas? Really anything goes, eyes on stalks, big wide mouths tall, short, squashed ones, odd or weird with teeth!
We have a good start the shape of our boxes will dictate that.
So let’s Monster those boxes!
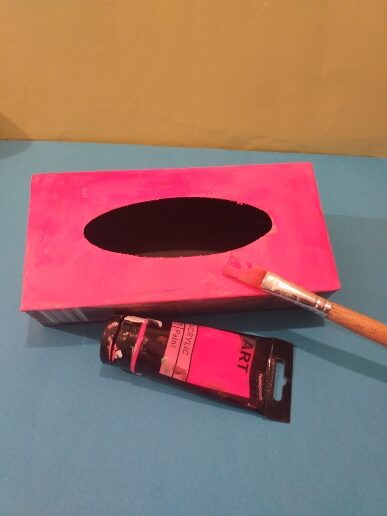
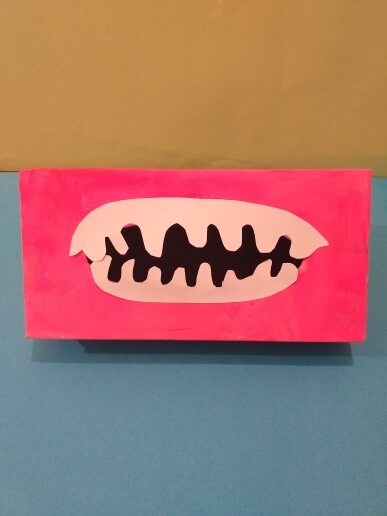
EASY VERSION! Tissue box monster.
(Click pic to go big).
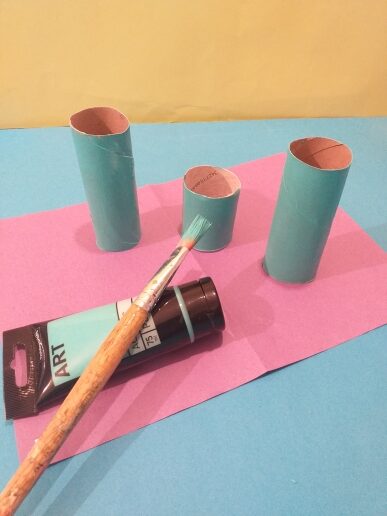
Resources you will need:-
1 Tissue box (like this one.)
Acrylic paints Black/blue/yellow/white to make green or green.
This is our our first basic monster. Due to moving parts, I decided to use hot wax to adhere them more securely. Our next tissue box will be up a notch, more embellishments will be added.
This is our second tissue box monster with legs. This time the eyes are on curled pipe cleaner, on top and arms are on the sides., giving it more texture, strands of coloured tissue has been added. This Monster looks like he is out for action!
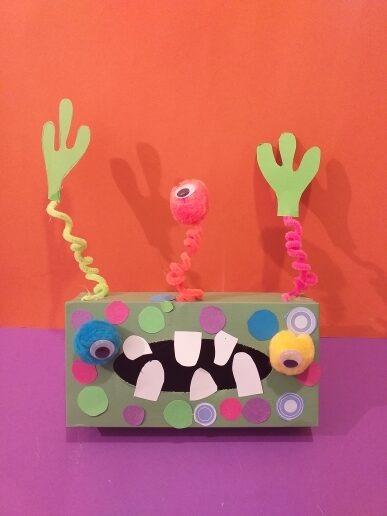
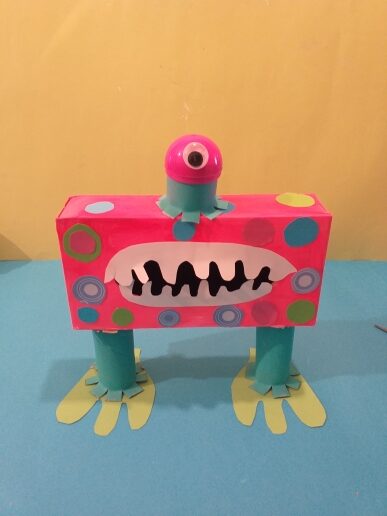
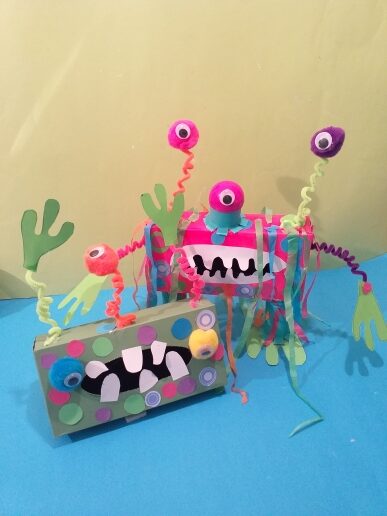
OUR FINAL BOX MONSTER! (a mixture of all 3, with movable part).
let’s look at the final box monster, using a cat food box.
RESOURCES!
1 cat food box.
1 A4 White/Yellow/Green card.
2 Pipe cleaners.
Red/Black permanent pens.
3 Glues, hot wax/PVA/stick.
Coloured tissue papers.
2 used coffee pods.
1 ice cream plastic cone.
Colours papers for dots/ 2 inner tubes.
3 Goggly eyes.
Turquoise/Orange Acrylic paint/paintbrush.
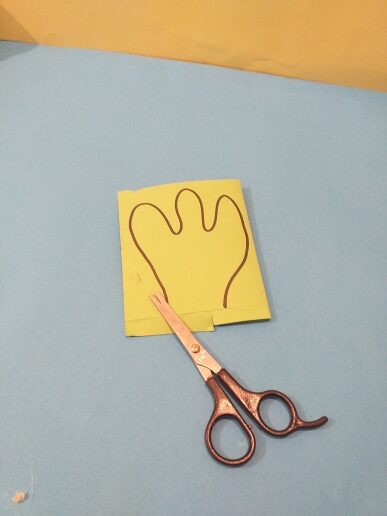
Scissors.
HOW TO MAKE! (some notes!)
The procedure is the same on embellishing this box, like the other two, the only difference with this one is, the eyes.
A red permanent markerwas used which doesn’t rub off.
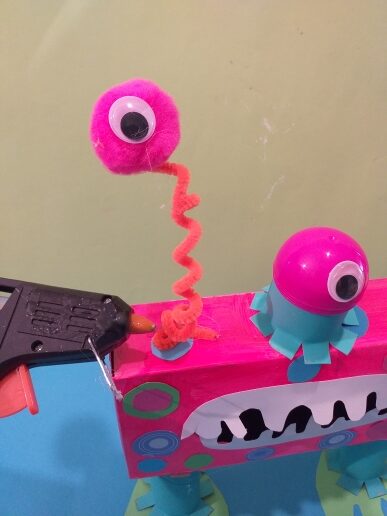
The middle eye is anempty ice cream cone.Hot wax was used to glue googly eyes on first, then to glue all 3 finished eyes on to the box.
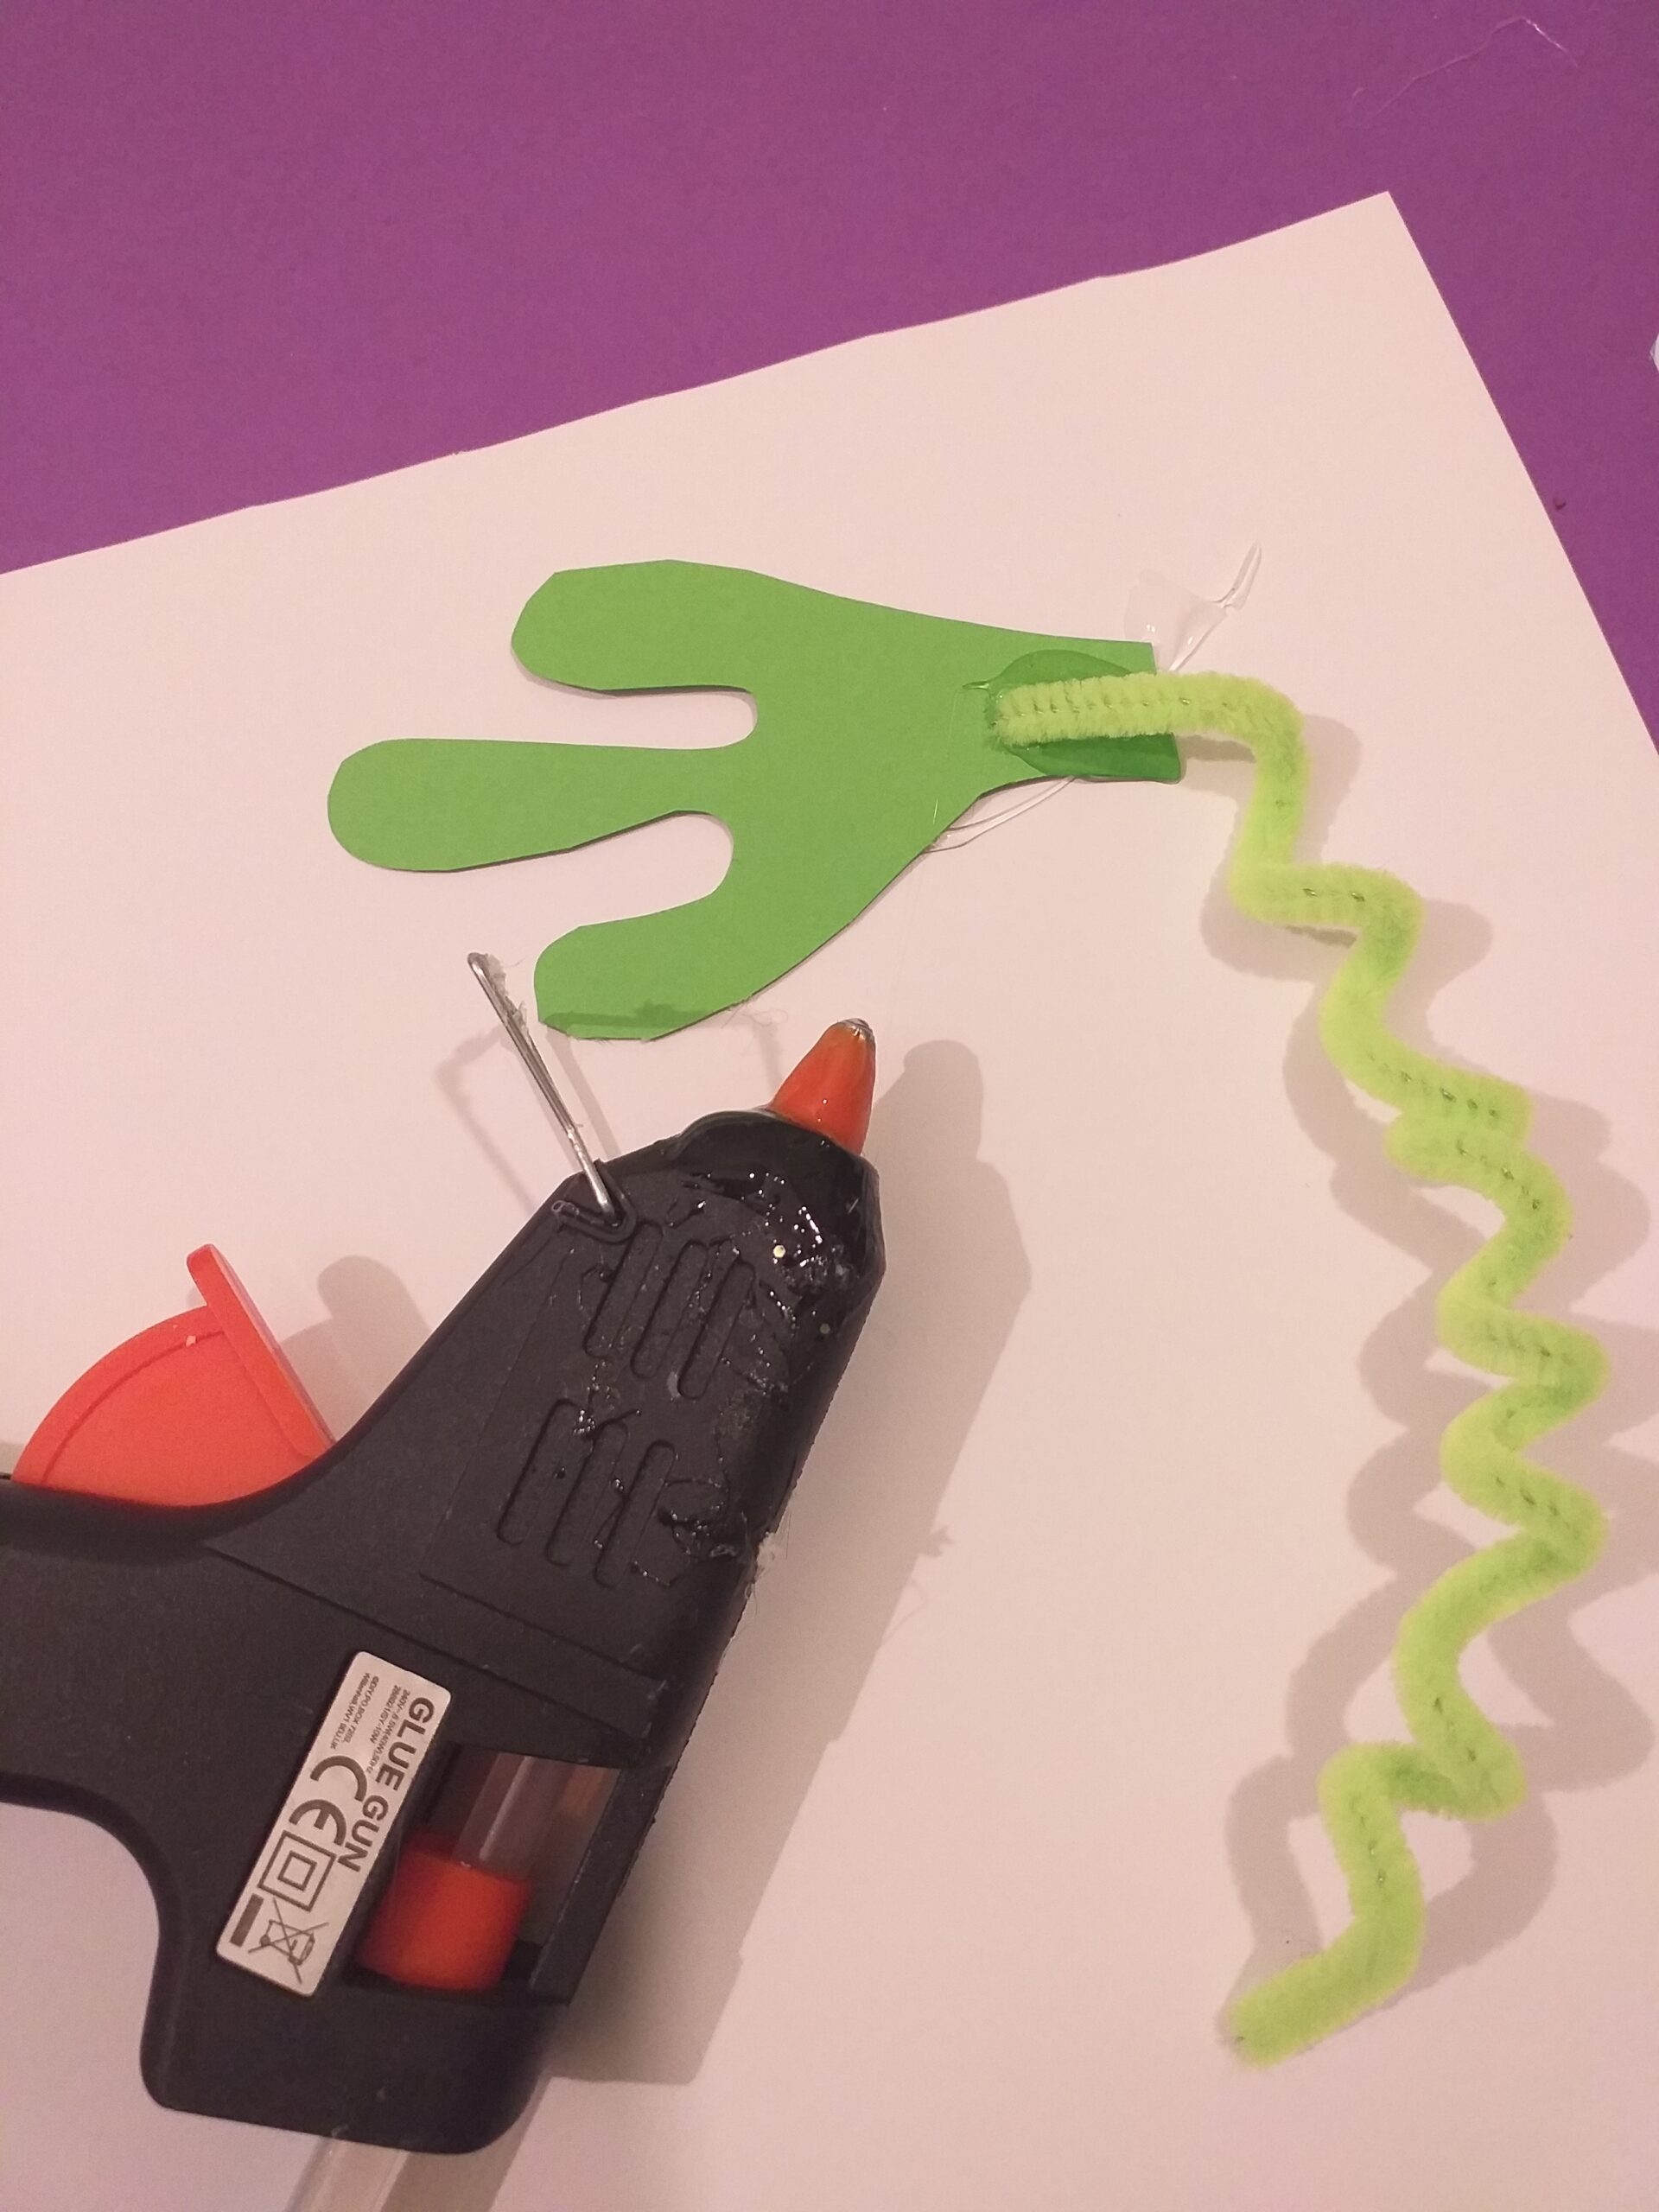
Curl2 pipe cleaners around a pencil.
Draw and cut out 2 hands approx. 8×10 cms and 2 feet. 14×9 cmsOut of yellow card.
Teeth and tissue papers can be glued on with glue stick, the rest with hot wax.
‘The signs’ are entirely up to you what you write, as this Monsters mouth opens and shuts. The sign comes in handy, so you can ‘Feed’ or ‘Post’ something inside the mouth as an interactive activity.
Paint black inside of box and turqoise outside of box.
Add teeth, coloured dots, 3 eyes. 1 on top of lid and the other 2 each side.
Glue on hands each side and feet below. Glue on tissue strips. Monster with mouth closed.
Monster with mouth opened.
Paint 2 tubes orange, cut and make signs. 'Feed me' or 'Post it'
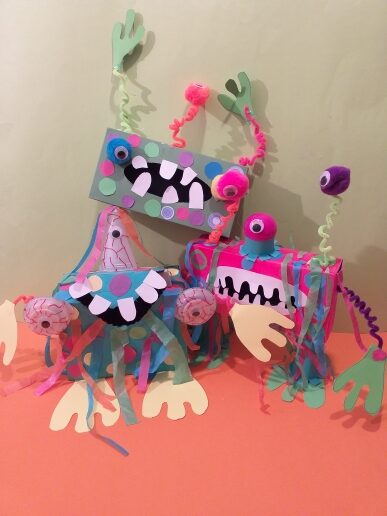
Here are 3 Monster Boxes!
TO CONCLUDE!
I have demonstrated how to transform 3 boxes into Monsters. Their form are dictated by the shape of the boxes.
There is abasic version, a littlebit advanced version and anultimate version.You can pick which one is more suitable depending on your child’s capability.
Handling hot wax may need to be adult supervised and use of scissors, but the rest I am sure any young artist can pull it together.
Monsters I believe are all year round and kids love them and how fun to recycle any type of throw away boxes into amazing MONSTERS!
So Monster those boxes!
FINAL NOTE!
I would love to see how you get on drop us a note and I could show them off for you!