Here is a brown cardboard Mr Potato Head with a selection of different attachable features that evoke four emotions.
Recycling your brown packaging to make a Mr Potato Head replacement parts!
REMEMBER MR POTATO HEAD?
If I mention Mr Potato Head, does it bring back memories?
Somewhere in your toy box, probably at the bottom of your box. Ring any bells?
MORE CLUES?
You know the one where you have a very large potato shape representing a head, and separate parts you attach to the head as features?
Now do you remember……
What do we know about Mr Potato Head, who invented the potato head and why?
LET’S TAKE A LOOK!
Disclaimer: This video is shared via YouTube for educational and historical purposes. All credit goes to the original creator, The Curious Collective.
I bet you never knew that about the humble Mr Potato Head!
The first toy commercial was seen in the early 50’s, and the idea got so popular that the vegetable progressed to more veggies and fruits used in the same way.
There was Katie the Carrot, Oscar the Orange, Pete the Pepper and Cooky the Cucumber.
Creating super heroes from Star Wars, ‘Darth Tater or from Transformers, ‘Optimash Prime.
You almost felt that his popularity started to decline, but it was restored in Toy Story, where his popularity once again grew.
Also, Mr Potato Head makes a very good sensory resource for kids to learn with in a fun and simple way to construct and deconstruct parts. Check out what Mr Potato Head looks like and a brief recap on the toys’ history at The Strong National Museum of Play!
MY TAKE ON THIS……
I am going to craft a Cardboard version of Mr Potato Head replacement parts! Not three-dimensional, but two-dimensional.
USE YOUR RECYCLING!
In this project, I am going to use ordinary packaging brown cardboard, keeping it flat, and parts of his face will be pieces also out of cardboard, which you can Blu tack on!
My version of this will be to have different sets of features, but to over-emphasise them in this instance, each set to evoke a different emotion.
Each set would include:-
- Hair.
- Eyebrows.
- Eyes.
- Nose.
- Mouth.
- Ears.
- Moustaches.
Four faces, four emotions which are:-
Happy, Sad, Angry, Shocked. Approximately ten parts per face.
Being this project is flat and it’s about facial expressions, I decided not to have arms, hands or legs and feet.
KIDS LEARN TO DEMONSTRATE DIFFERENT EMOTIONS!
The potato head starts as your base, your blank canvas, and you create your chosen emotion.
HOW TO PLAY!
Say your kid is Sad, they can show this by using the appropriate features, like sad eyes, drooping mouth, ears, moustache, eyebrows and so on.
Kids will learn that when someone feels a certain way, their face and body will show this too.
EYES ARE KEY!
Eyes are very important, they depict the start of an emotion the rest of the features follow.
All this can be presented in a fun way, which is why I exaggerated some features to make the face and its chosen emotion entertaining!
LET’S GET STARTED!
Here are the cardboard Mr Potato Head replacement parts in four different emotions!
SOME TIPS!
LAYING CARDS
- Layering three packaging cards one on top of each other for the face will enable the push pin to go in and not protrude through the other side.
BLU TACK
- For the younger kids, Blu tack will be safer to attach parts to the face, whereas for the older kids, they can use push pins.
PUSH PINS
- Push pins can be used as long as there is a watchful eye of an adult.
- What I do like about the push pins is that they are colourful and a small hand can grip the head of the pins and push them into the card.
- The colours of the pins can represent and different features, eg, ‘eyes’ in pink, ‘mouths’ in red and so on. Kids can follow a chart and make it into a game.
EYE BROWS
- It may be easier to keep the eyebrows in one strip, rather than individual parts, as I have done, so there are less parts to add.
ONE NOSE OR MANY?
- You may just have one style of a nose and keep this as the main part throughout your different emotions, instead of having different noses.
USE A HB PENCIL
- A 4B soft pencil works well to trace off features, flipping tracing paper over and drawing parts again, then flipping it back and drawing features again onto your card will transfer more easily.
USE A LARGER THAN A4 CARD
- When looking for your brown packaging card, you will need it to be at least A4 size or larger to make a Potato Head similar to the one I have presented.
HAIRSPRAY SETS
- To fix the chalks, use hairspray; this will set the chalks.
STORE
- Store in a large see-through zip bag
NEEDING TIME TO PREPARE!
You will need to put some time aside for this project, as there are quite a few bits to prepare, with a steady hand.
You will need to draw up your features against the blank face, to size trace off onto white card, then cut out over-size and stick on to the card and cut out again.
So sit in a comfy chair, watch your favourite program and cut away!
There are ten single parts to prepare for each emotion.
Remember, the size of your card may vary, so would the size of your chosen features.
DON’T WANT THE HASSLE OF DRAWING.
To help you along, I have presented six pages with all you would need to kick-start you.
If you print to an A4 size and your potato head is around A4, even slightly larger, these images should be in proportion.
TO PRINT OUT.
Right click on the image, ‘save image as’, to ‘downloads‘ or ‘documents‘, then right click to print, select settings to print to A4, or full page portrait, then print each page out.
Or refer to these images as examples, and you or your kids can draw them freehand and make your own interpretation of each feature.
PRINT OUTS!
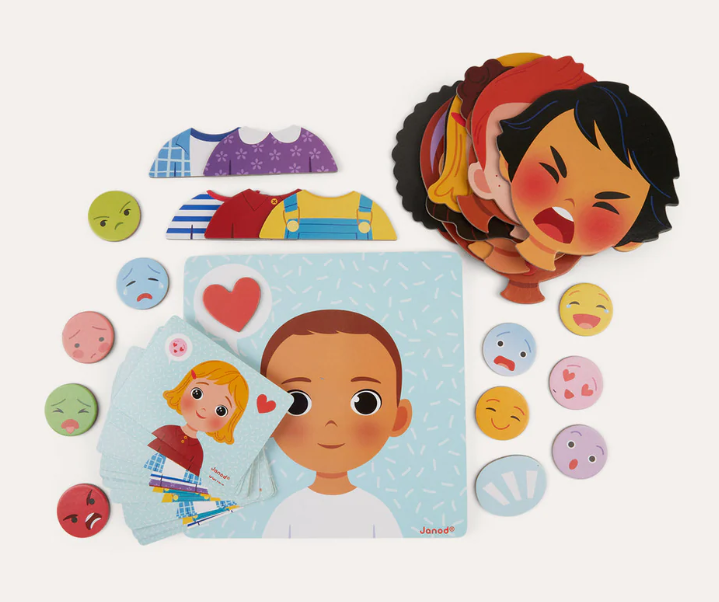
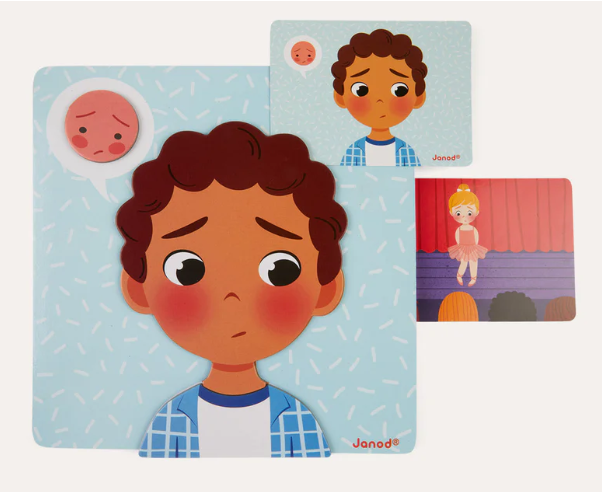
May I recommend something on the same lines as Mr Potato Head? I came across a super magnetic toy from this lovely websiteThis toy has a similar function of exchangeable interactive facial features, which evoke different emotions. In this instance, the face can be adapted into a boy or a girl, just change parts with a lasting painted finish.
Take a look at Janod’s Emotions Magnetic game.
From KIDLY UK, with 30 magnetic pieces!
There are 10 emotional states for them to recognise – joy, fear, sadness, anger, shyness, love, disgust, laughter, jealousy and surprise – and a mirror in the box so they can try to copy the expressions for each one. A thoughtful game that will help you to have supportive conversations with your toddler about their feelings and other people.
• Explore emotions in a game format
• Encourages emotional literacy
• Best from 2 years,
Hey there, when you click on links in this post and you make a purchase, I may earn a small commission that l can use towards resources (other than throw-outs) for project making within my website😀
CHECK OUT MORE MONTESORI TOYS AT KIDLY!
TO CONCLUDE!
I have shown you how to make good use of your brown packaging and turn it into Mr Potato Head replacement parts!
In this instance, the replacement parts are designed to show different emotions; you choose either how you feel or just to create your own emotion!
Simply by attaching the cardboard features one by one to the blank face.
With just a few resources, you or your kid can be quite inventive and either use the features I have provided, just like the ones shown on the finished Mr Potato Head, or do your own version.
So what are you waiting for? This is a really nice project to do, and you don’t have to knock it out in one go; you can space yourself and enjoy the making of a
‘Mr Potato Head replacement parts!‘
Check out this post on Crafting Kids’ Facial Emotions, where I show a variety of emotions from live photos turned into worksheets.
A great way for kids to get in touch with their feelings and add their emotional words to them!
Go straight to the post.
⇓
Go straight to my Etsy shop.


Hi Julia,
I used to love Mr. Potato Head! I think this is a really great way to teach children about emotions and facial expressions. It is also a great way to get kids off of electronics and to spend some quality time together. I also really love how you added the templates.
Thank you,
Chastity
I agree with you Chastity, there are too many electronic devices, toys
you name it these days and kids are getting wrapped up too much with them,
even though technology has it’s place, they still need to learn by going back
to basics again, learning useful skills that’s where it all starts.
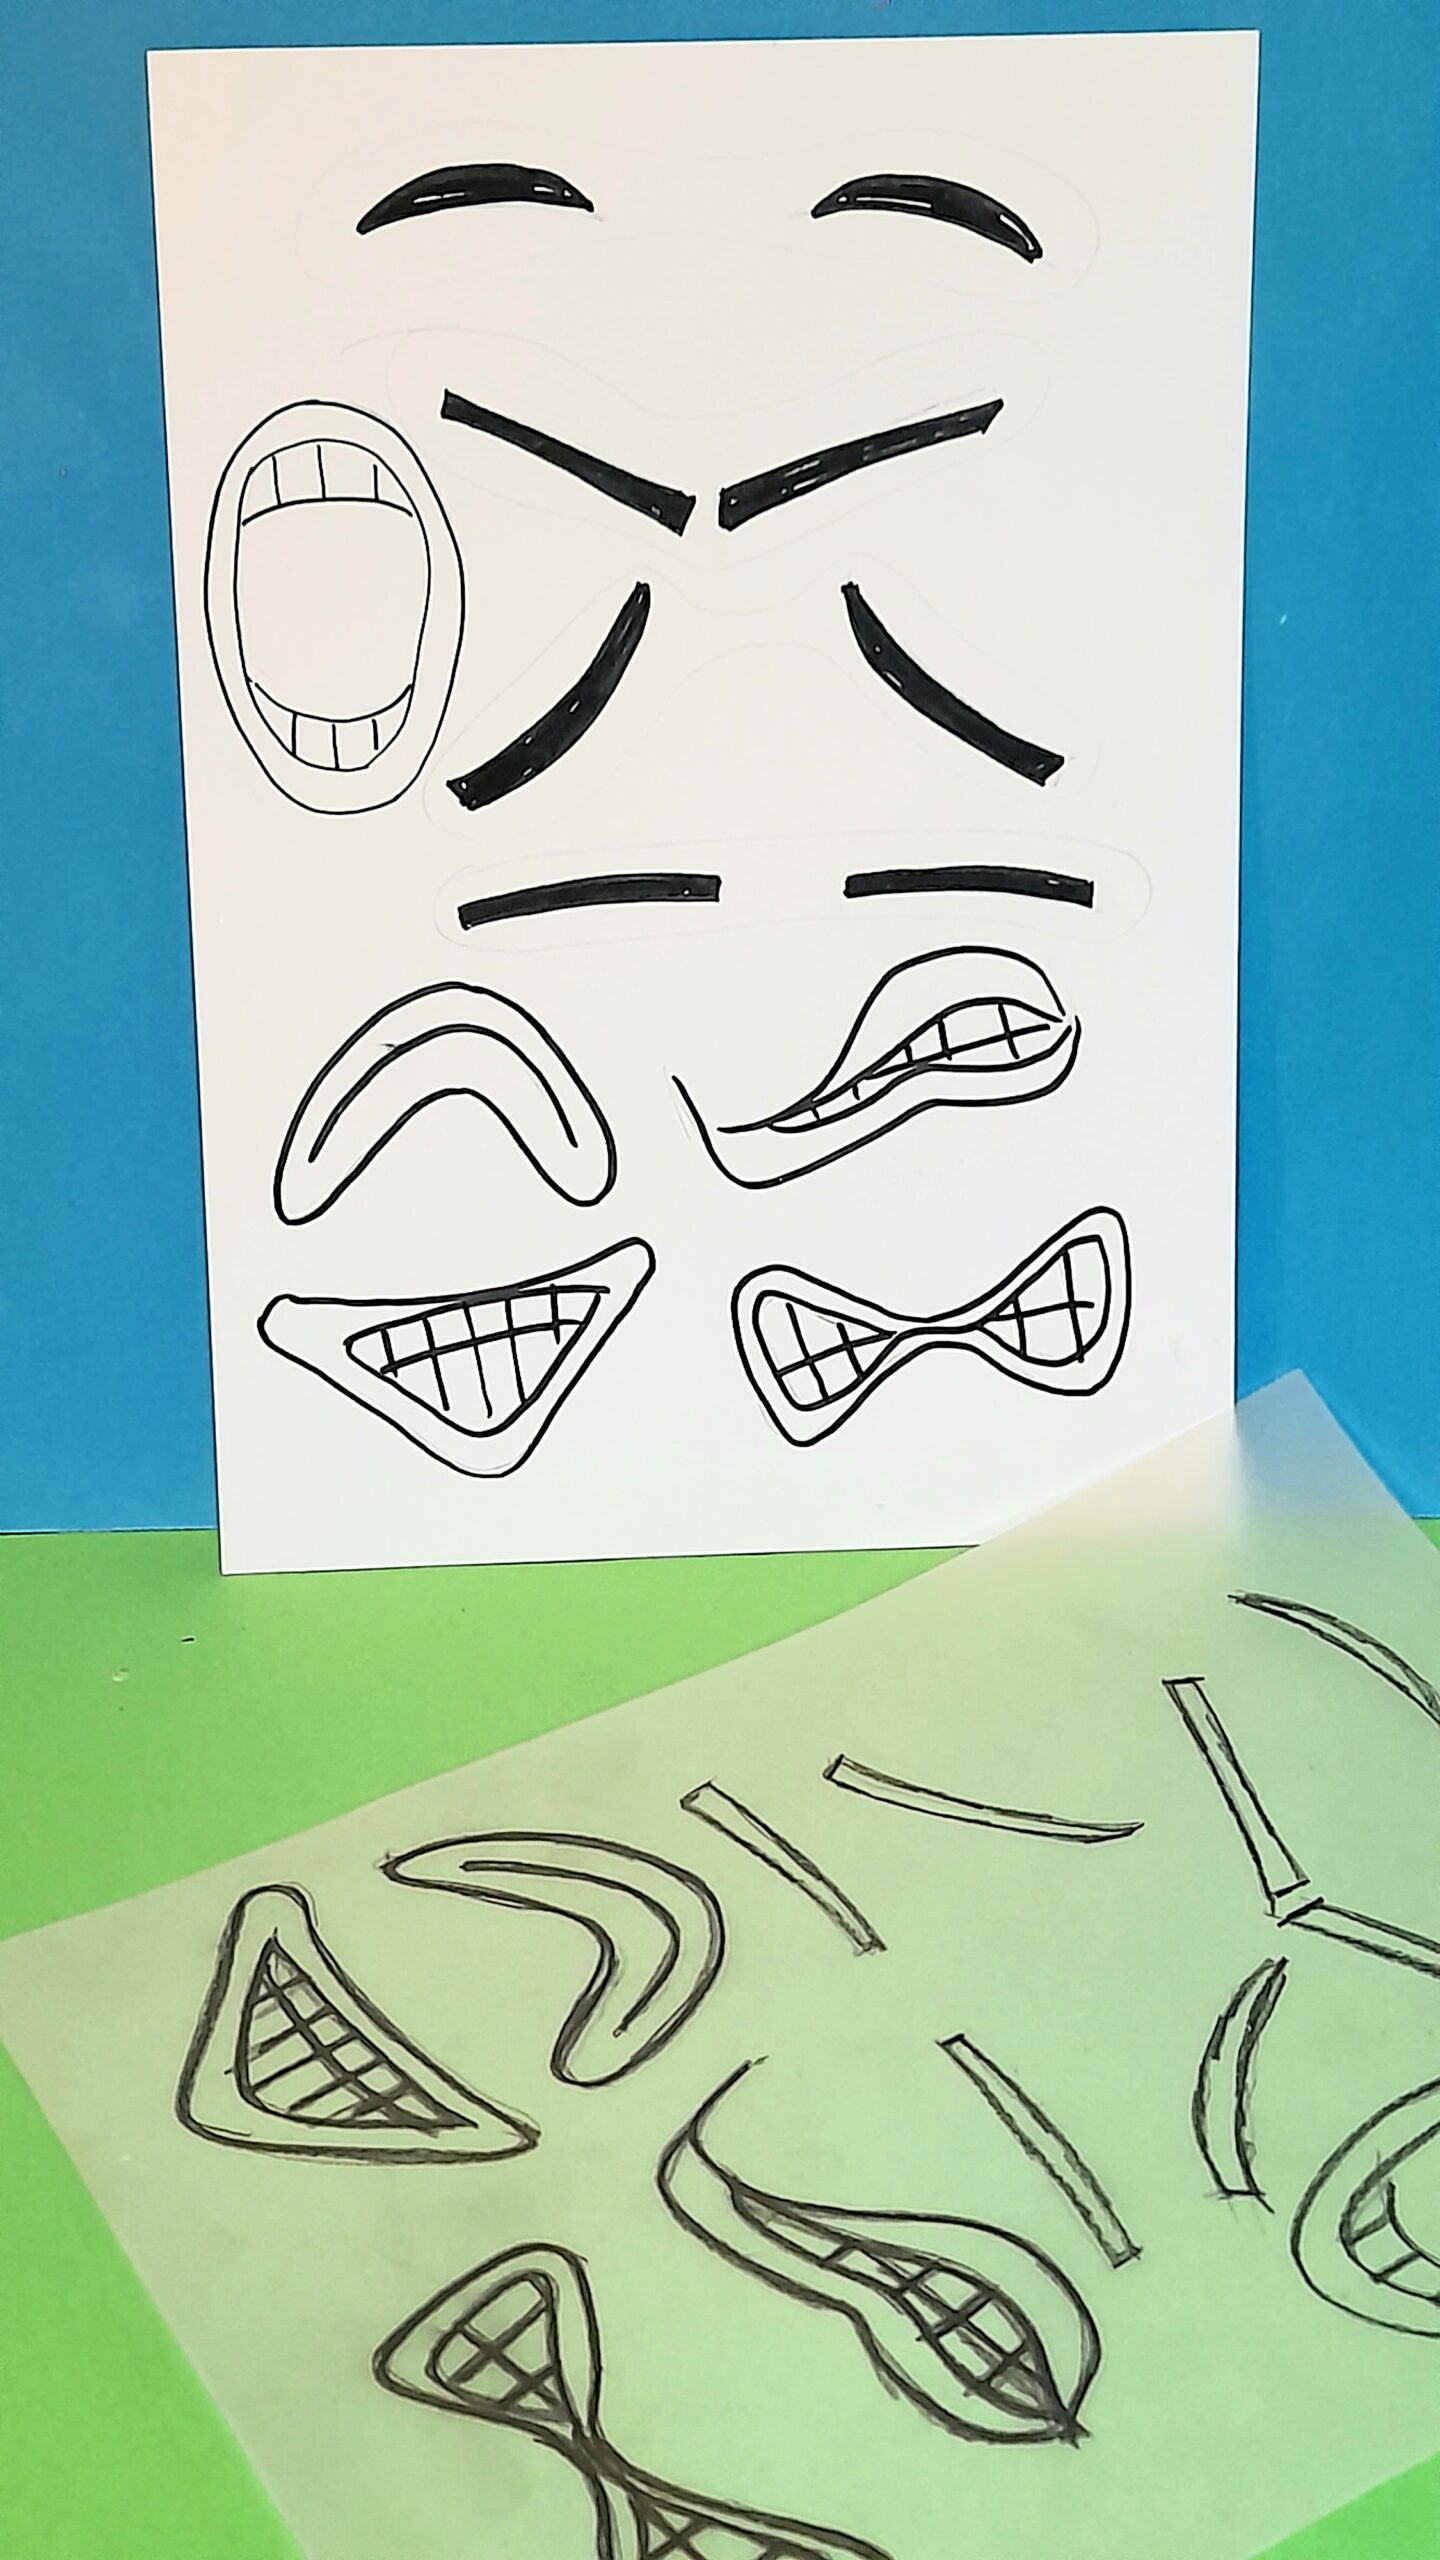
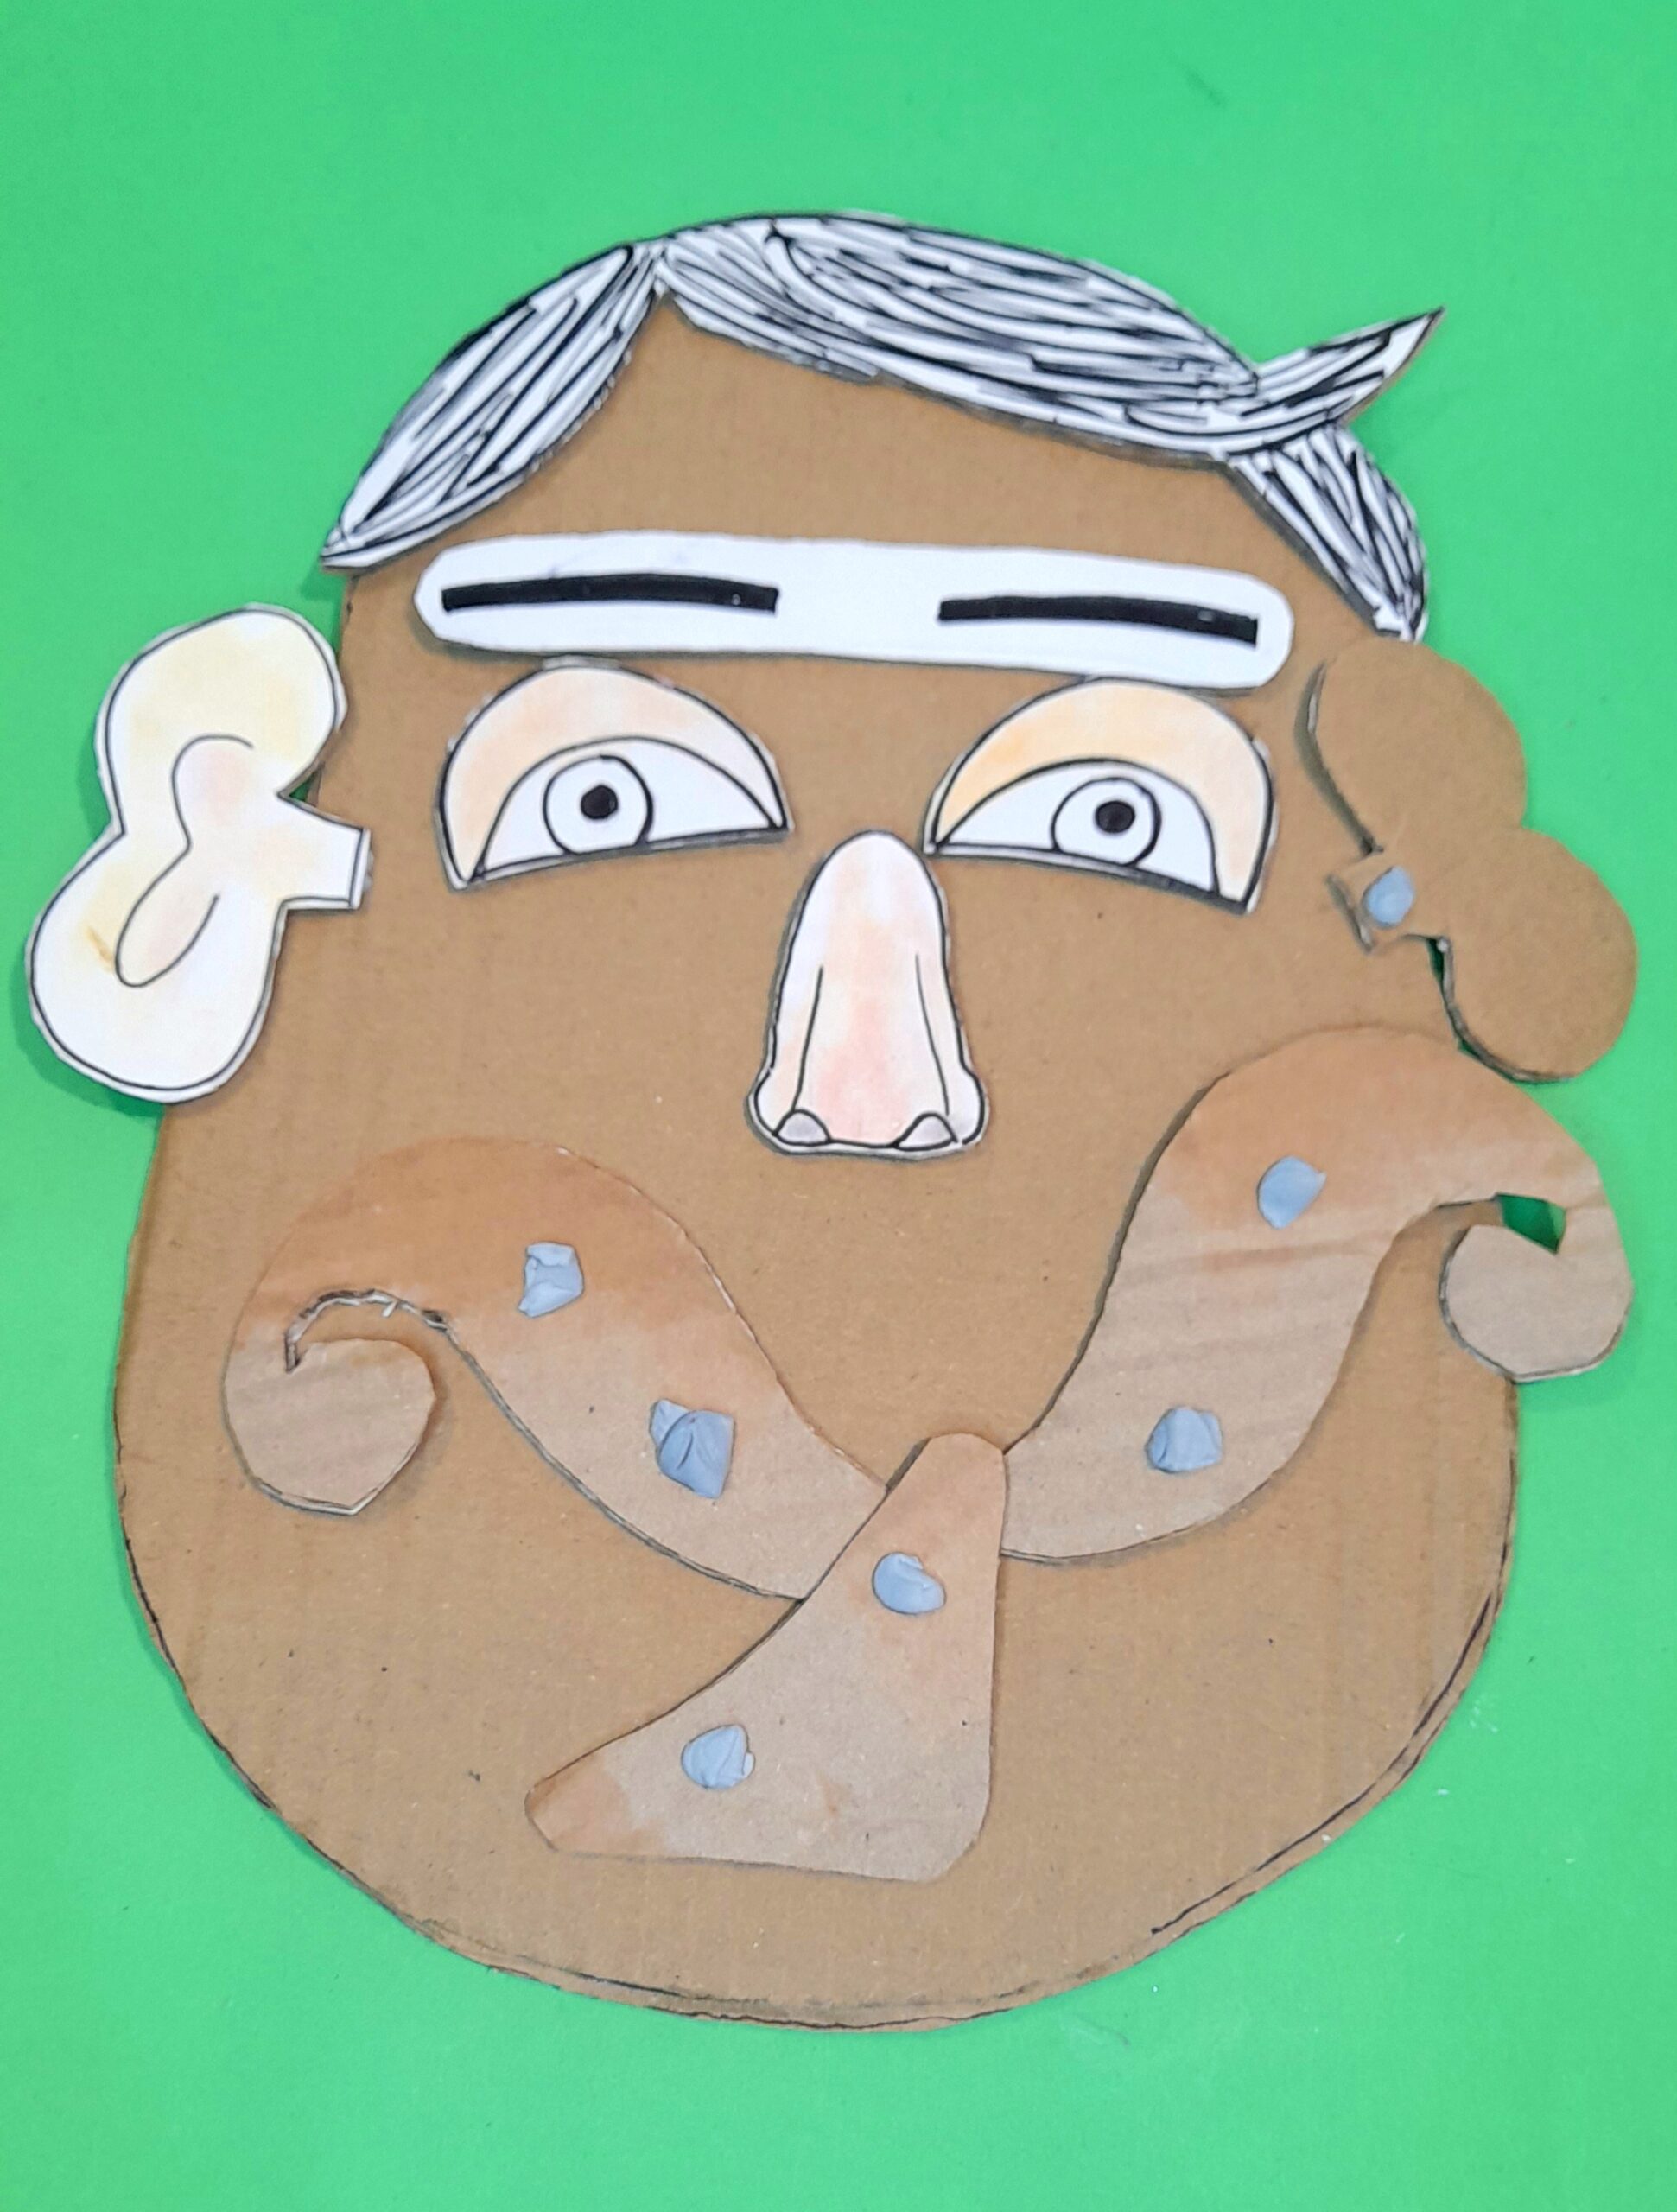
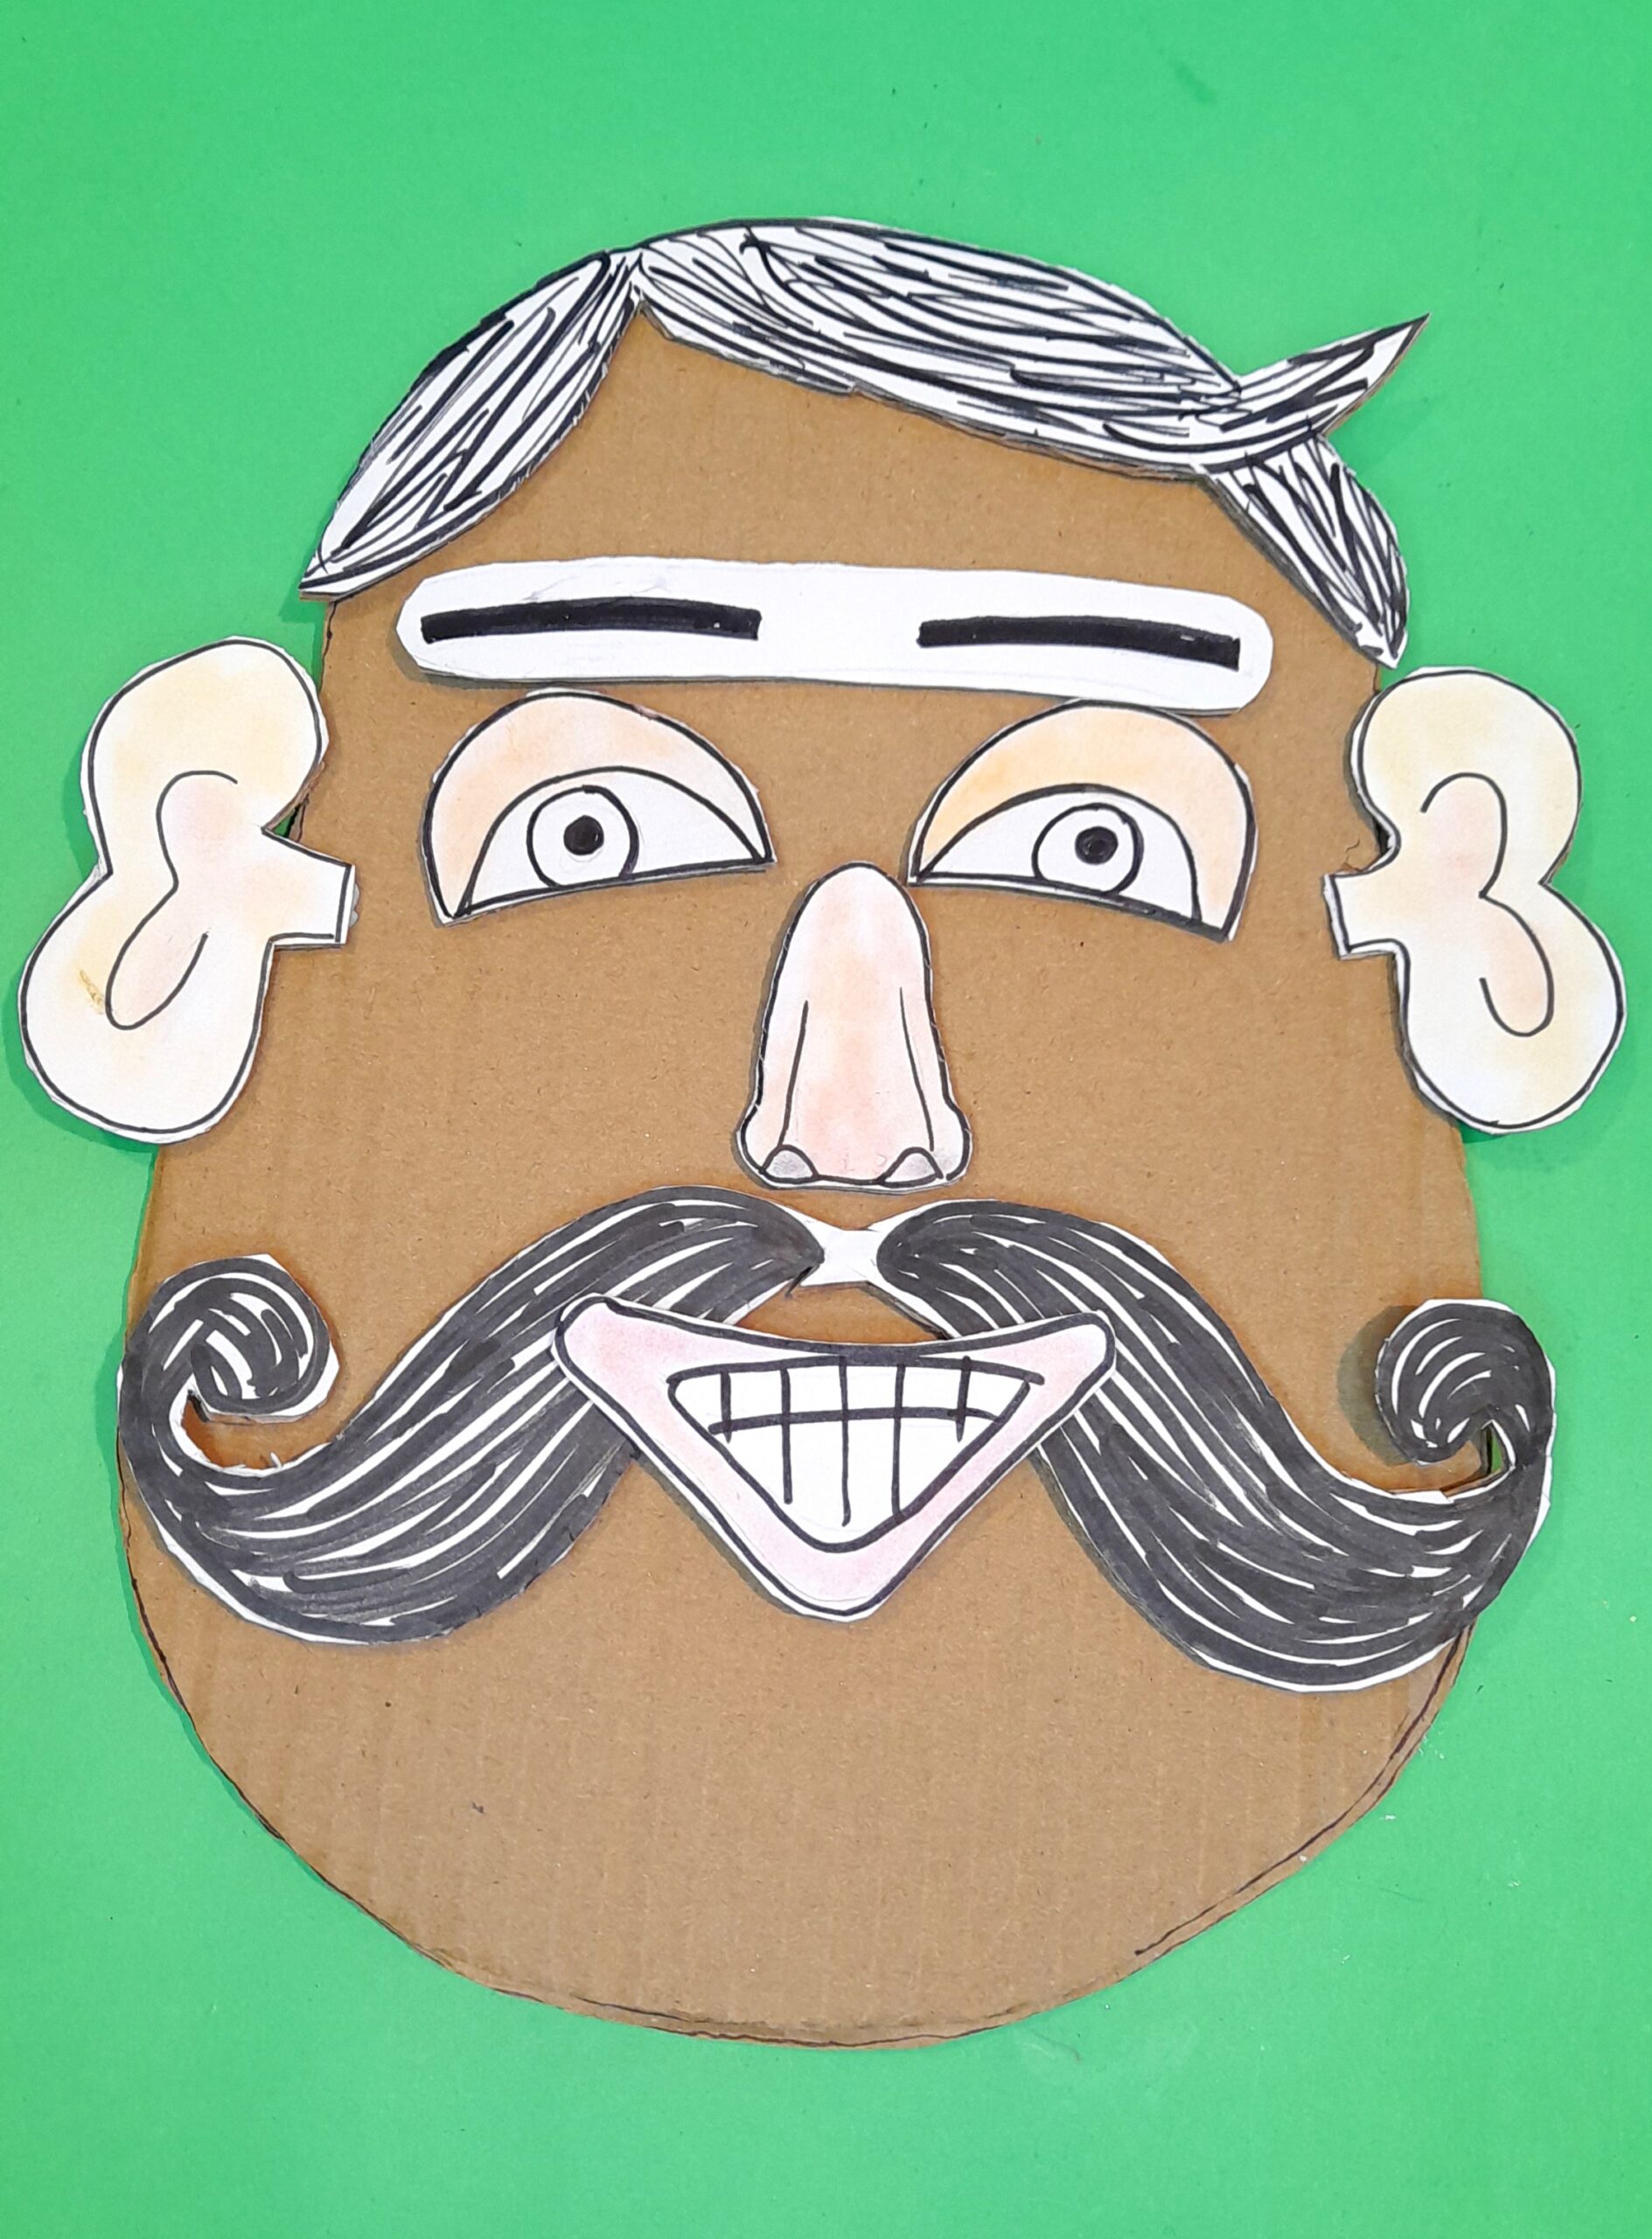
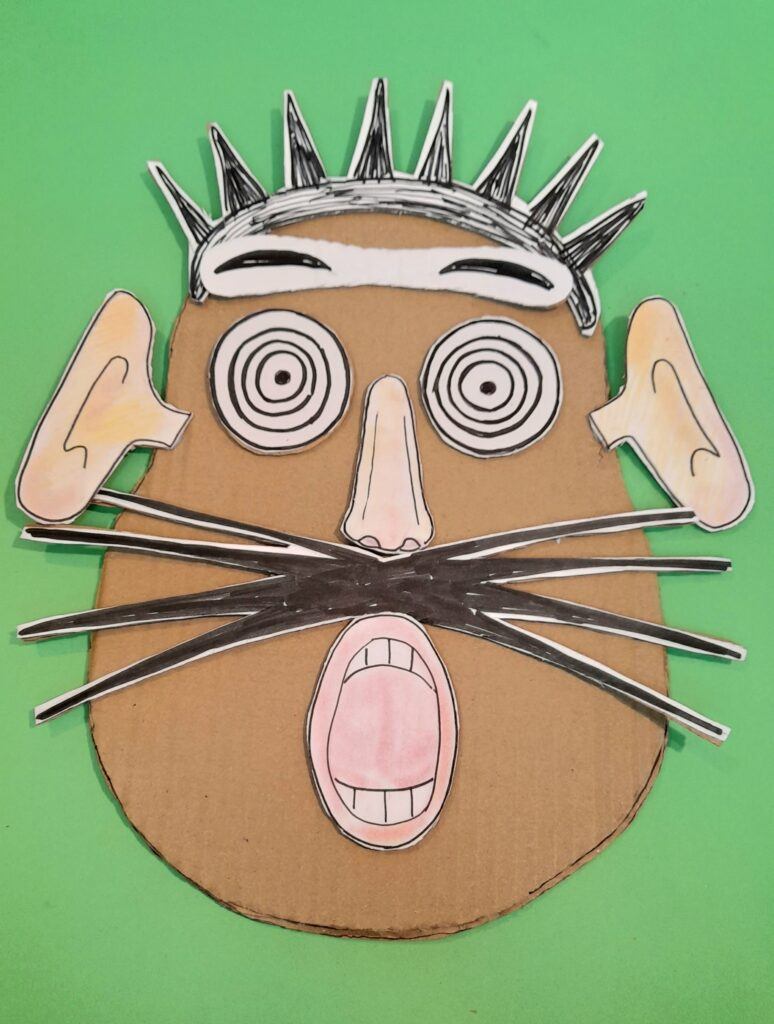
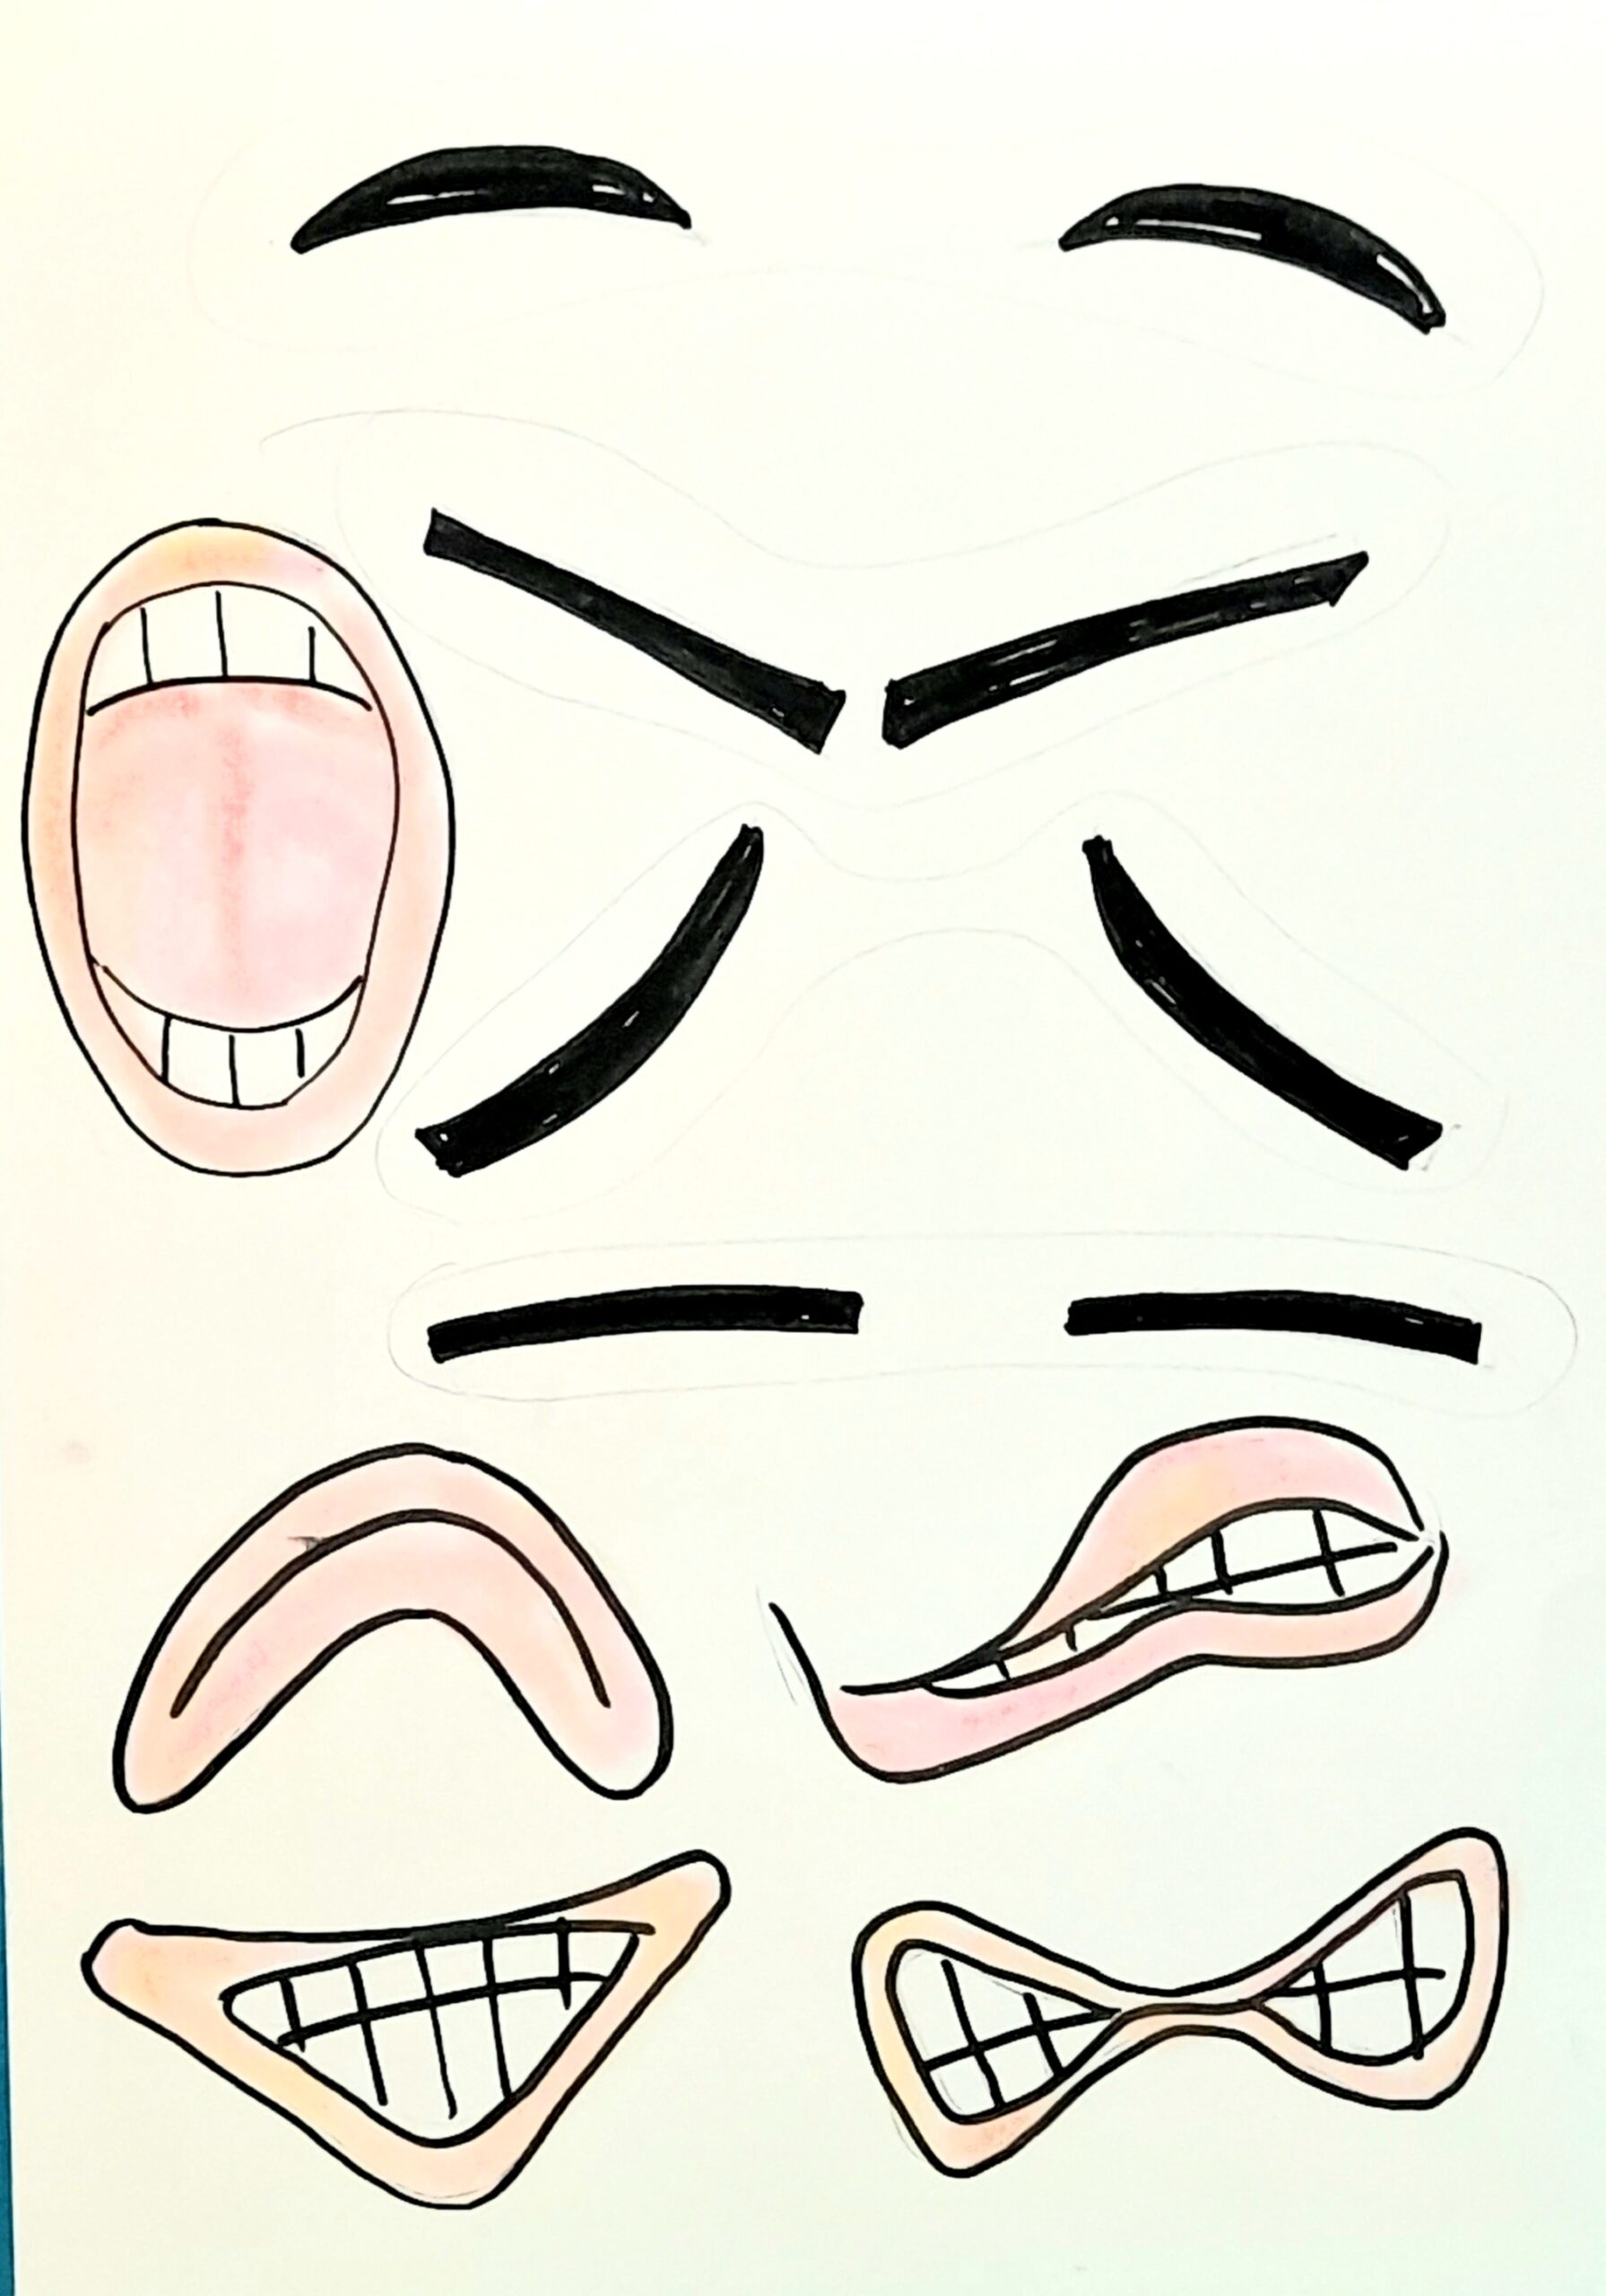
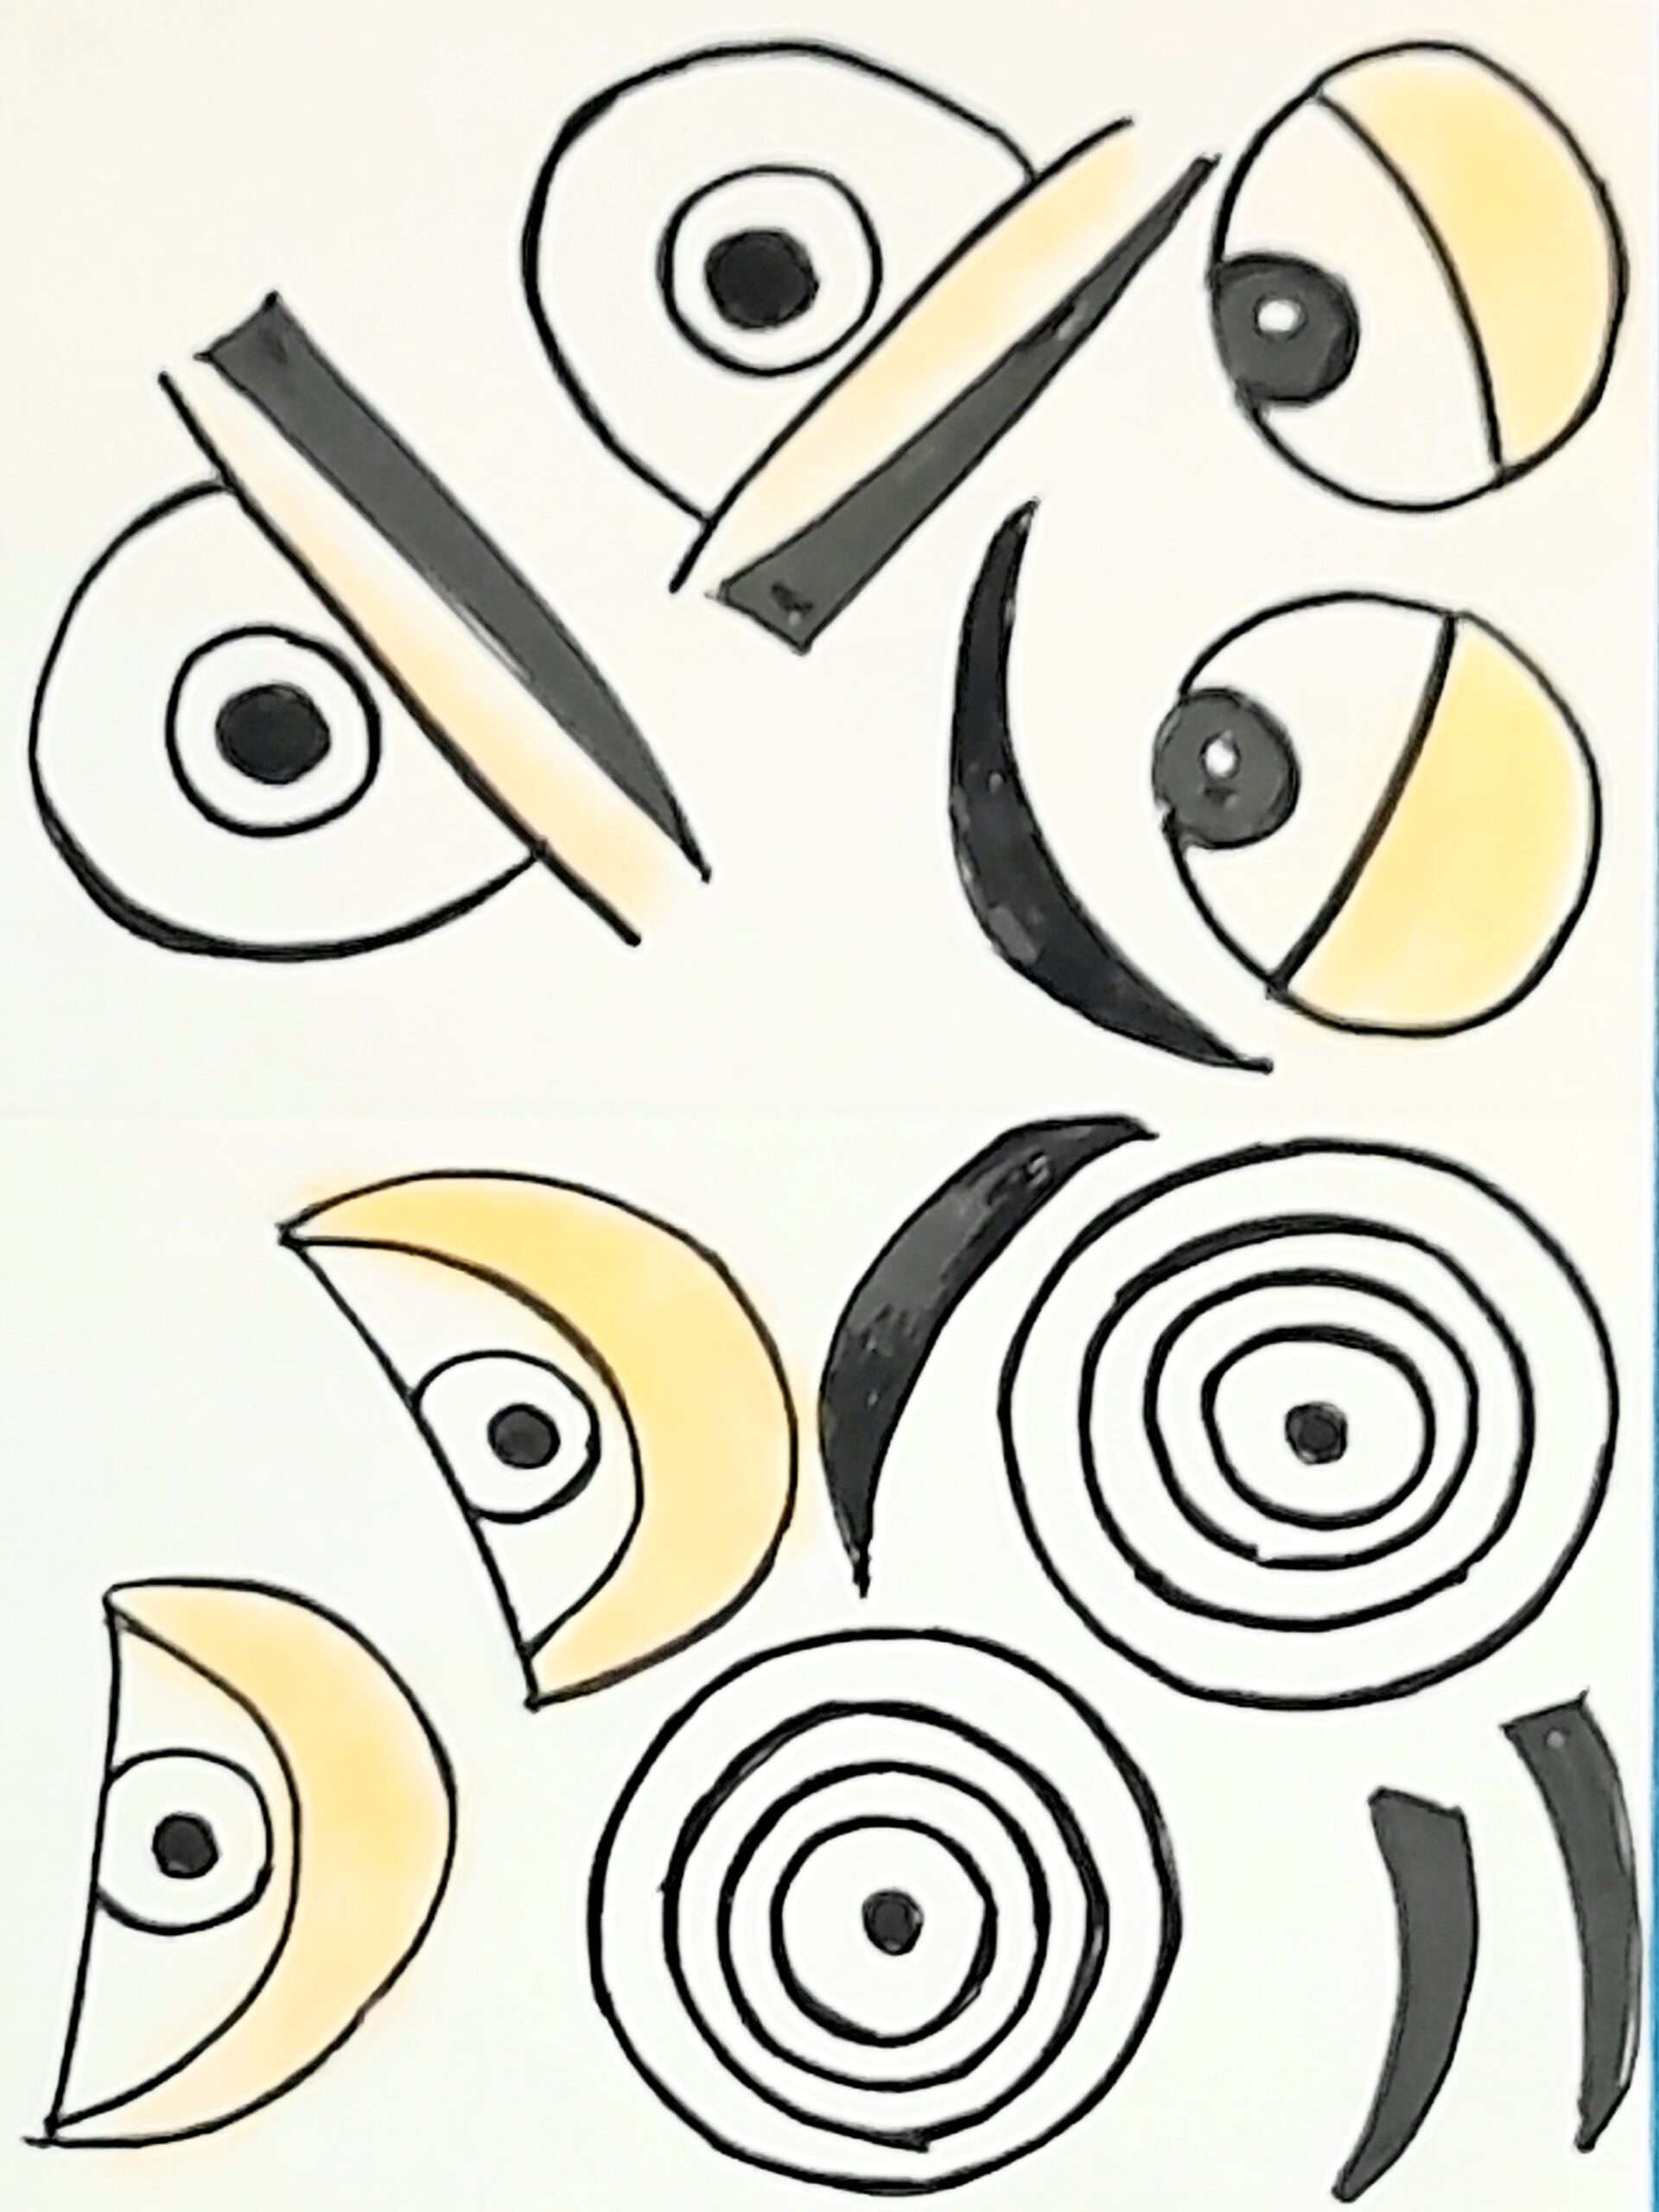
Showing kids emotions and expressions visually, works in my books for kids who find it
difficult to express themselves, this is a cool way to show how they are feeling!
Thanks for your comment and o’h glad you liked the templates!
Happy Crafting.
Julia.?
I always loved Mr. Potato Head in the Toy Story movies and I didn’t know that he was already known before that. I love the names for him and the other veggies, what a great way to get children to appreciate their veggies more 🙂
Katie the Carrot, Oscar the Orange, Pete the Pepper and Cooky the Cucumber, Darth Tater and Optimash Prime. I love it!
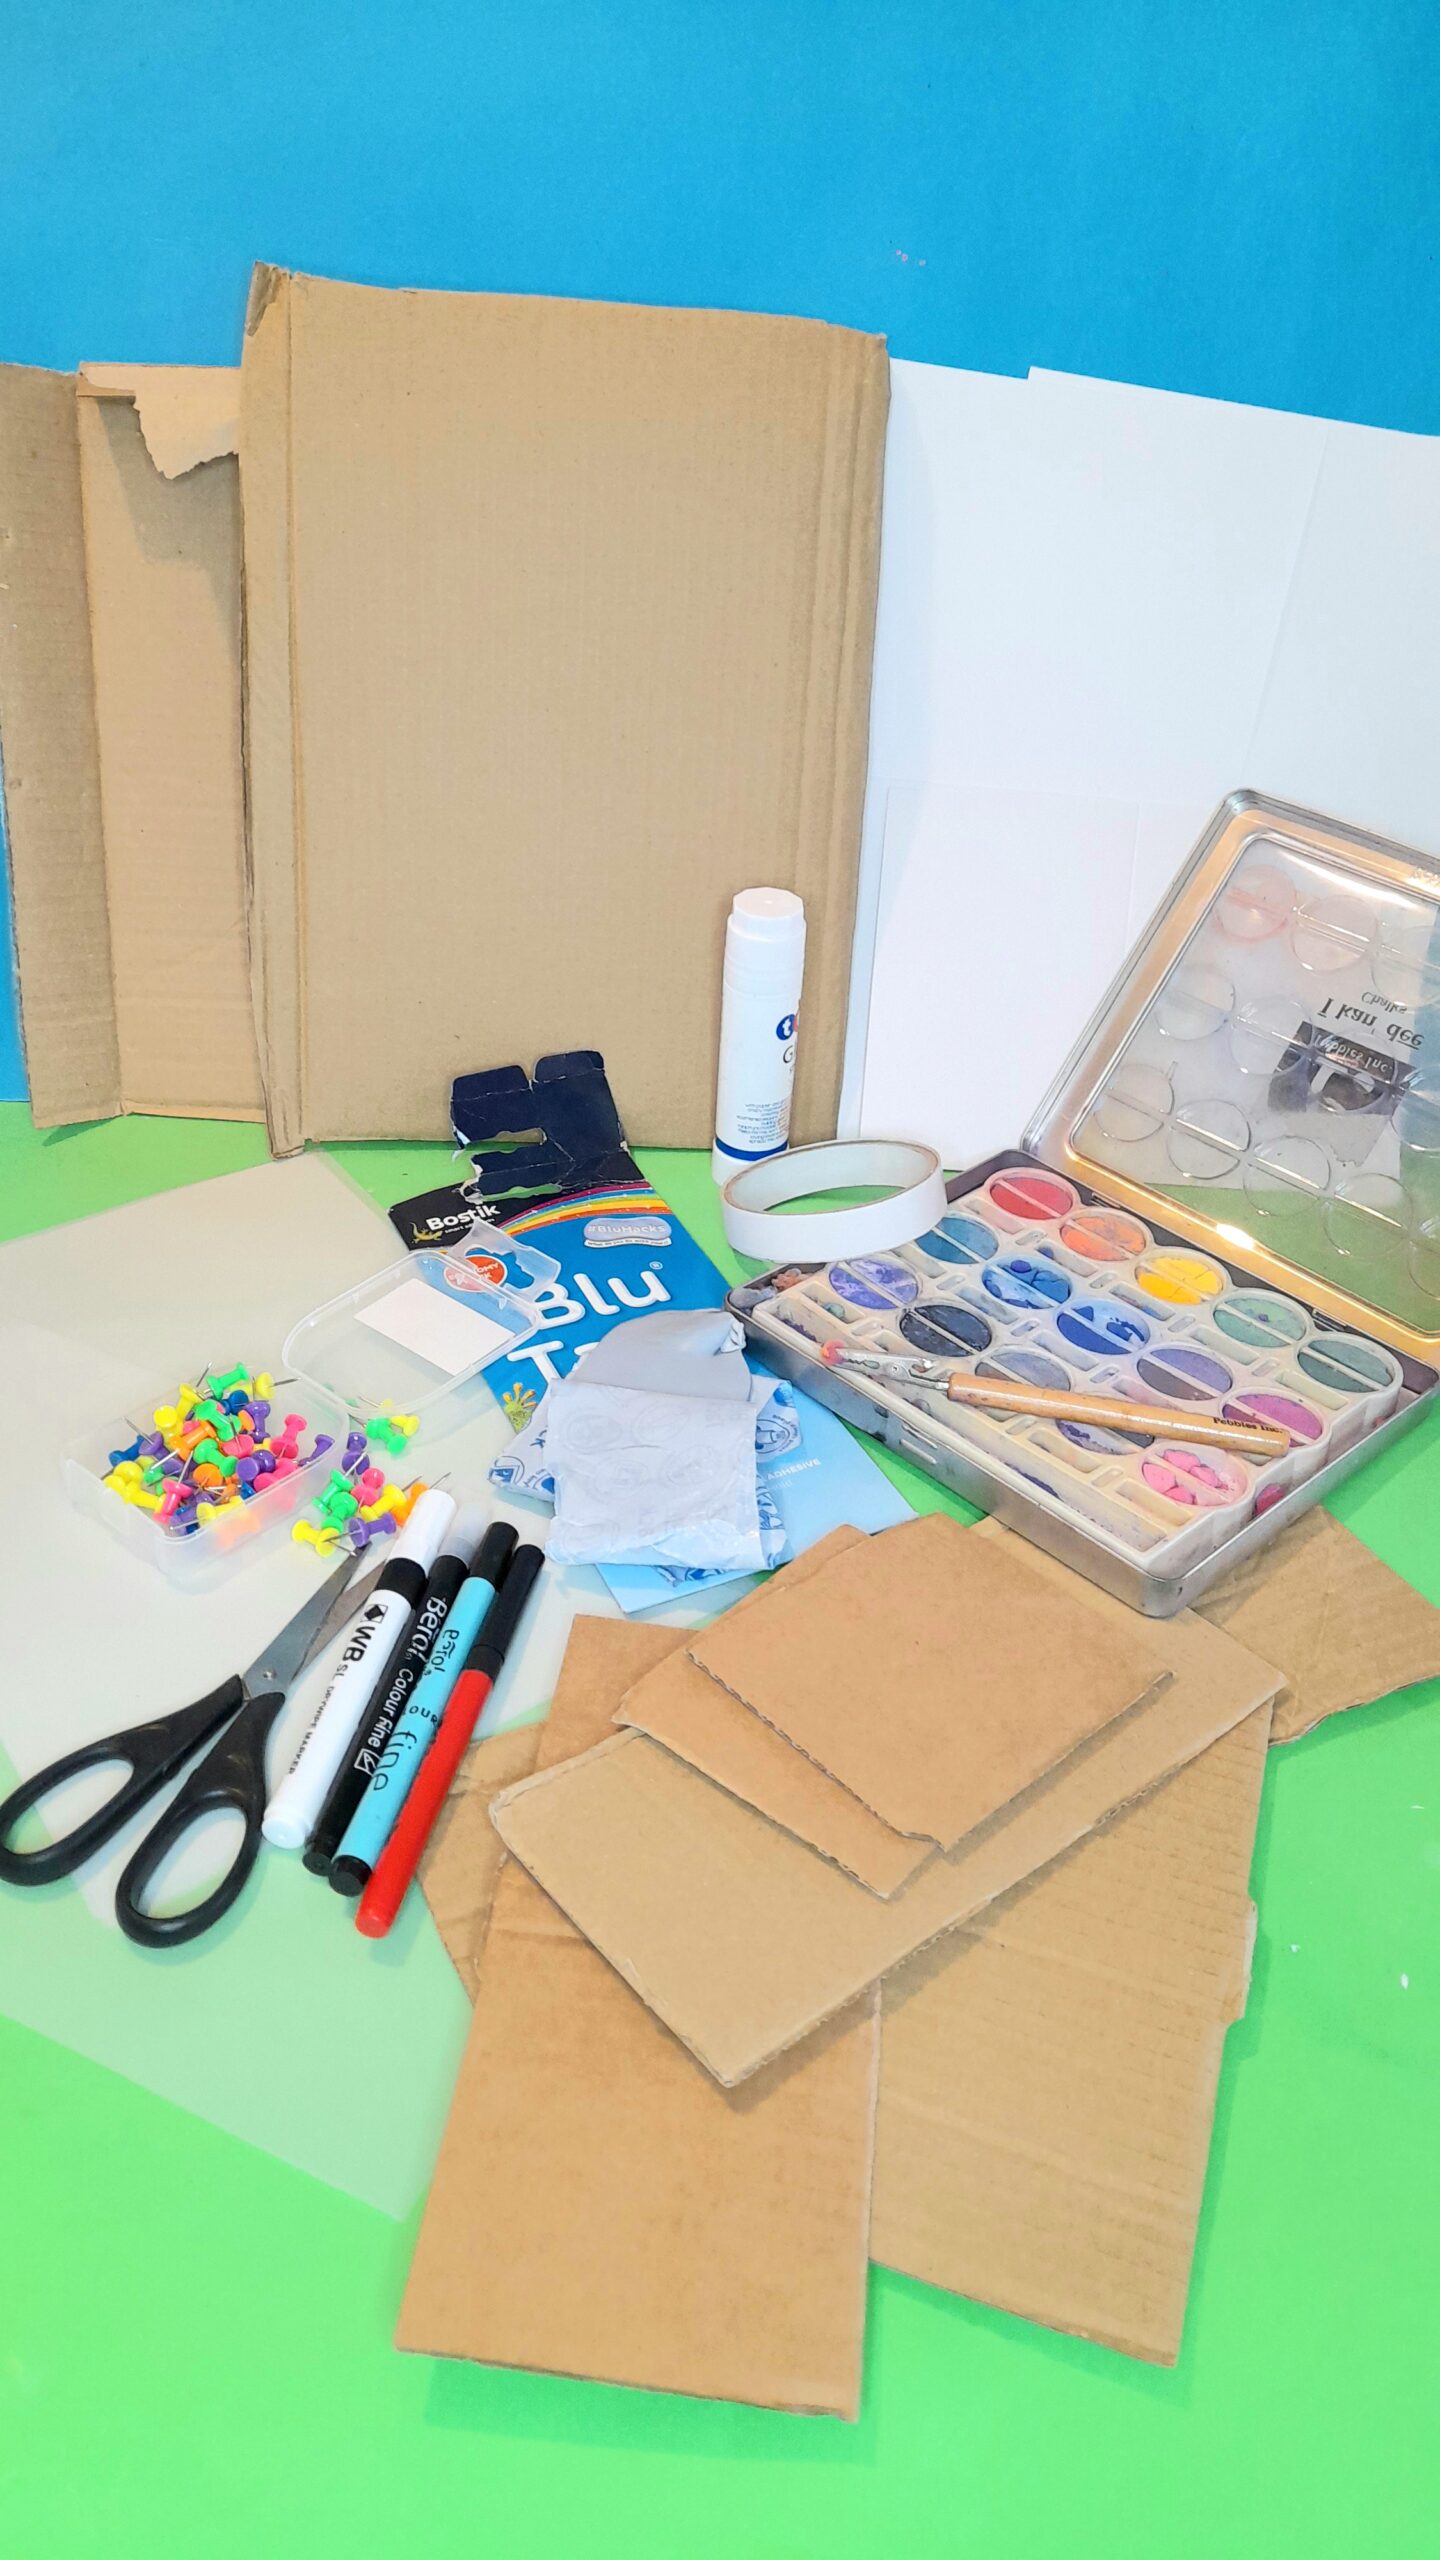
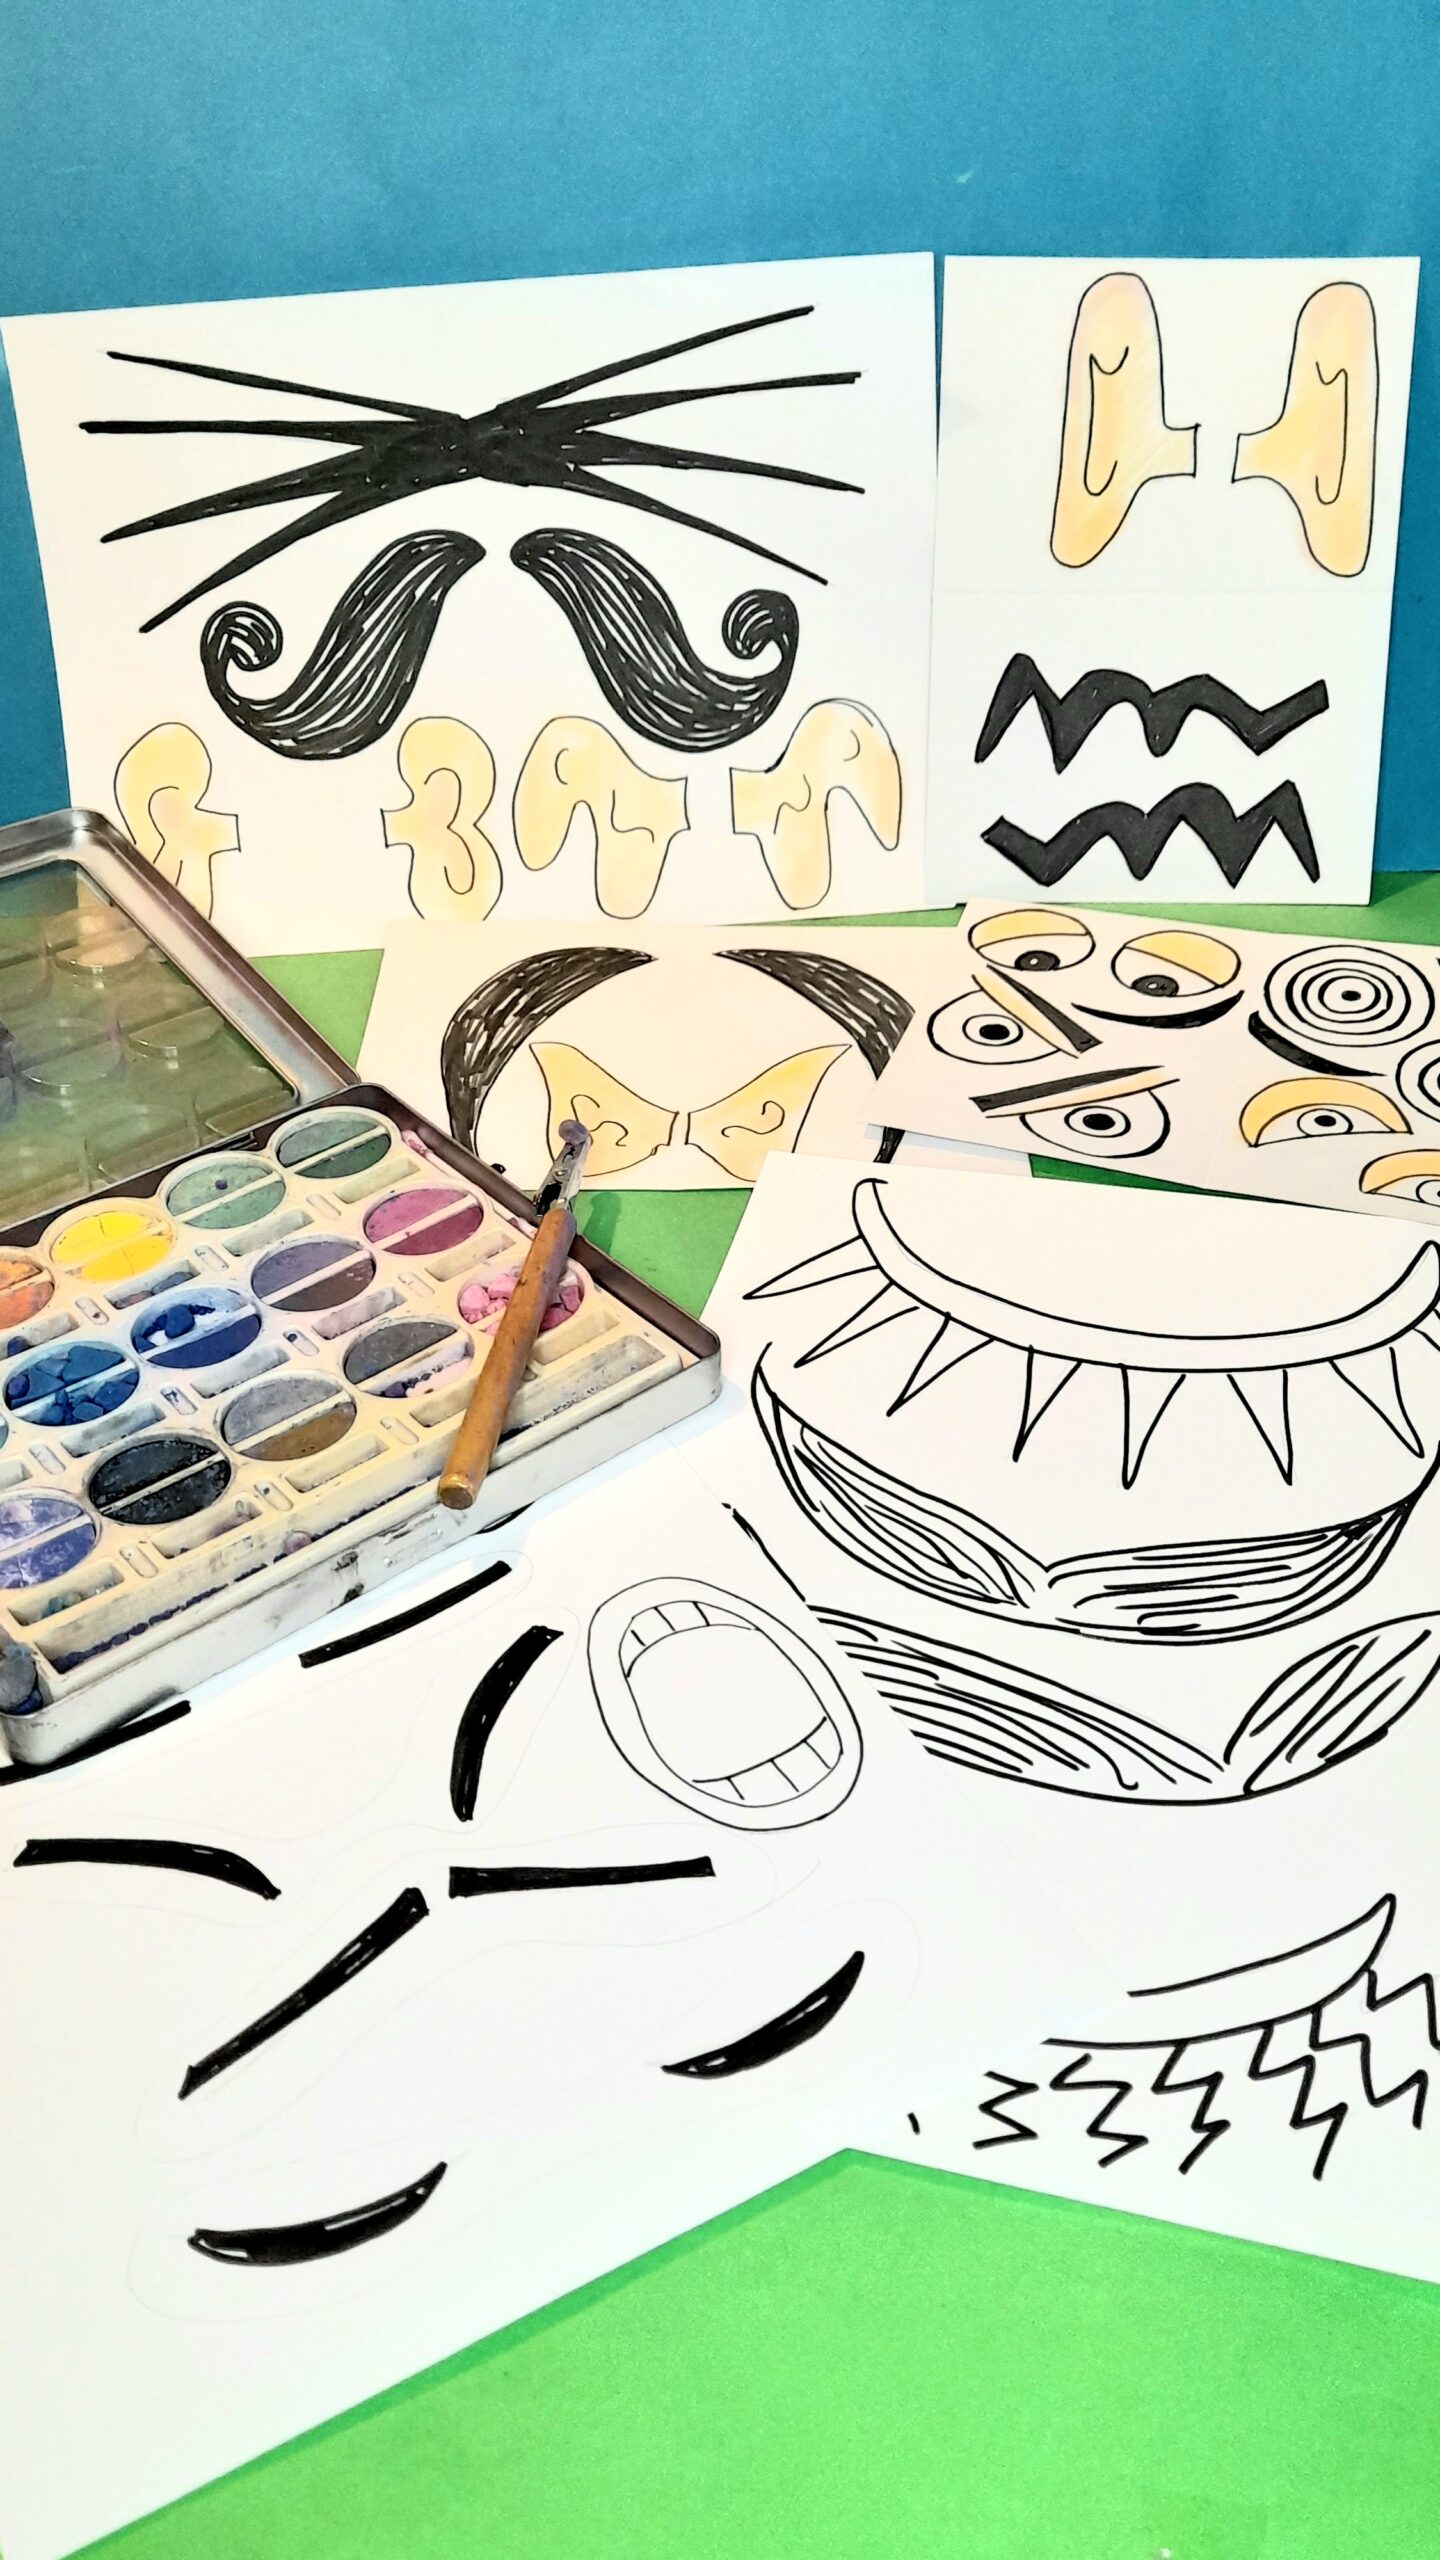
It’s great to see how easy it is to make the different facial expressions for Mr. Potato Head, and you don’t need to spend a lot of money on materials. Thanks for sharing this!
It’s my pleasure Christine. Mr Potato Head toy kind of disappeared
over the years and it took the Toy Story movies to bring him back
again.
This is an excellent toy for children to learn with, whether it’s
facial expressions or what goes where, but hey who cares where they
put parts it’s a learning curve.
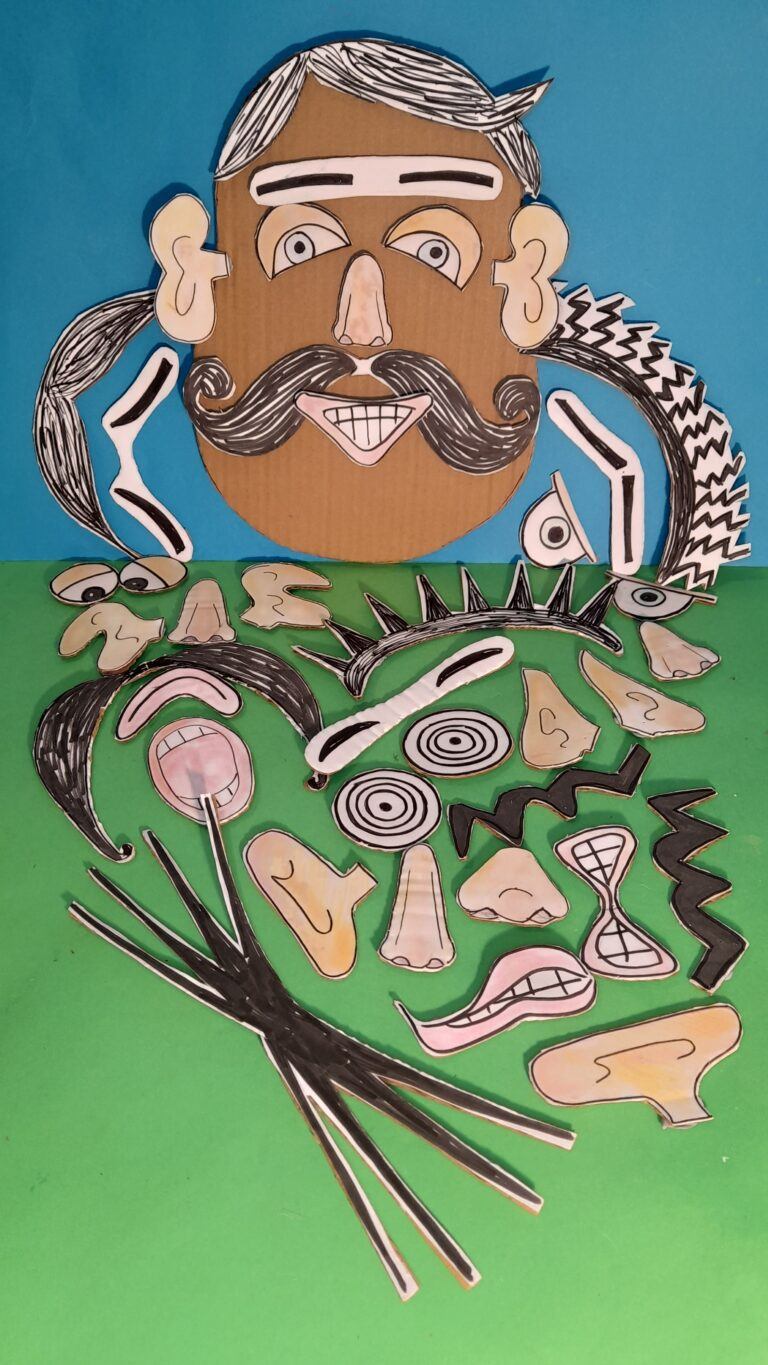
Crafting a two-dimensional version, also works and you get to use all
that throw-out packaging in a inventive way for kids to learn.
Thanks for your comment.
Happy Crafting.
Julia?