SENSORY CRAFTS FOR KIDS!

Fancy making a fun, easy colourful,Tablet?

Thought about recycling your throw-out packaging into a fun sensory tablet?

What’s popular today in the techno world for kids!

Don’t you think it’s the thing these days, that practically all kids own something techno, especially a laptop or a tablet?

They are quite the range now, where kids do their homework or, play games with so many apps now available!

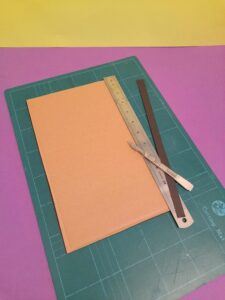
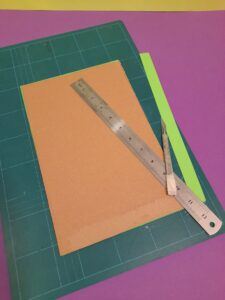
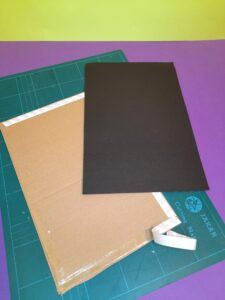
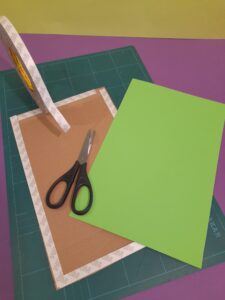
In this post I will show you how to make sensory crafts for kids! Going really back to basics and working with ‘touch’ and no electrics, Wi-fi or buttons to press, just good old crafting with simple throw-outs and some art resourses!

Let’s continue……

Also the worst punishment you could give a child is to confiscate their precious form of entertainment, that being their techno gadget! O’h dear, well whatever works!

It’s funny how they will then listen to you, hopefully!!!

For the rest of us, adults!

Even for the grown ups they are a means to store all our lovely pictures on.

Not forgetting surfing the net and doing our research on! Long gone are the days where we use to have a dictionary on hand or an encyclopaedia. ‘What’s that?’ I hear the young ones ask.

What’s that?

Well, for those who need a reminder, they are rather large books, that you would look up information with.

The dictionary would be used to look up words, for their correct spelling and definition and the encyclopaedia would provide you brief information about many subjects.

What do you do with them?

You would need to store them on a shelf or book case or where you can have easy access to. 

Now they would probably be gathering dust and most probably have sadly been, passed on to some kind of charity.

You can always check out kids.kiddle.co there you will find various information just like using reference books.

Back in school!

I remember when I was back in primary school, I won an award and I could pick any book I wanted and you know what I picked? a humble dictionary which I kept in my school bag and enjoyed looking up any word I had trouble with its spelling.

Nowadays, we would Google it!

Internet is in our lives!

Everything now is but a button away. Googling it or making a quick buy with on-line shopping, like Amazon or Ebay or top of the notch retail shops.

In anycase, what would we do without them and o’h, we musn’t forget our smartphones, the smaller versions of a tablet and more!

Do we need post boxes?

Checking our emails, checking, checking and I have wondered this being the case, will we still need to send letters anymore?

Alot of our mail is going paperless, we are trying to go green, which I quite understand.

What’s on-line?

Which brings me to social media, like Facebook, Instagram, Pinterest, Twitter, TikTok and so on! We definately need our techno gadgets to log on to these platforms. 

So practically everthing is done on-line, even banking, making payments and communication with a relative far far way!
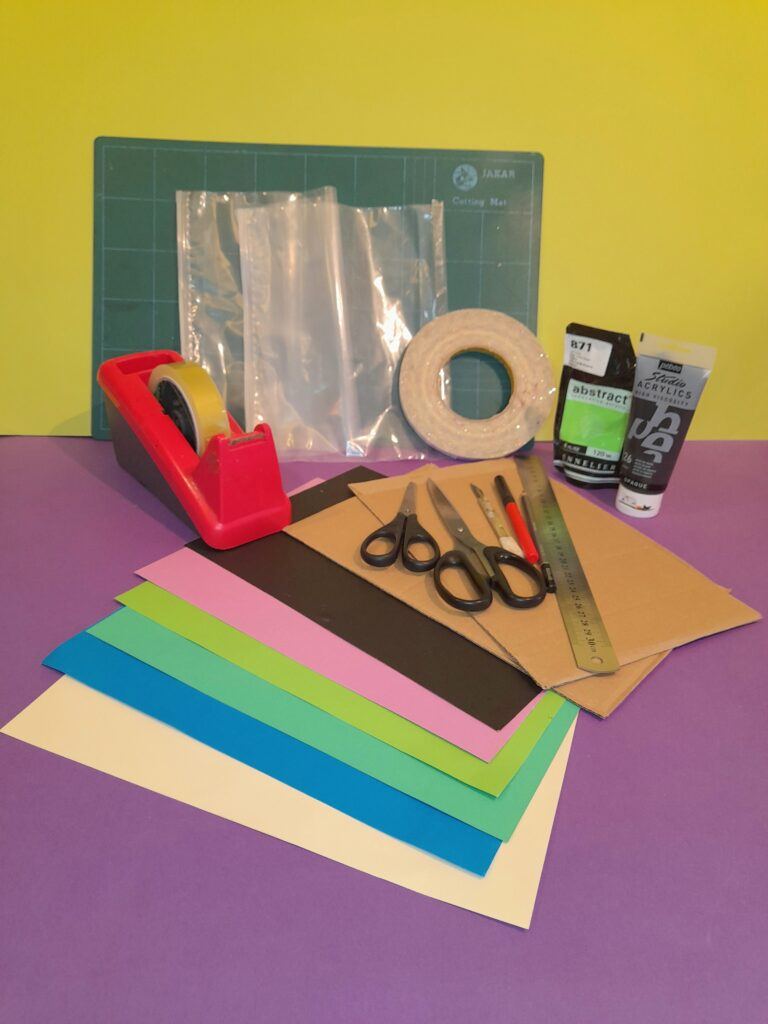
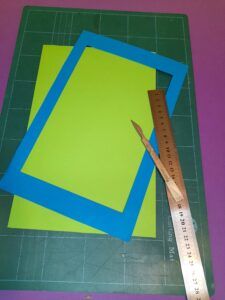
About this project!

In this project we are not going to have fancy buttons, or being connected to the internet, we are going to go very basic and very hands on.

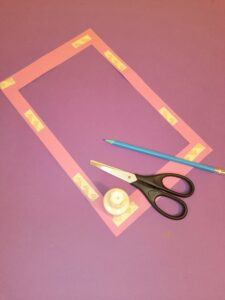
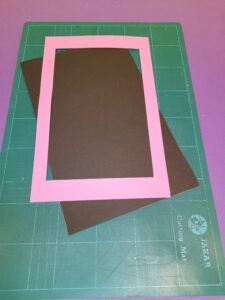
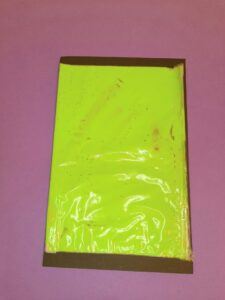
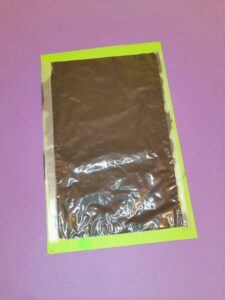
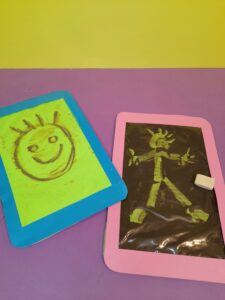
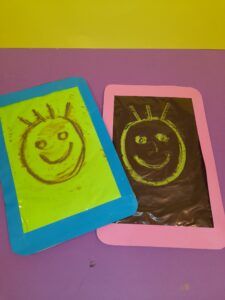
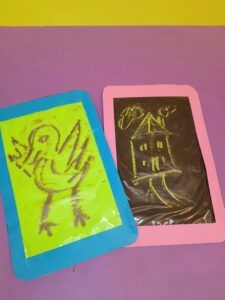
In this project we are looking to make ‘Sensory crafts for kids”

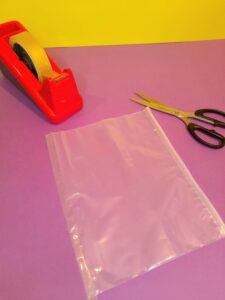
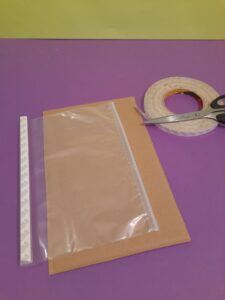
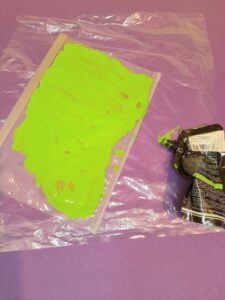
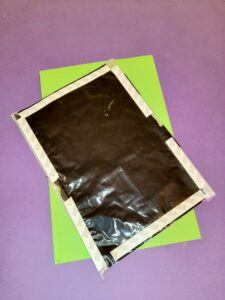
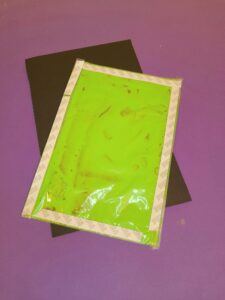
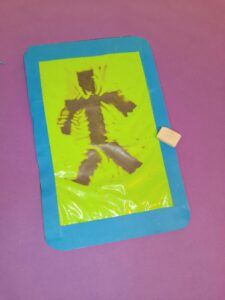
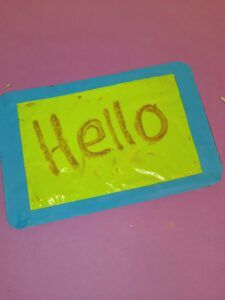
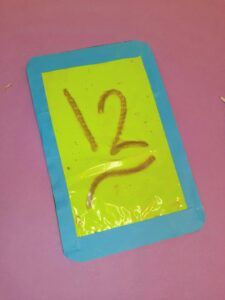
Simply using a finger to mark make, we are going to make a fun sensory tablet.

Ideal for the very young!

A scribbling tool, where your kid could do their first learning by applying pressure to a coloured surface and whoosh, like magic marks will appear!

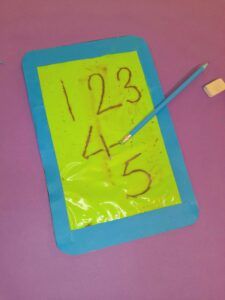
This would enable the younger kids, to develop their hand and eye co-ordination and fine motor skills.

The aim of a sensory tablet!

In this instance they would start using their finger and practice small movements and in a way this will eventually encourage them to mark make on paper, then they will progress in using chunky crayons, felt tip pens and so on.
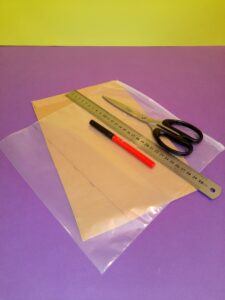
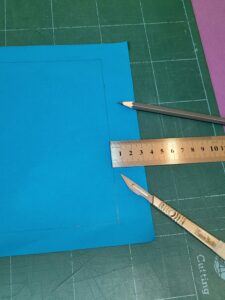
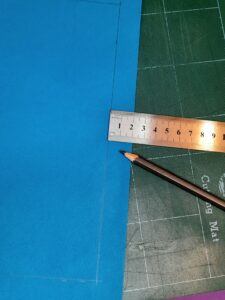
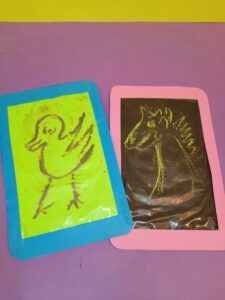
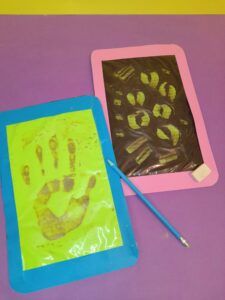
How to mark-make!

For the purpose of this project first start with a finger to get the feel of it, then use a rubber ended pencil which will make good clear marks. Also I found using the back of your finger nail gives a good impression, but try not to press too hard as this may damage the plastic bag, the same with any tool you use be gentle, but firm.

This activity is like magic writing for the younger ones, of about age 2 and upwards.

Sensory and what's involved!

This project is for kids to learn how to mark make, touching the surface of a springly like plastic and beneath it, there will be a different colour so when your child starts to make marks the paint with seperate, hence showing the different colour beneath it.

Build up confidence!

A nice surprise, even if it’s a silly scribble, or a number or letter it still has a impact on your kid, therefore giving them confidence, first little steps in a new world of communication!

Before we move on here is a Heads up for parents and some advice!

There is alot of good advice here and sometimes, as parents or carers of very young children we have to be, just a bit more mindful!

So are you ready to start?

What you need to make your sensory tablet.
Resourses!
  • 2Xpacking card approx A4
  • 2 sealable /zip pouches.
  • Acrylic paint black/lime.
  • Doublesided tape.
  • Coloured card (for frame)
  • Scalple/ruler/metal ruler.
  • Bright coloured papers (for base)/Scissors.
  • Cutting board.
  • Little pot of water.(not shown)

Before we start, just a brief note.

I will show two colour versions, so you can see how different they are, you would only need to make one.

One tablet with lime acrylic paint and a black base and the frame will be turquoise.

The other tablet will have black acrylic paint, with a lime base and a pink frame.

So here goes!

Wasn’t that fun and easy to make?

Some useful tips!

Seek packaging card that is tougher than normal, so when you press down, it doesn’t cave in.

Or stick 2 pieces together of same size card with double sided tape.

It might be easier to cut shorter pieces of double sided tape when sticking the frame on the board, it will be easier to pull of each backing tape.

Pull off partially the backing of the double sided tape, when sticking down because, if you make a mistake you have more of a chance to pull it back off.

I chose to use the flaps of a packaging box, they were about A4 size, but you can work with smaller sizes or squares, just remember it should also accommodate the size of the sealant bag within it.

In the image carousel I demo how to reduce the size of a sealant bag, as it was too big, you can do the same if bags are too big, or work with ever you have, just marry it up with a slightly bigger piece of packaging card.

Acrylic paints are of your choice, you can stick with black as your main, or any bright colour.

If you are worried about using a scalpel, you can opt out for a stanley knife, or even a pair of scissors, although cutting out the inside of a frame might be easier with a blade.

Children will need adult support with any sharp tool.

If this is too hard for your child to handle, then cut strips of card and stick them around the sealant bag instead, as long as you can cover up the edges of the bag with paint in it, so it would look more appealing.

Experiment with how much acrylic paint you use inside your sealant bag, you will need enough to spread across the whole bag edge to edge.

You may need a tiny drop of water to thin out the acrylic paint if it’s too thick, but don’t add too much water as this will make it too runny.

Using brighter coloured papers as your base will work the best to glow through, when you start to make marks.

Find a small object to draw the rounded corners on the frame, so that it resembles that of a real tablet, but you can leave this bit out.

Something that may be of interest to you!

To take the worry out of what to do with your old gadgets, may I recommend this super site which will do everything you need when it comes to RECYCLING YOUR TECHNO items! 

Recycling your Gadgets!

The theme of this website is to try to use as much recycling material I can saved to make fun projects for kids, so by recycling we are doing our bit where we can, for the health of our plantet. 

Stop! don’t throw away your gadgets!

Before you decide to get rid of your gadget, think of this, an uncesessary disposal of possibly a still useful machine and or parts can be recycled.

What about your data?

Also not forgetting that your data would still be intacked, within your product, so that would need to be removed and once that is done, it can be of service to someone else………

So have you thought of selling it on?

An update coming soon!

Hey there, when you click on links in this post and you make a purchase, I may earn a small commission that l can use towards resources (other than throw-outs) for project making within my website😀

(affliate disclosure)

To Conclude!

Sensory crafts for kids! is a no brainer. I get to show you how to simply use parts of your packaging, with sealable bags and some paint to put together an easy, drawing tool for younger kids to dabble on!

Using their fingers to mark-make, in a spongy layer is a great touchy feeling tool, for especially the very young ones! 

The experience and learning is where we are at in this project, where kids can be as creative as they like with their learning, but through play.

The adult gets to model it first on the sensory tablet, wipe it out then the child will copy or do their version.

That’s it simple, but effective and it doesn’t have to be for hours, this activity can be for short bursts so your child can go back to it as many times as they like.

How cool is that, to have your kids scribble out little graphics, numbers, letters, or just shapes, or anything that takes their fancy!

So check out your recycle bag and save your brown packaging!

Leave a Reply

Your email address will not be published. Required fields are marked *