Here are three easy cardboard and inner tube love ideas for you and your kids to try out for this love month!
Simply check out your throw-outs,, and you can put together these fun love ideas you and your kids could do over the holidays.
♥ It’s love month and valentines day, week, month is ♥ upon us and love is in the air! ♥
I thought long and hard on what I should present for a quick and easyish project to do.
The word L-O-V-E stands out, obviously because it’s valentines day and possibly something cute.
Cute I thought, well I adore penquins and they kind of look sweet when drawn in a fun way.
So maybe I will do a couple of these penquins to add to the project.
Next I need to find items in my recycle bag that I can use that work well with this project to make Easyvalentine crafts for kids!
I came across some small emptywhite boxes that held catfood pouches and some packaging card and finally cardboard toilet innertubes.
THIS IS WHAT I PLAN!
I am looking to make the word L-O-V-E and there are two ways to show this.
First wayis the easiest is to use the cardboard toilet inner tubes.
These tubes can be easily cut into the shape of the letters and I will make a couple of penquins to go with the word, also made from inner tubes.
Second way is to use the empty white boxes, that will be the blocks and the base that hold strips of cardboard letters, which I will explain later on.
But first what is valentine about? Who or what represents it and when or where did it originate from. let’s take a look at this short video to tell us more.
NO TIME TO WASTE, LET’S GET GOING!
WITH OUR EASY VALENTINE CRAFTS FOR KIDS!
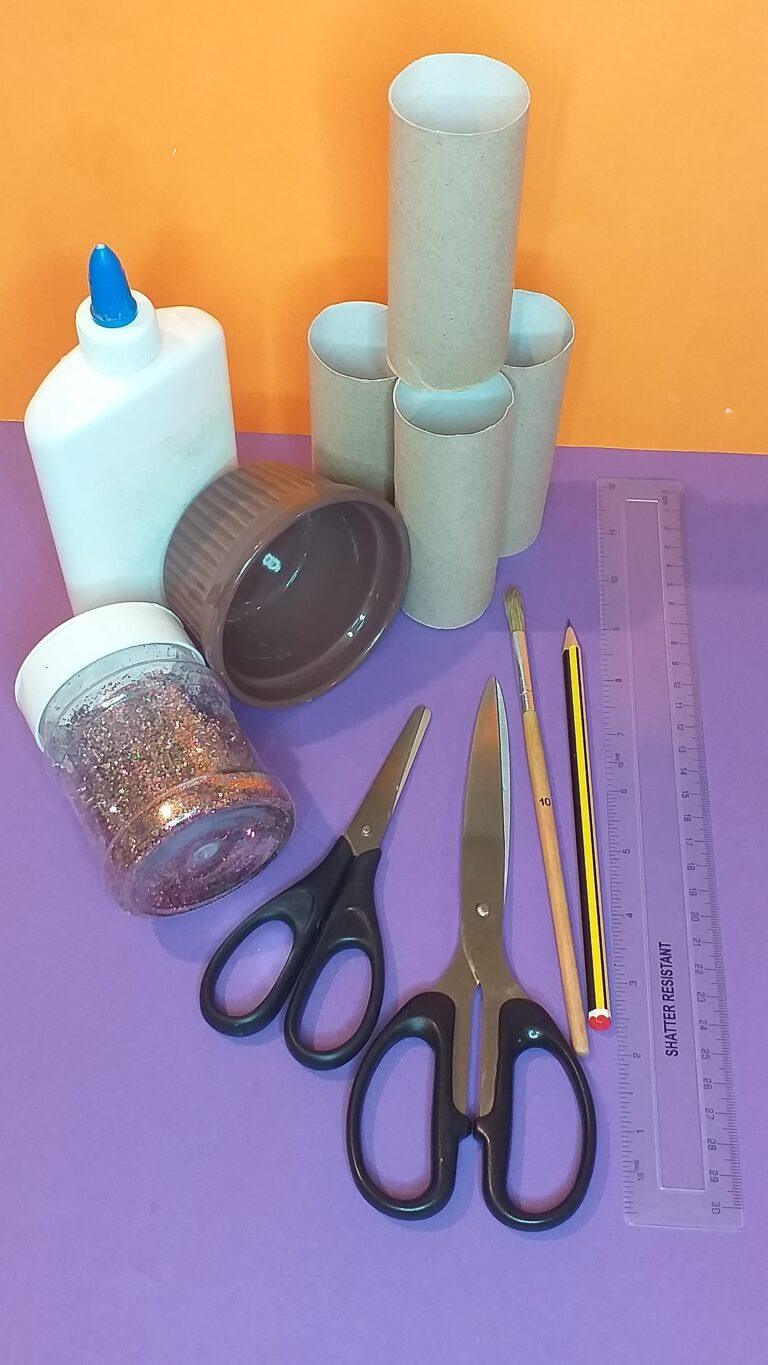
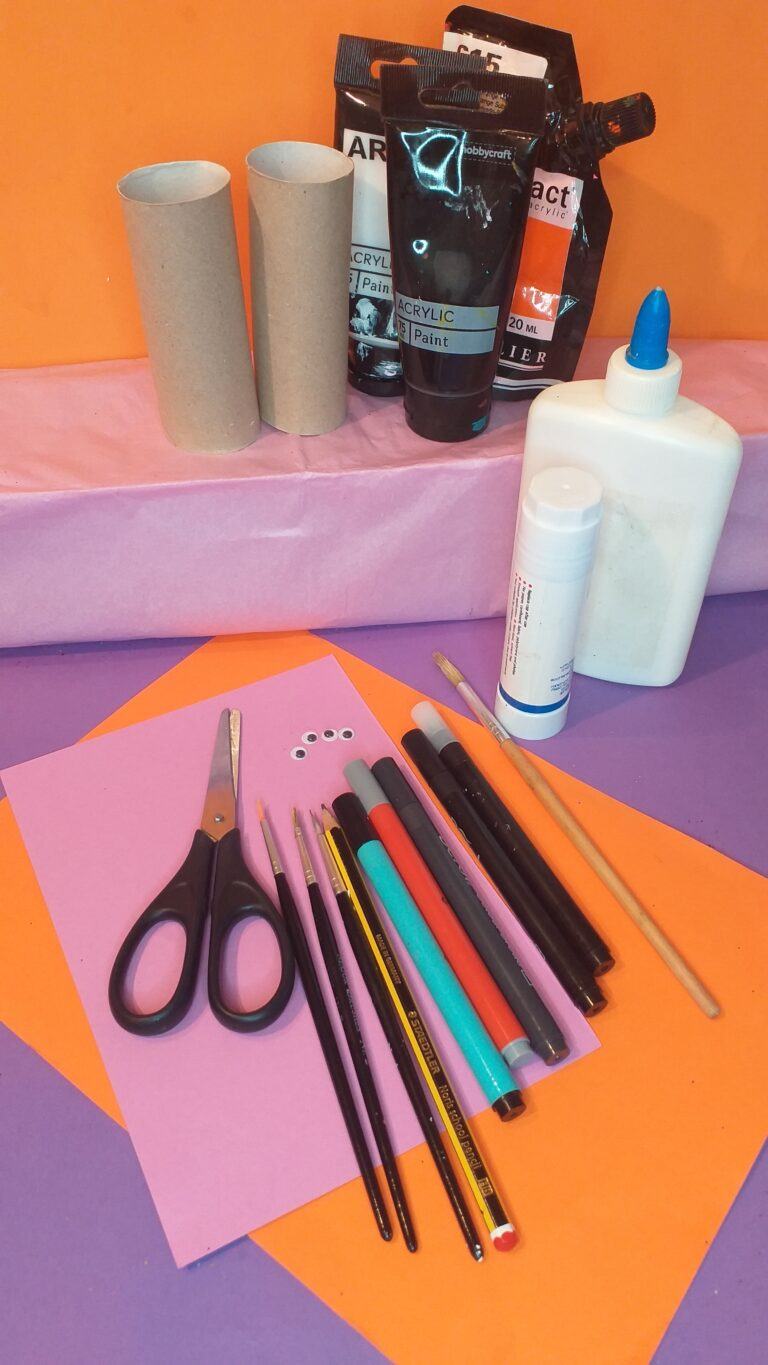
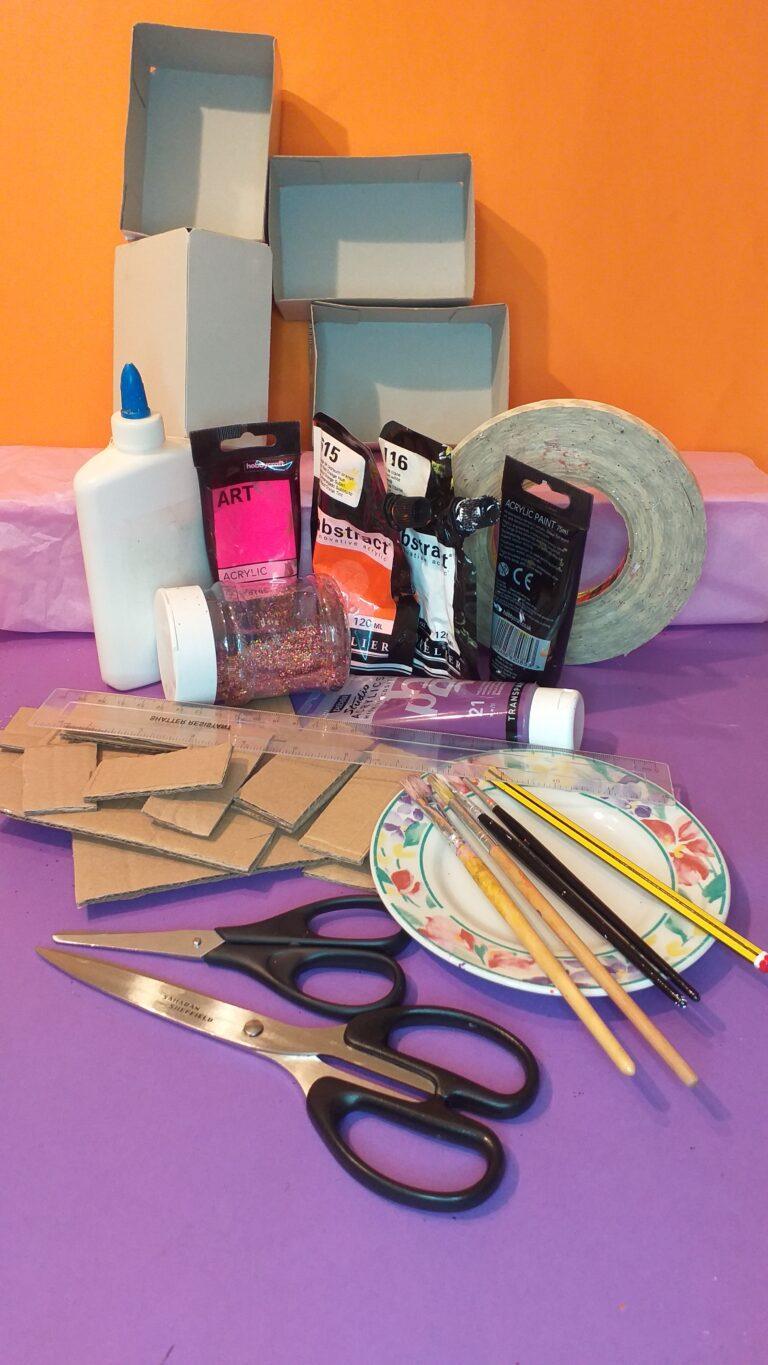
RESOURCES!
4 Cardboard inner tubes. (some spare if you make a mistake.)
PVA glue/small pot.
Large scissors/small scissors/Ruler.
Stapler. (not shown)
HB Pencil.
Double-sided tape. (not shown)
Paintbrush. (fine)
Multi-coloured glitter.
Acrylic paints (not shown)
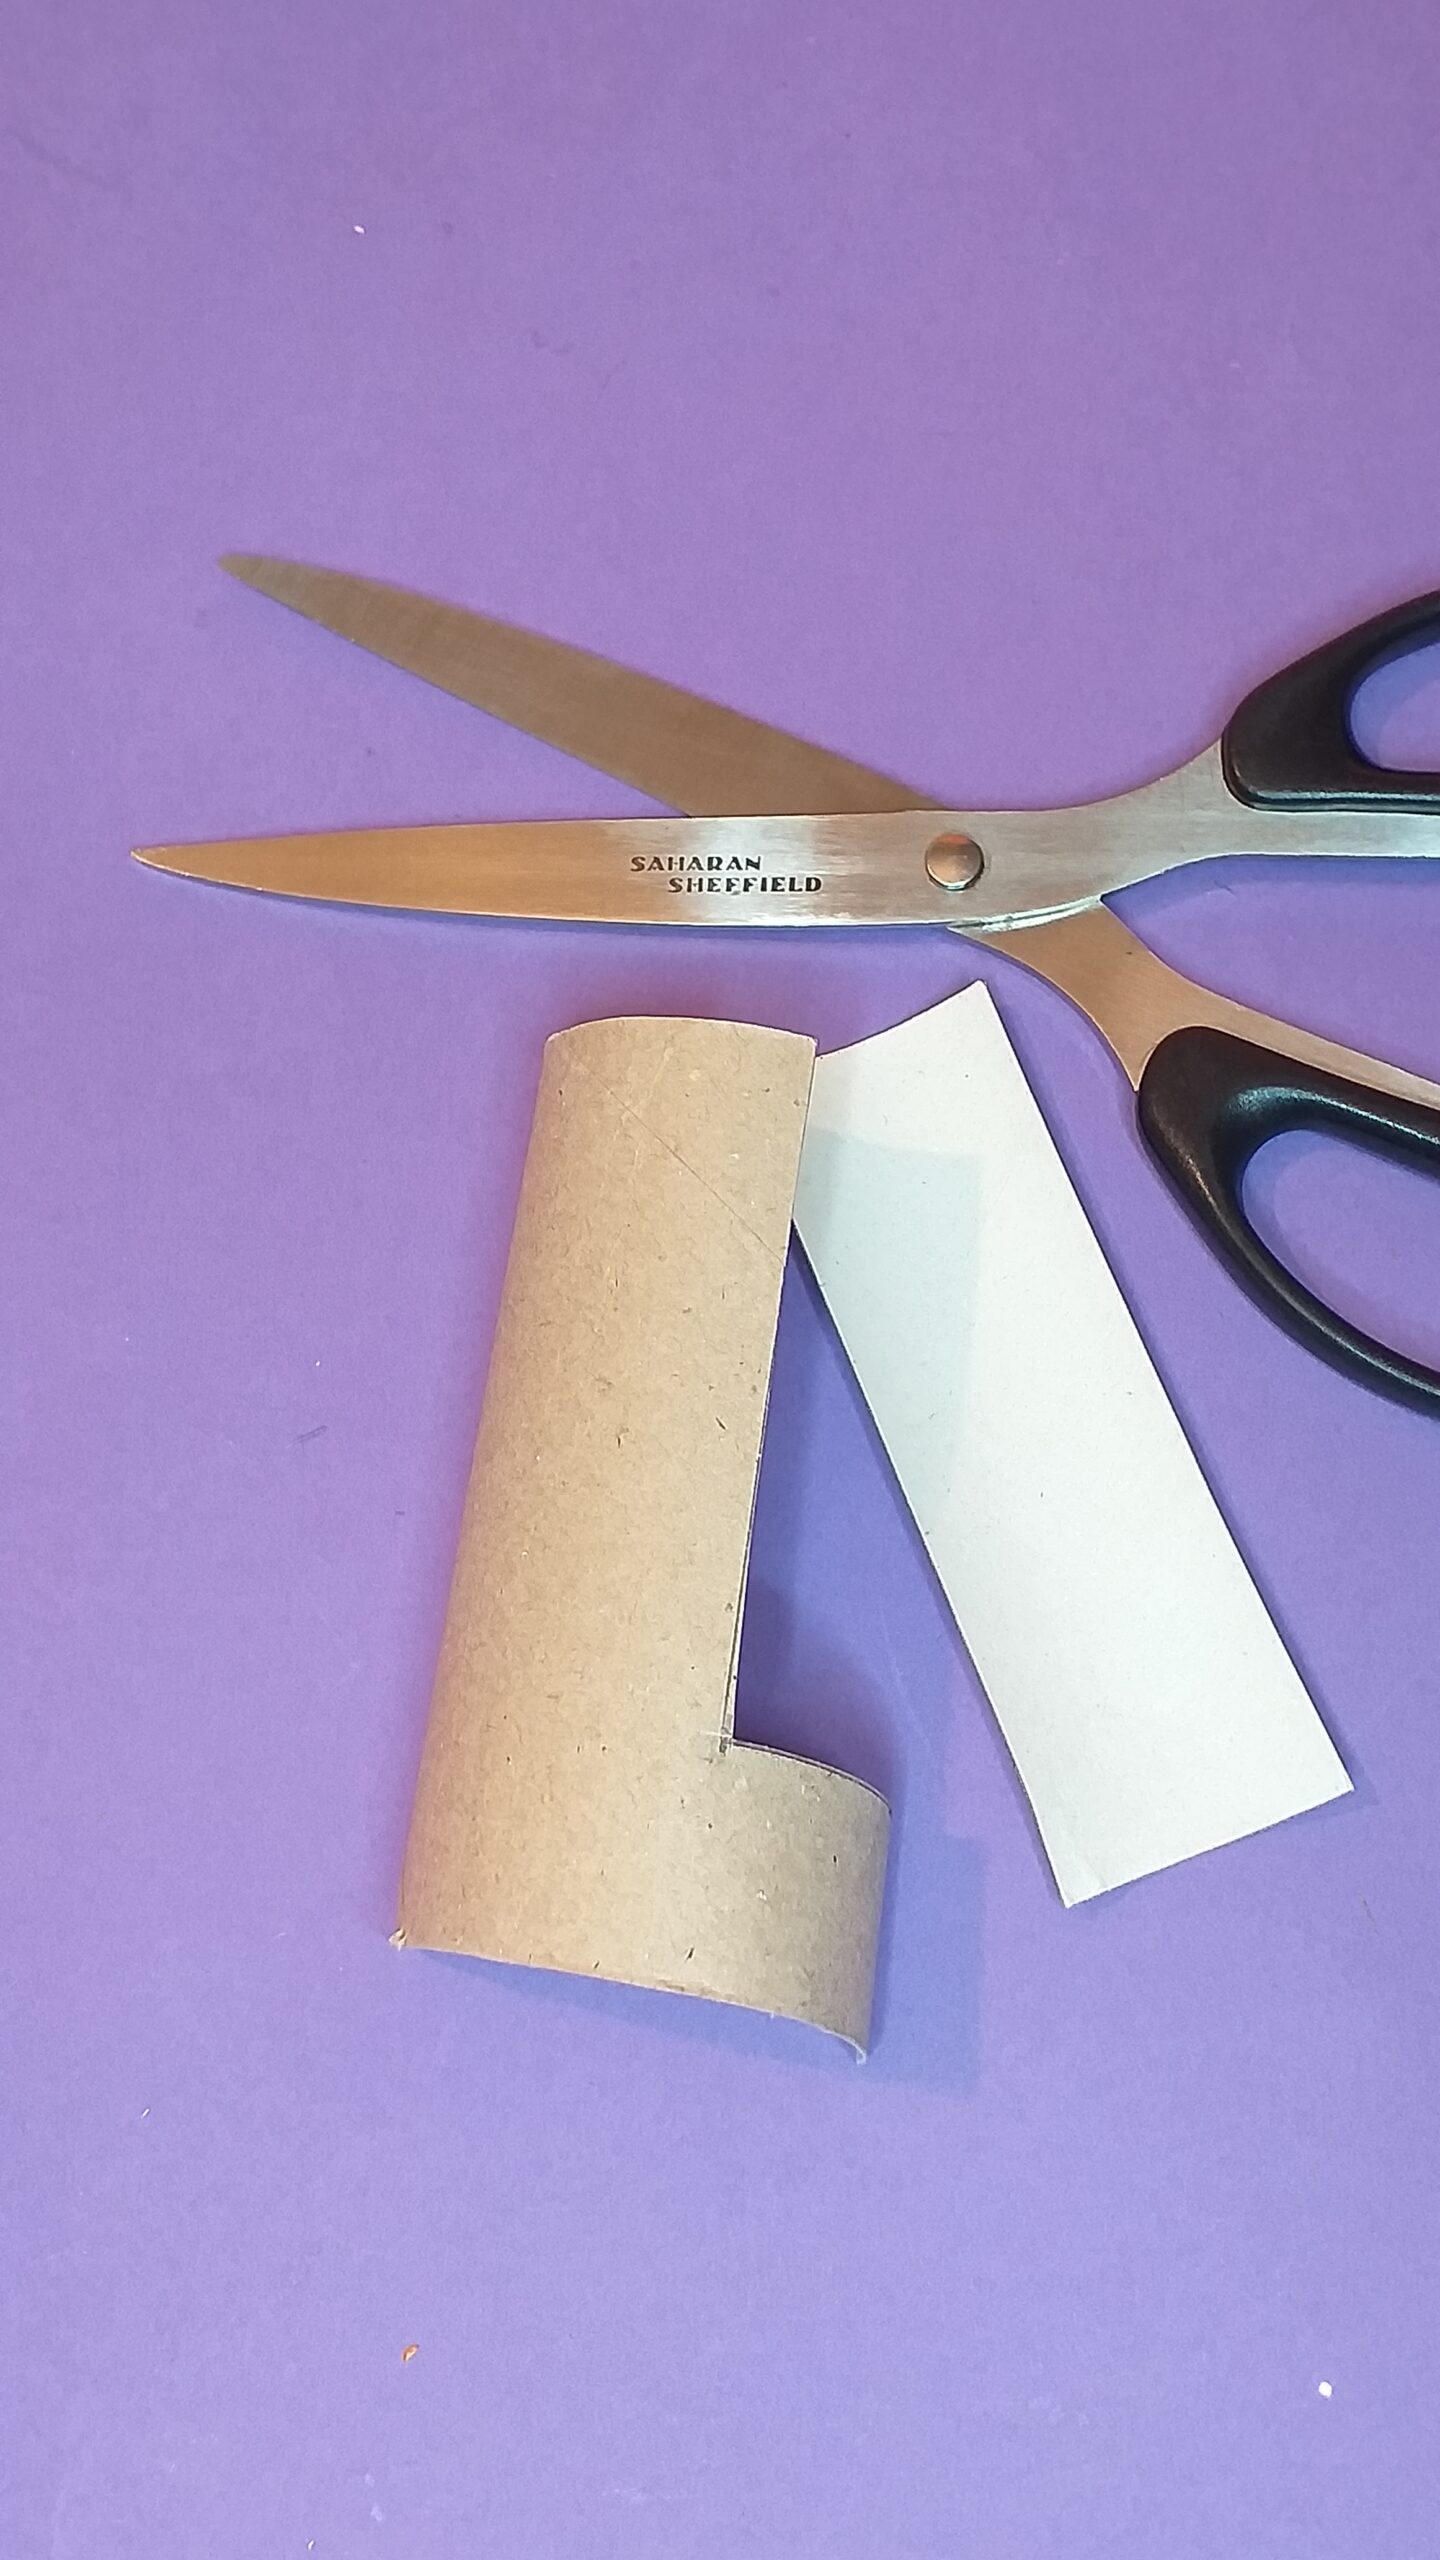
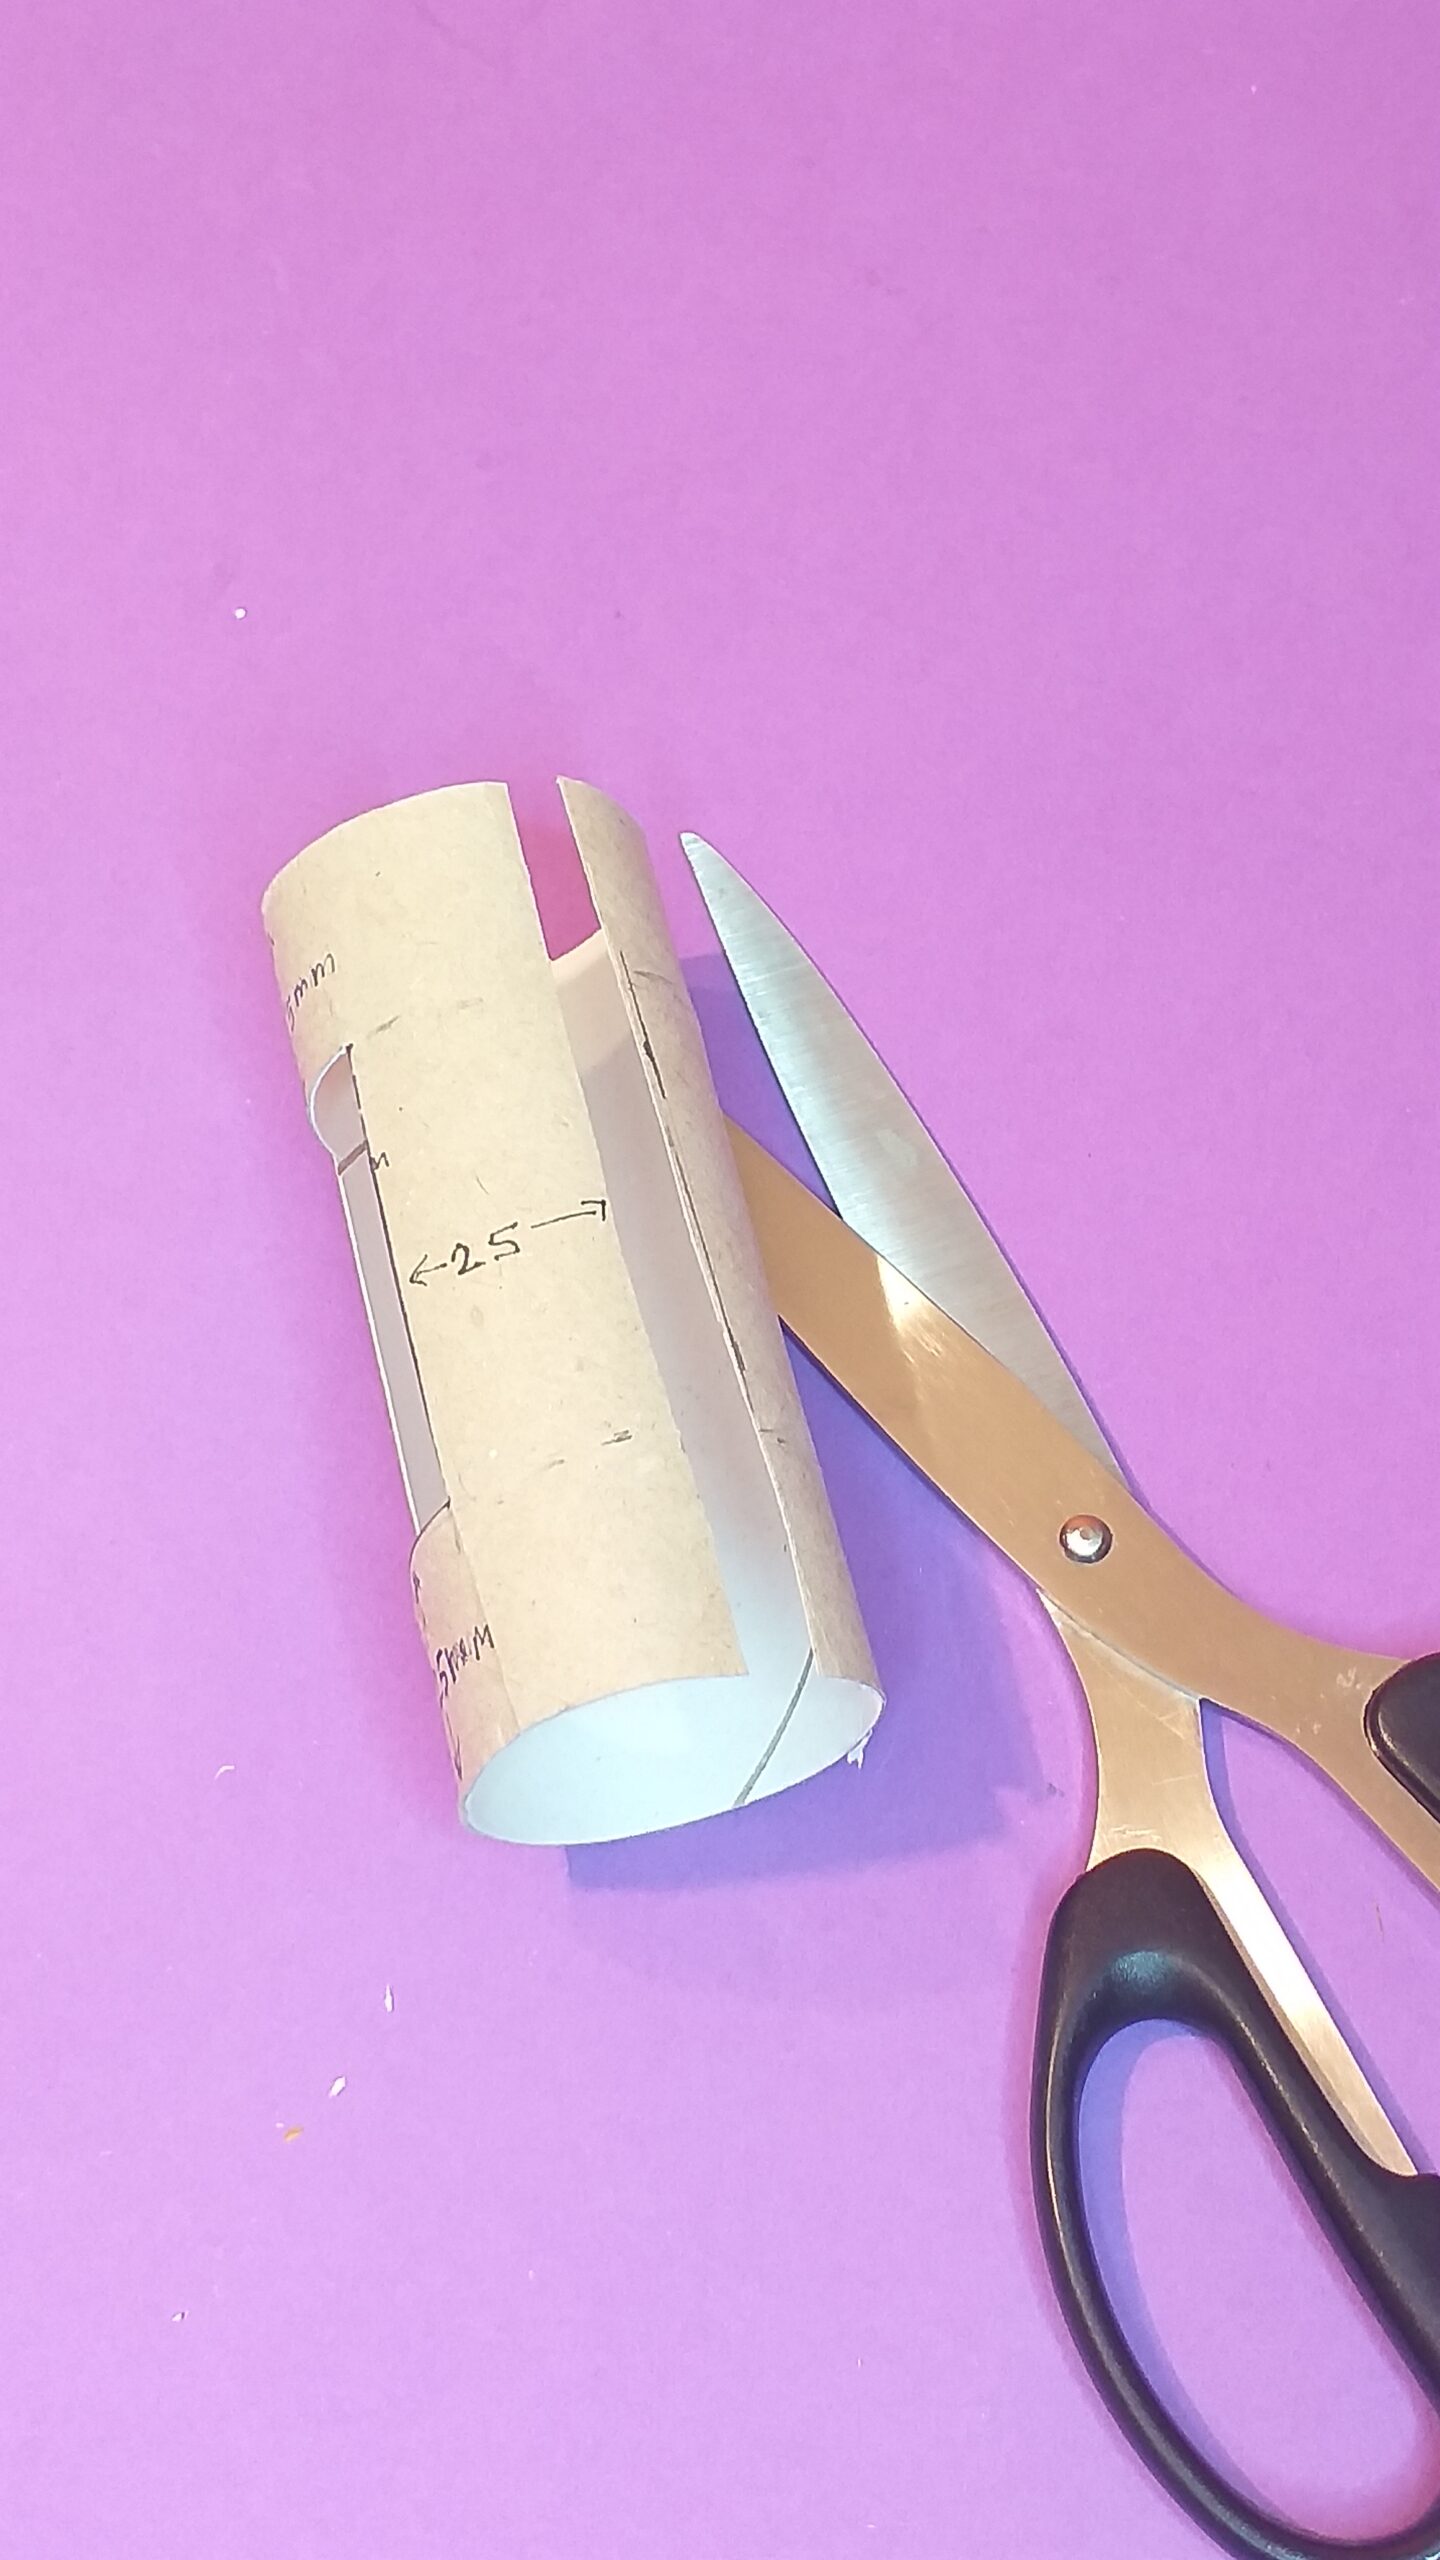
1) Measure 25mm bottom up.
2) Cut ‘L’ shape and cut away back part so L is free standing.
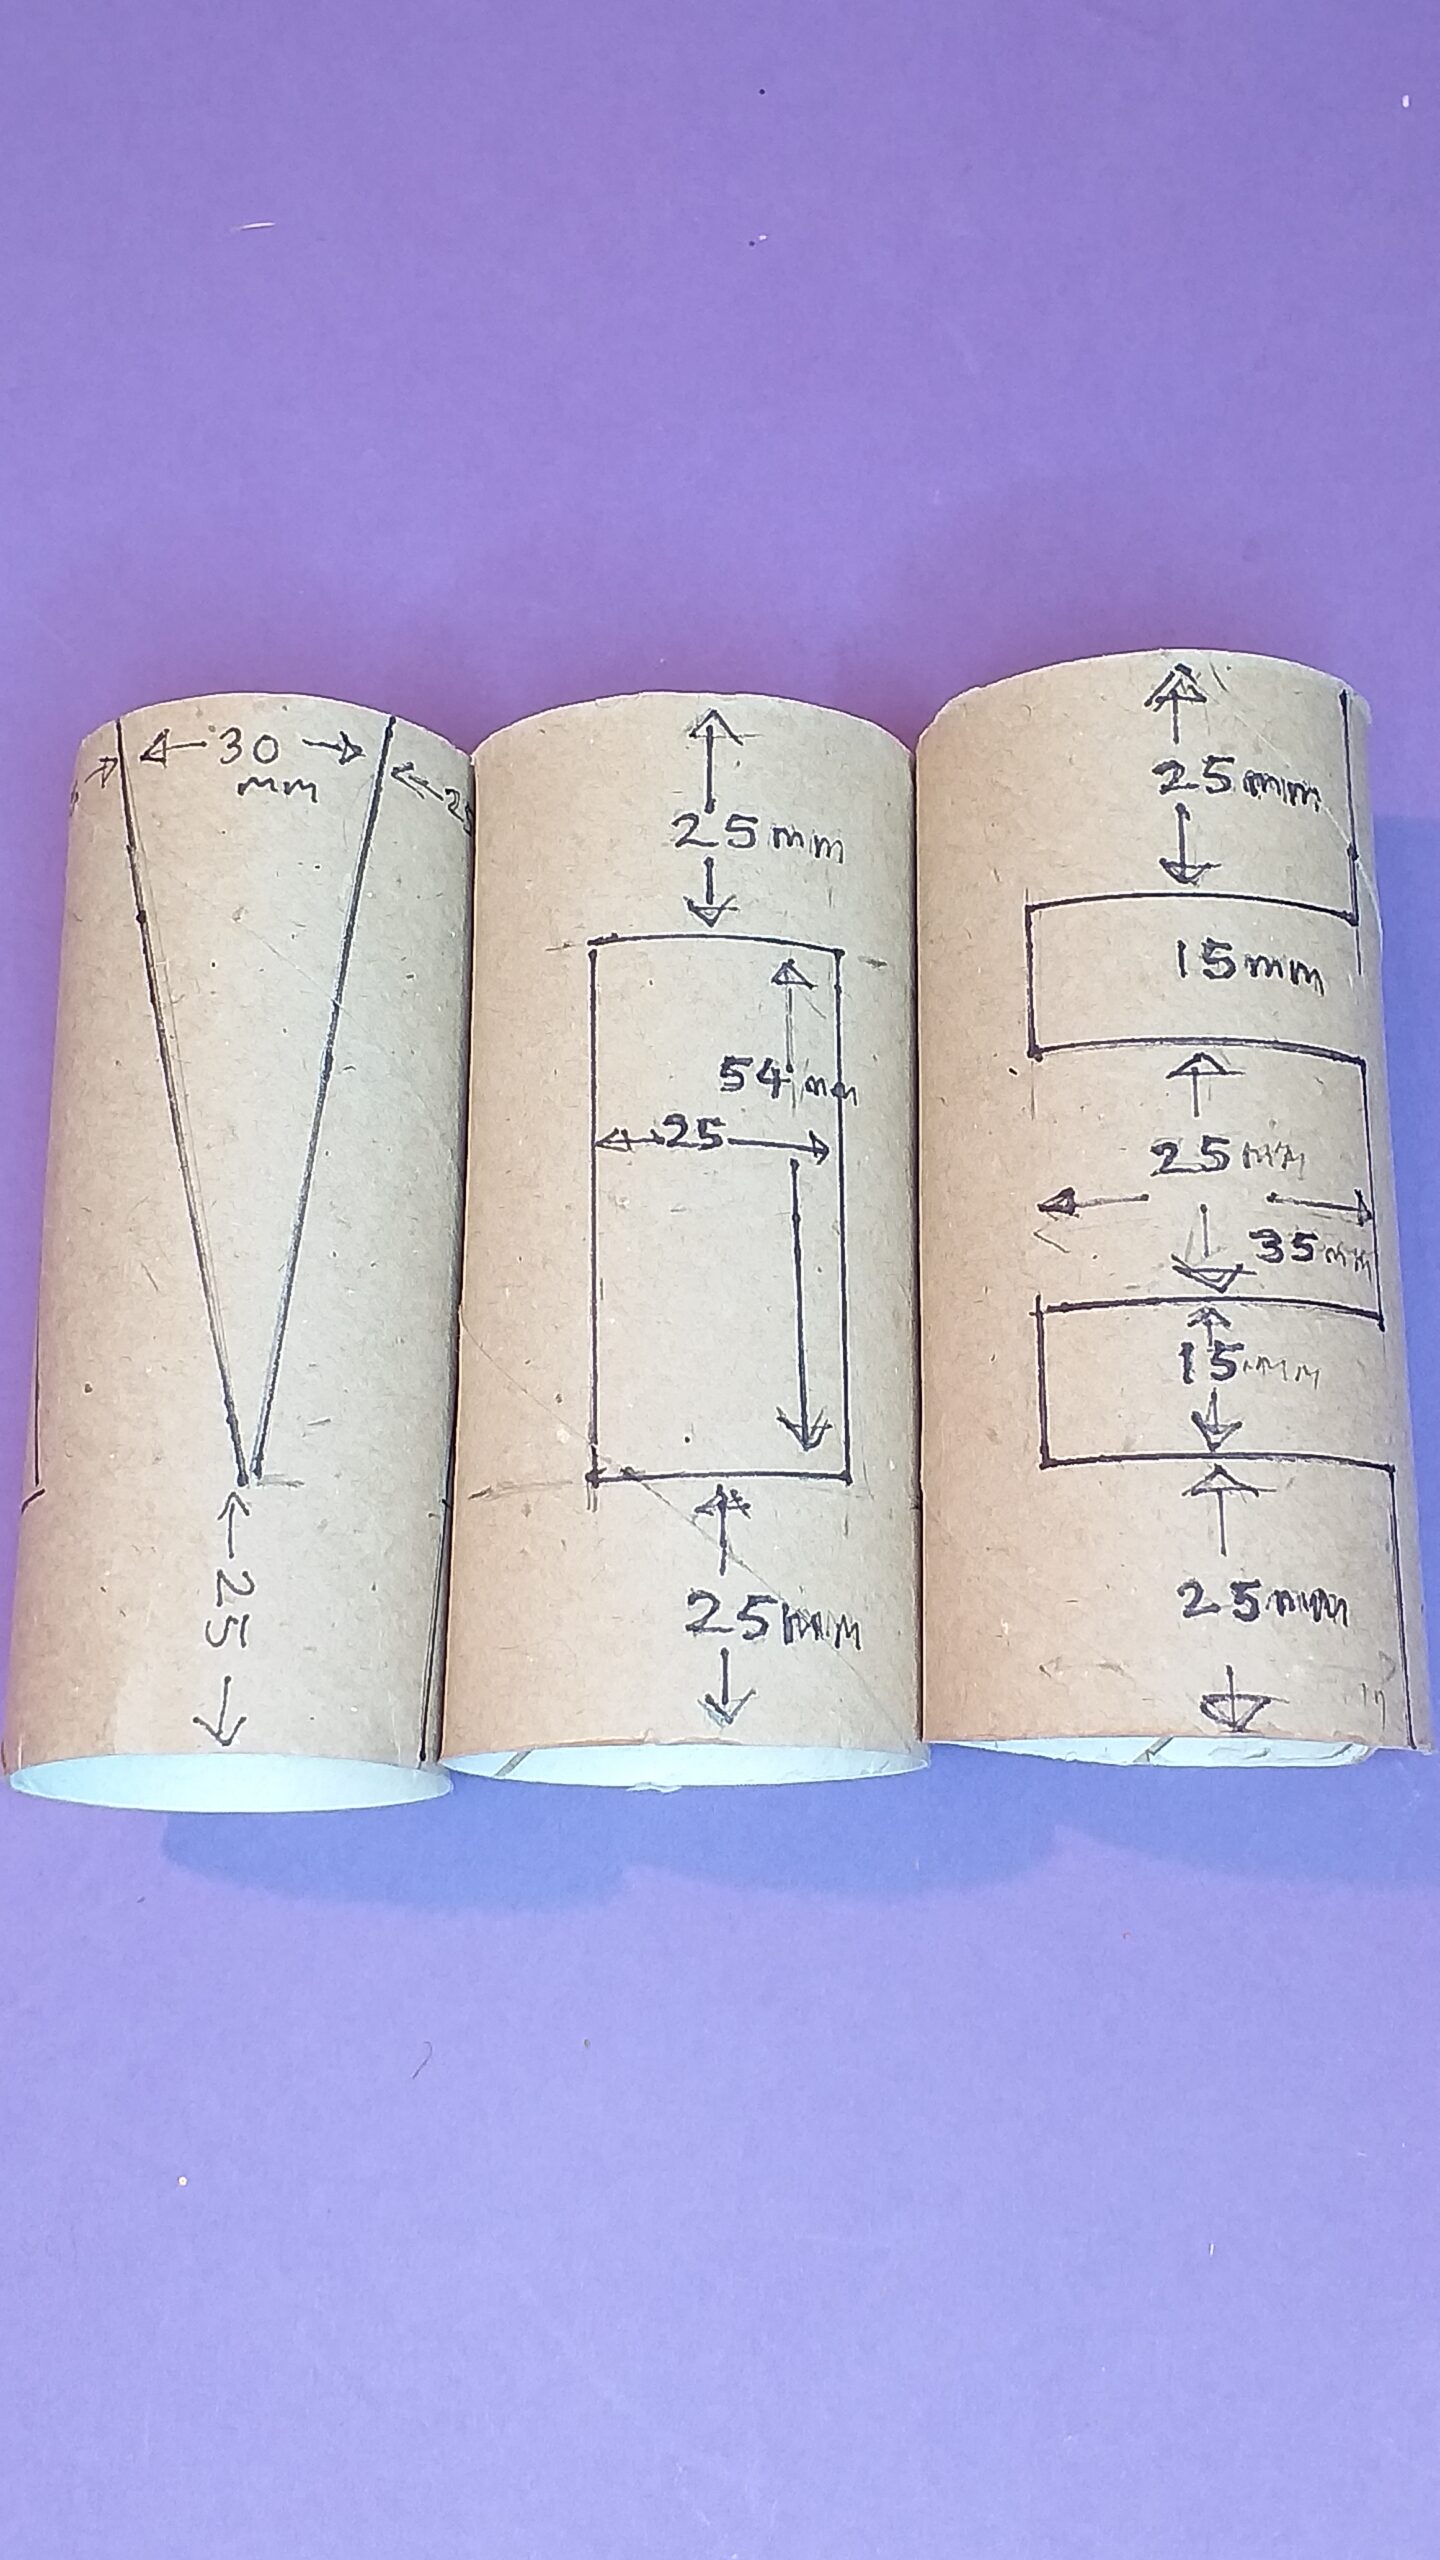
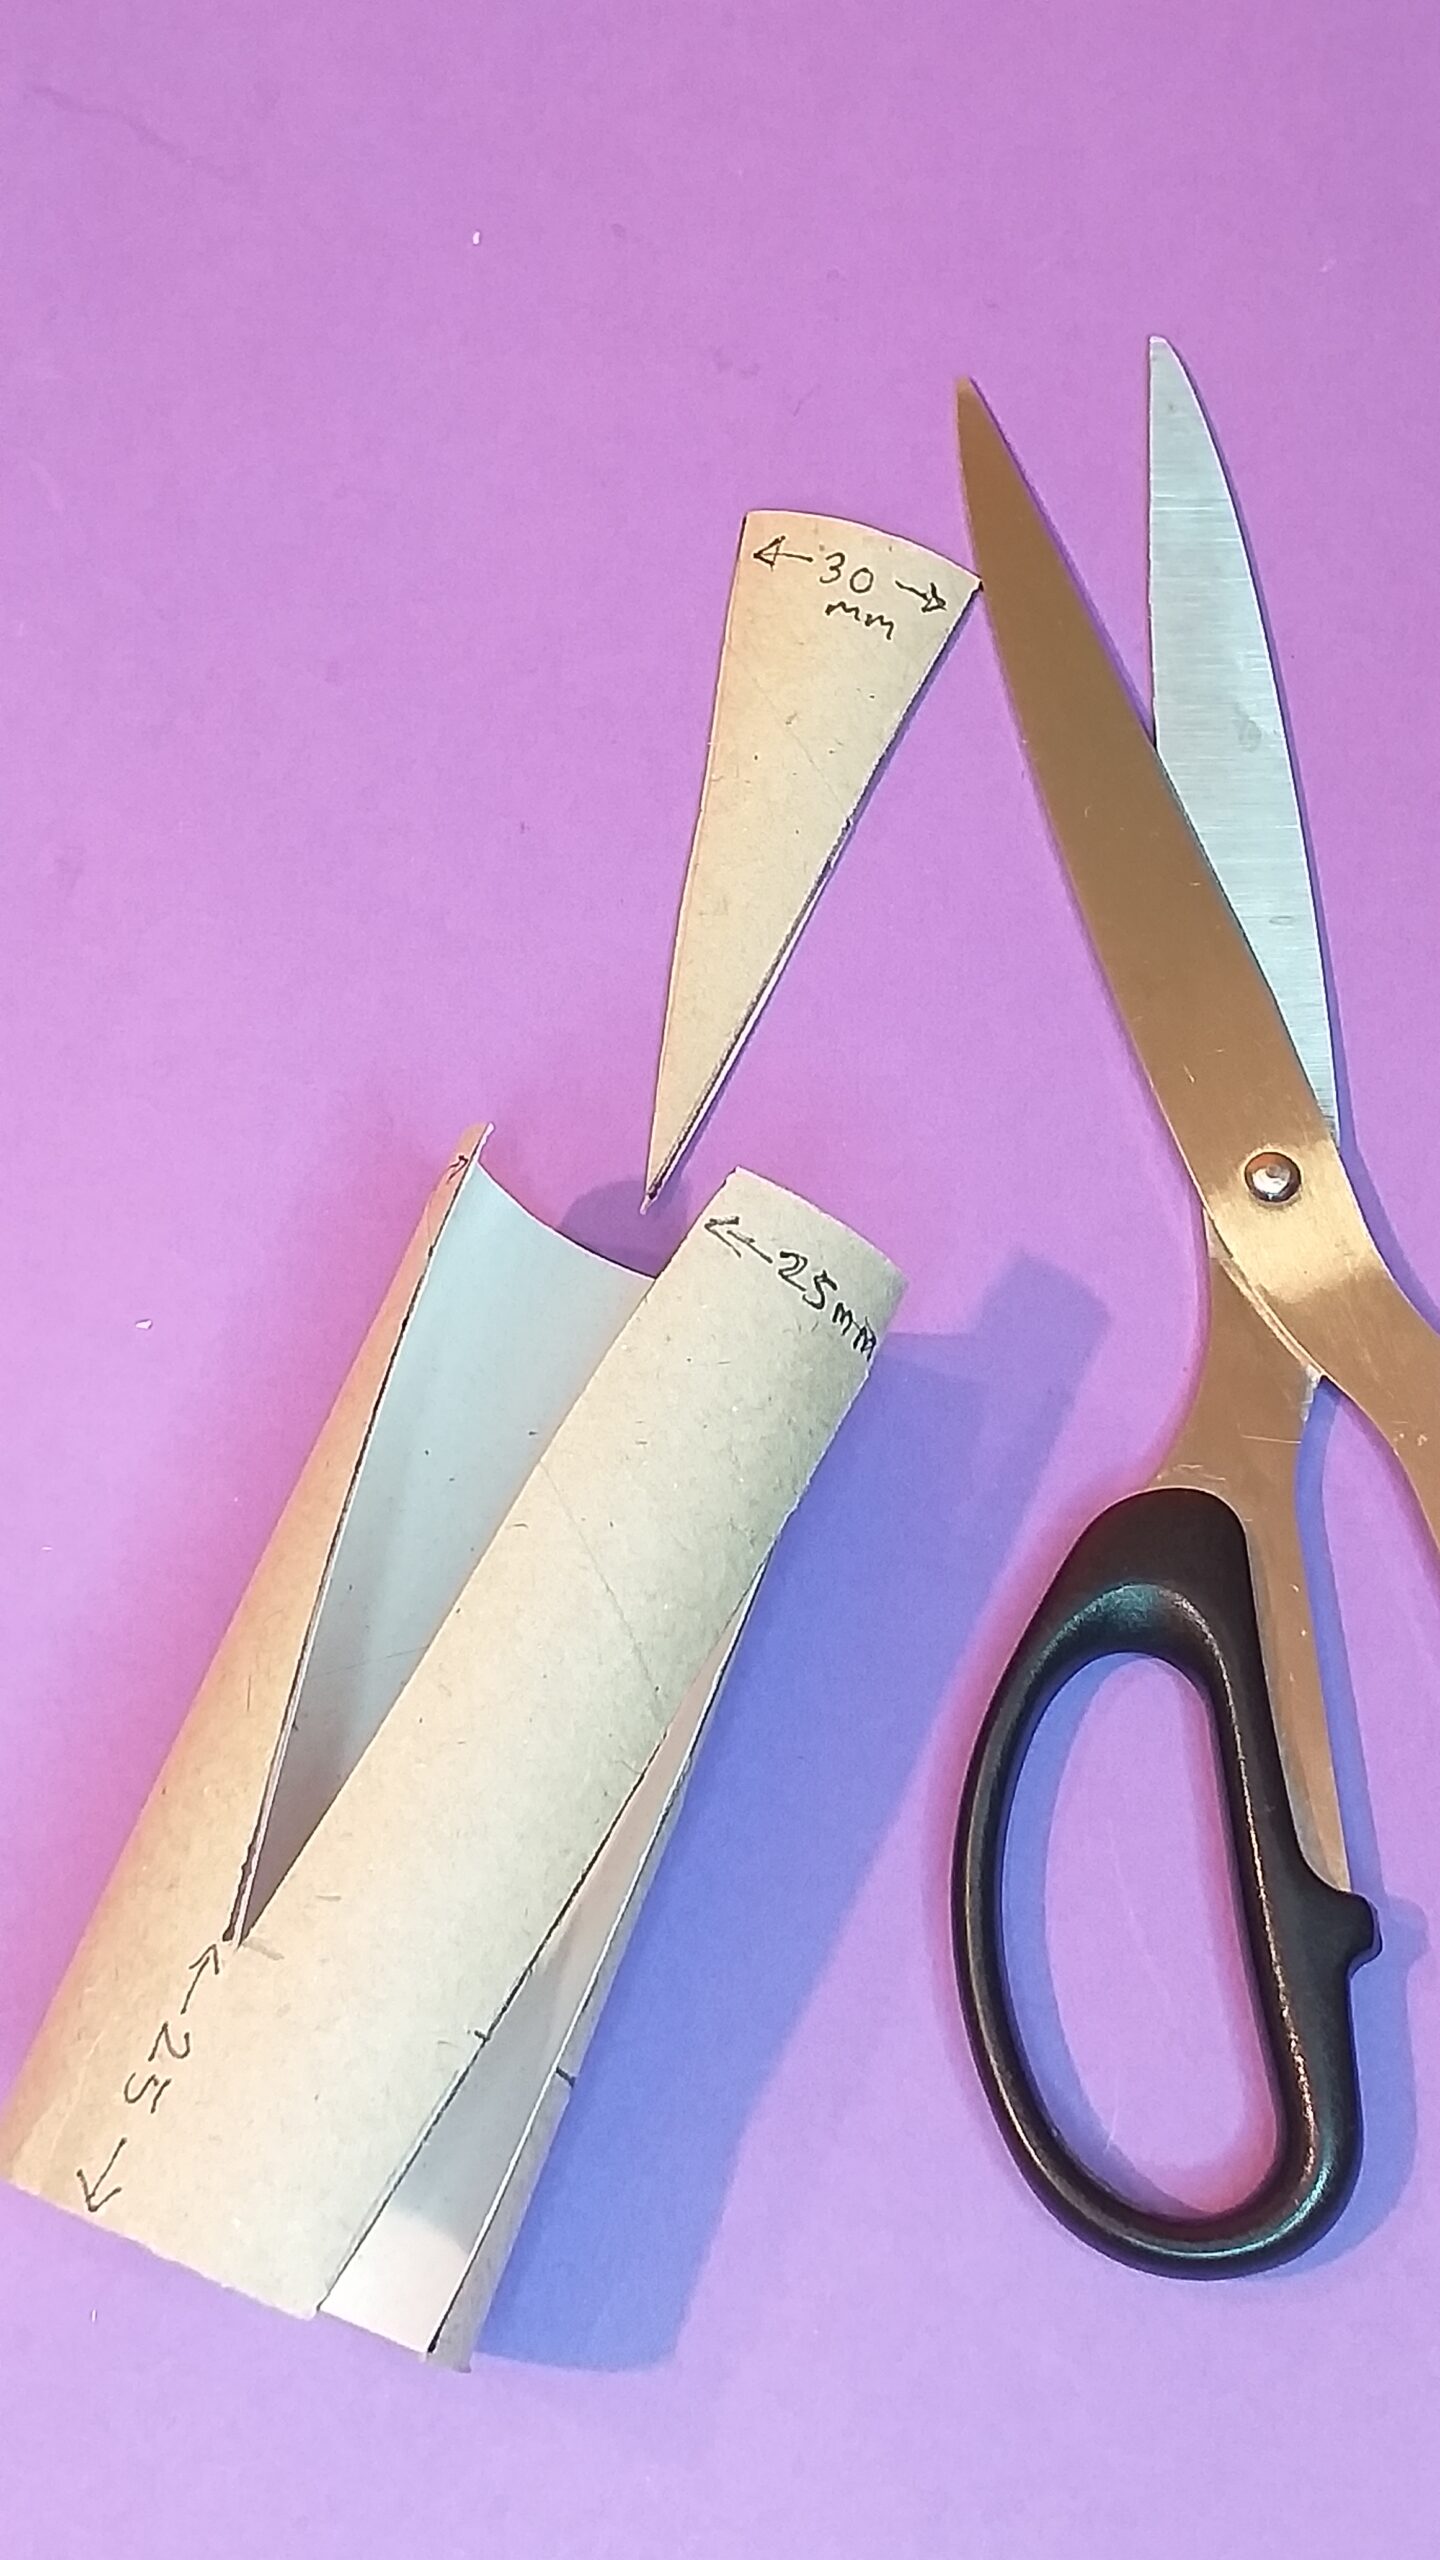
3) Draw letters to size, use 25mm as your guide.
4) Next cut from bottom up to the top of the side of the ‘O’
5) Like so.
6) Cut away the inner part.
7) Cut away the back part so you can see right through.
8) Cut from bottom right to the top the outer part of the ‘V’
9) Like so.
10) Cut out the ‘V’
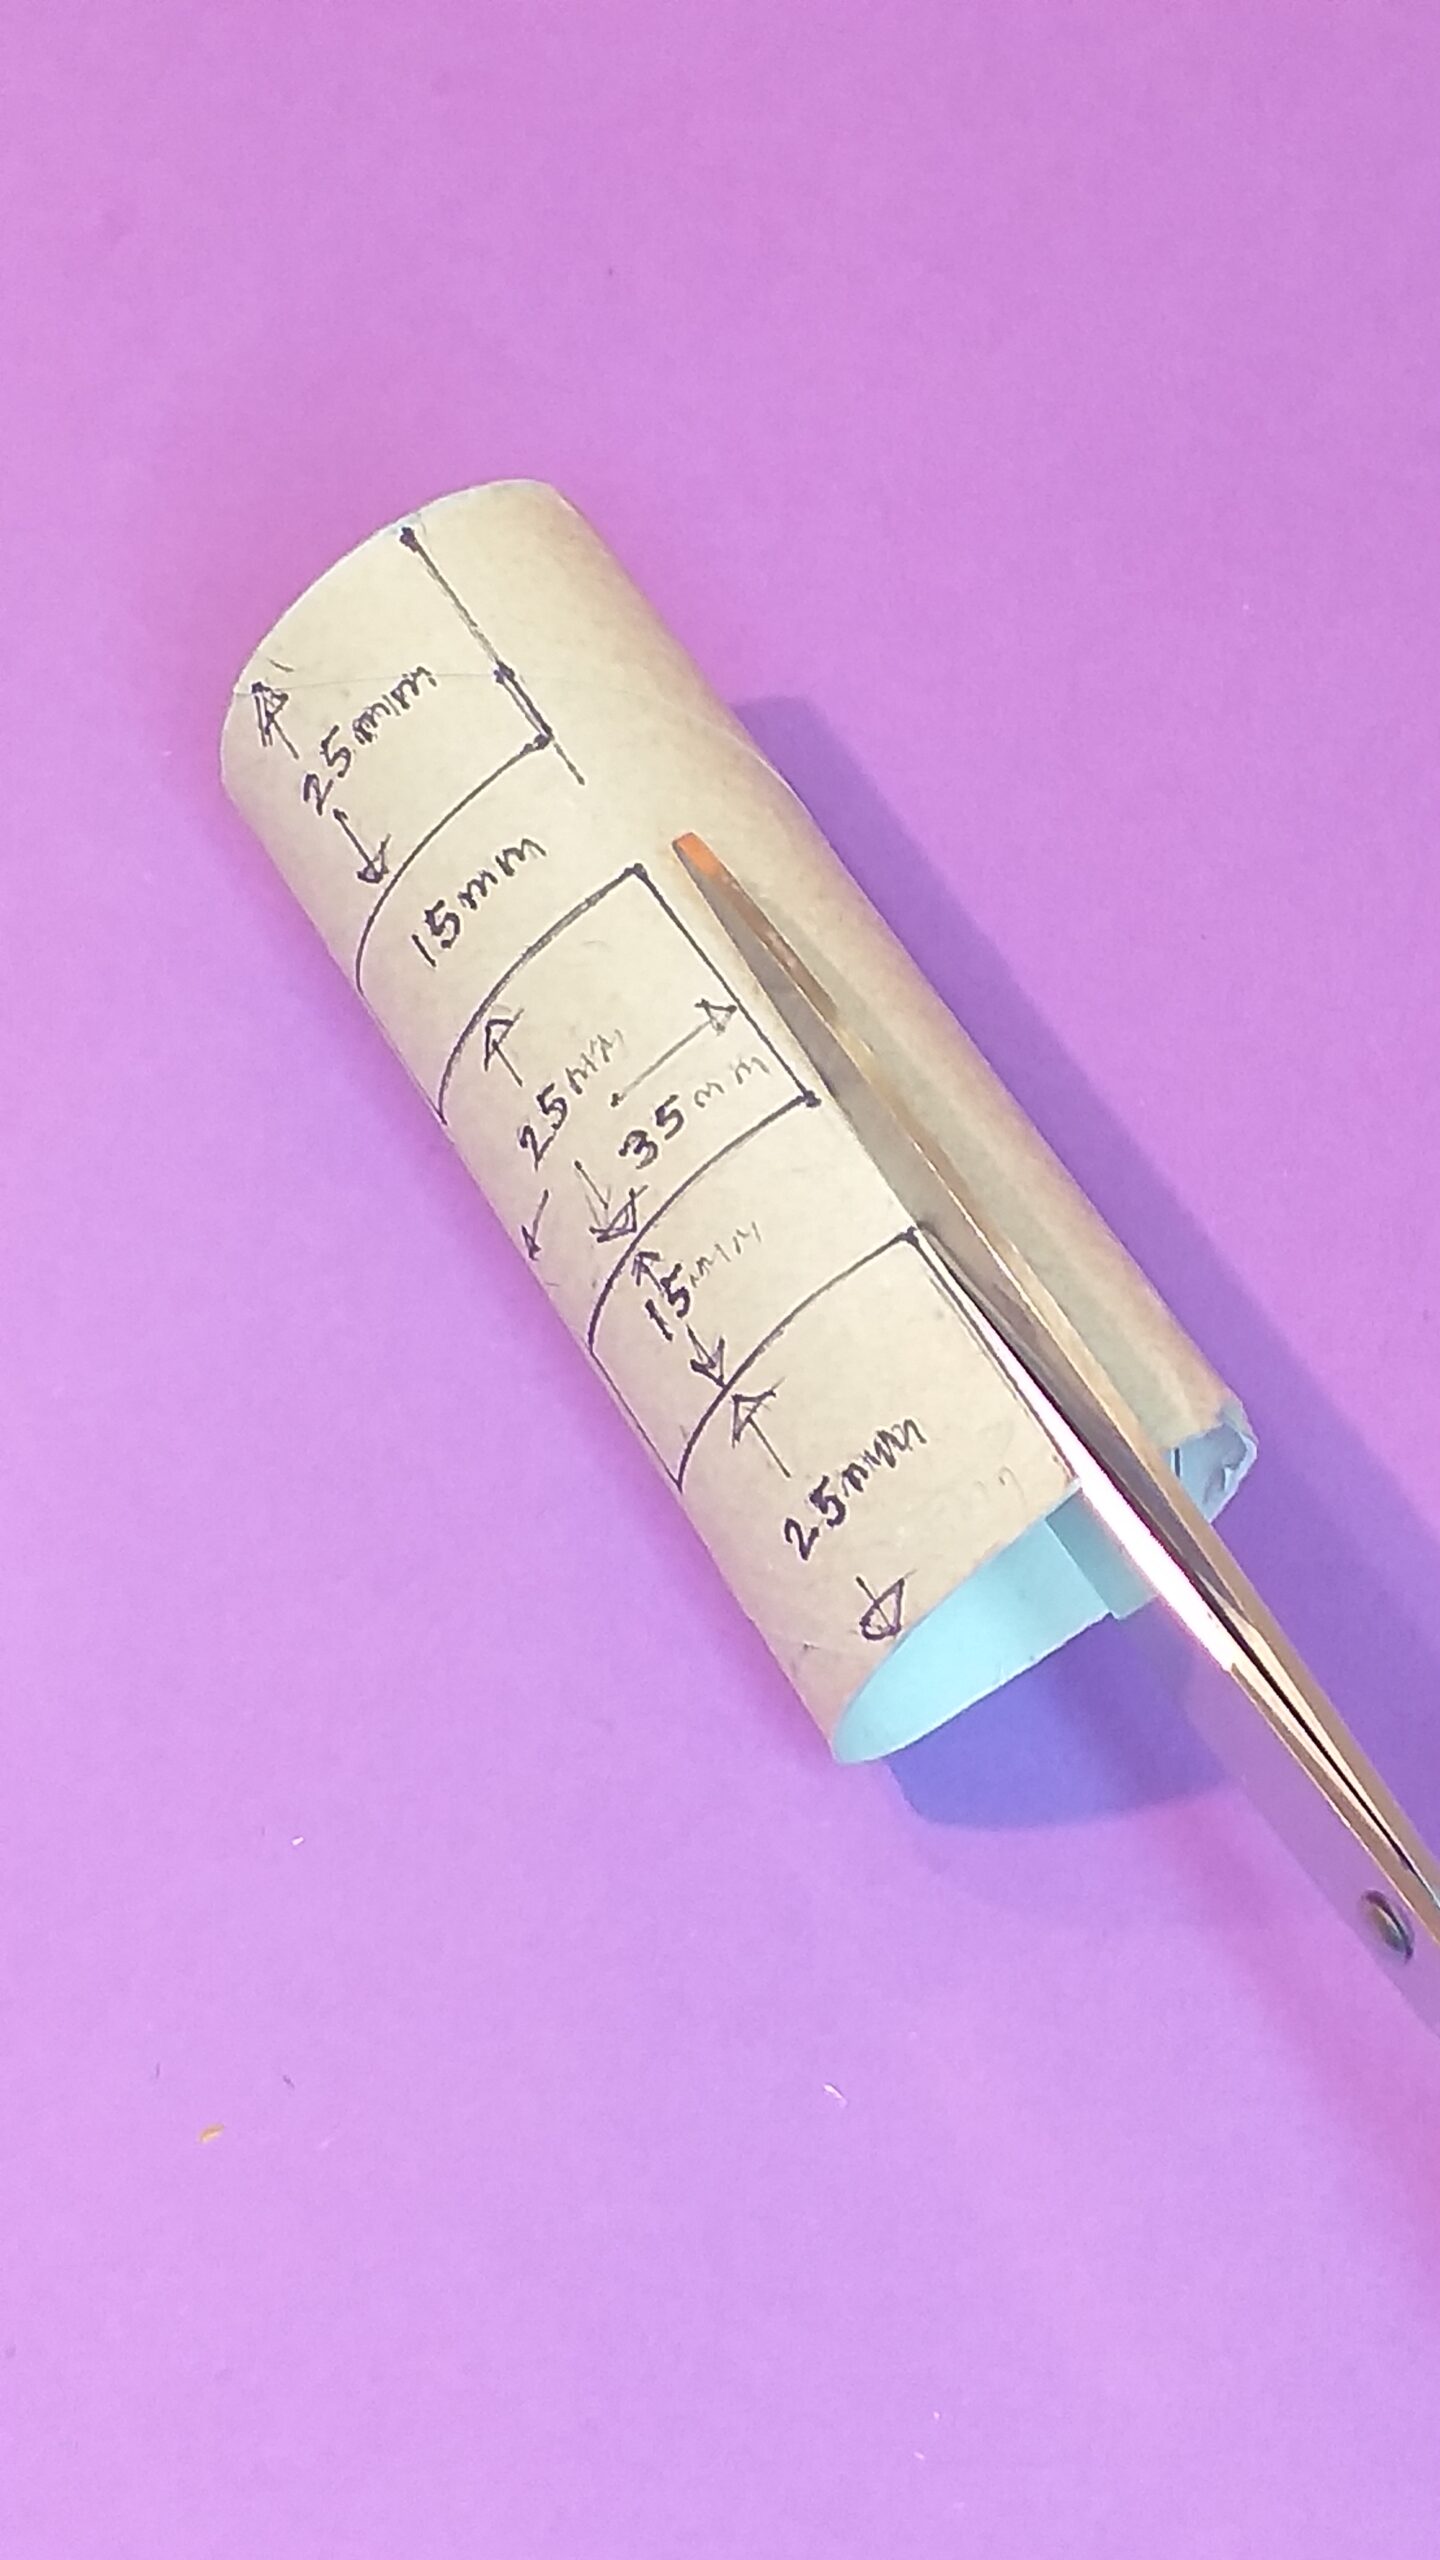
11) Cut all the way around the back, so there is a ring of 25mm.
12) With the ‘E’ again cut bottom all the way up to the top.
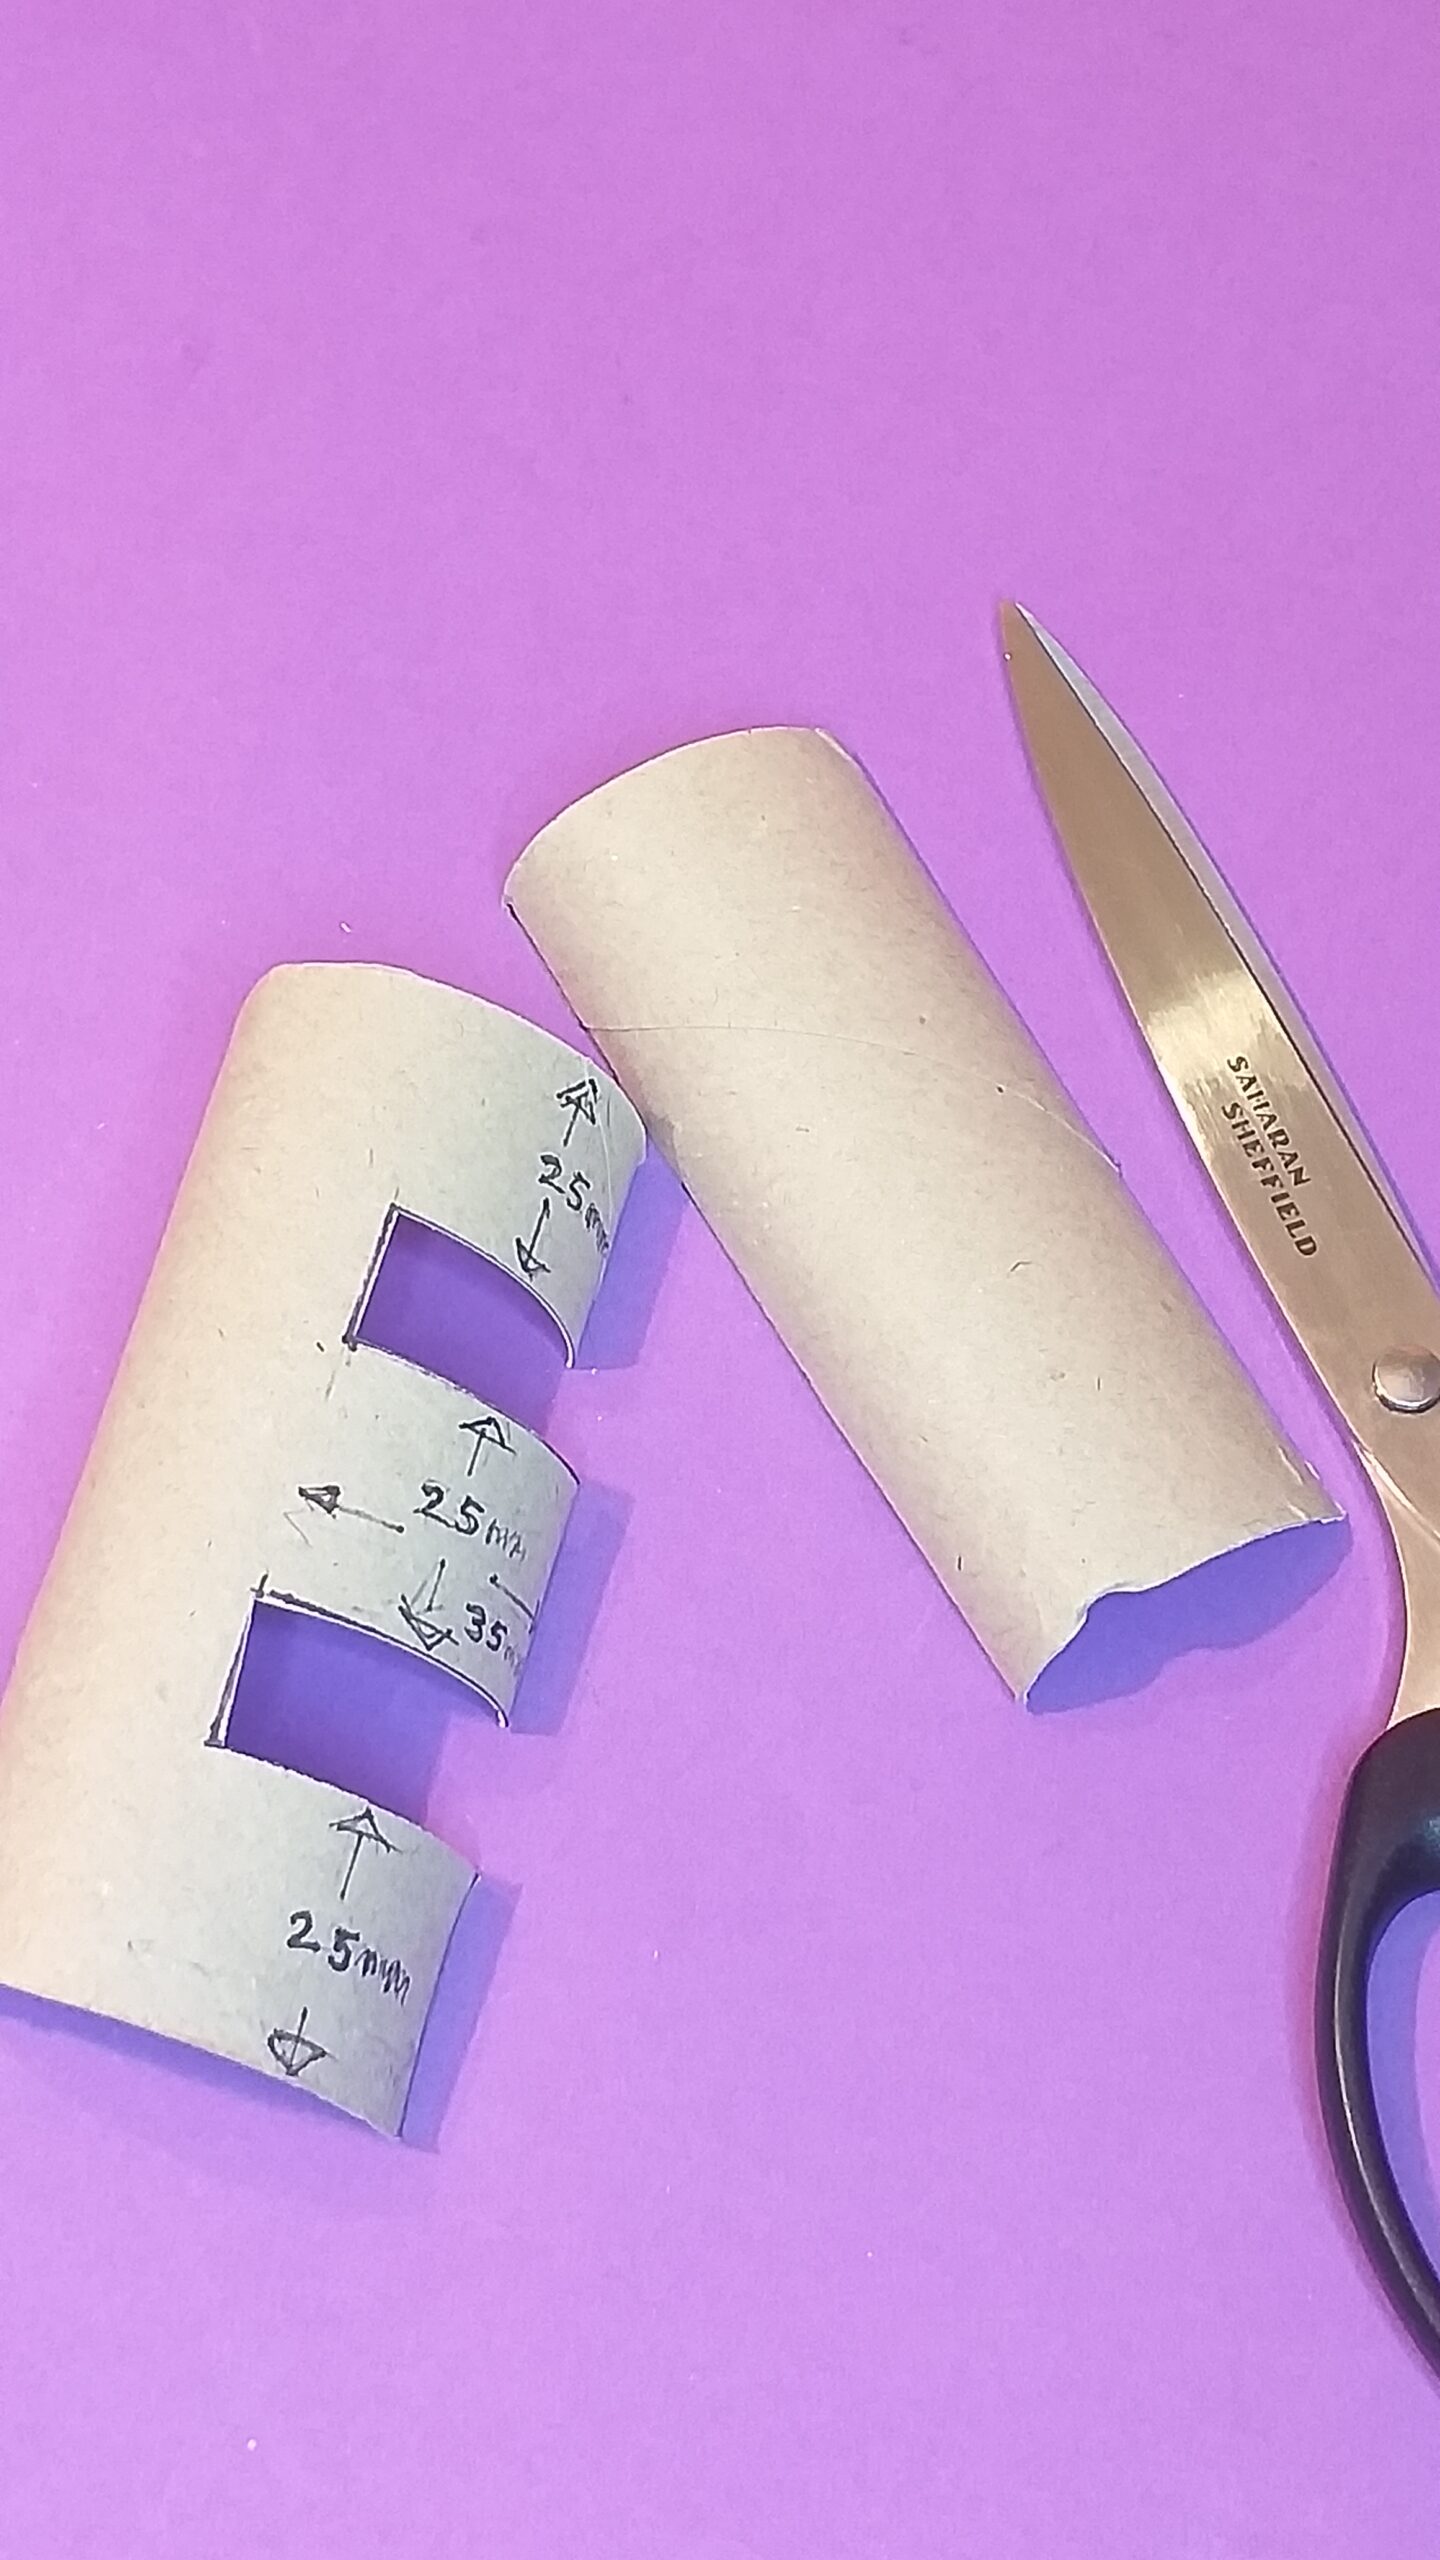
13) Now cut out the parts to make E.
14) Cut away the back, so E is free standing.
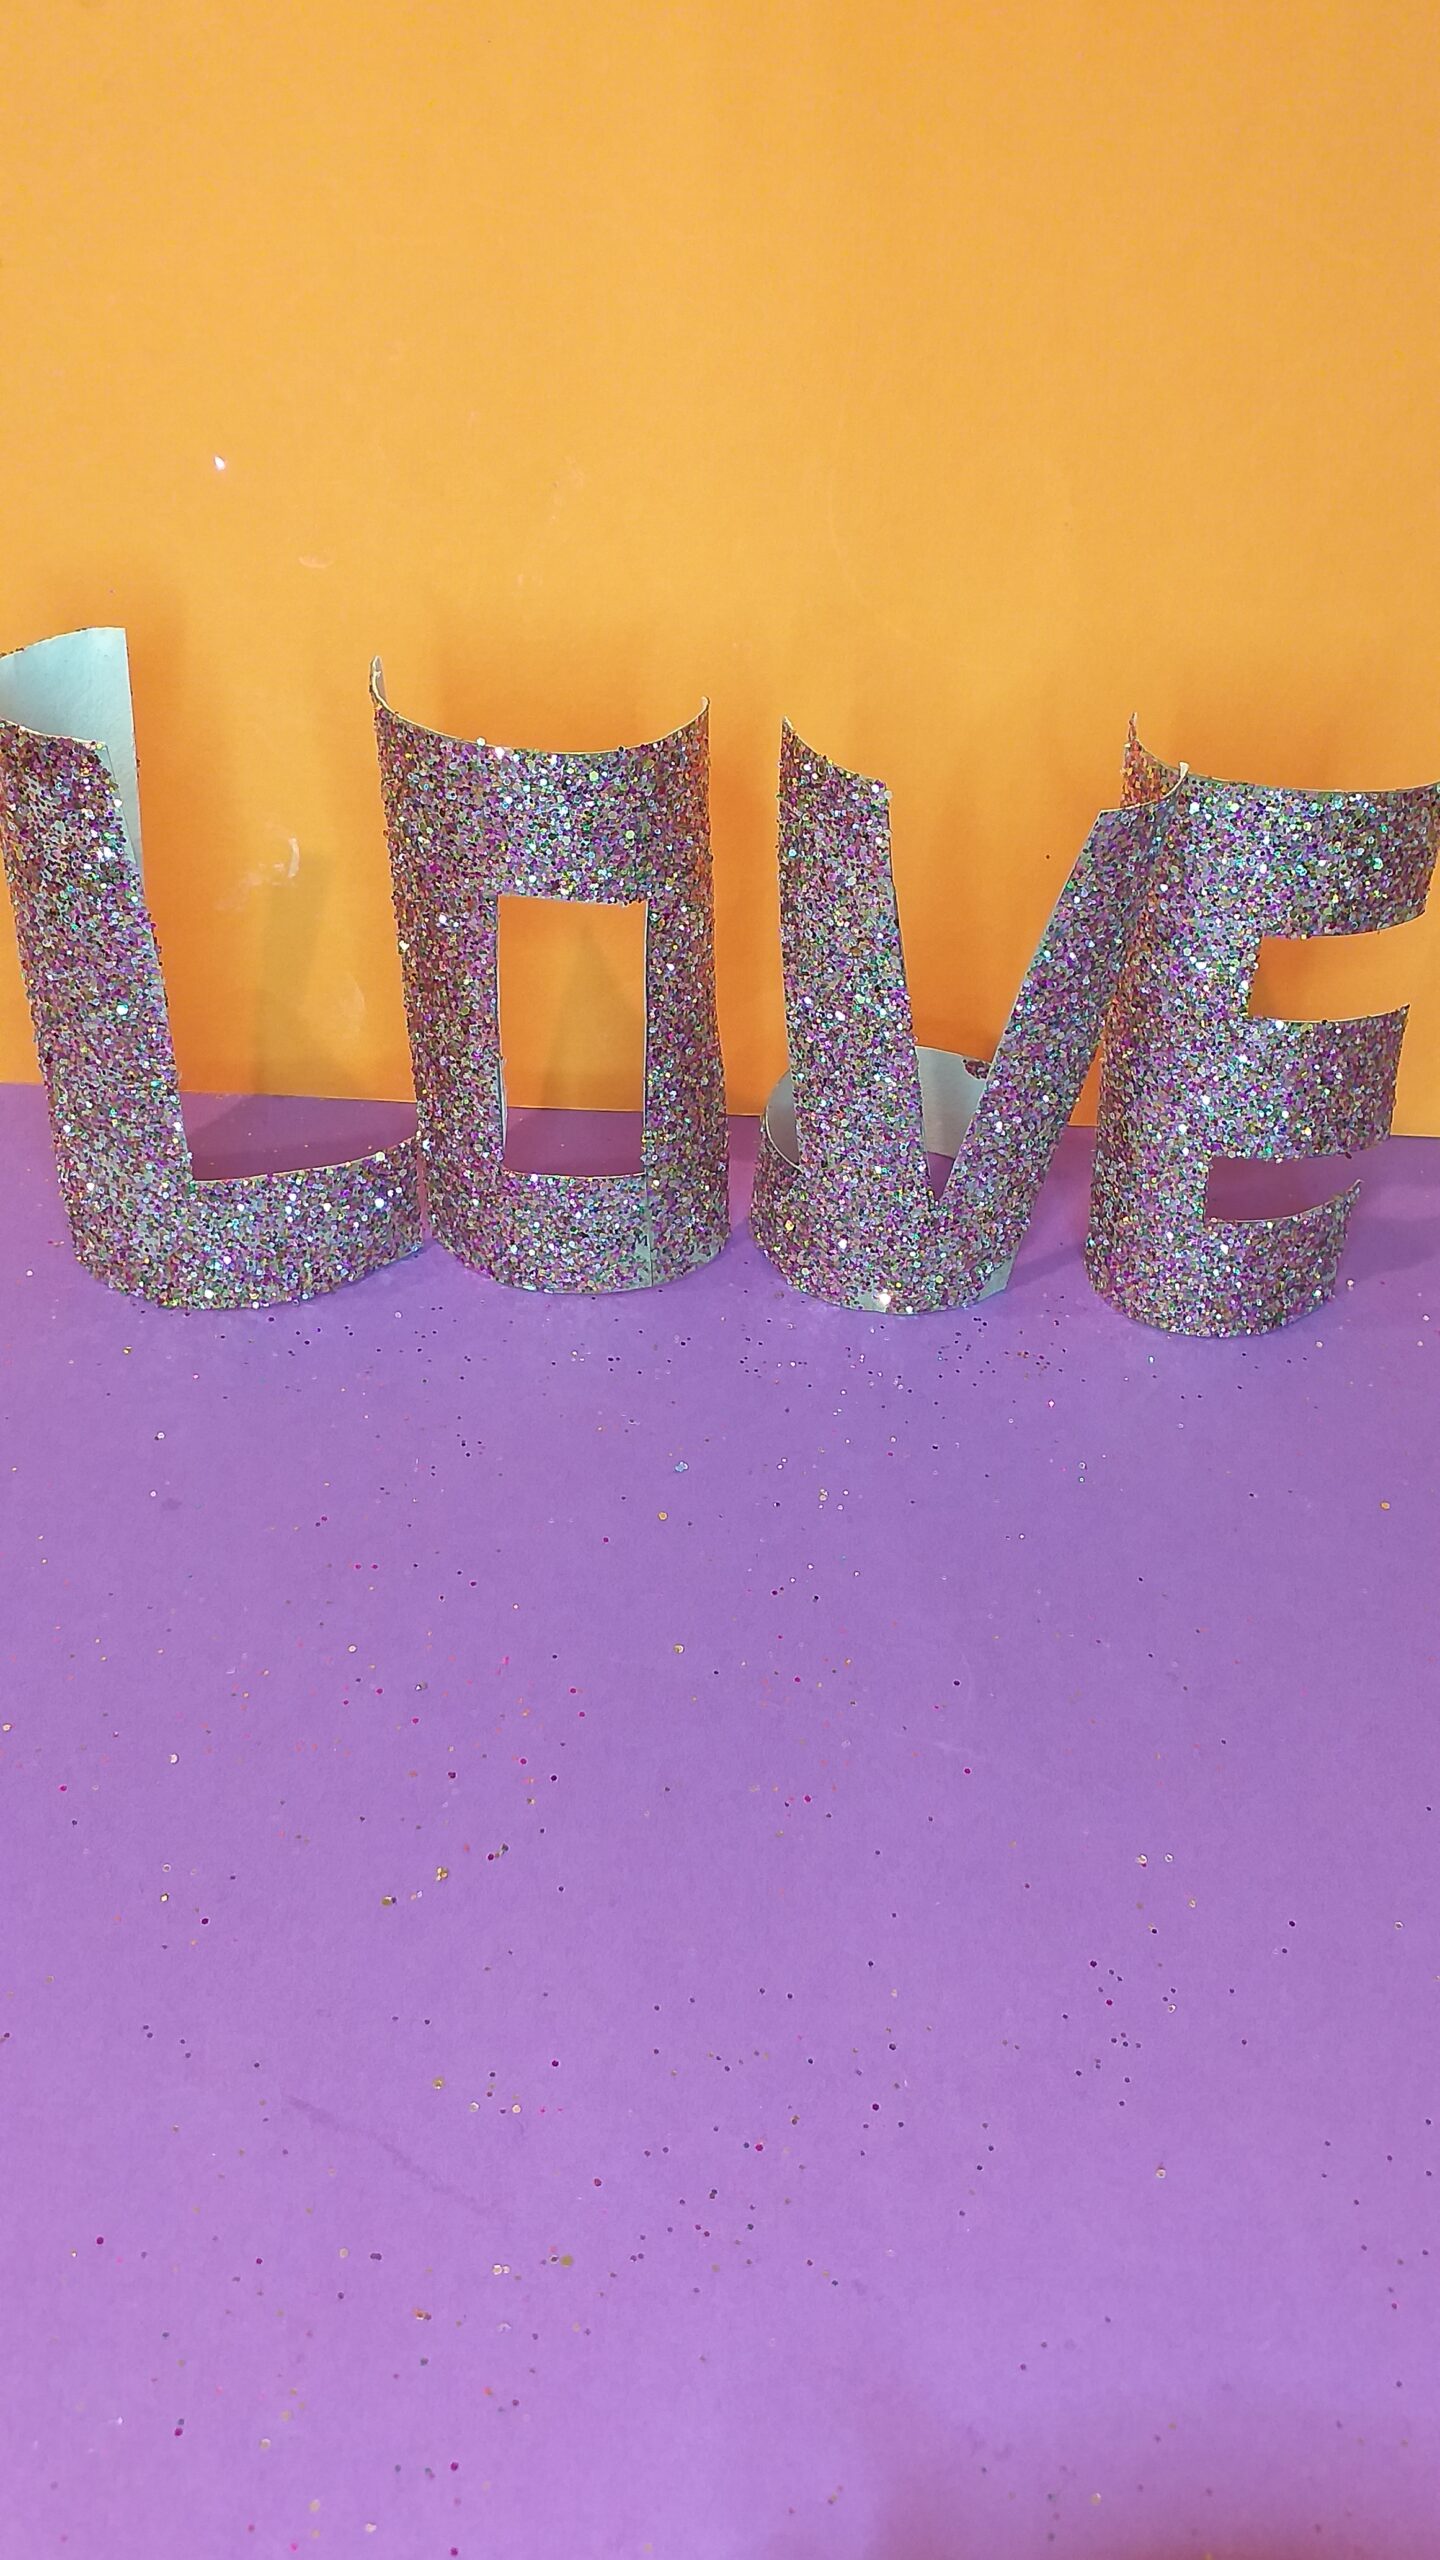
15) When finished you have the word L-O-V-E
16) Start to paint on the PVA glue.
17) On a sheet of paper pour multi-coloured glitter.
18) All glittered letters.
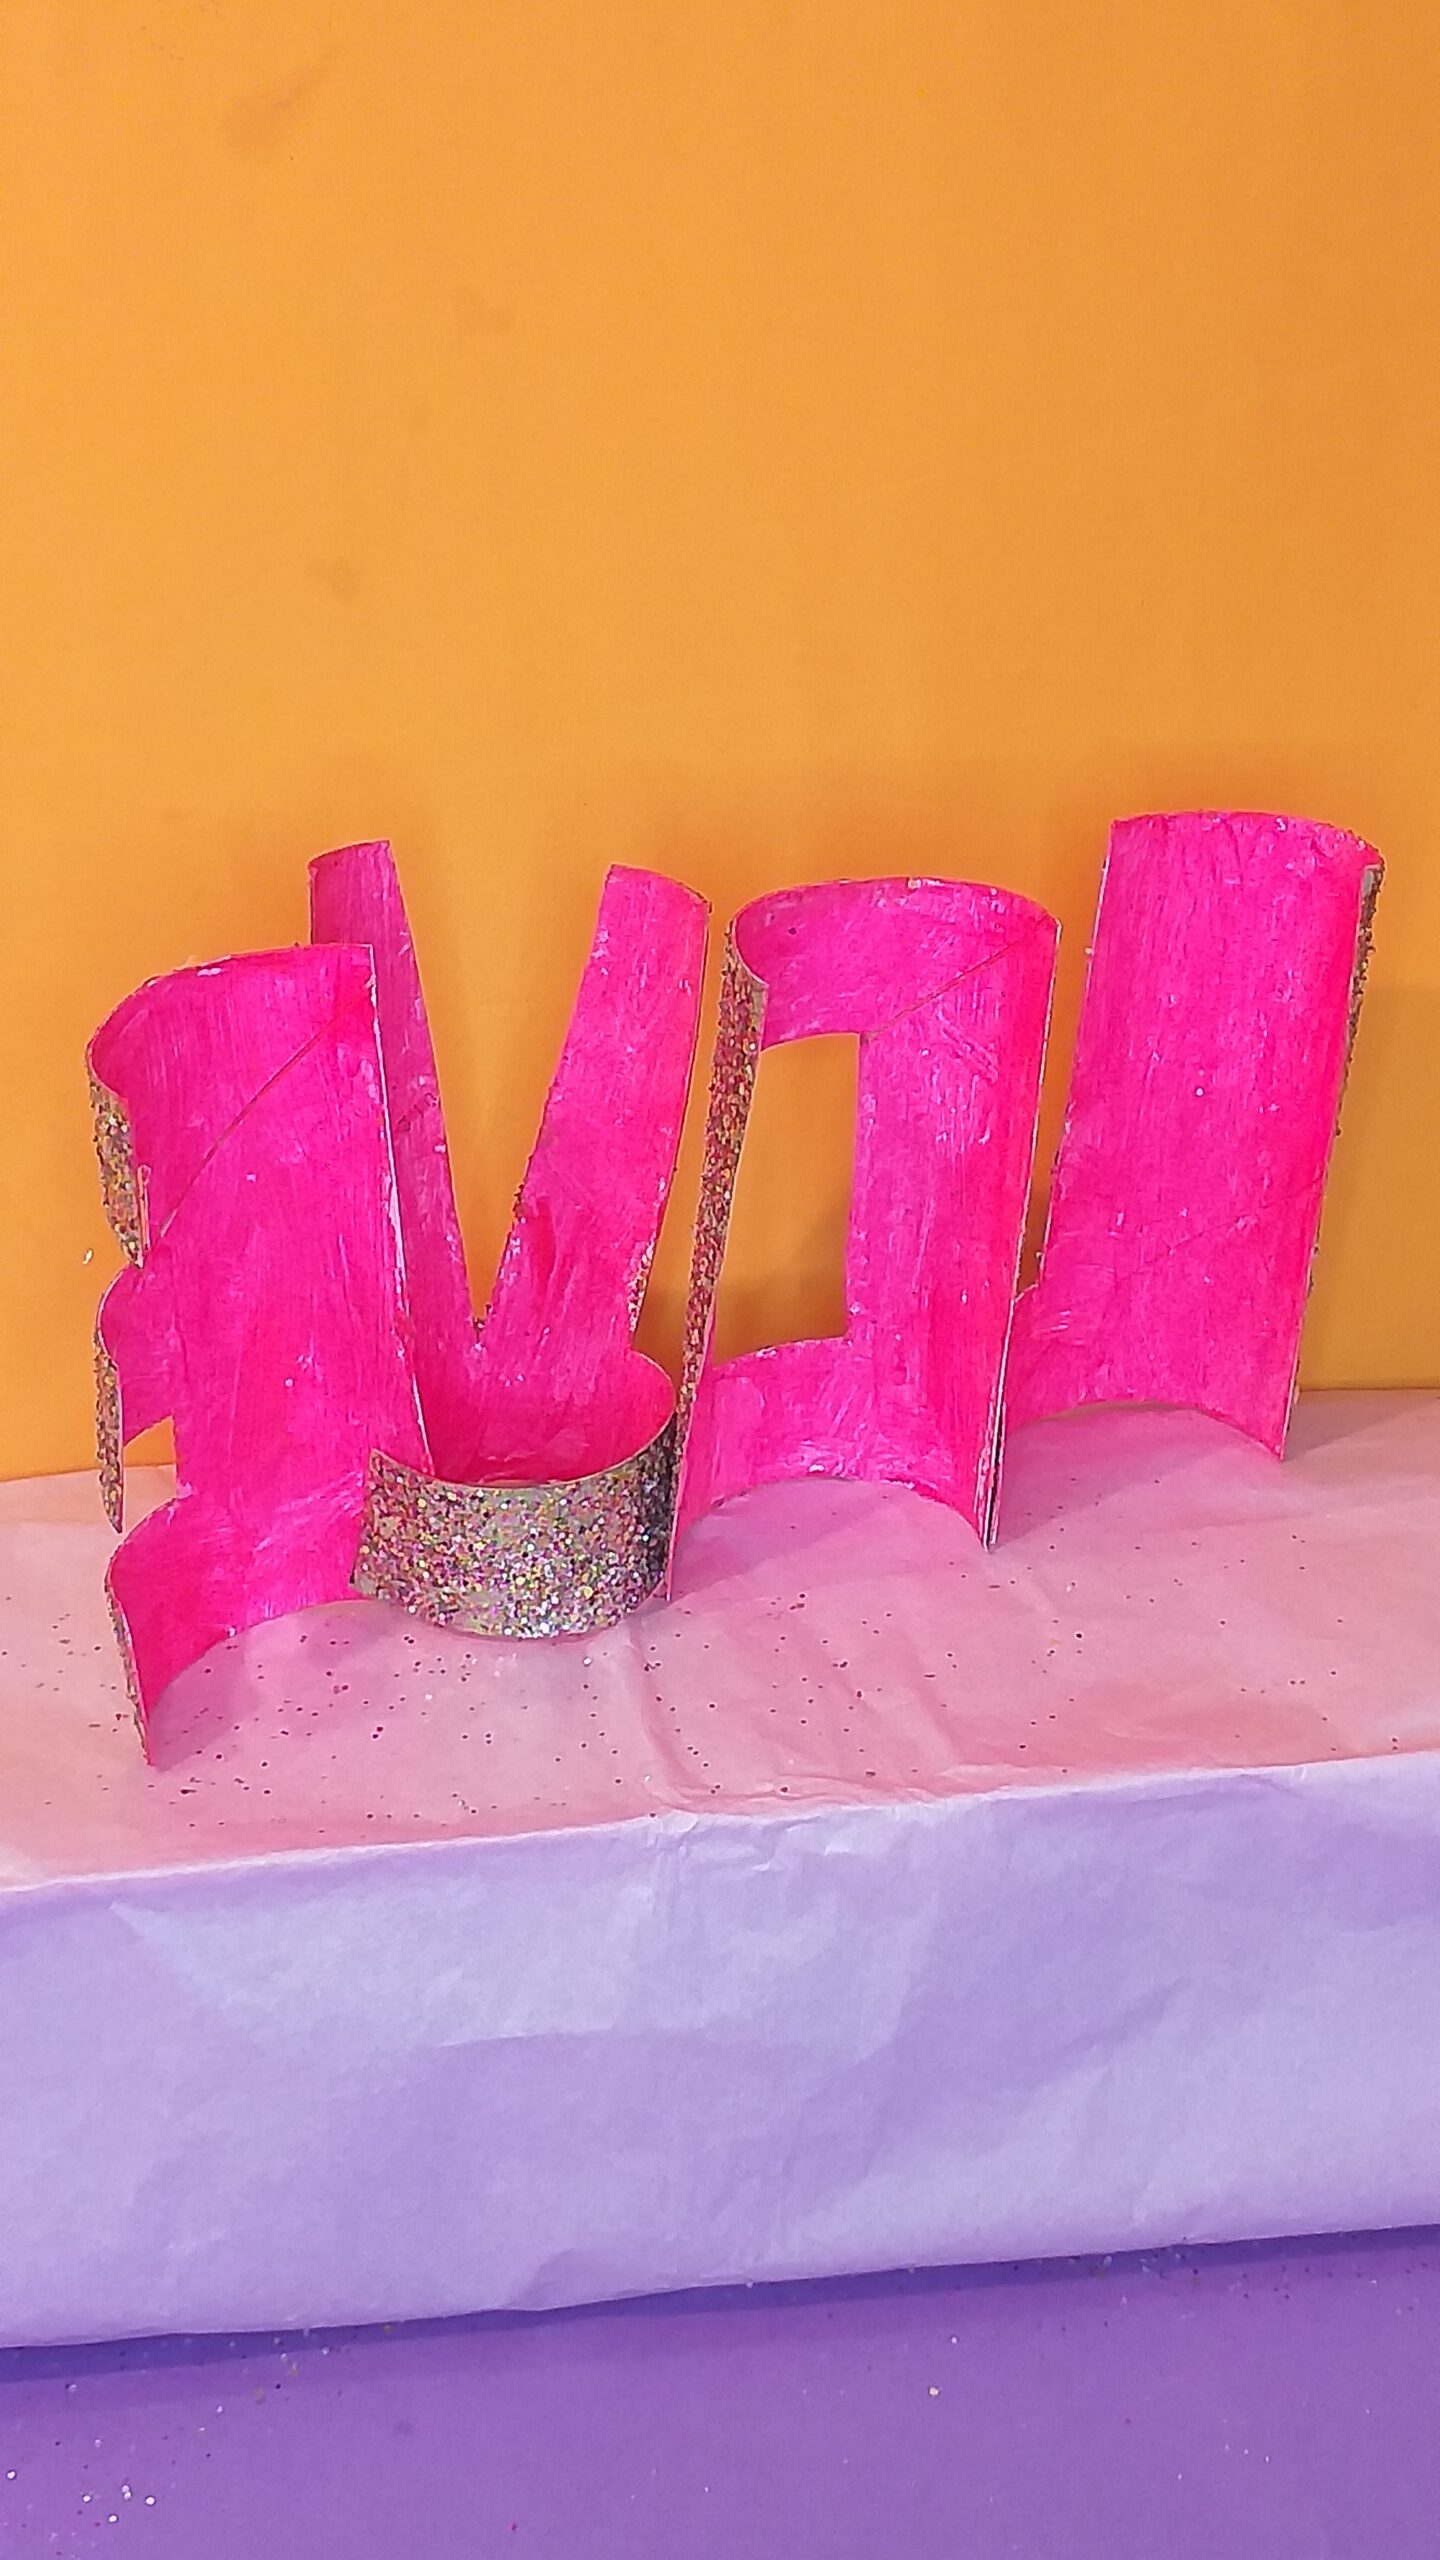
18) Paint the back in a pink or your choice of colour.
19) Here are the glittered letters.Staple letters on the bottom so they become secure, so when you pick it up it is one whole piece.
20) Another way is to not remove back section and keep tube whole and paint in different colours and glitter to your style. Then stick together with double sided tape at the bottom.
Hey there, when you click on links in this post, and you make a purchase, I may earn a small commission that l can use towards resources (other than throw-outs) for project making within my website😀
If you are wanting to top up or find art resources to decorate and or to embellish your letters and penguins. with paints, pens, glue and glitter, then Etsyis the place to go and find an array of super art stock!
SOME TIPS!
DRAW FREEHAND
I’m using measurements for you to follow, but if this is difficult for your kids to process, then the easiest solution is to draw letters freehand, which could work just as well.
LARGE SCISSORS LONGER CUTS
Use the large scissors to cut a long line from the bottom to the top.
SAVE AND RE-USE
Glitter on the paper, gently fold and pour back into the glitter tub.
ALLOW DRYING
When the PVA/glitter has dried, you can staple the bottom of the letters together; this will make it easier to handle and bend about accordingly.
GLITTER OR PAINT
If glittering is not for you and you prefer to paint, then the alternative option is to keep the tubes whole and only cut away fewer parts to make your letters, and then you can paint them.
PATTERNS WITH GLUE
Use the PVA glue to draw the pattern, then pour the glitter over the patterned glue and shake off.
TWO CARDBOARD TUBE PENQUINS!
Resources for 2 Tube Penguins.
RESOURCES!
2 Cardboard inner tubes.
Acrylic paints: White, Black, Orange.
PVA glue/glue stick.
Scissors/Pencil.
Different-sized paintbrushes.
Find broad black felt-tip pens.
Orange/Pink card.
4 small googly eyes.
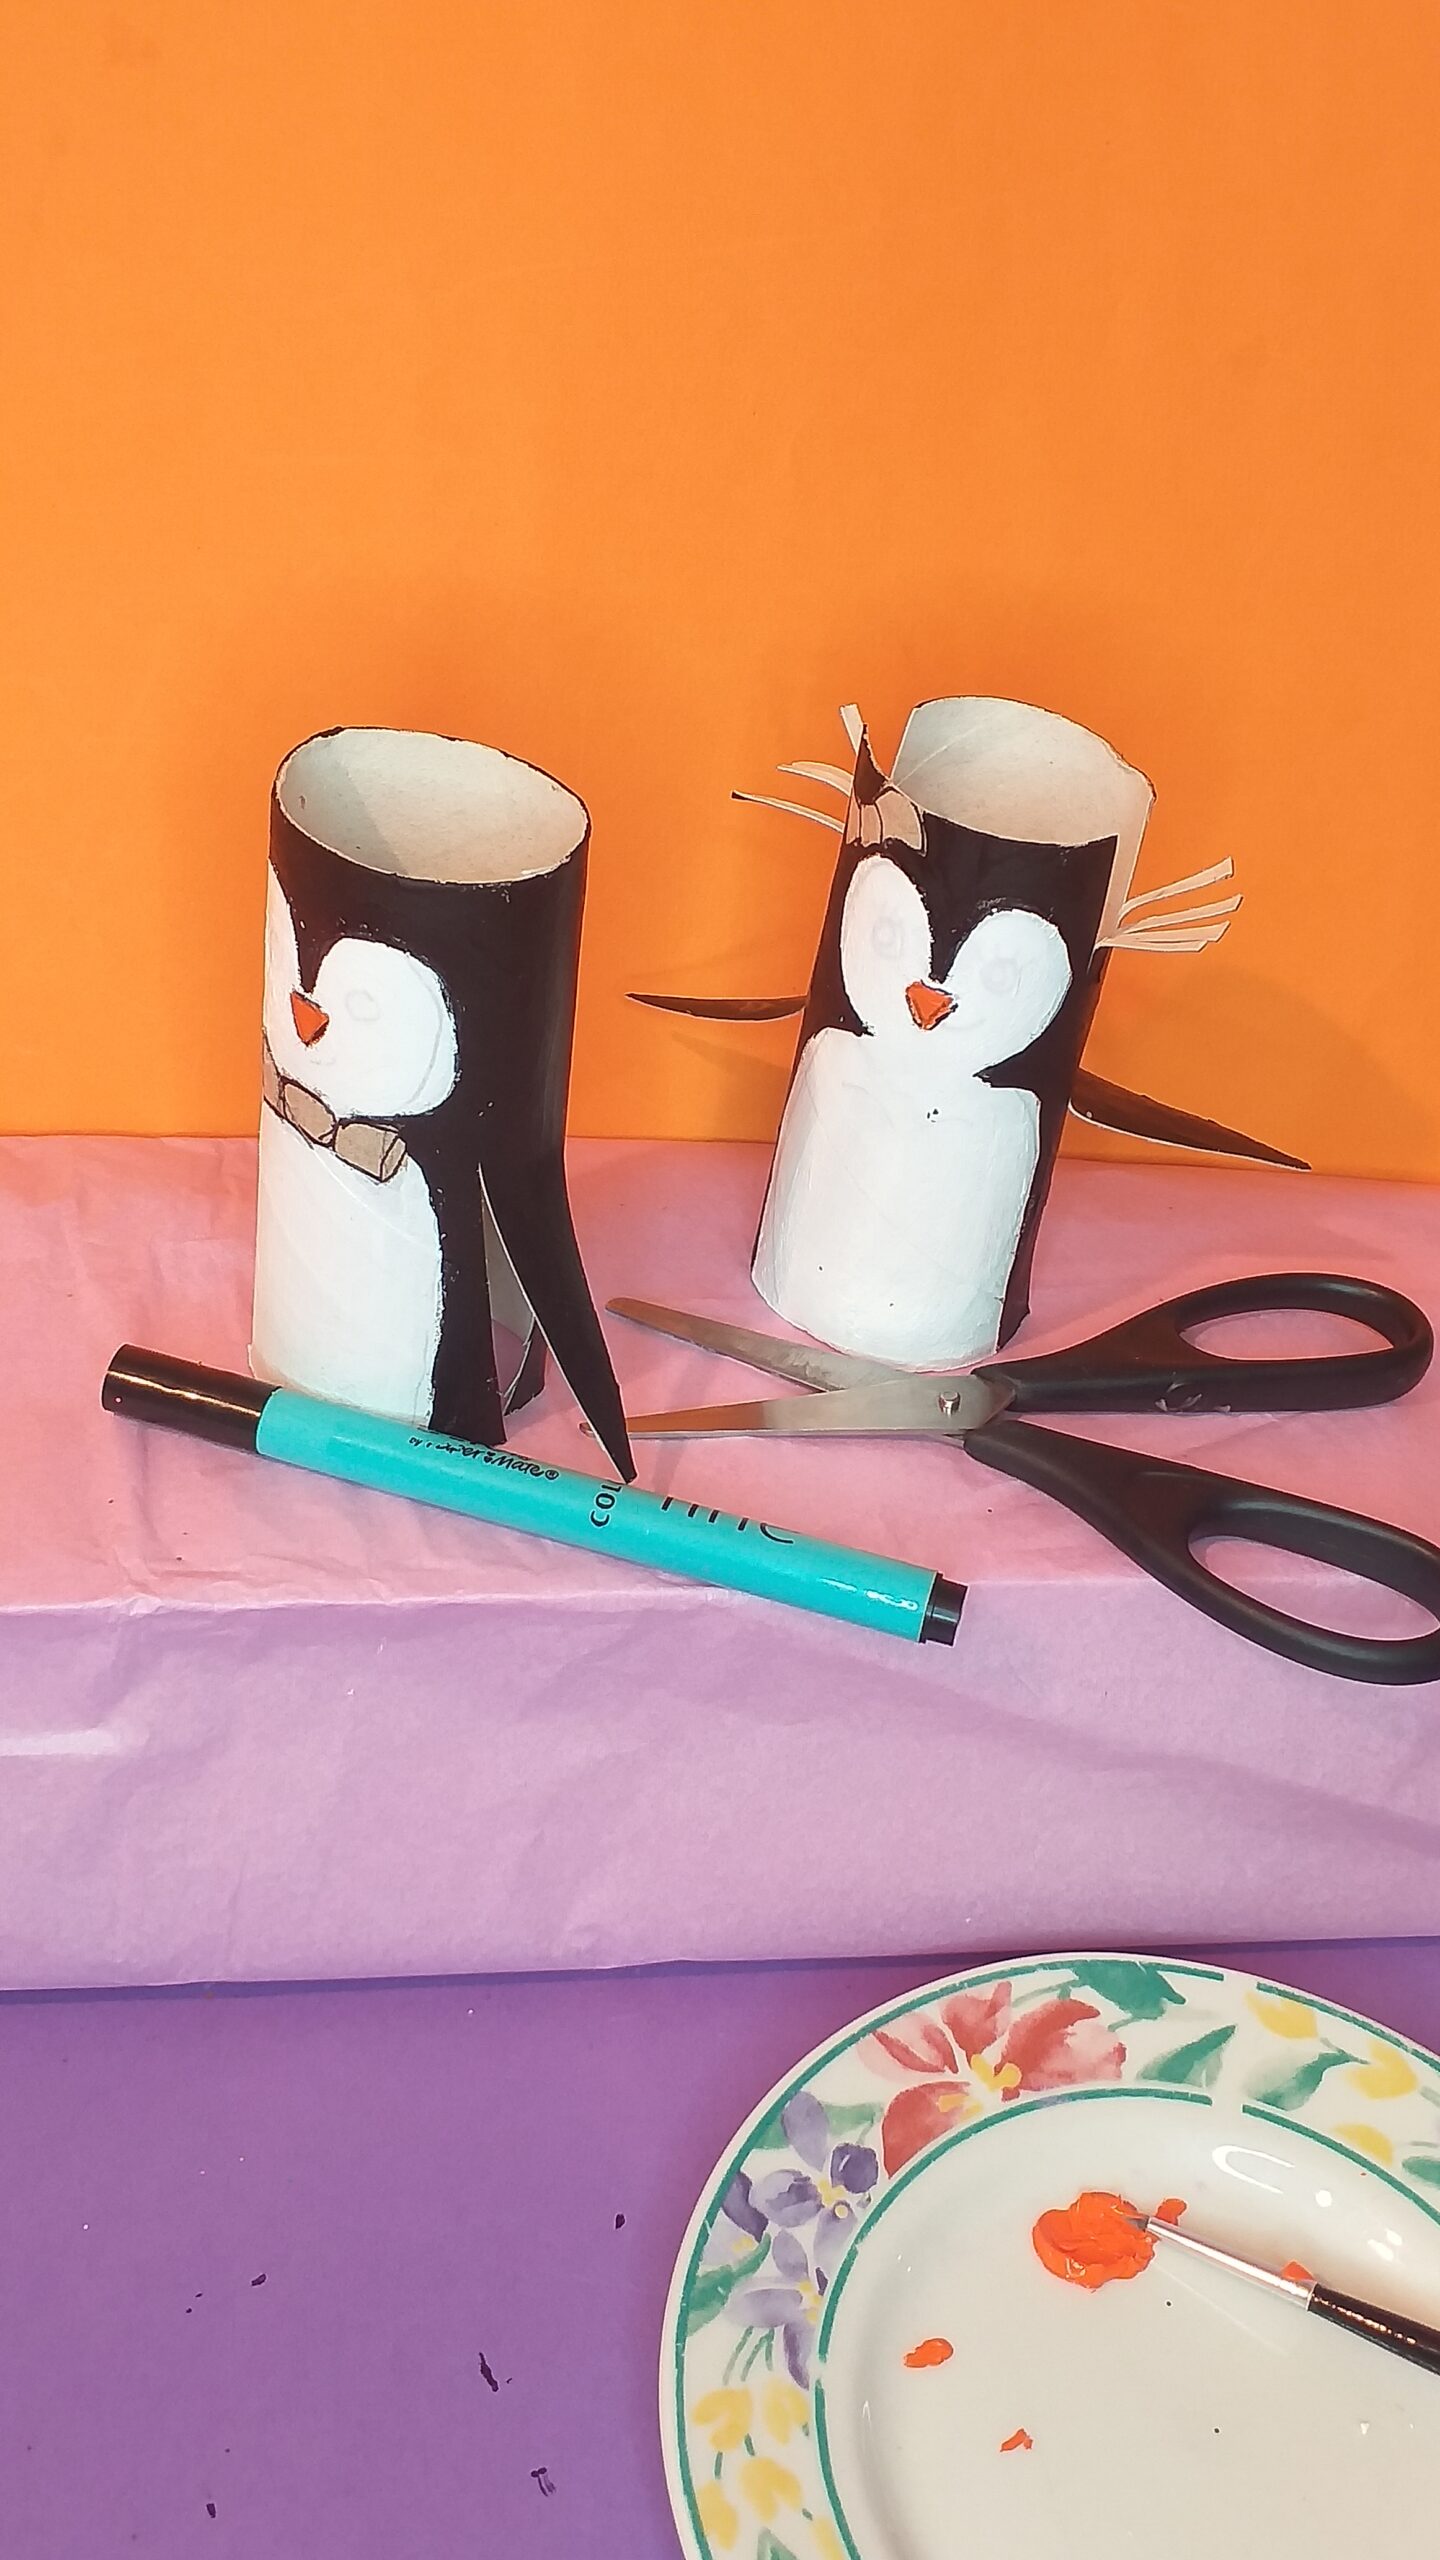
HOW TO MAKE!
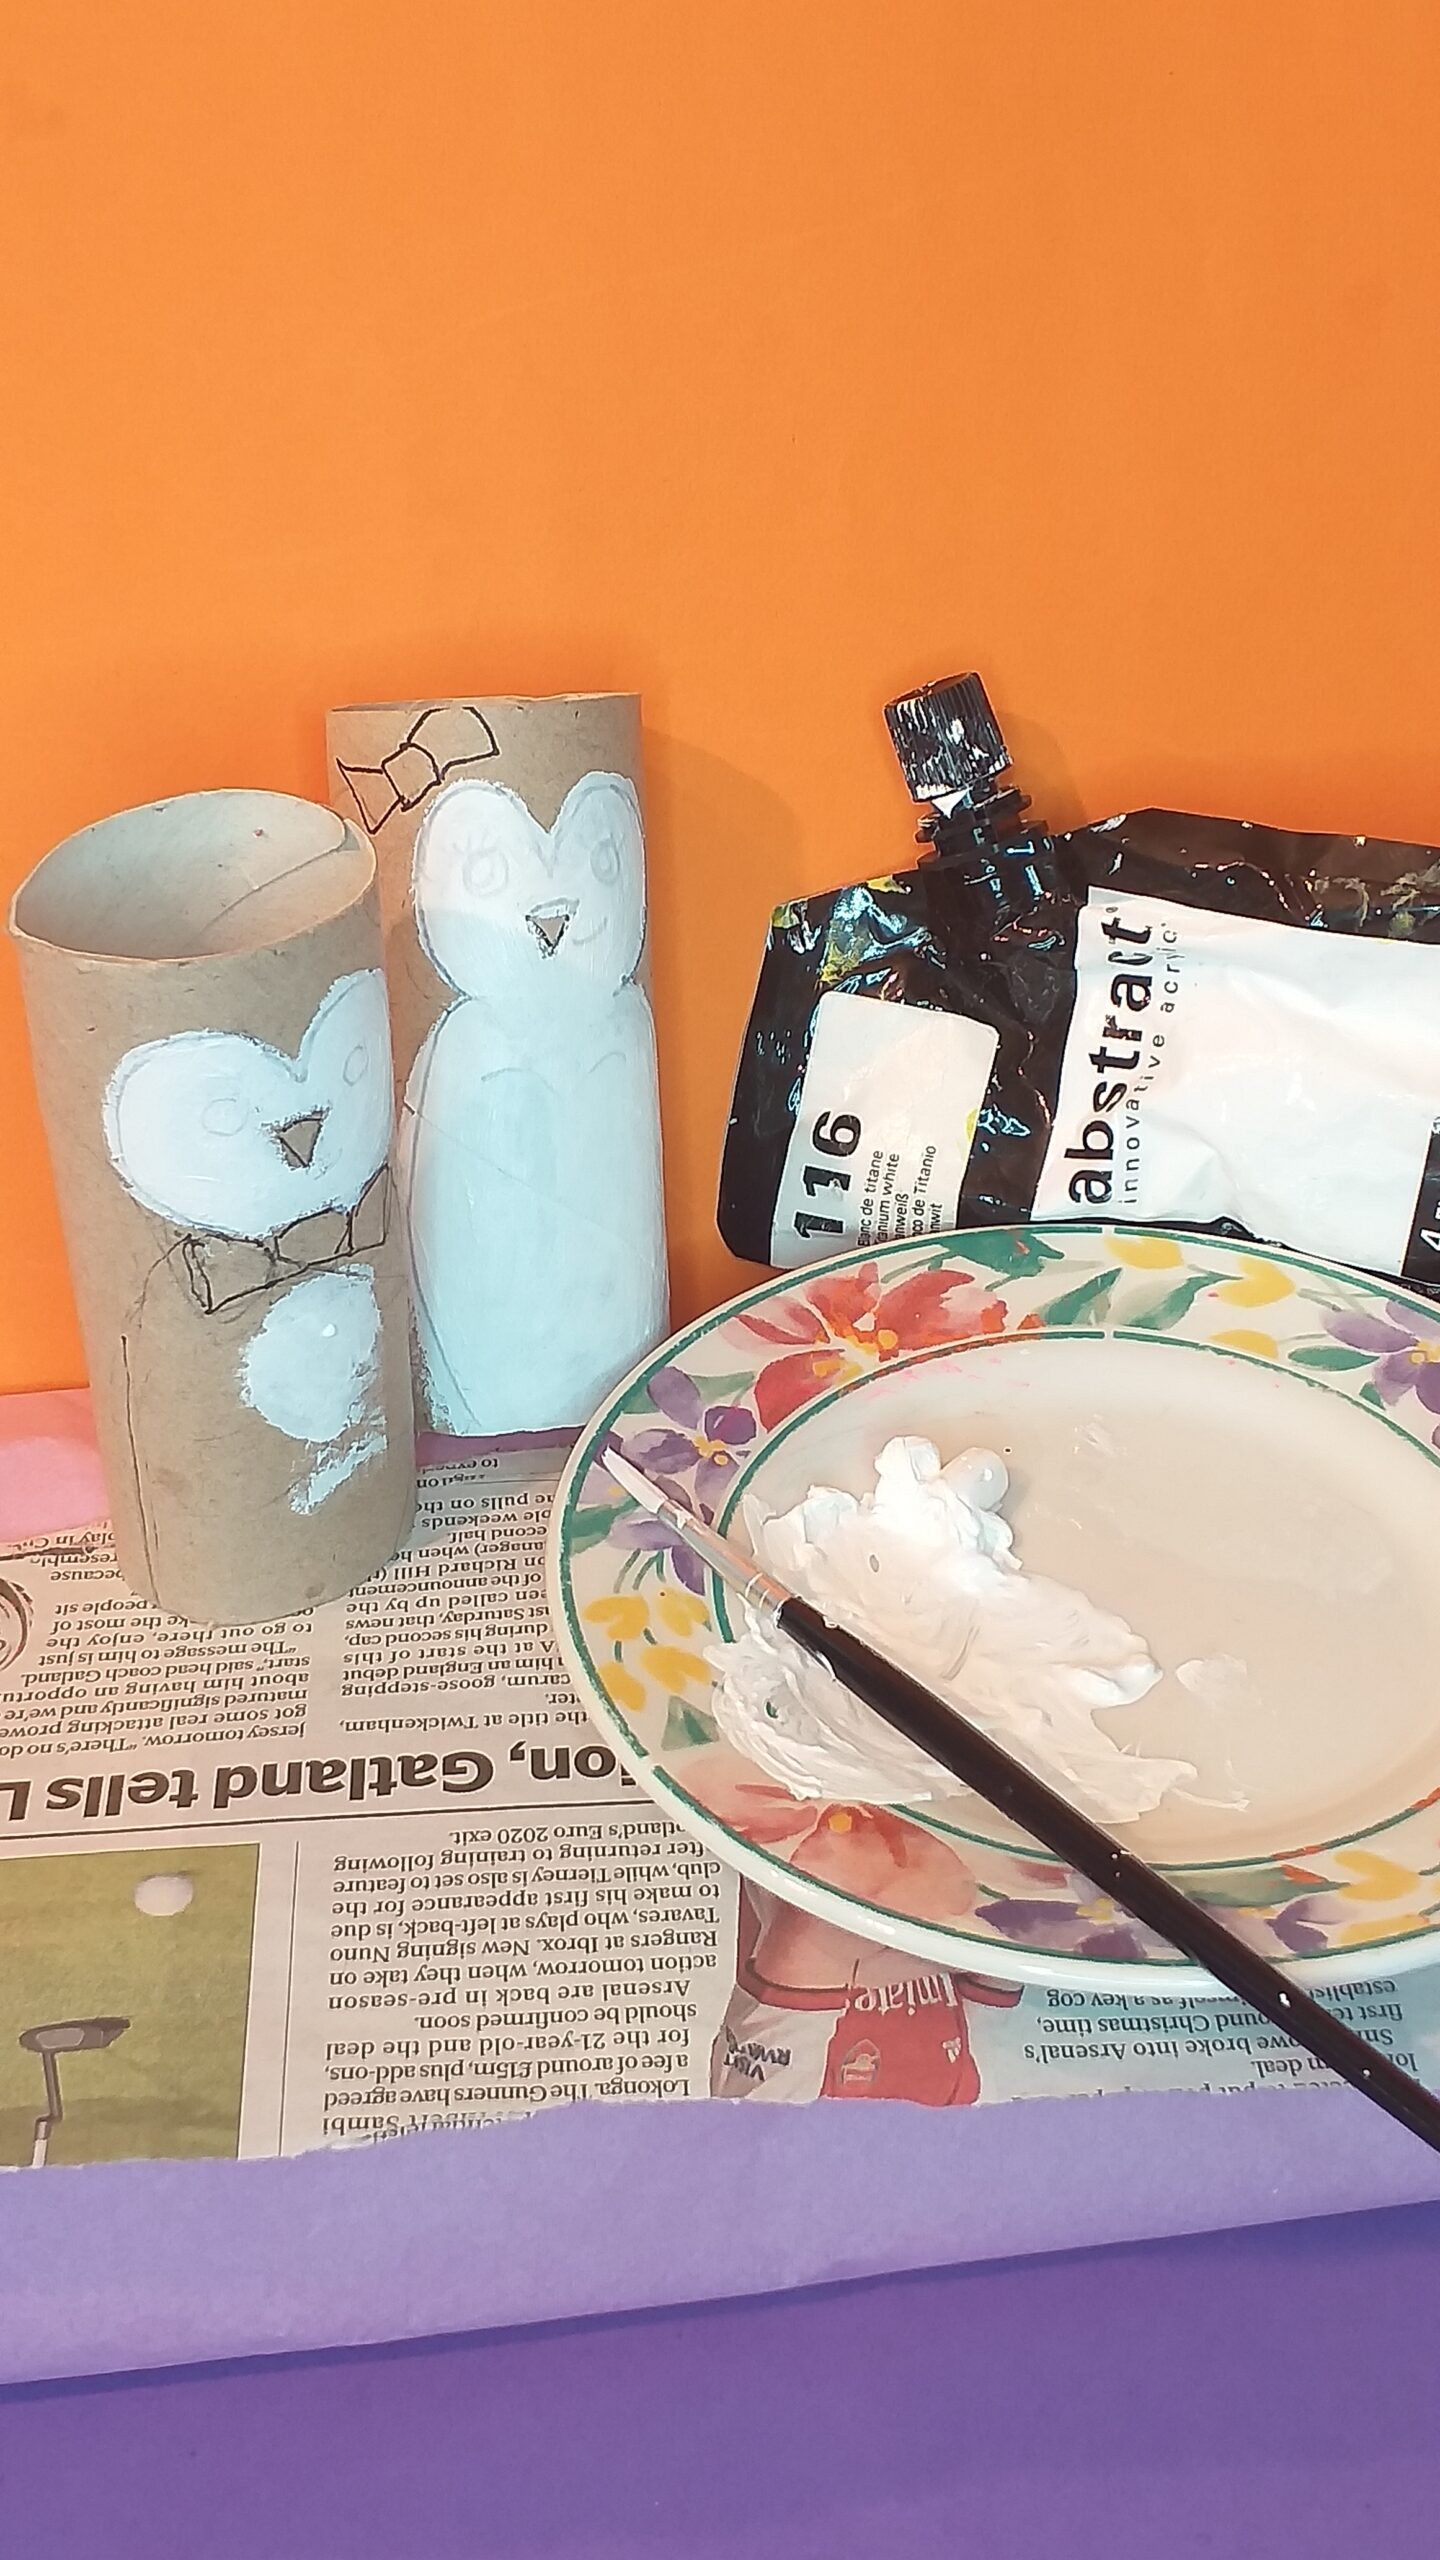
1) Draw penquins faces one with a bow-tie and the other with a bow on the head.
2) Paint all the white areas as shown.
3) Now paint all the black areas.
4) Cut penquin arms on each side.
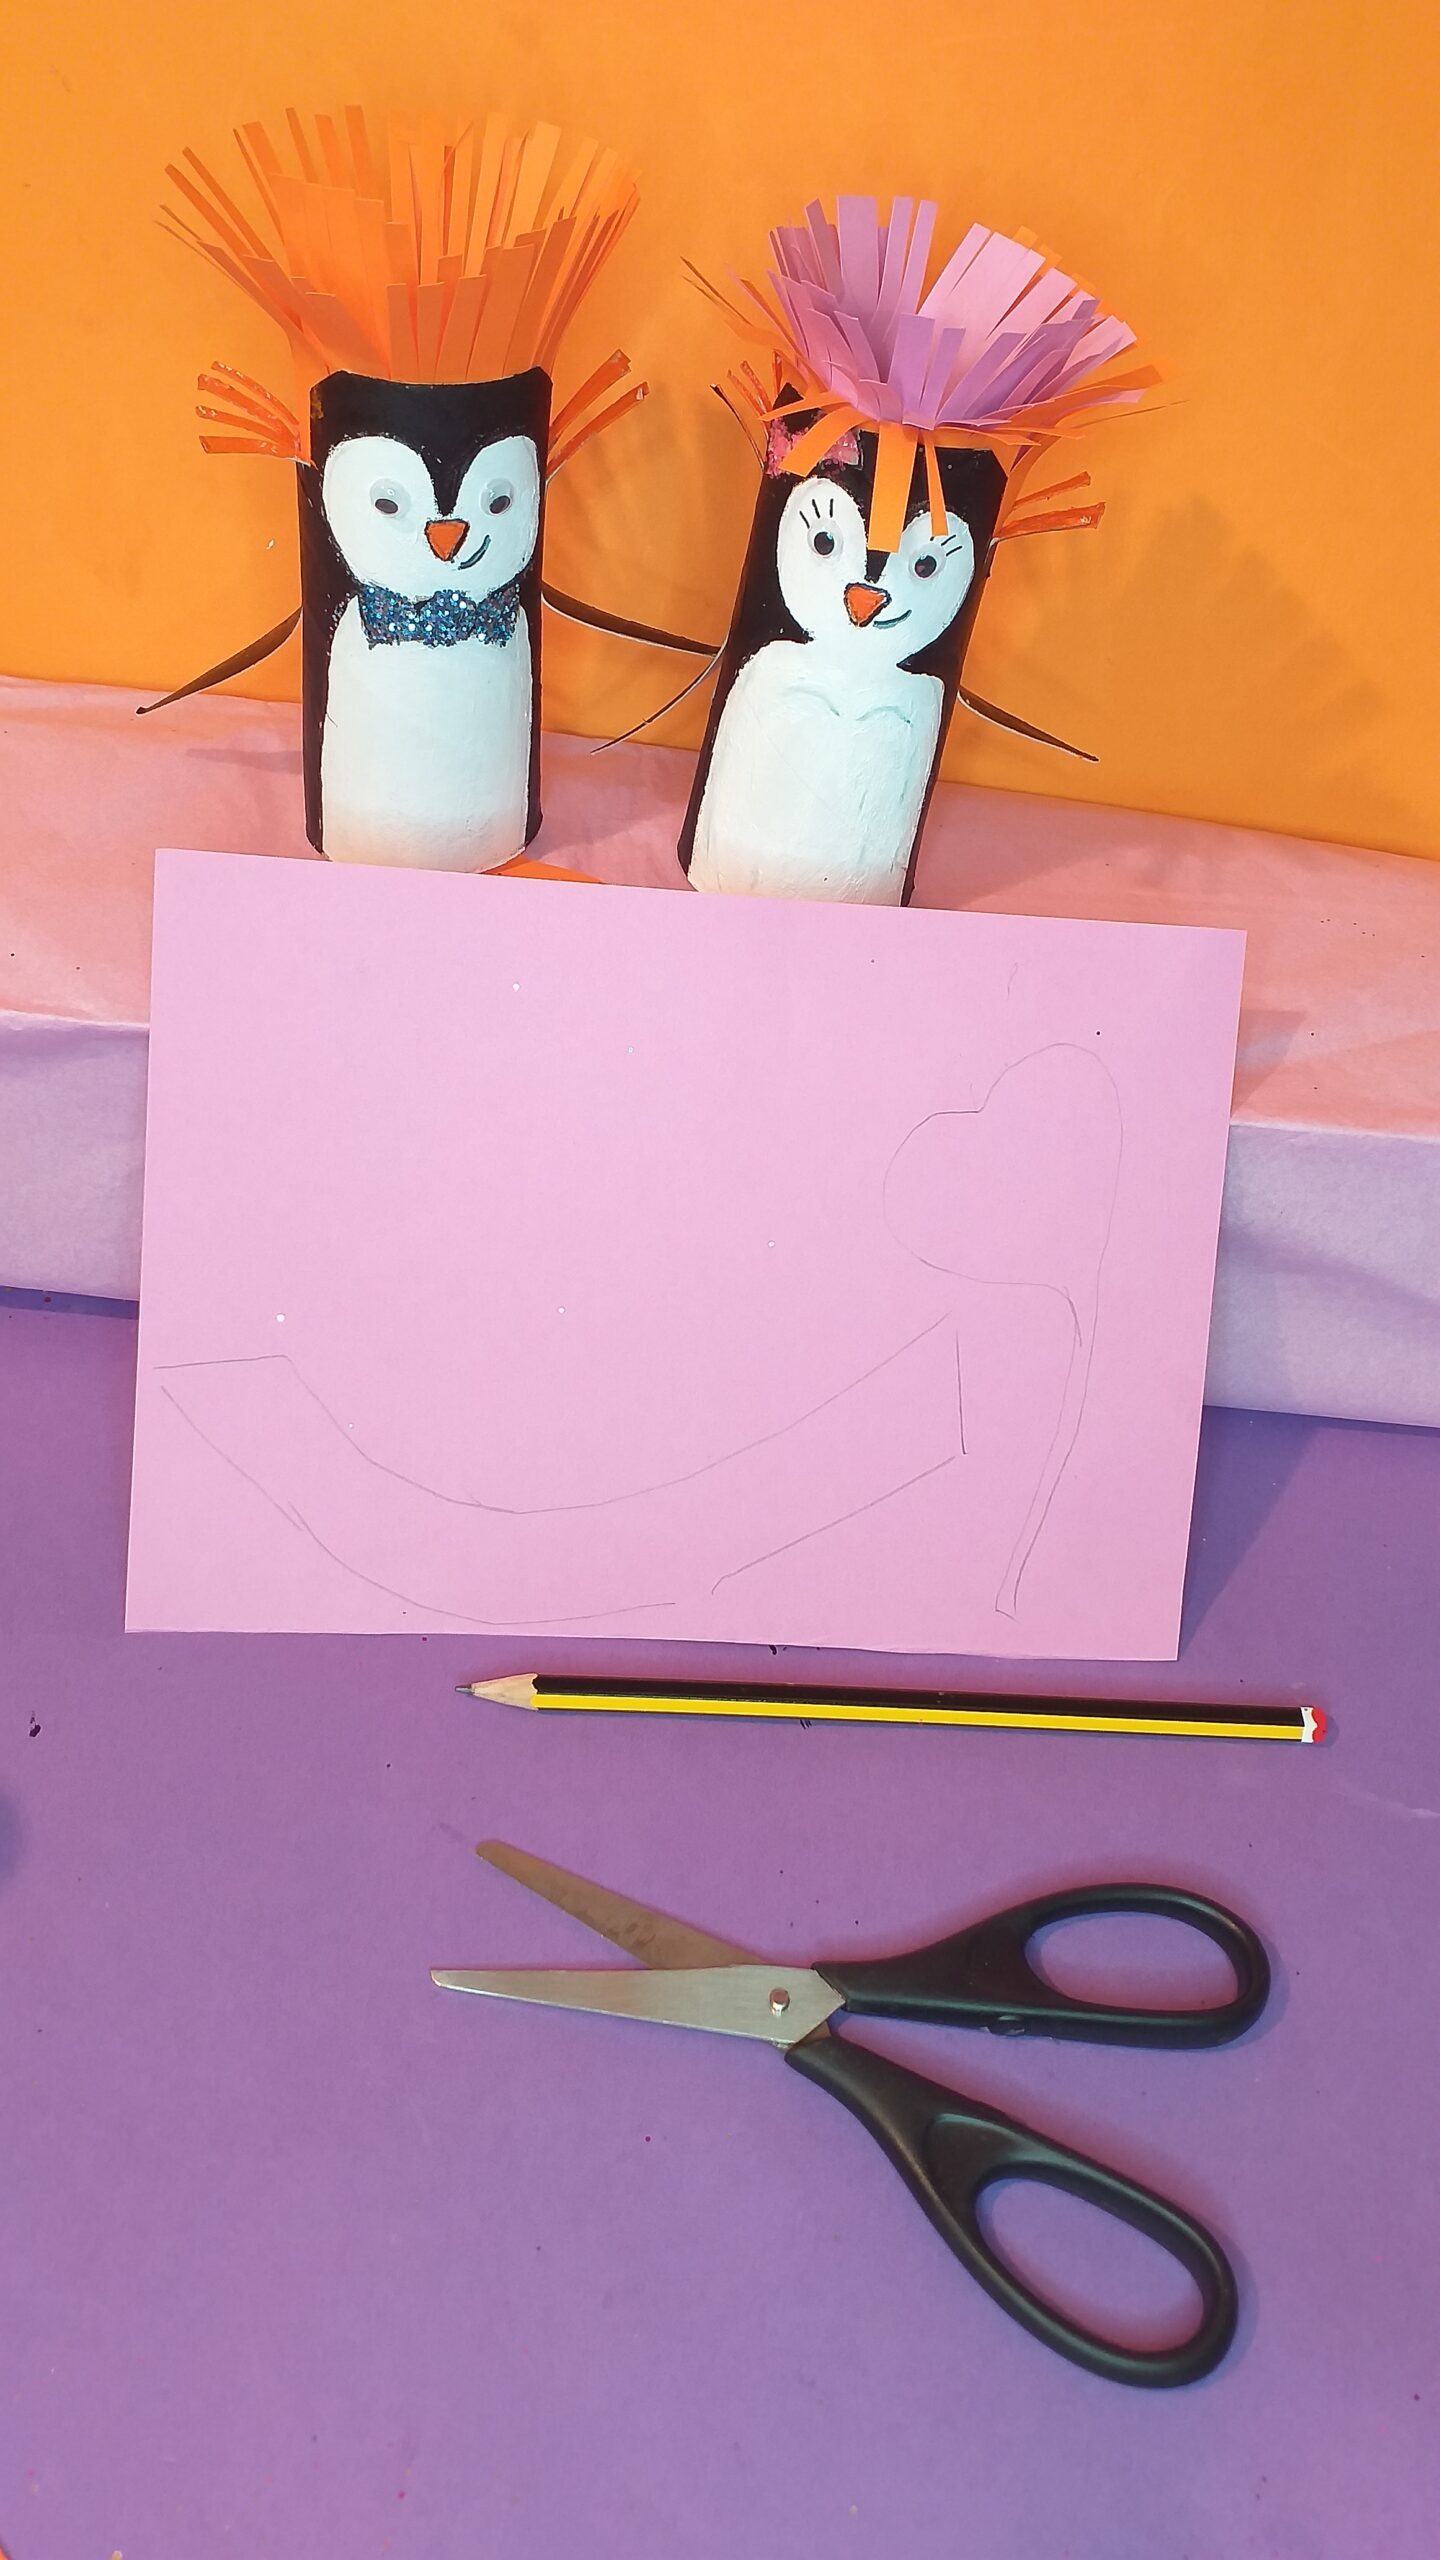
5) Paint PVA glue on each bow and glitter. Cut and frill for hair on top and paint.
6) Cut strips of orange and pink card and cut a frill for hair.
7) Draw and cut out banners for the penquins to hold stick with glue stick onto arms.
8) Roll up the frilled card and pop into the crown of each penquin. Here are the finished cute penquins.
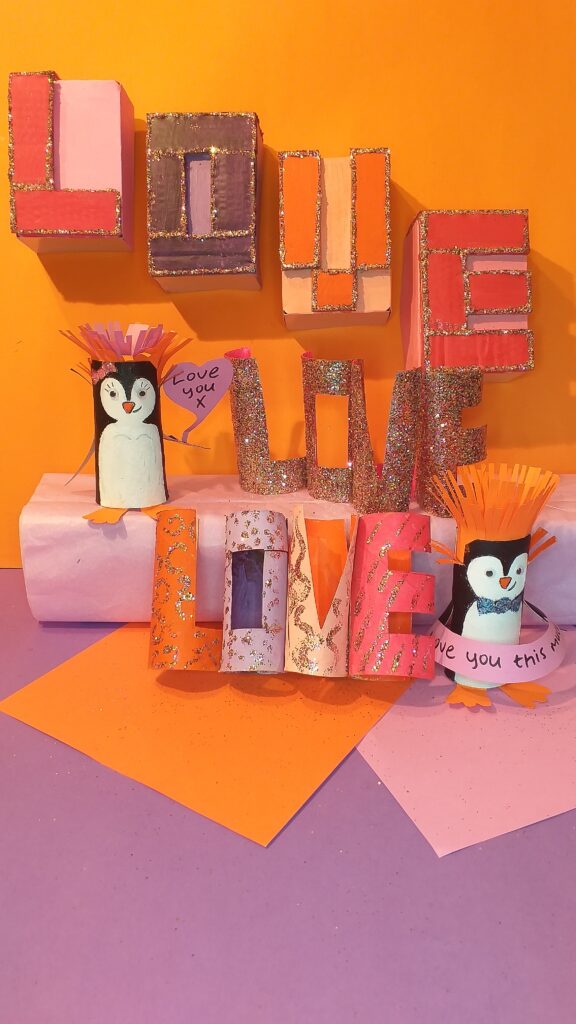
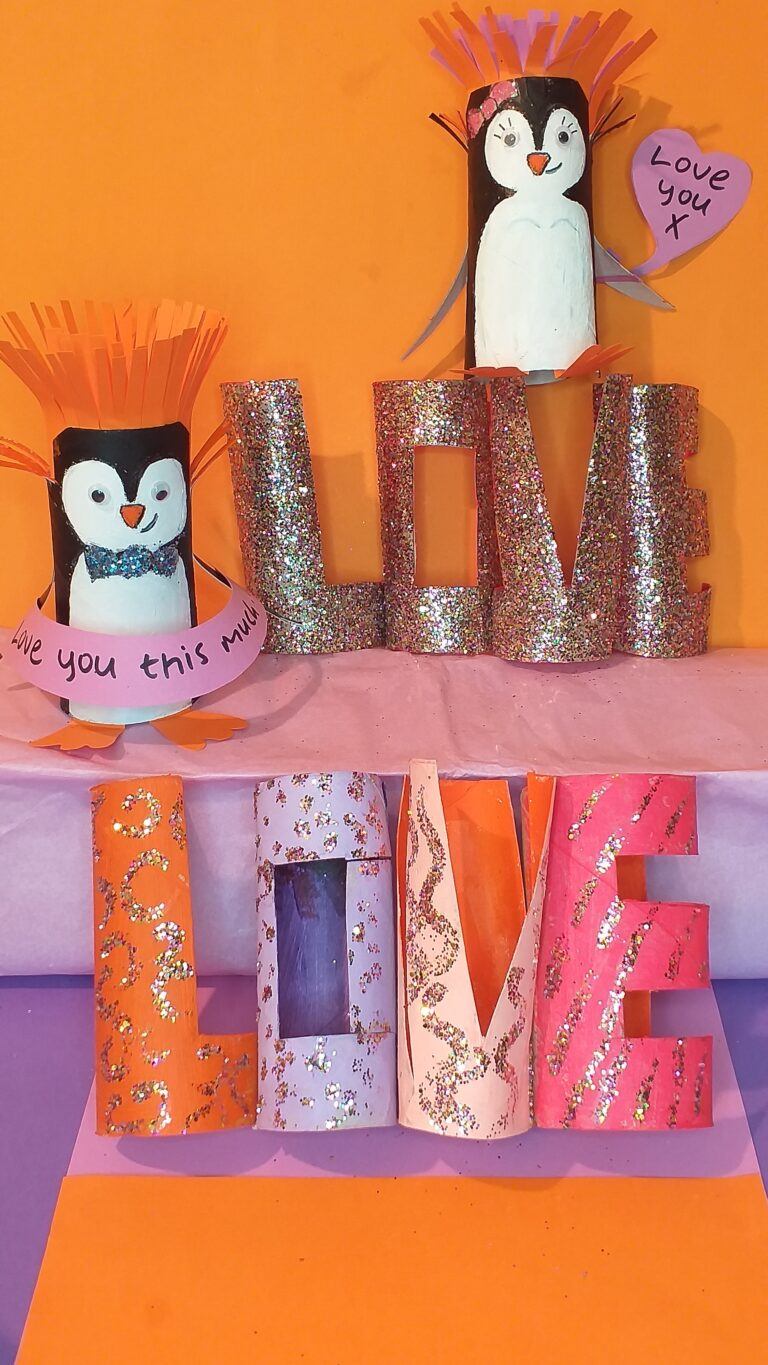
Here is the finished Easy Valentine Crafts for KIds!
Here are the two cute penquins holding banners with love sentiments written on them. The long one says ‘Love you this much’ and the other one says ‘Love you’♥
The penquins can be either added with the love word or be a seperate craft project.
SOME TIPS!
DRAW FIRST
When drawing the penquins on the tubes, use a pencil first until you get the right look, then go over it in a fine felt tip.
USE FINGERS TO HELP
When painting put your fingers inside the tube, which will make it easy turning the tube to paint and not smudging the paint.
LAYER PAINT
You may need more than one coat of paint to get a good strong colour.
GLUE EYES AFTER
Add the googly eyes when you have finished all the painting.
NOTE FOR ARMS
When cutting out the arms have them slightly pointed at the bottom, then pull out and bend upwards.
ADD CRAZY HAIR
If you prefer you can just cut and frill the top part of the head of the penquin and fold down, as the frilled paper fills in the hole on top.
FINAL TOUCH
Draw and design your own banners with words of your choice.
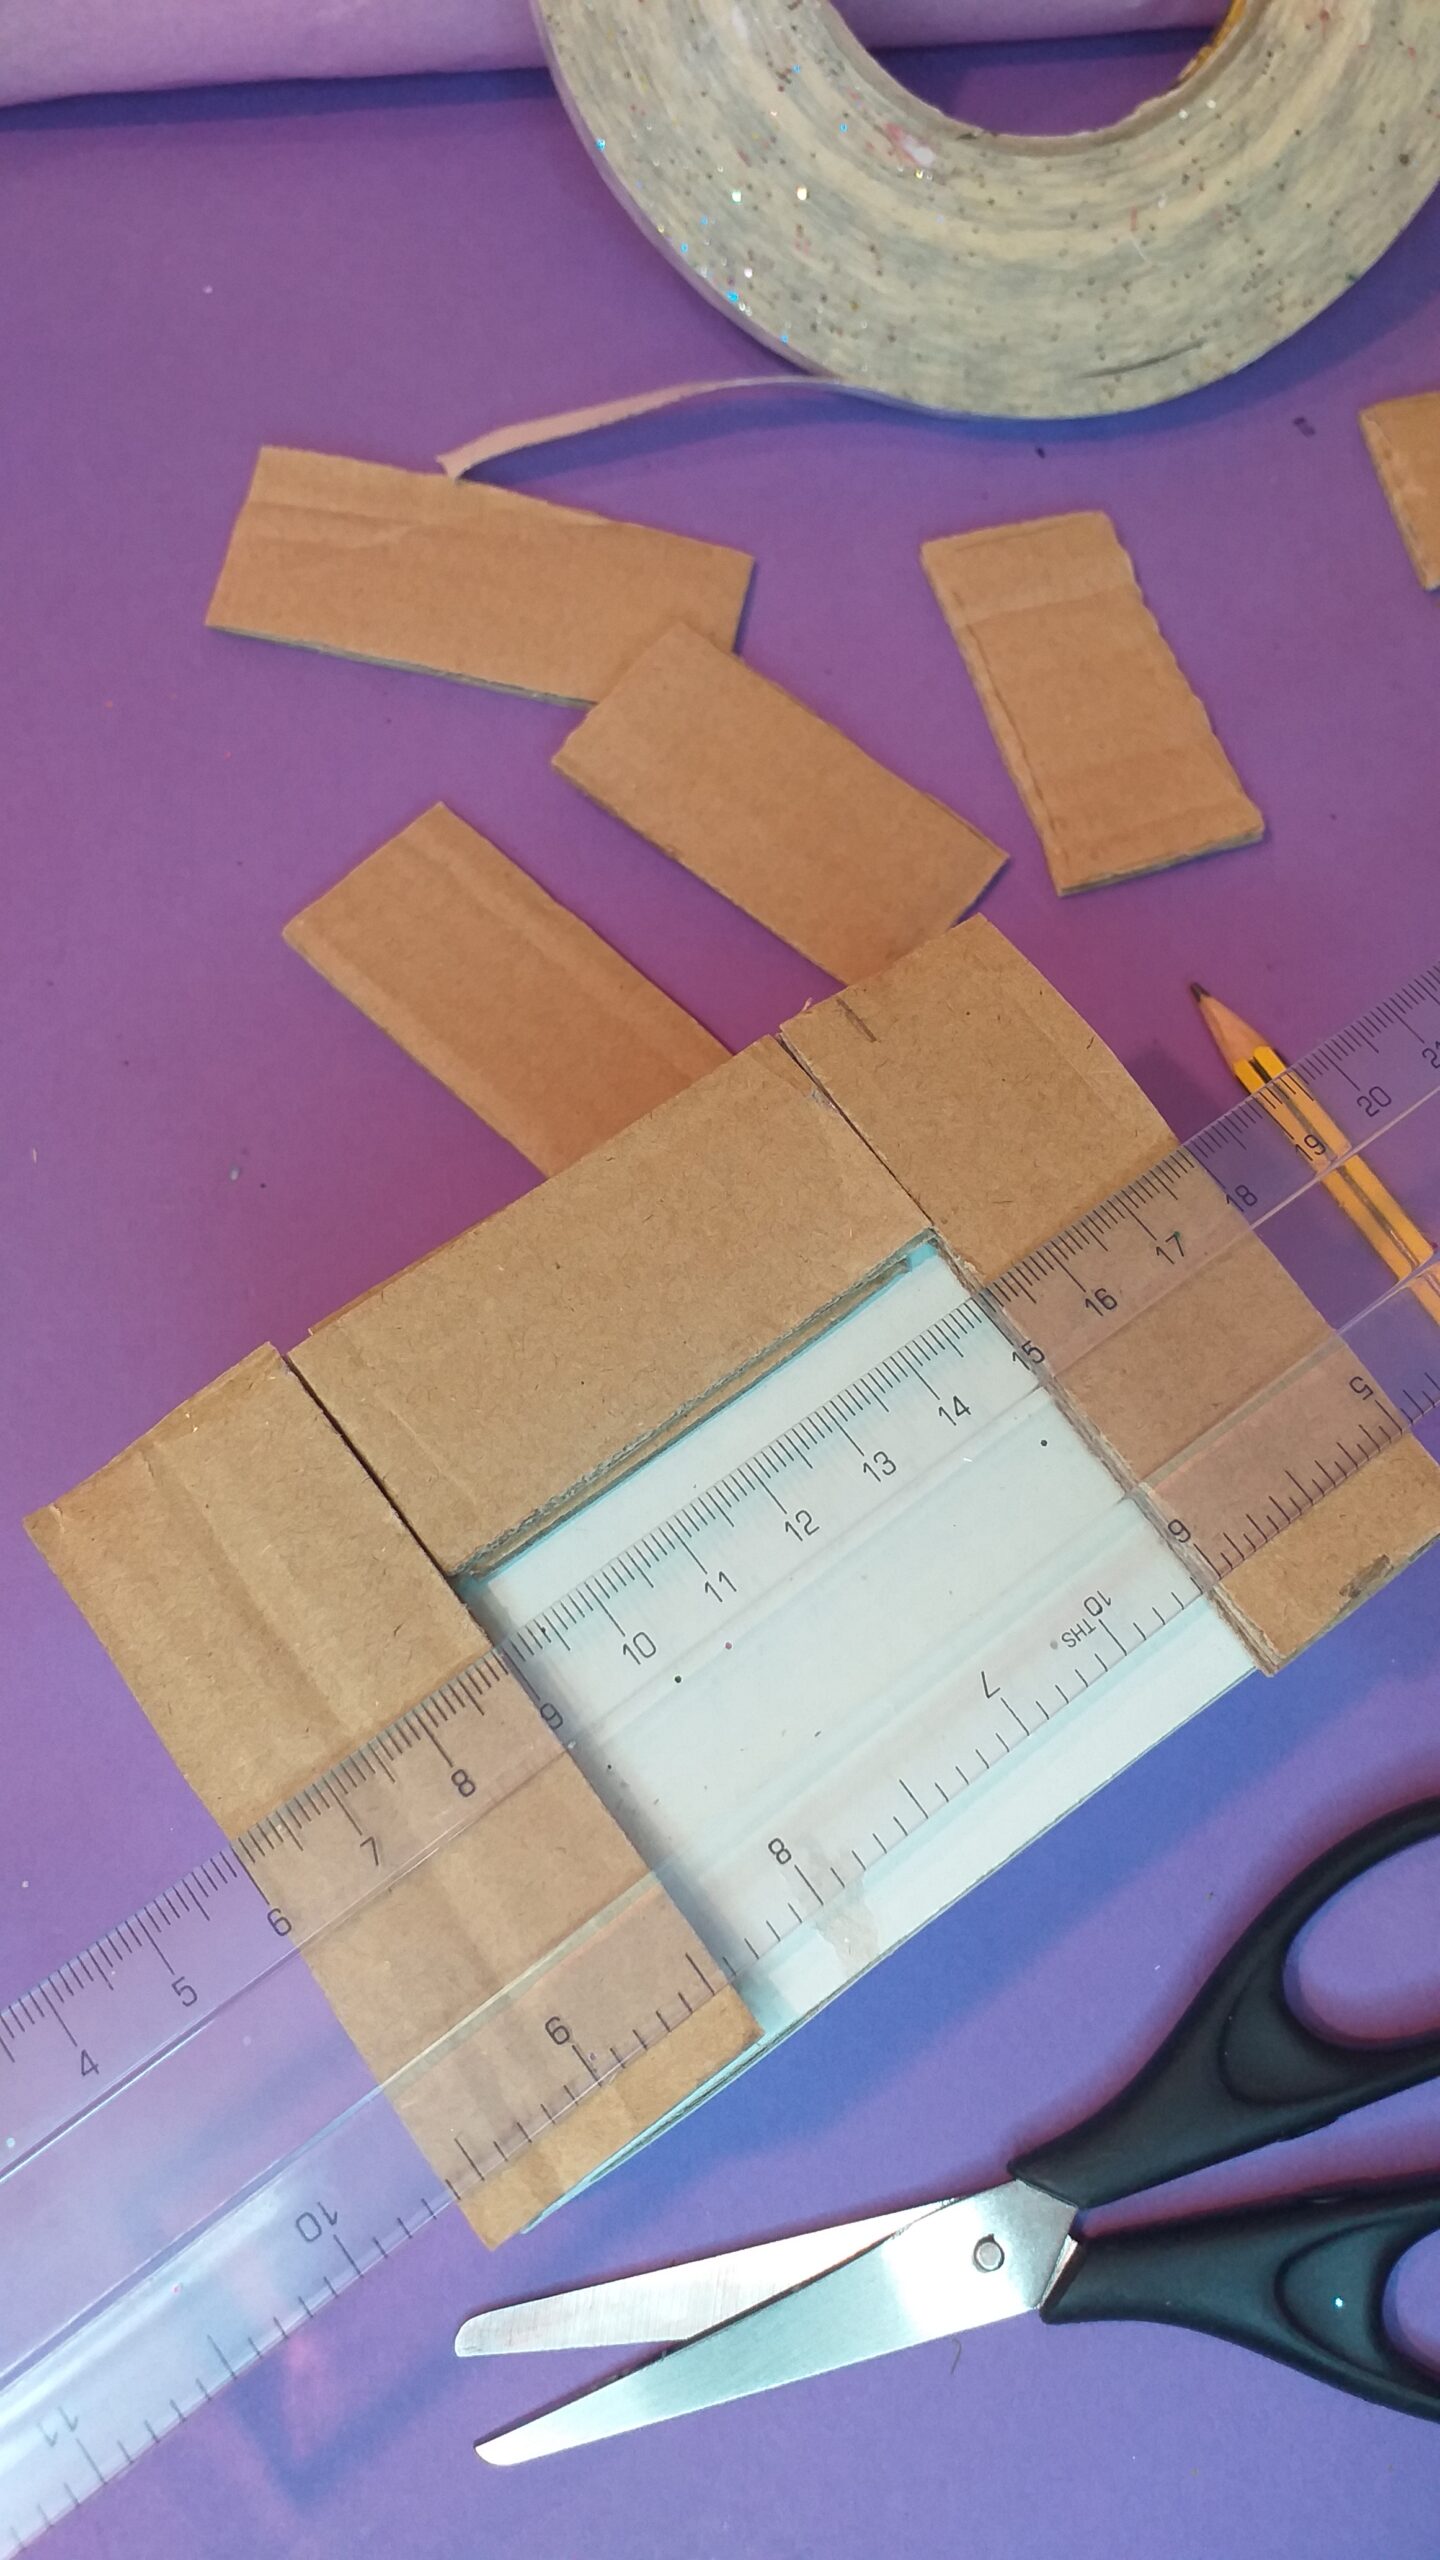
1) Cut card to size approx. 30mm wide, depending on the size of your boxes.
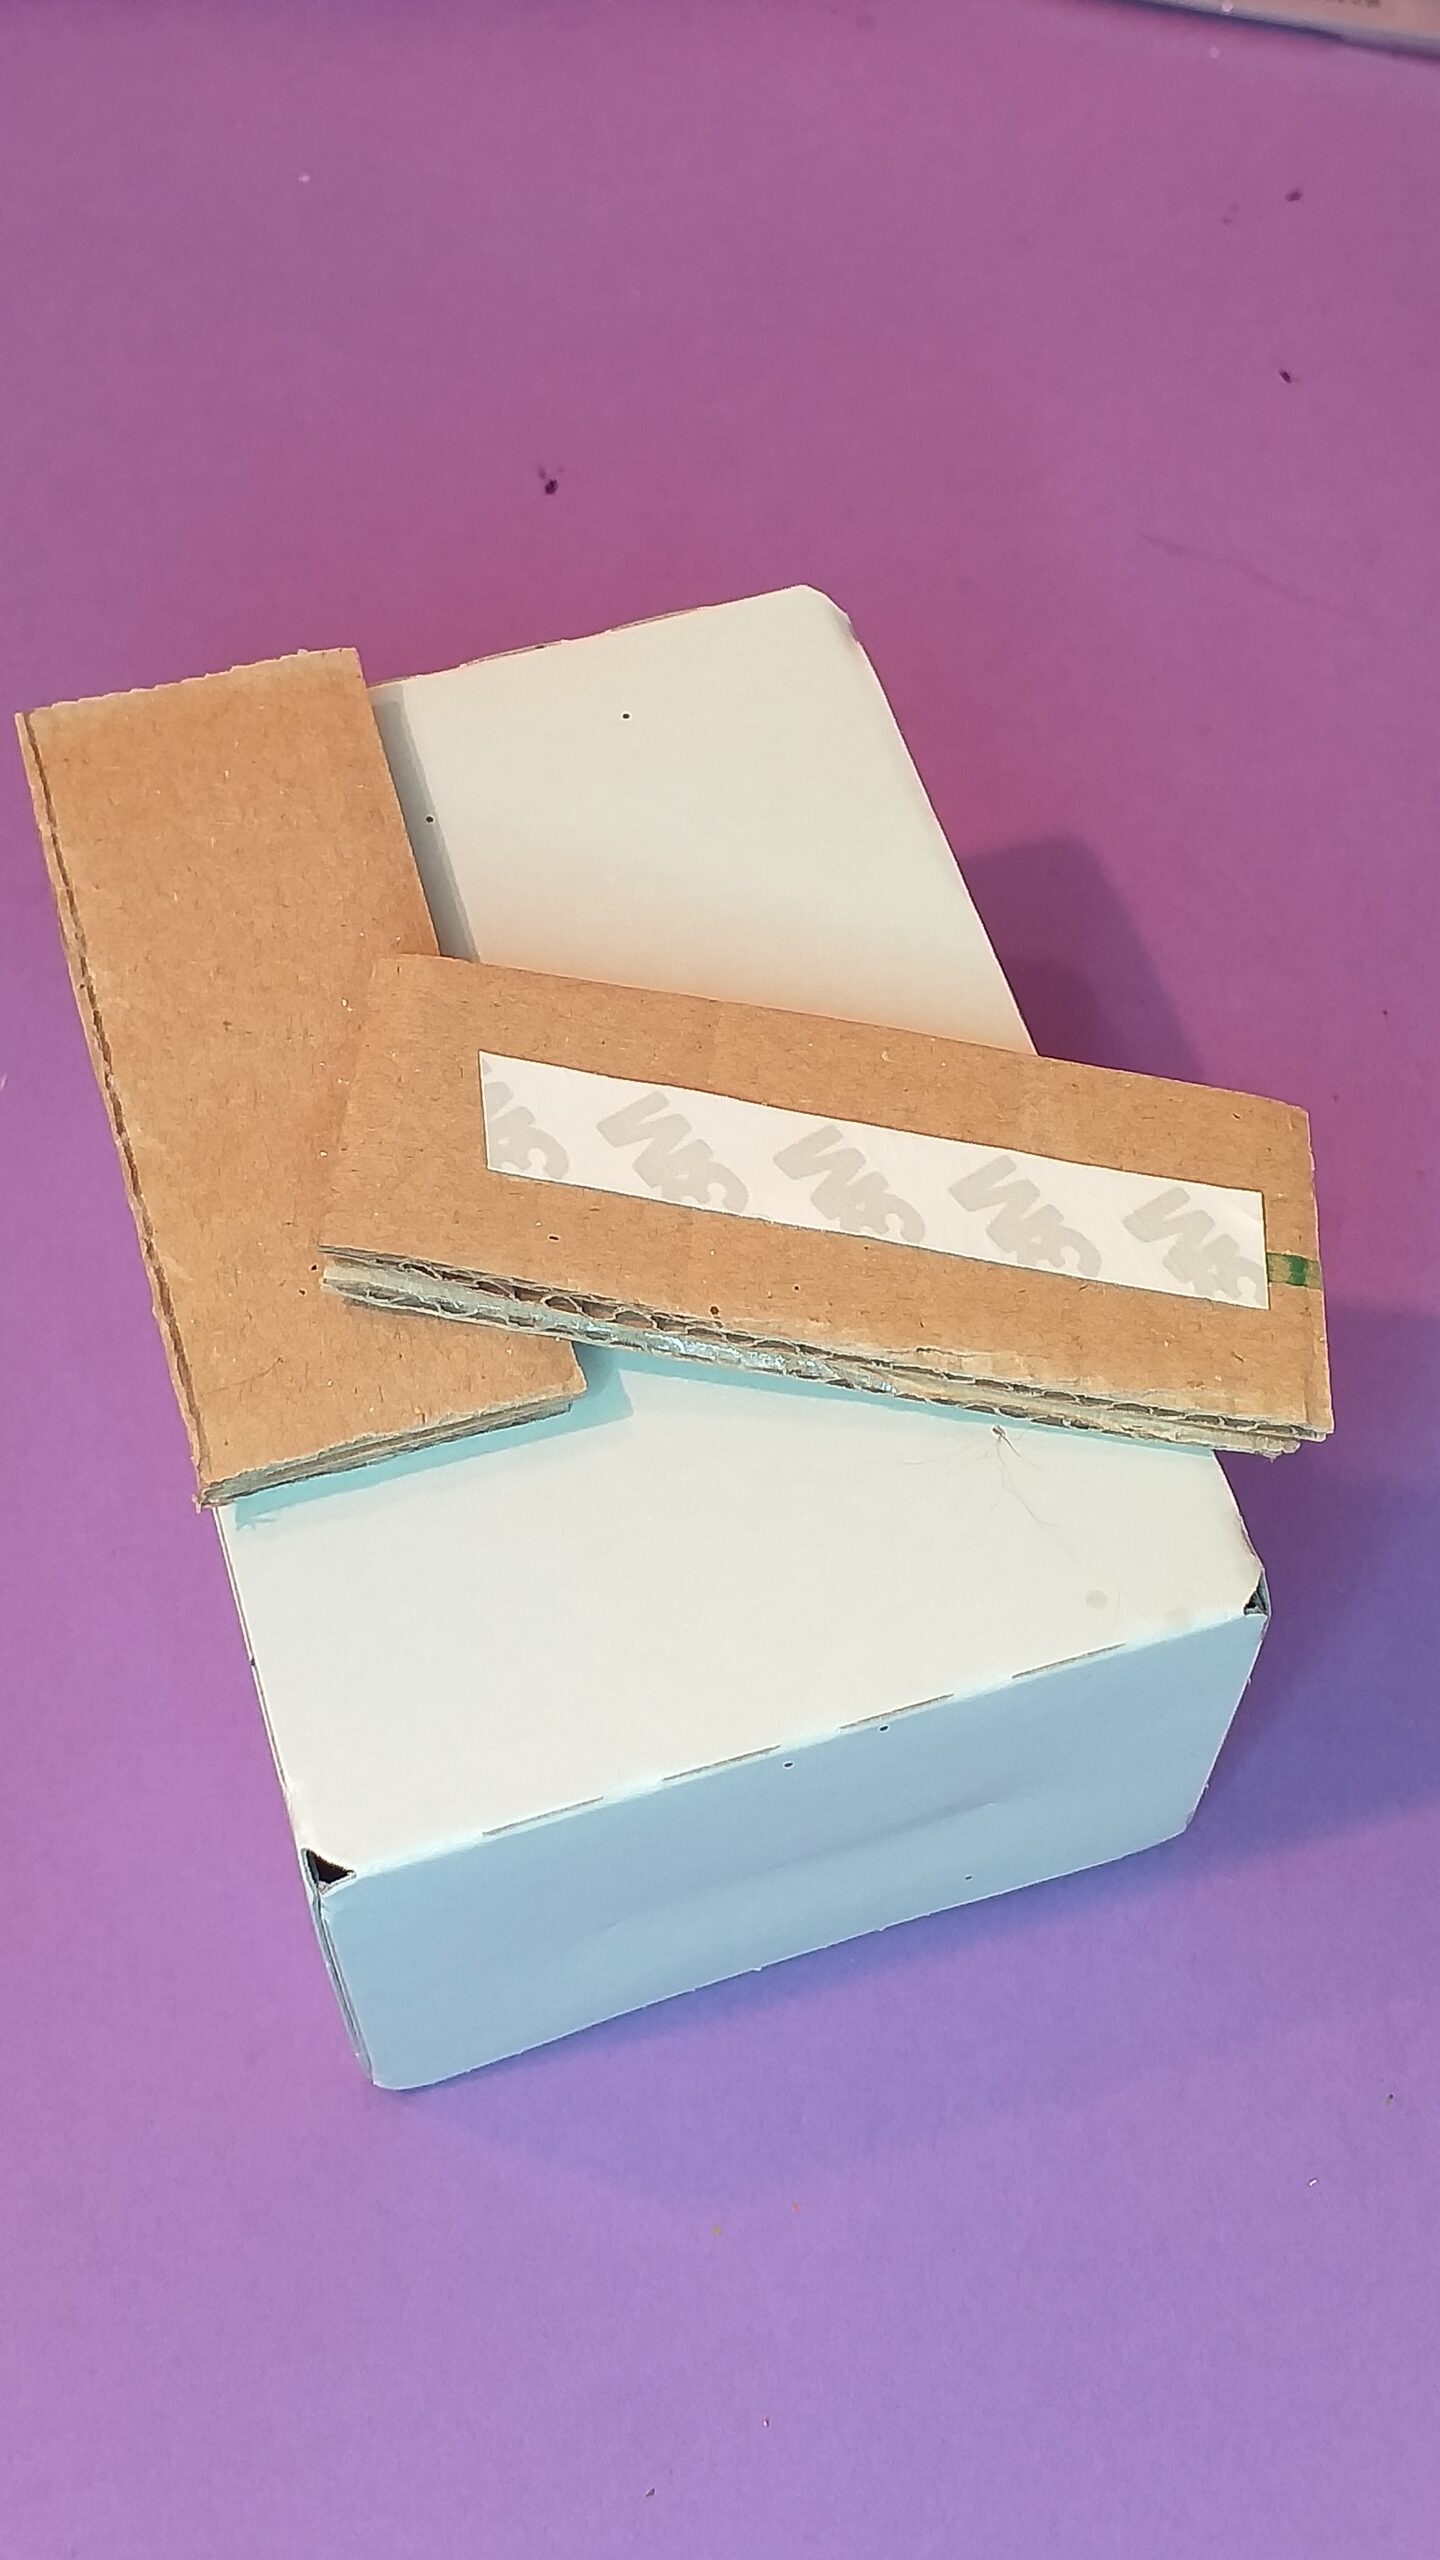
2) Stick 2 lots of card to make it thicker and add strips of double sided taped on the strips of card and glue onto boxes.
3) Create your LOVE word as shown.
4) Add card to the topside of the word to give it a better finish.
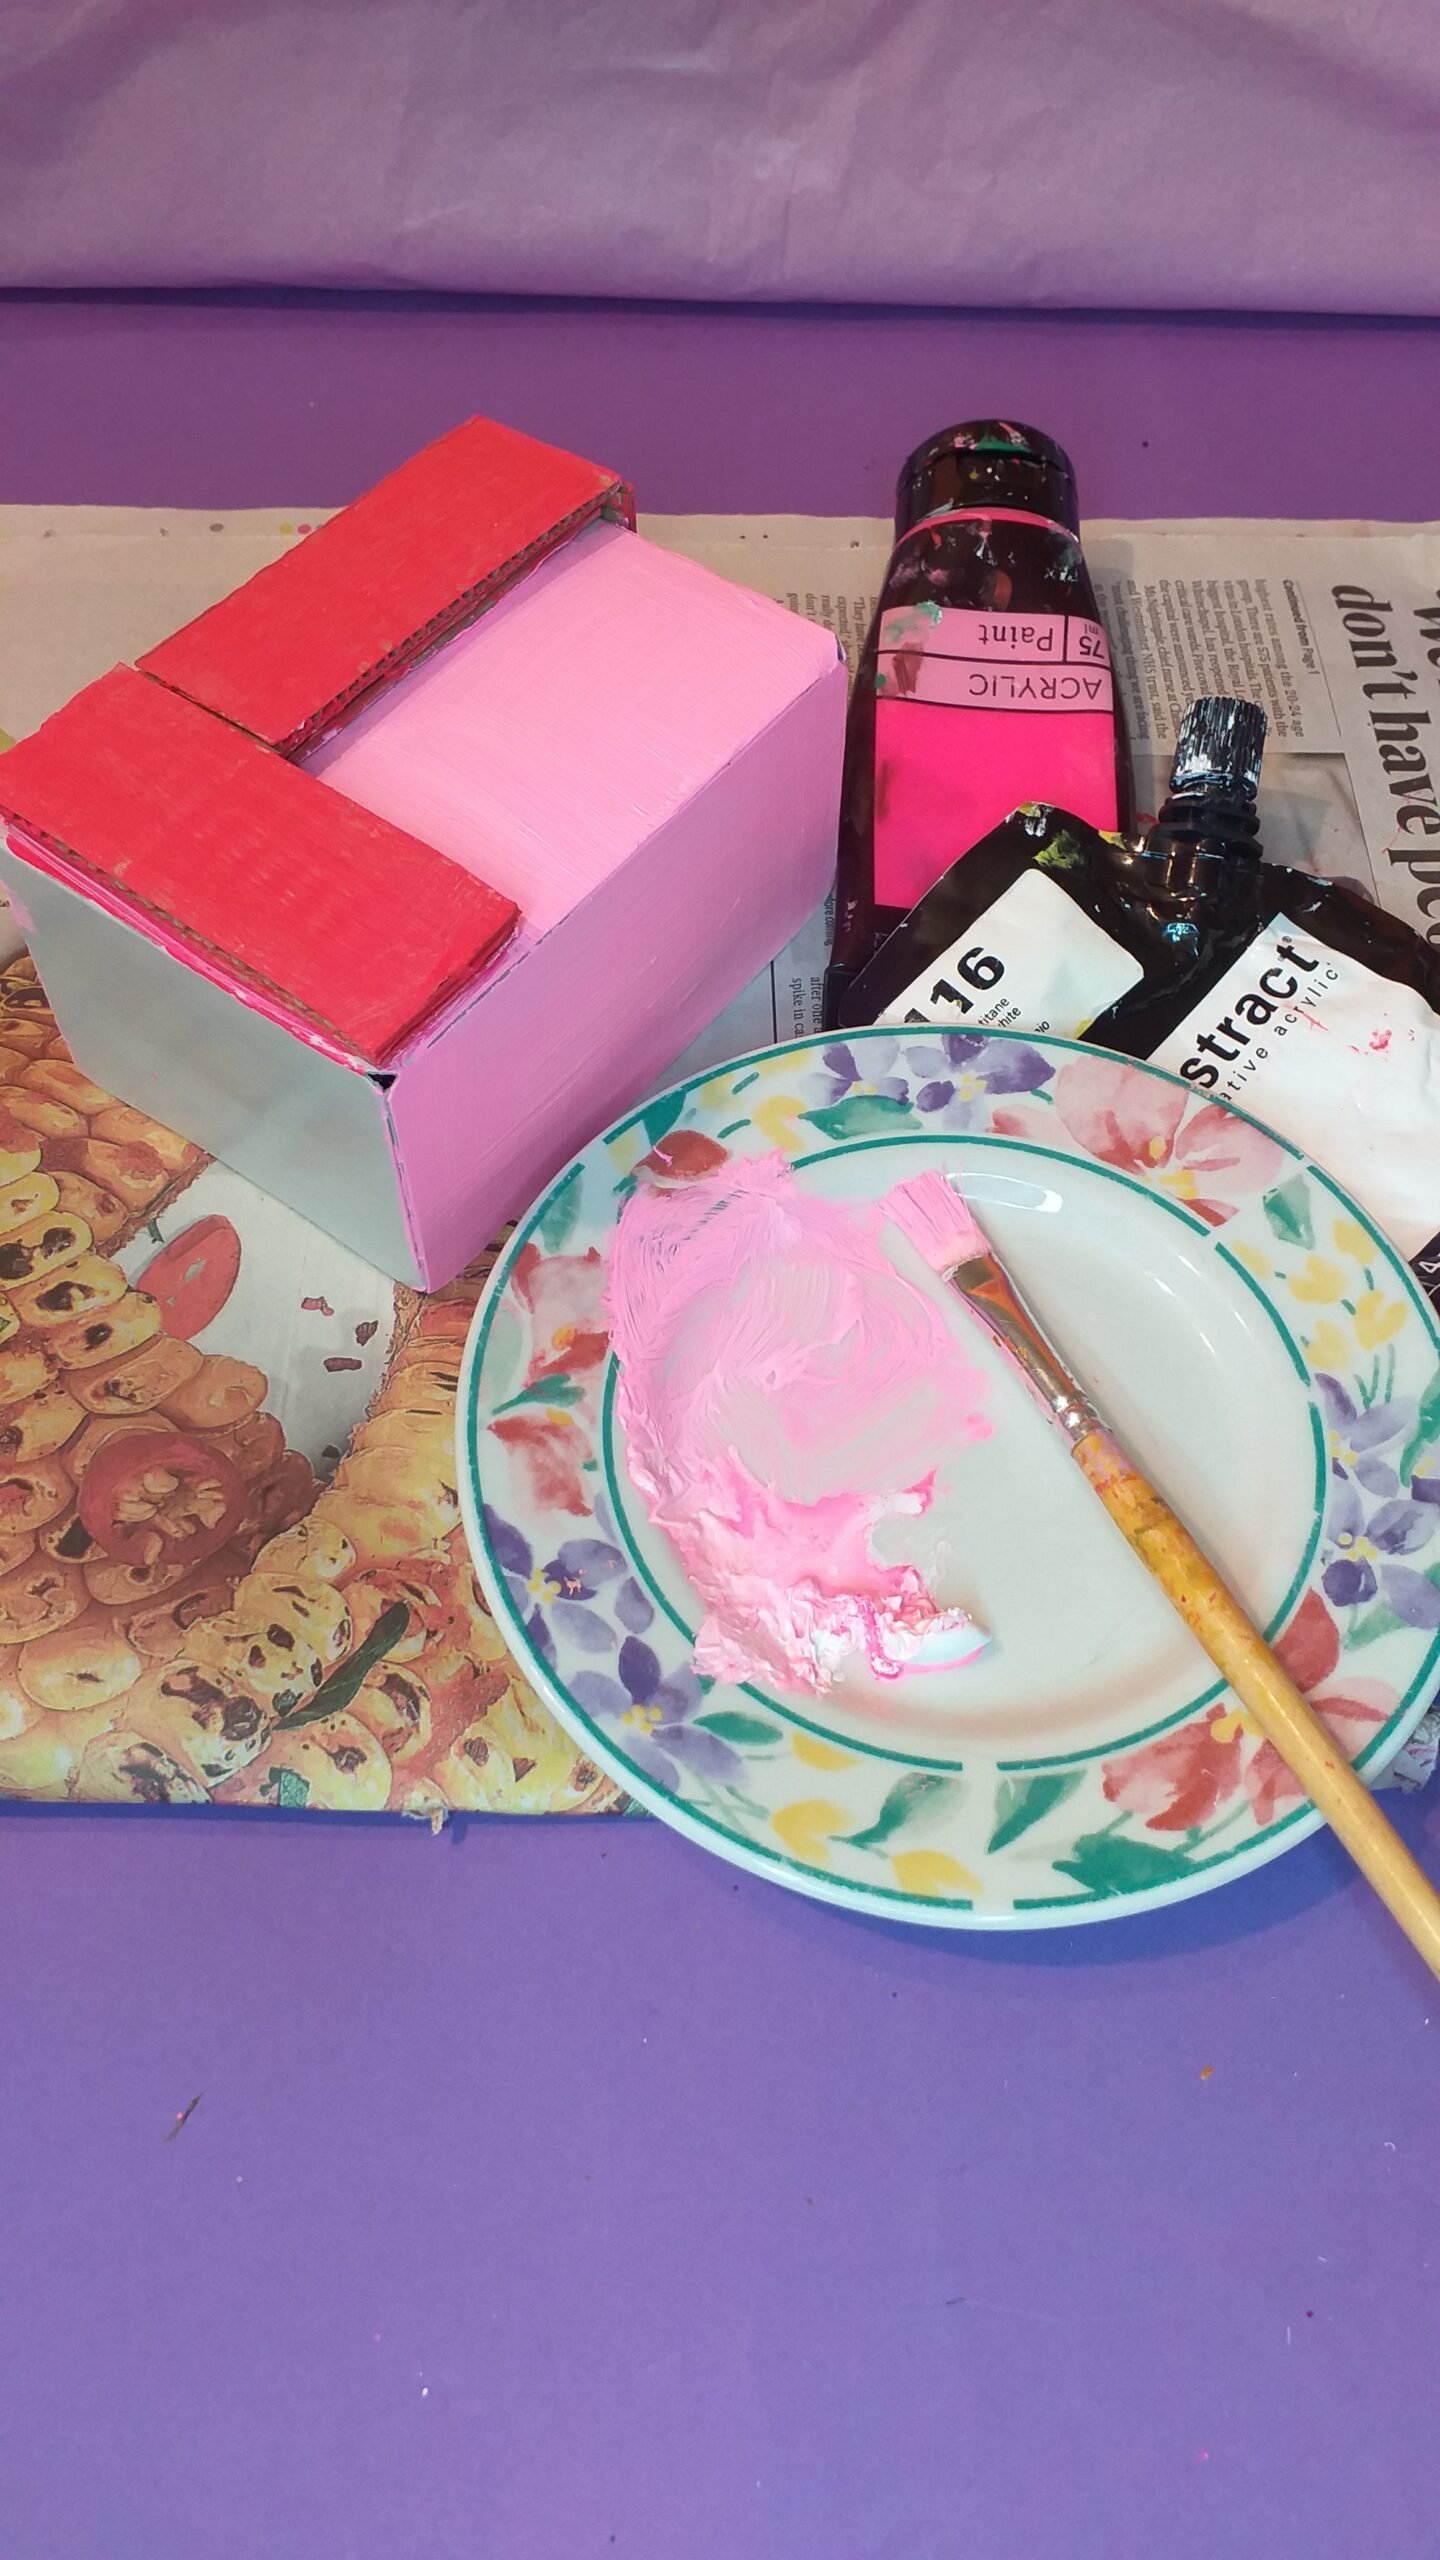
5) Now paint the letter in chosen colour, then add white to lighten the colour and paint the box.
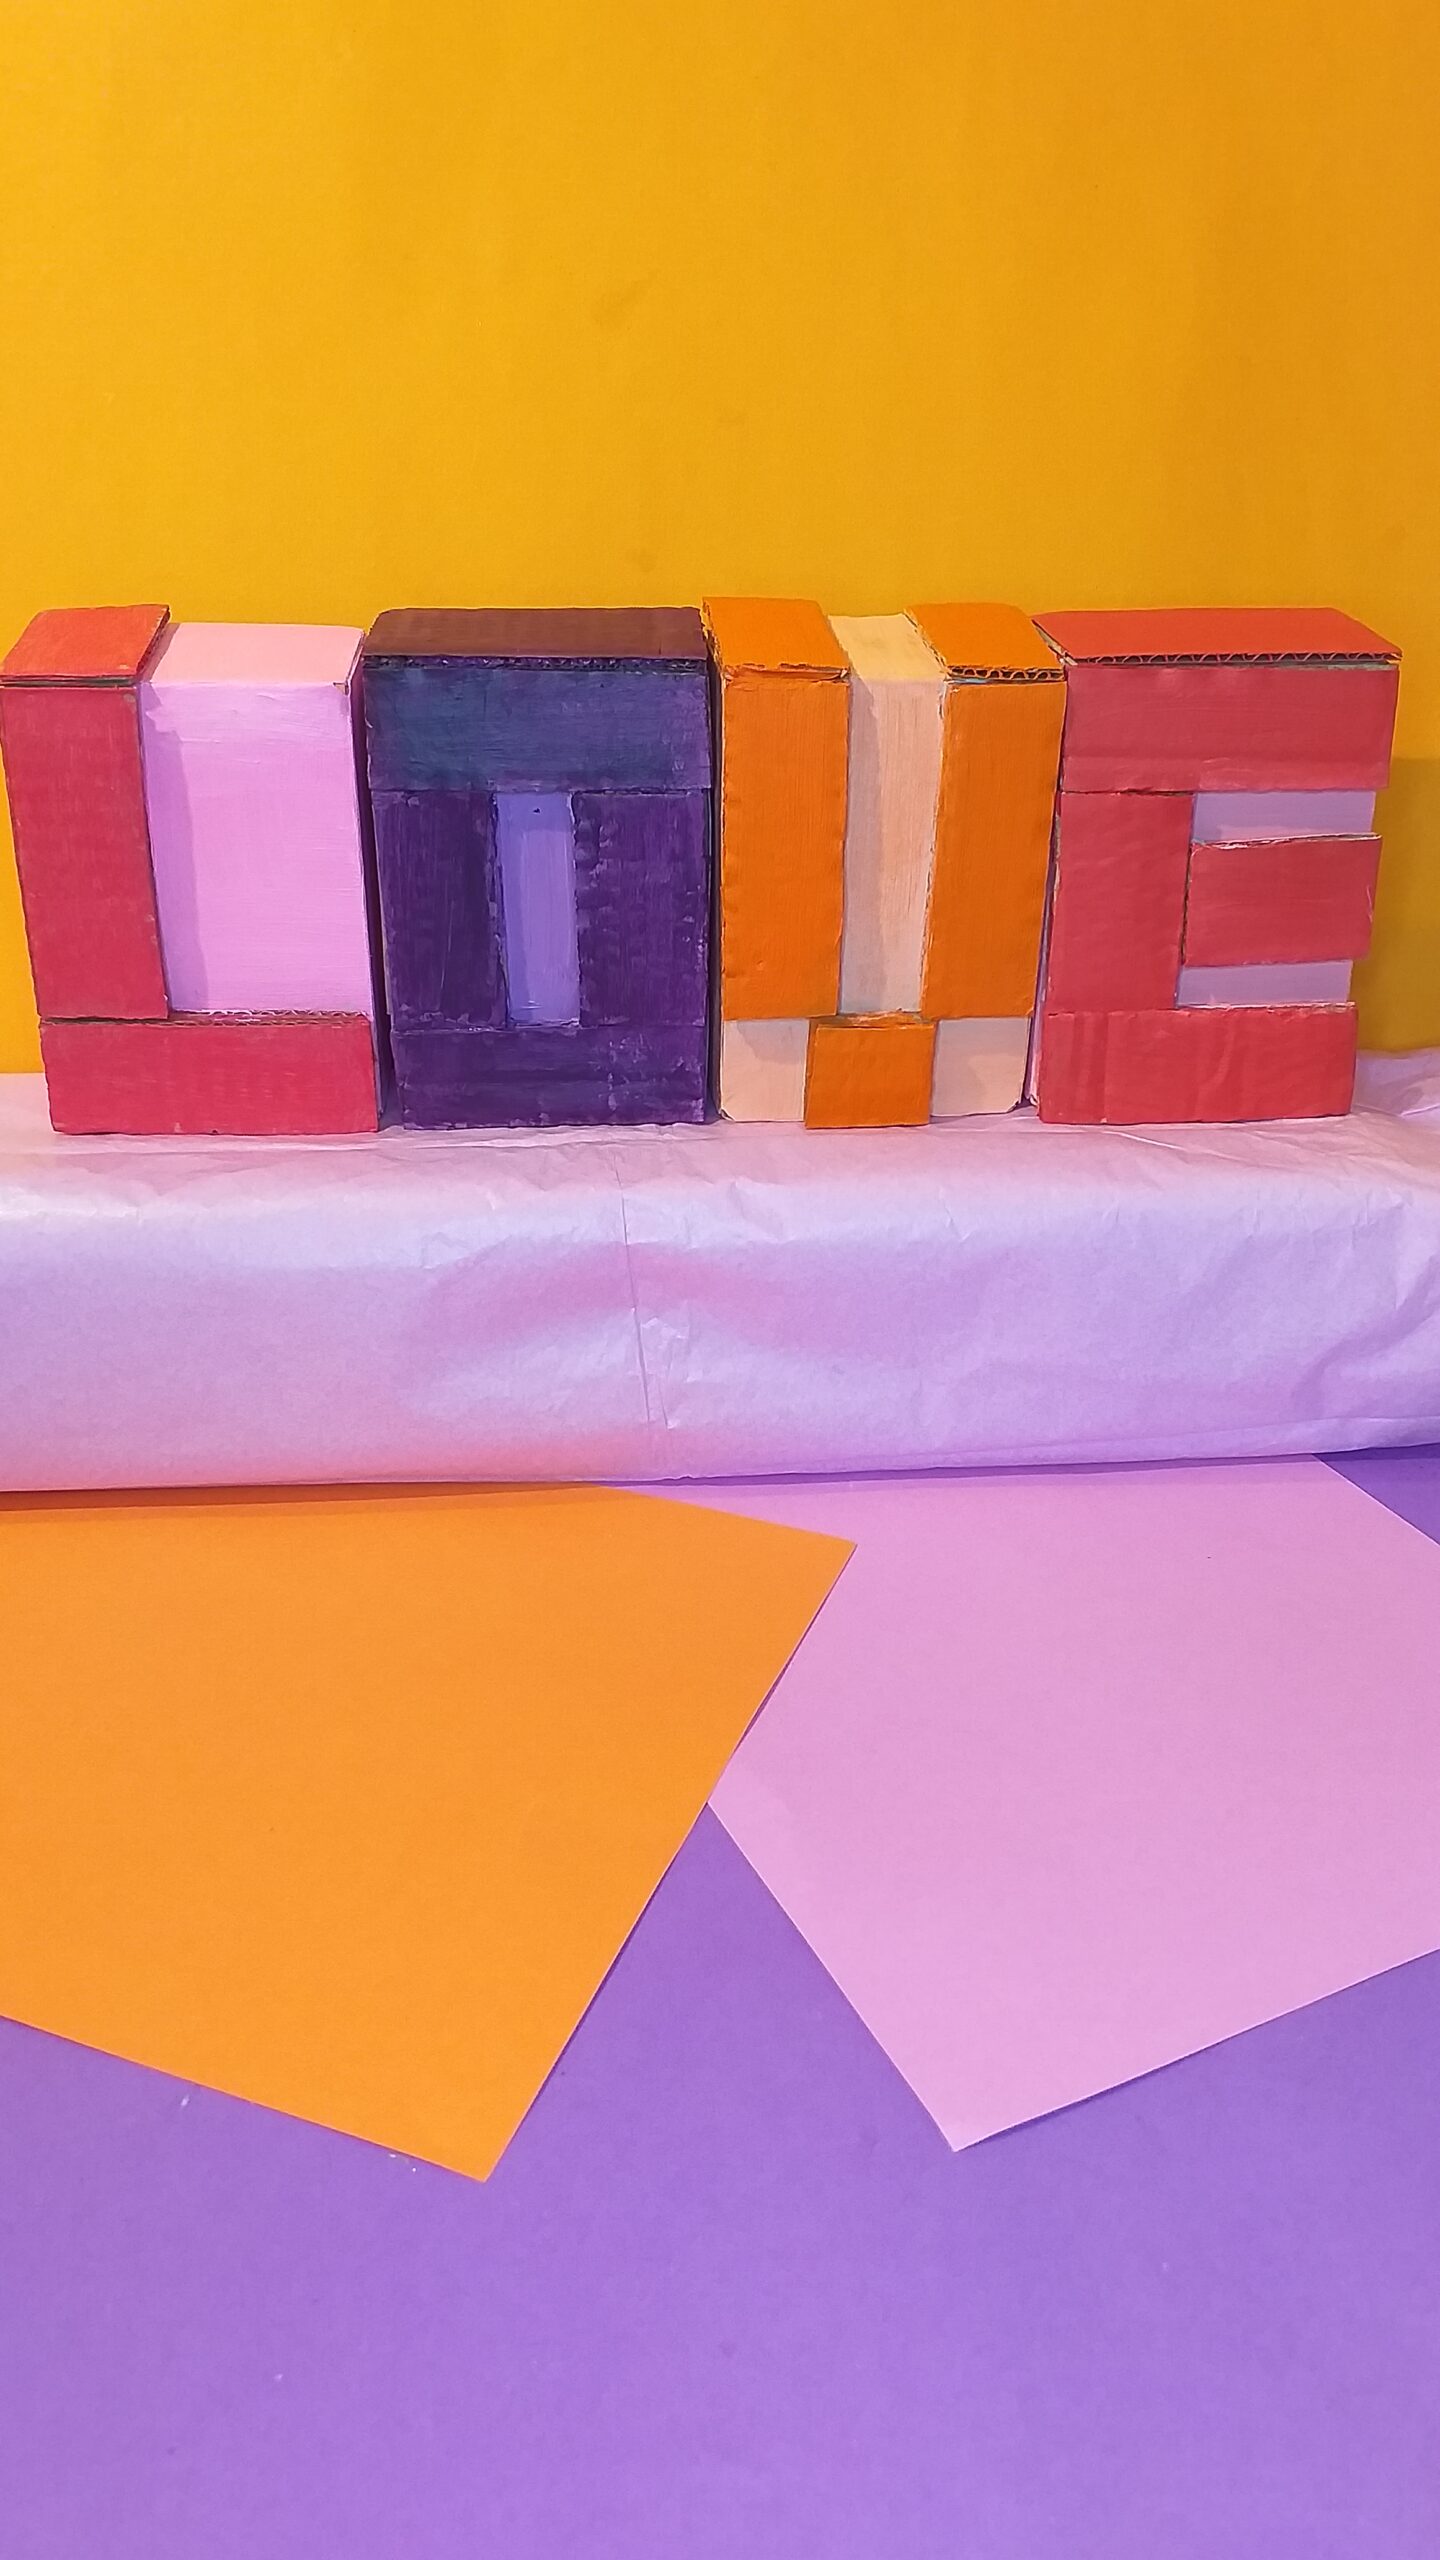
6) This is the finish look.
7) Where the cards join you can fill gaps with PVA glue and glitter.
8) This is the finished look.
9) As they are hollow boxes you can hang them up like so.
SOME TIPS!
BASE FOR LETTERS
If you can find similar-sized boxes, that’s great, but you can be inventive and choose different-sized boxes, or even one biggish box, as it’s only playing the part of a base to attach the letters on.
SEPERATE LETTERS
Having separate boxes allows you to move the letters about and hang them how you like.
YOU DECIDE THE SIZE
When cutting cards for letters, the width is entirely up to you, depending on the size of your boxes.
USE GLITTER TO HIDE GAPS
I decided to add PVA glue and glitter to all the joints and edges, as it hid grooves and slight imperfections, as well as made them look good.
TO CONCLUDE!
I have provided you with three super cardboard Easy Valentine Ideas for Kids!
Whether it’s now, or over the holidays, all you need to do is to save your suitable throw-outs and take the ideas and make fun words, or instant little penquins!
Colour and glitter how you like and simply enjoy the crafting with your kids!
So happy Valentines day, week, and even month and enjoy your crafting projects!
Here is another Valentine project you might like. Jump in and check it out. This time it’s homemade playdough hearts!