Let’s celebrate what we know about our ‘Dads’ with these fun word ideas! Either a D.I.Y. wannabe or a Gardener lover!
Fathers day letter craft!
Father’s Day is ahead of us, on Sunday 16th June 2024, and there is already a lot of typical memorabilia that is out and about that is very common for this time of the year!
Picture from Pexels.com, by Christian Dina.
This kind of image that we might be familiar with depicts our Dads simple, but effective.
SOMETHING A BIT DIFFERENT!
So I am thinking of crafting something a little bit different! Although I still want to stick with a bit of tradition.
The question is, can I make it any more different than what’s already out there?
MY INTENTION!
In this post, I will craft a Father’s Day Card Craft Ideas!
In essence, I shall be crafting a cardboard word, that being another version of Father, is ‘Dad’
Once I have this word, I will decorate it with familiar items, that remind us of our dad.
WHAT REMINDS US OF OUR DADS?
Two ideas that come to mind for our dads, and it’s these;
1) A D.I.Y. wannabe!
2) And a Garden lover.
In the first option, I will use items or embellishments that reflect fixing, and maintenance.
In the second option, I will show something that resembles parts of a garden and tools.
WHAT ABOUT OUR DAD?
Good old dad, I don’t know why we associate our dads with these two subjects, but it is the subjects that our dads are recognized for.
When our dads disappear, it’s normally because they are busy fixing, repairing and mending broken doors, and shelves, or doing some plumbing.
Picture from Pexels.com by Ksenia Chernaya.
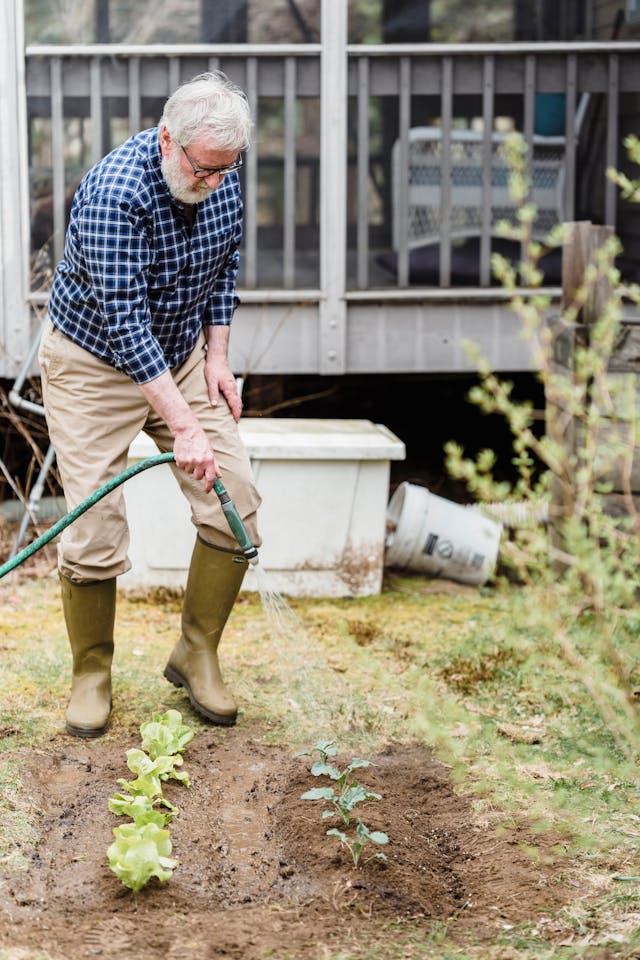
IF NOT D.I.Y. THEN GARDENING!
Picture from Pexels.com, by Geta Hoffman.
Whether it’s sweeping leaves, shovelling soil, trimming branches, washing the patio, or doing a bit of weeding, our dads have an unwavering passion to get on with it!
HOW I SEE THINGS GOING!
I visualize a fun element to these two projects.
I reckon it will bring a smile to your dad’s face, no matter which one you choose to make!
WHAT YOU WILL MOSTLY NEED!
You need some brown packaging cards, that you can cut out of cardboard boxes.
I will draw and cut out the word ‘Dad’, then embellish it accordingly.
NUTS AND BOLTS!
With the first option, the D.I.Y. you will need to collect some screws and nuts, so maybe grab what your dad has in his toolbox, shhhhh, and he doesn’t know it’s gone missing.
If you can find small screws and nuts then that’s a start, although you may have to invest in some more to build up a good collection.
This is what I shall use to embellish the word ‘Dad’.
GRASS EFFECT AND GLOVES!
For the second option, the Gardener lover, I will be looking to create, a grass-like texture, which I shall use to cover the ‘Dad’ word with, and some new garden gloves, that he can add to his collection of garden equipment.
To achieve the grass-like texture I shall use green knitting wool, cutting it up and covering the word ‘Dad’.
Just for some fun, I included this video about dads!
We have to feel, for these Dads, as you can see when put on the spot, they haven’t got a clue about anything to do regarding their kids, but mums do whoops!
ARE YOU READY?
ABOUT THE CARD.
To begin with, you will need some packaging card to make the word ‘Dad’. To do this, cut out sections of large boxes that you can use.
The size of the cards I used is approximately 18.5 X 50 cm, allowing a section that will fold under that will hold the word ‘Dad’ up which could be any size in depth.
The packaging card I worked with had natural folds, this determined the size of the word that I could draw on to it.
For both of these projects making the word ‘Dad’ will be the same procedure, but to decorate the word, you will use different embellishments or textures.
HERE WE GO!
The first of these projects is the D.I.Y. wannabe!
I Shall use a mix of screws, nuts and bolts to decorate the word ‘Dad’.
RESOURCES.
A long piece of packaging card approx. 50 X 45 cm.
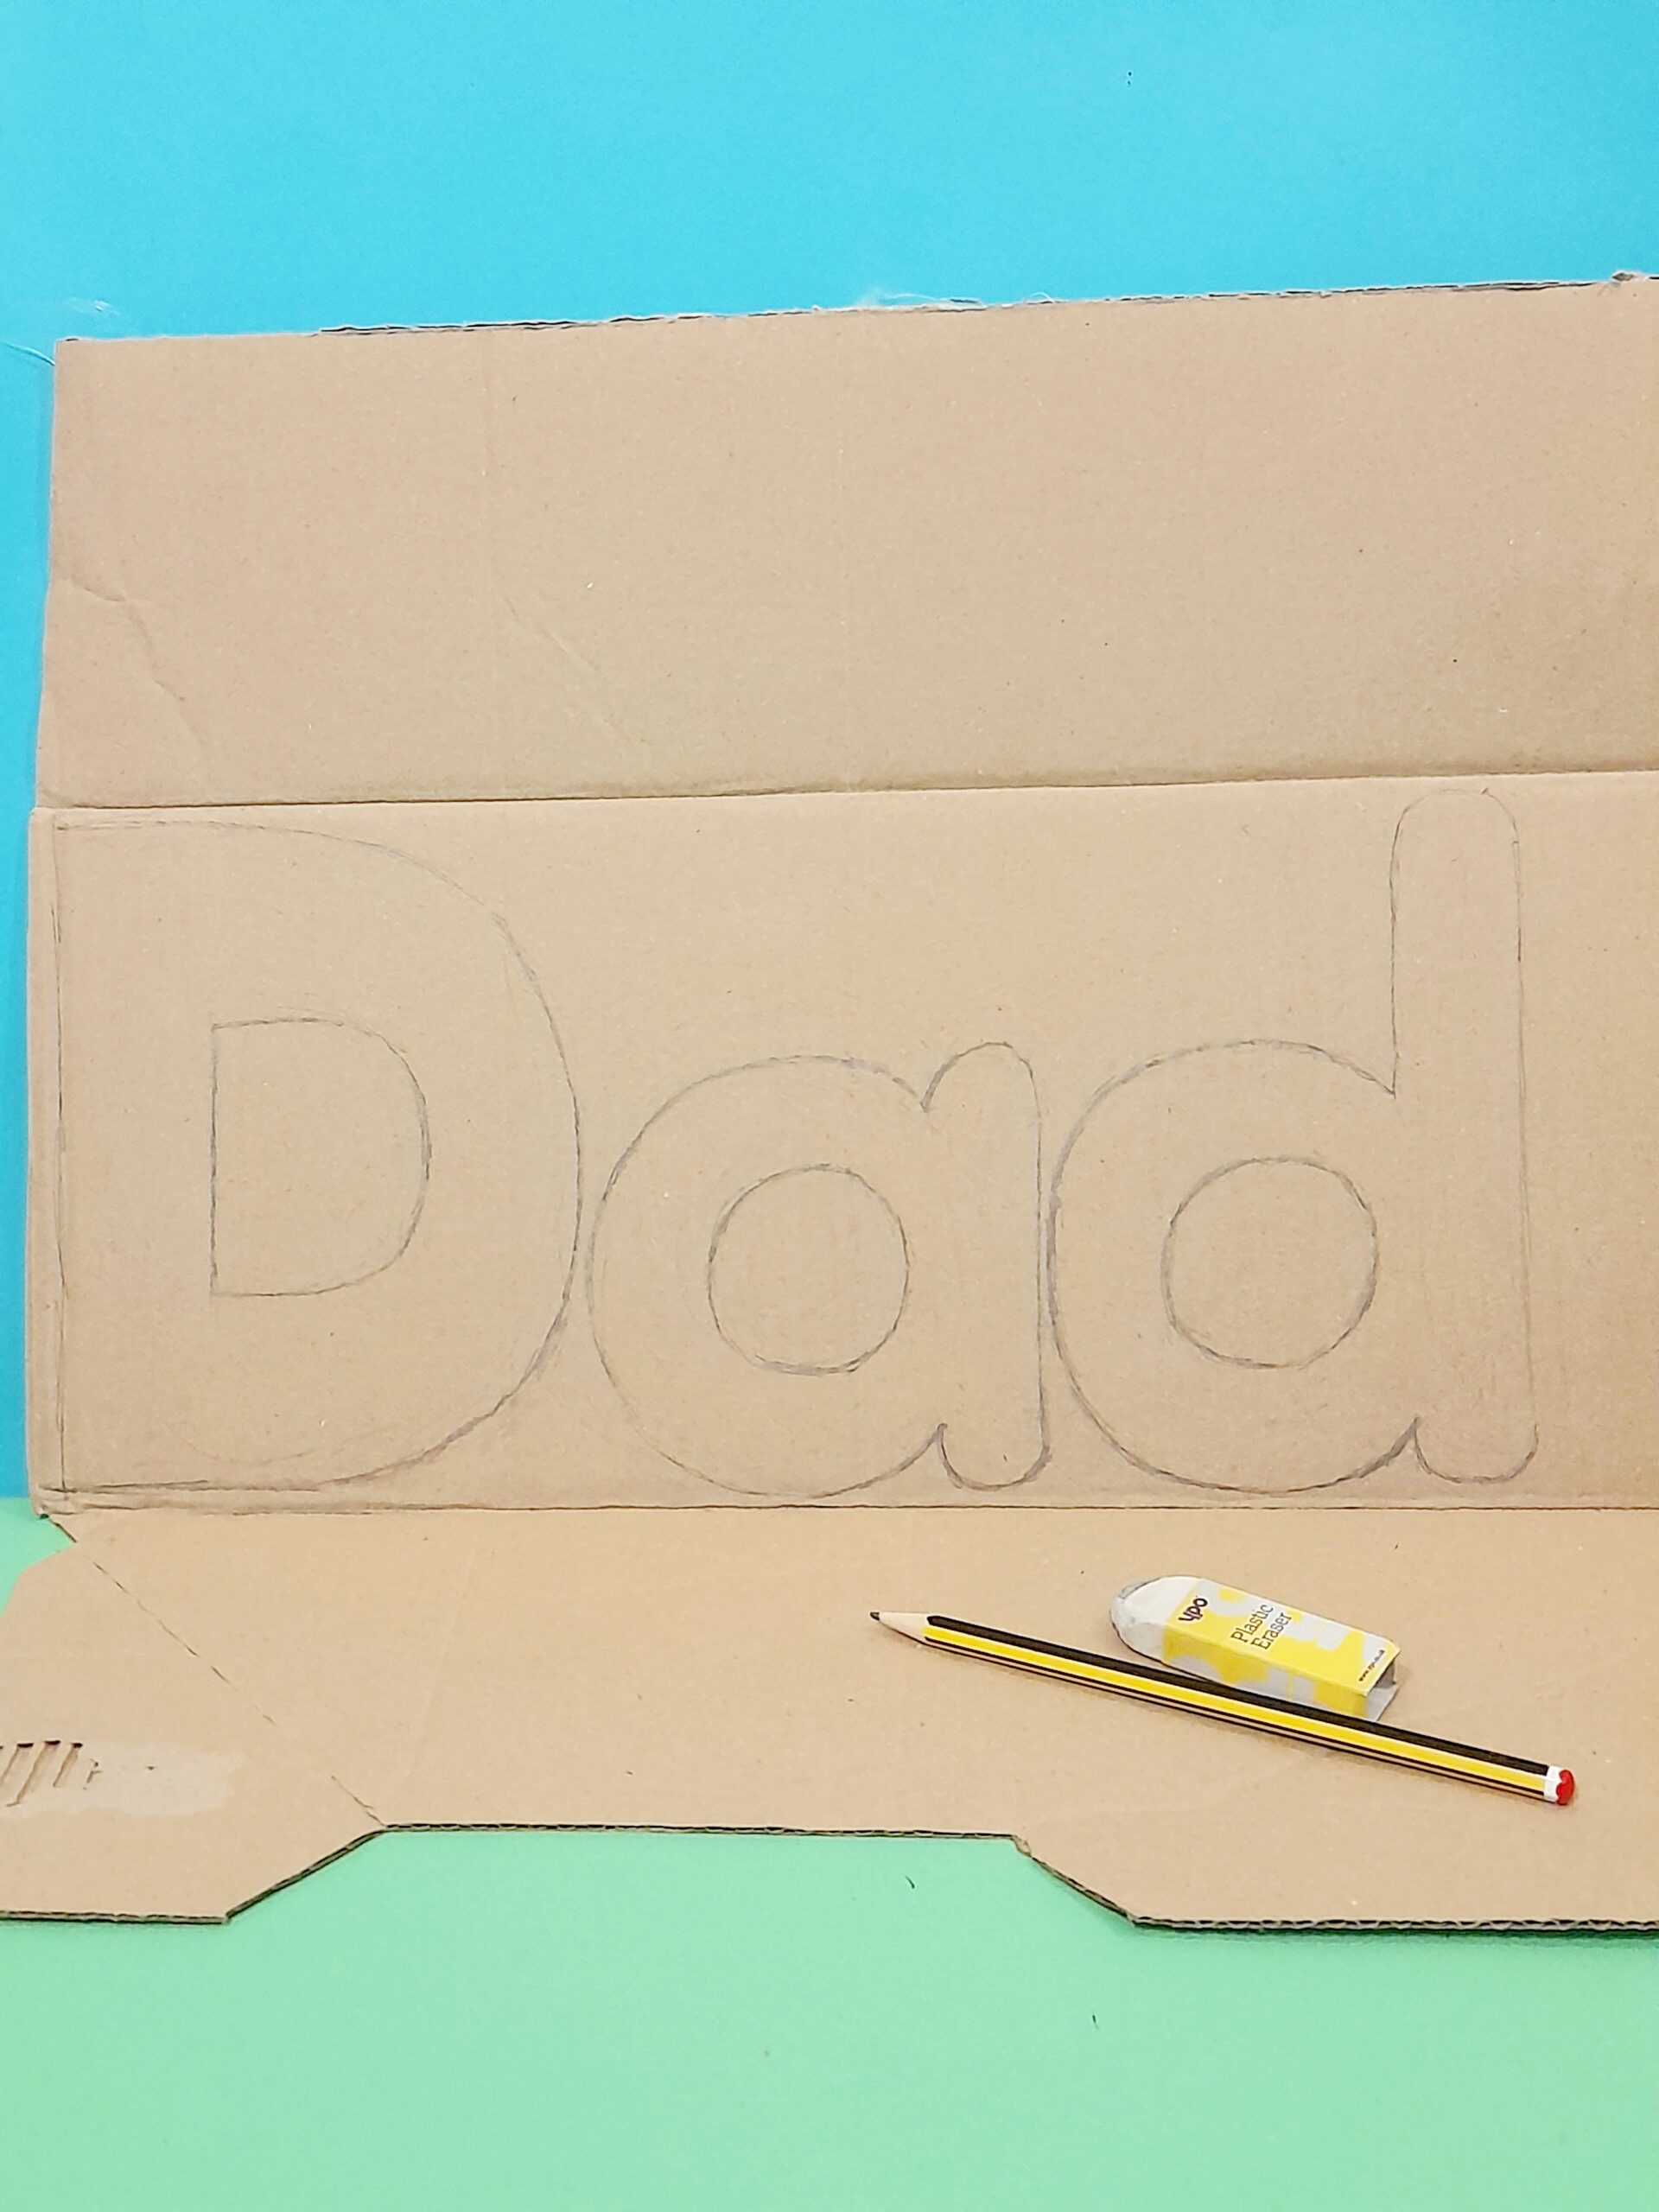
1) On your card, draw the word ‘Dad’ large and in bold.
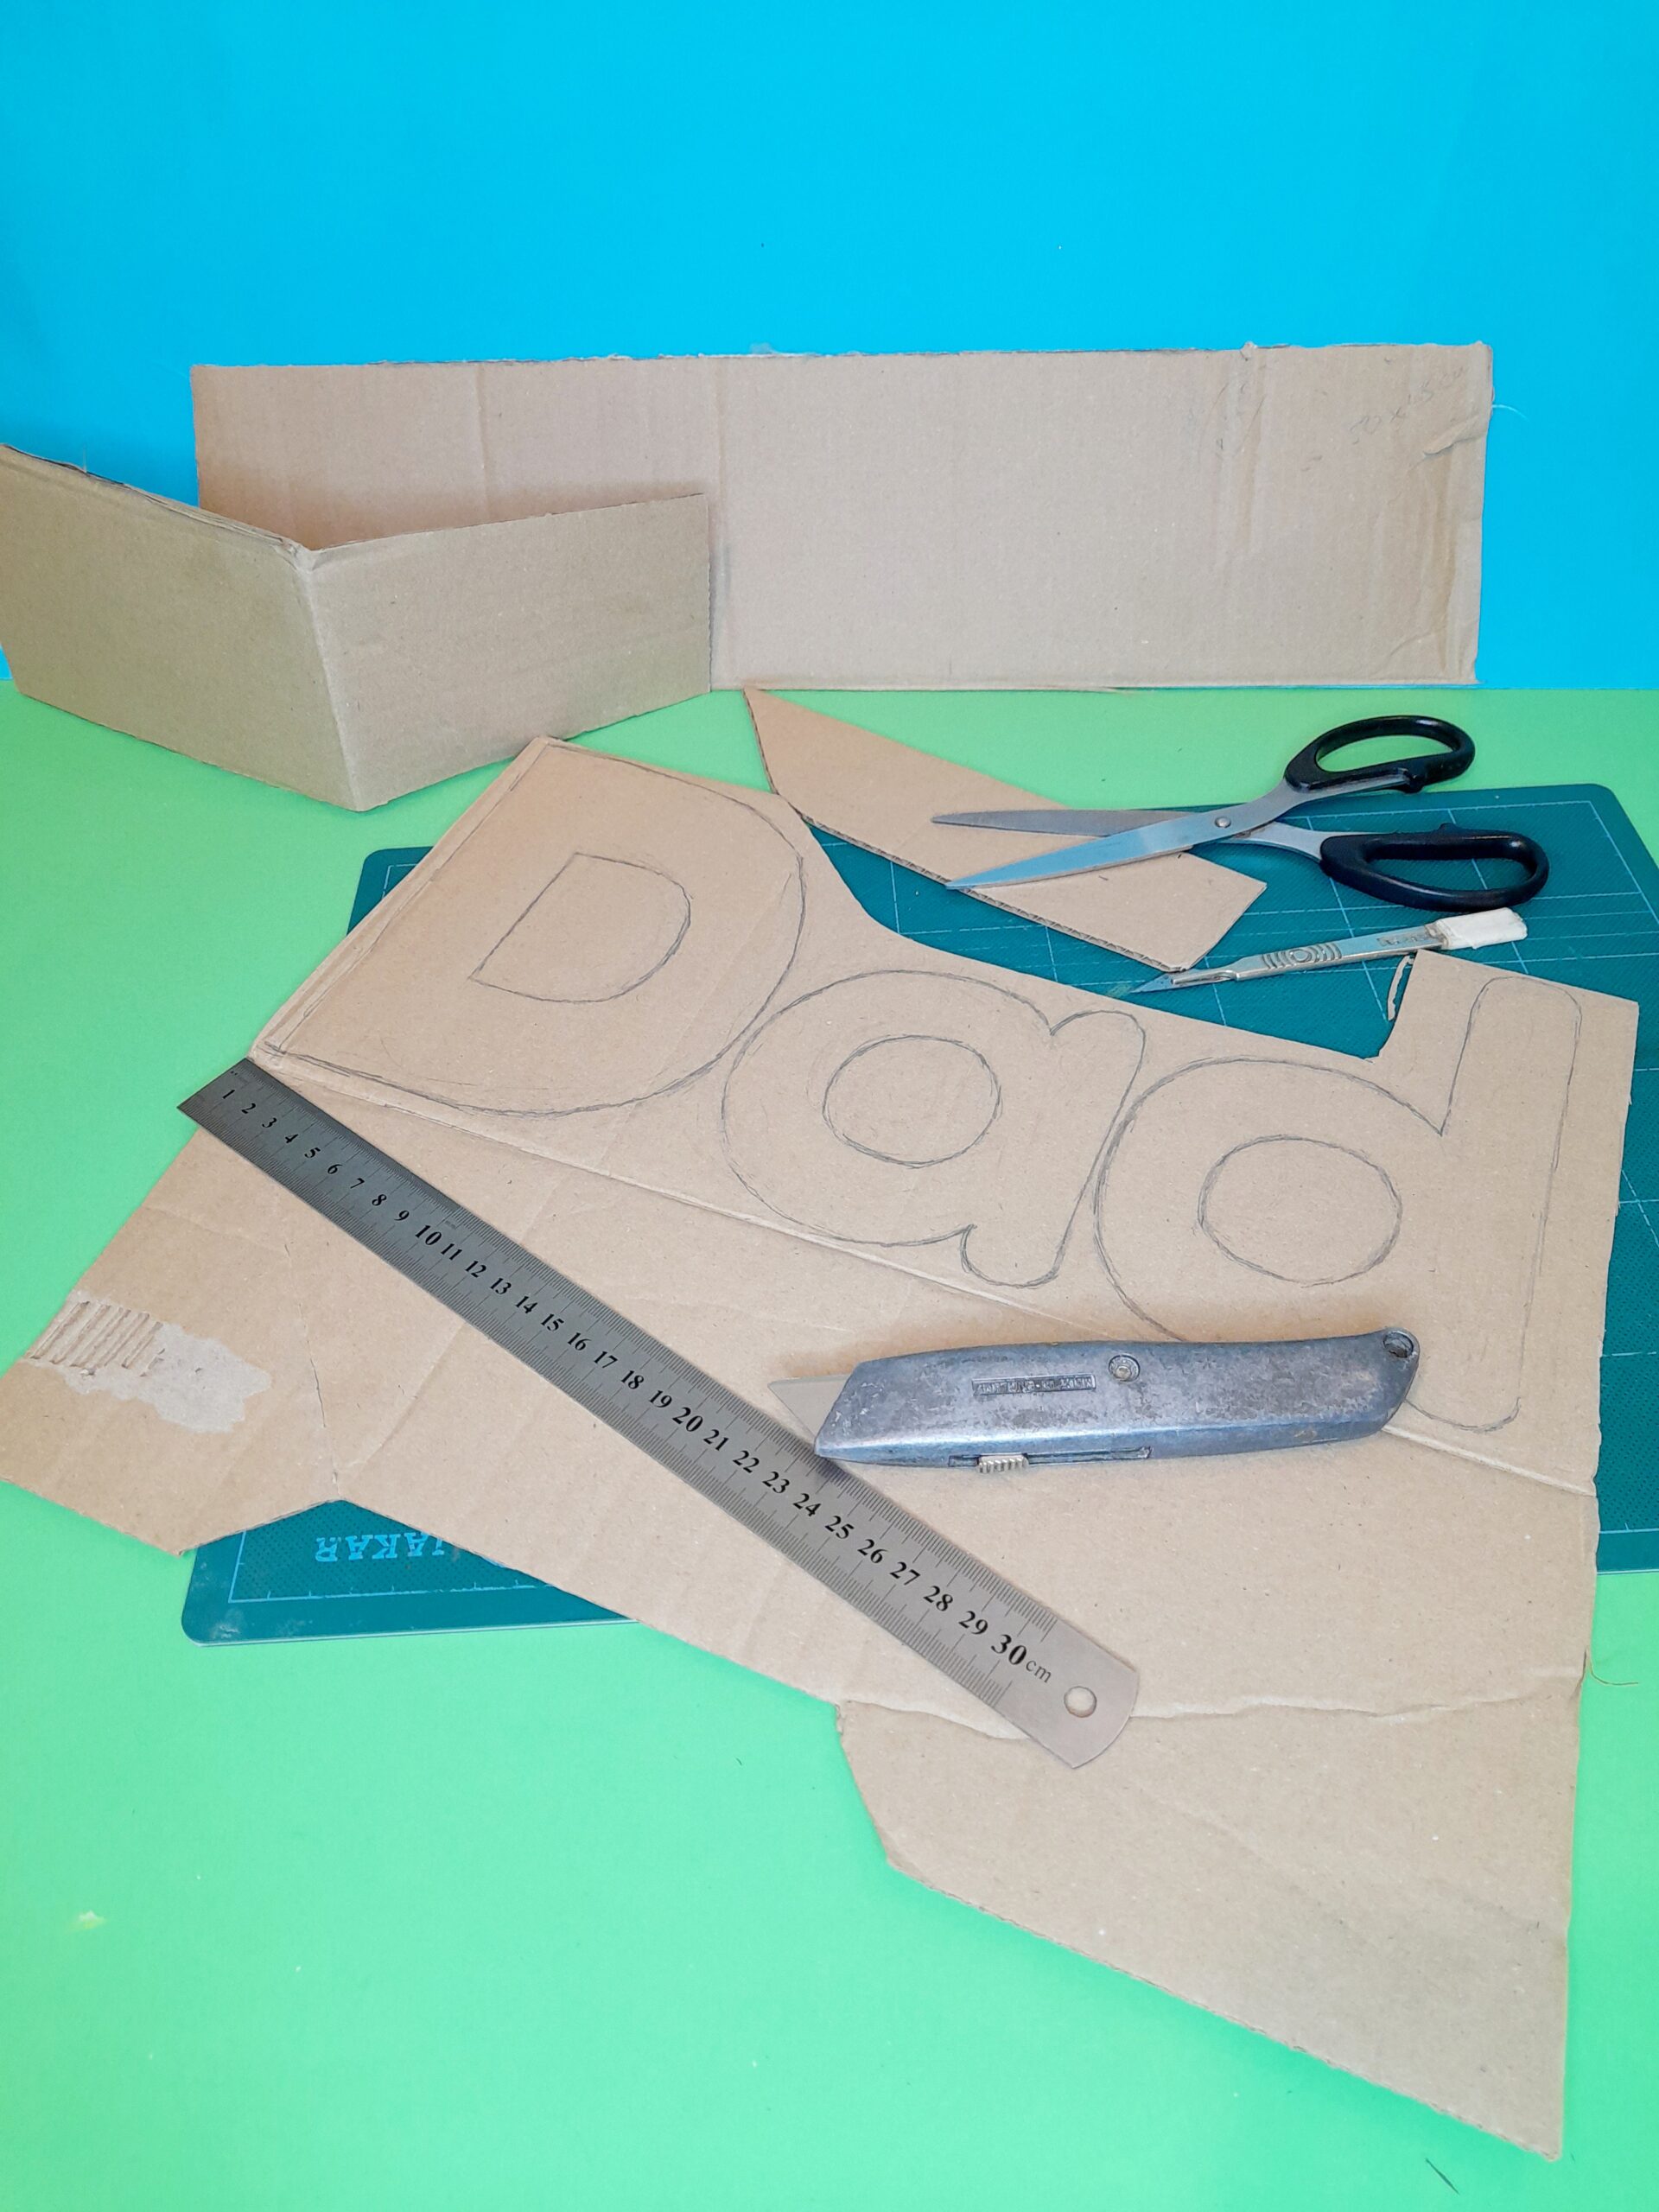
2) Cut around the top parts of the word, and side bits and remove them leaving the bottom section that will fold under.
3) Carefully cut out the inside parts that are circular in shape.
4) When you stand up the word ‘Dad’ with the folded section underneath it should look like this.
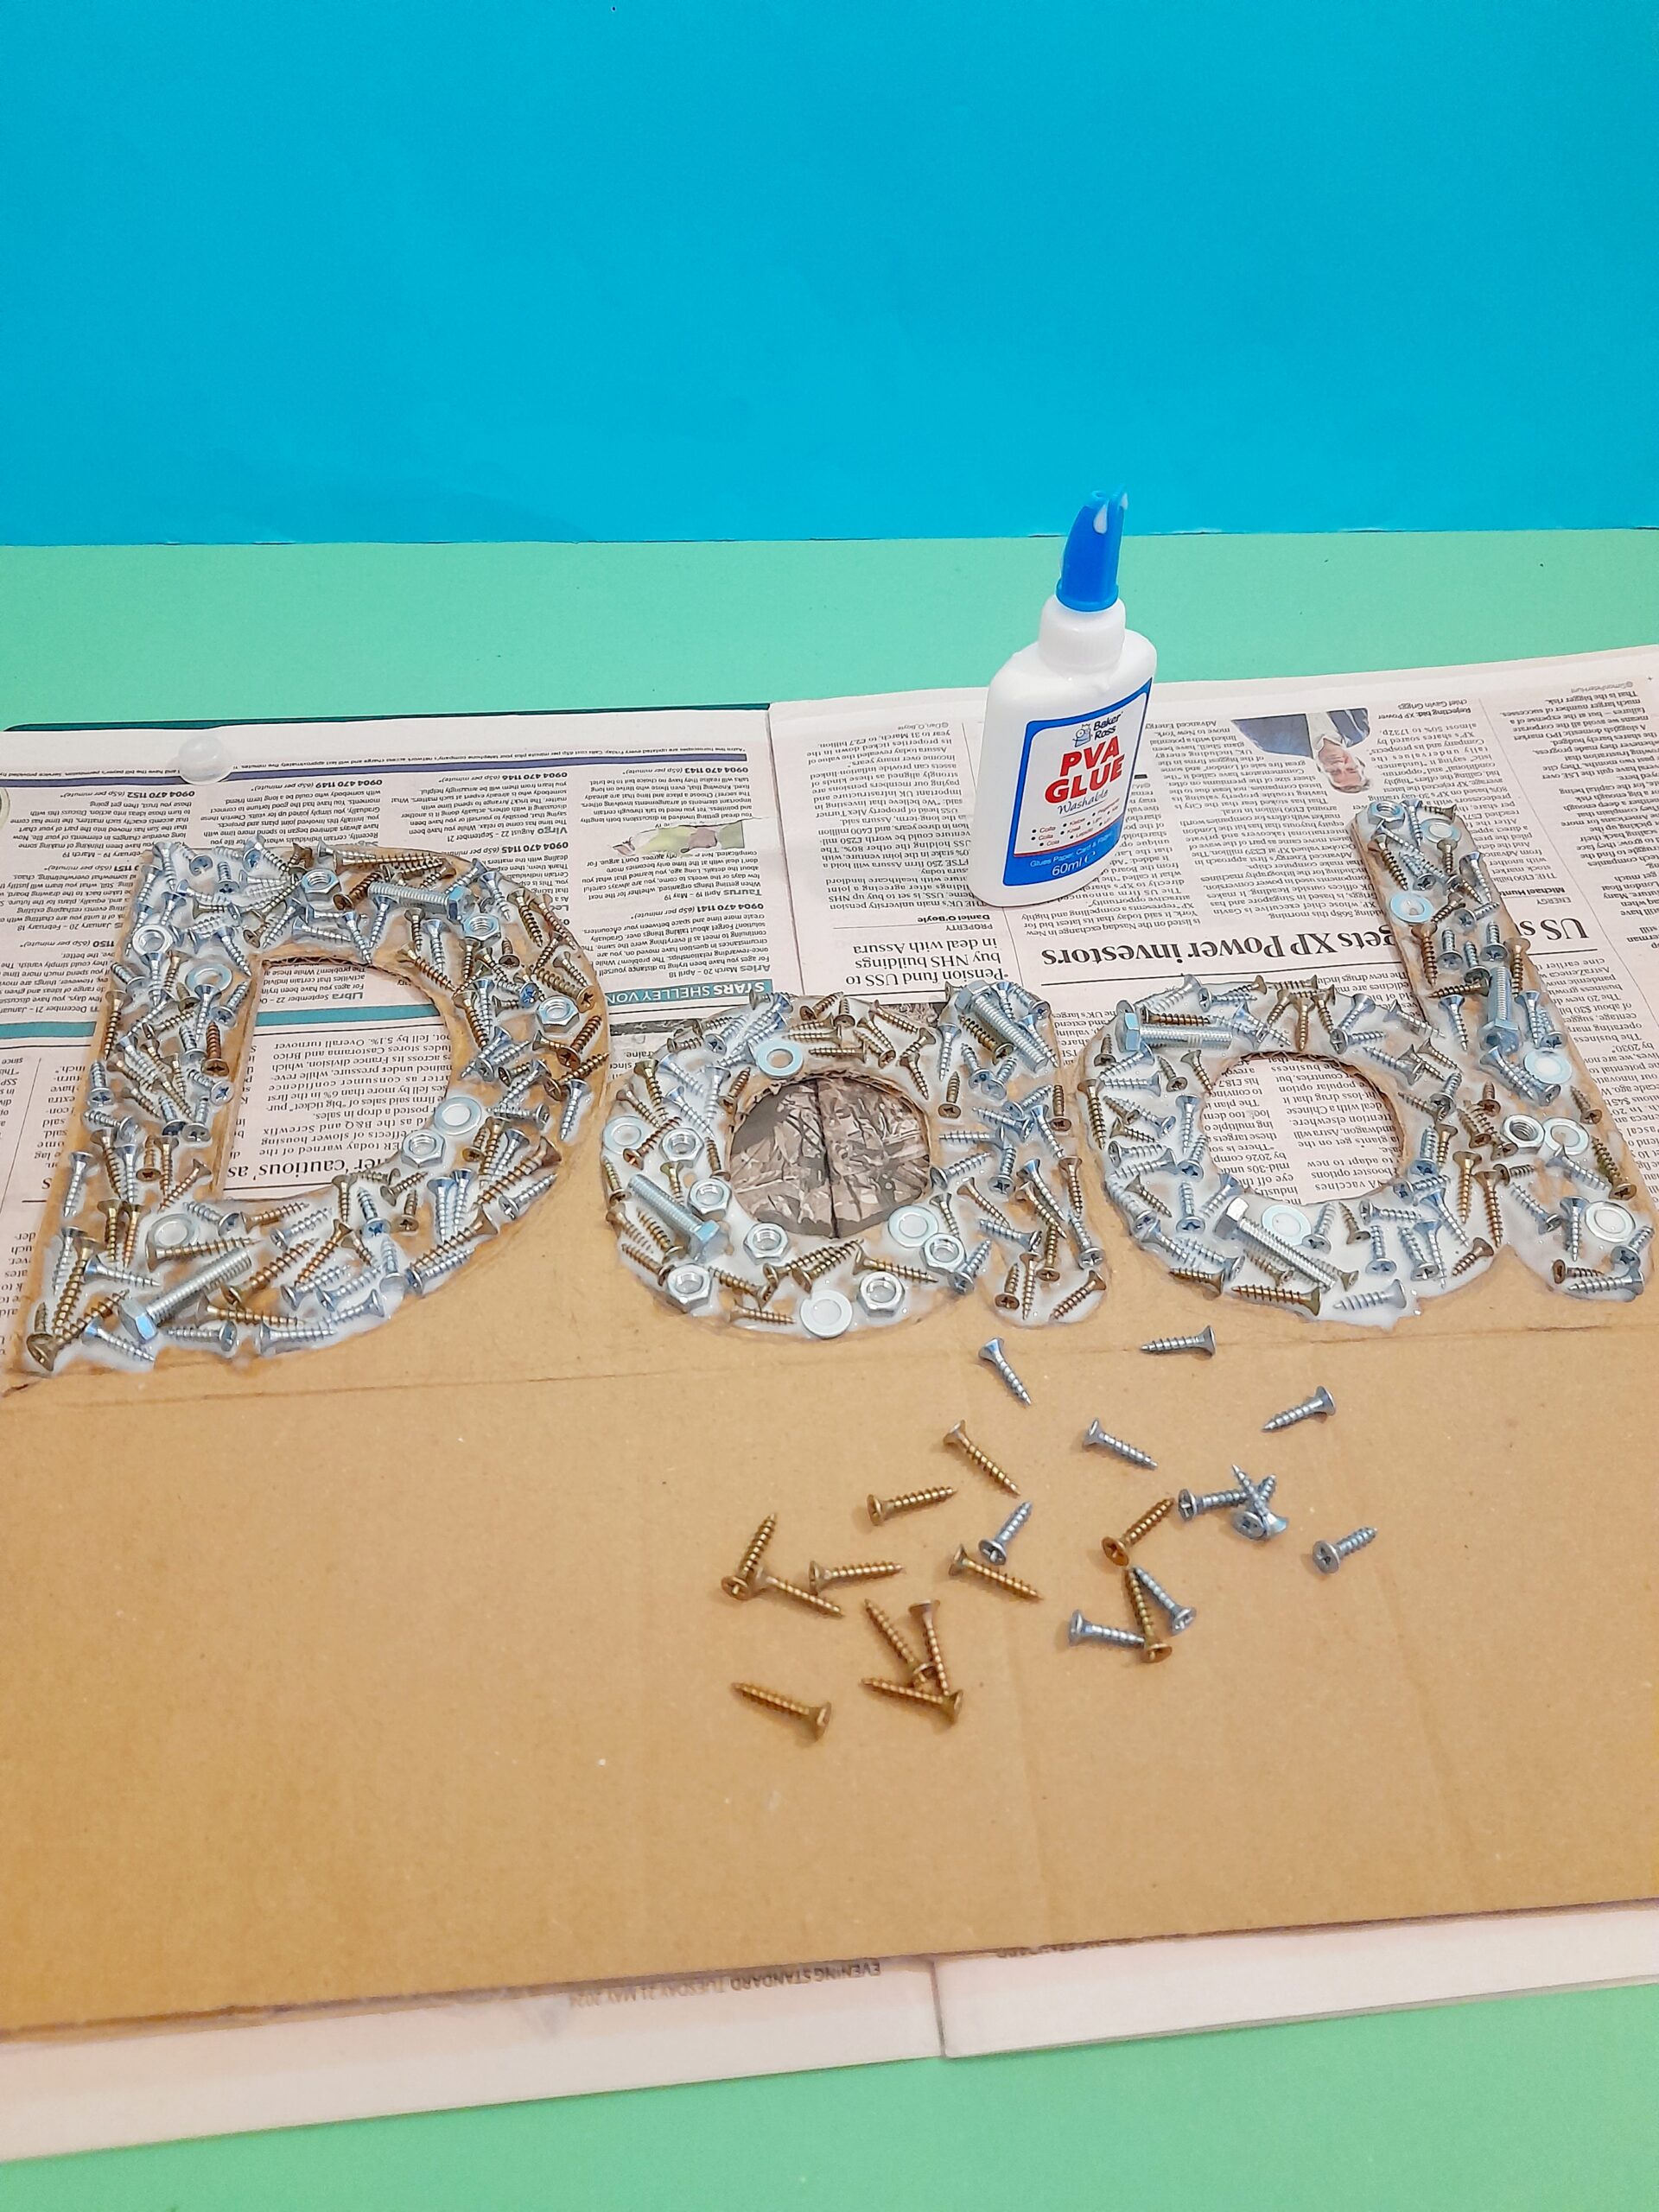
5) Cover letter in PVA glue, and add all screws, bolts washers, and build up.
6) The whole word is completed, now leave to dry.
7) Cut off the corners from the card that folds under.
8) So that it looks like this. Neaten it off.
9) Save a tin can, remove wrapping and clean up.
10) This will be a storage container for paint-brushes, or any tool as a gift.
11) Use hot glue to stick it at the back of the word ‘Dad’ like so, the word should lean on it.
12) This is the finished word. As the metal screws will make the word heavy, the tin can will support it.
USEFUL TIPS!
ABOUT THE PACKAGING CARD.
When you cut out parts of the packaging to make the word ‘Dad’ you can decide how large you would like it to be.
The size I ended up with per letter was around 17 X 13 cm and the smaller letters were around 11 X 12 cm, So the word is quite large.
The folds of the packaging card will fold naturally, so use this to line up the word and determine the size to work with.
CUTTING!
I used a scalpel to cut out the letters, and then smaller scissors to round off the letters.
The metal ruler is a useful tool to help cut away the card, on a cutting mat which is important when using a sharp tool, and it protects the surface of a table.
Caution is needed when using sharp tools, so adult guidance is important, or the adult should be doing the cutting.
USING PVA GLUE.
Make sure you cover each letter with enough glue so that you can embed the screw into it.
CHECKING FOR SPACES.
Once you have completed laying out all the screws, nuts and bolts check for odd spaces and add more glue then place more screws in place.
CHOICE OF SCREWS.
I managed to find different screws, in two colours, silver and bronze. You can do one colour choice or mix them up and arrange your screws to cover the glue.
TIN CAN SUPPORT.
Once all the screws and metal decorations are stuck onto the card, it will become heavy, so sticking a tin can on the back of the word ‘Dad’ with hot glue, will support it so that it won’t fall over.
Adding a tin can on the back of the word ‘Dad’ is a great excuse to pop a D.I.Y. gift in it, and support the heavy word.
GARDEN STRING.
I have included garden string, as an option to tie small D.I.Y. items onto the word, although you need to be careful, as it could dislodge the decor and ruin the finish.
THE GARDENER LOVER PROJECT!
This is the second project, follow the same directions as the first to make the word ‘Dad’
Once you have cut out the word, the next stage is to decorate it.
To decorate it you will cut the green knitting wool, and lay it on the card to represent green grass!
1) Once you have your word ‘Dad’ cut out you are ready to decorate.
2) Now pull out long strands of wool fold and fold again, then cut small section that will be the texture for grass.
3) Cover the letters in PVA glue and build the texture over the letters.
4) Until you have accomplished a green woolly letter.
5) When completed you should have a green textured ‘Dad’!
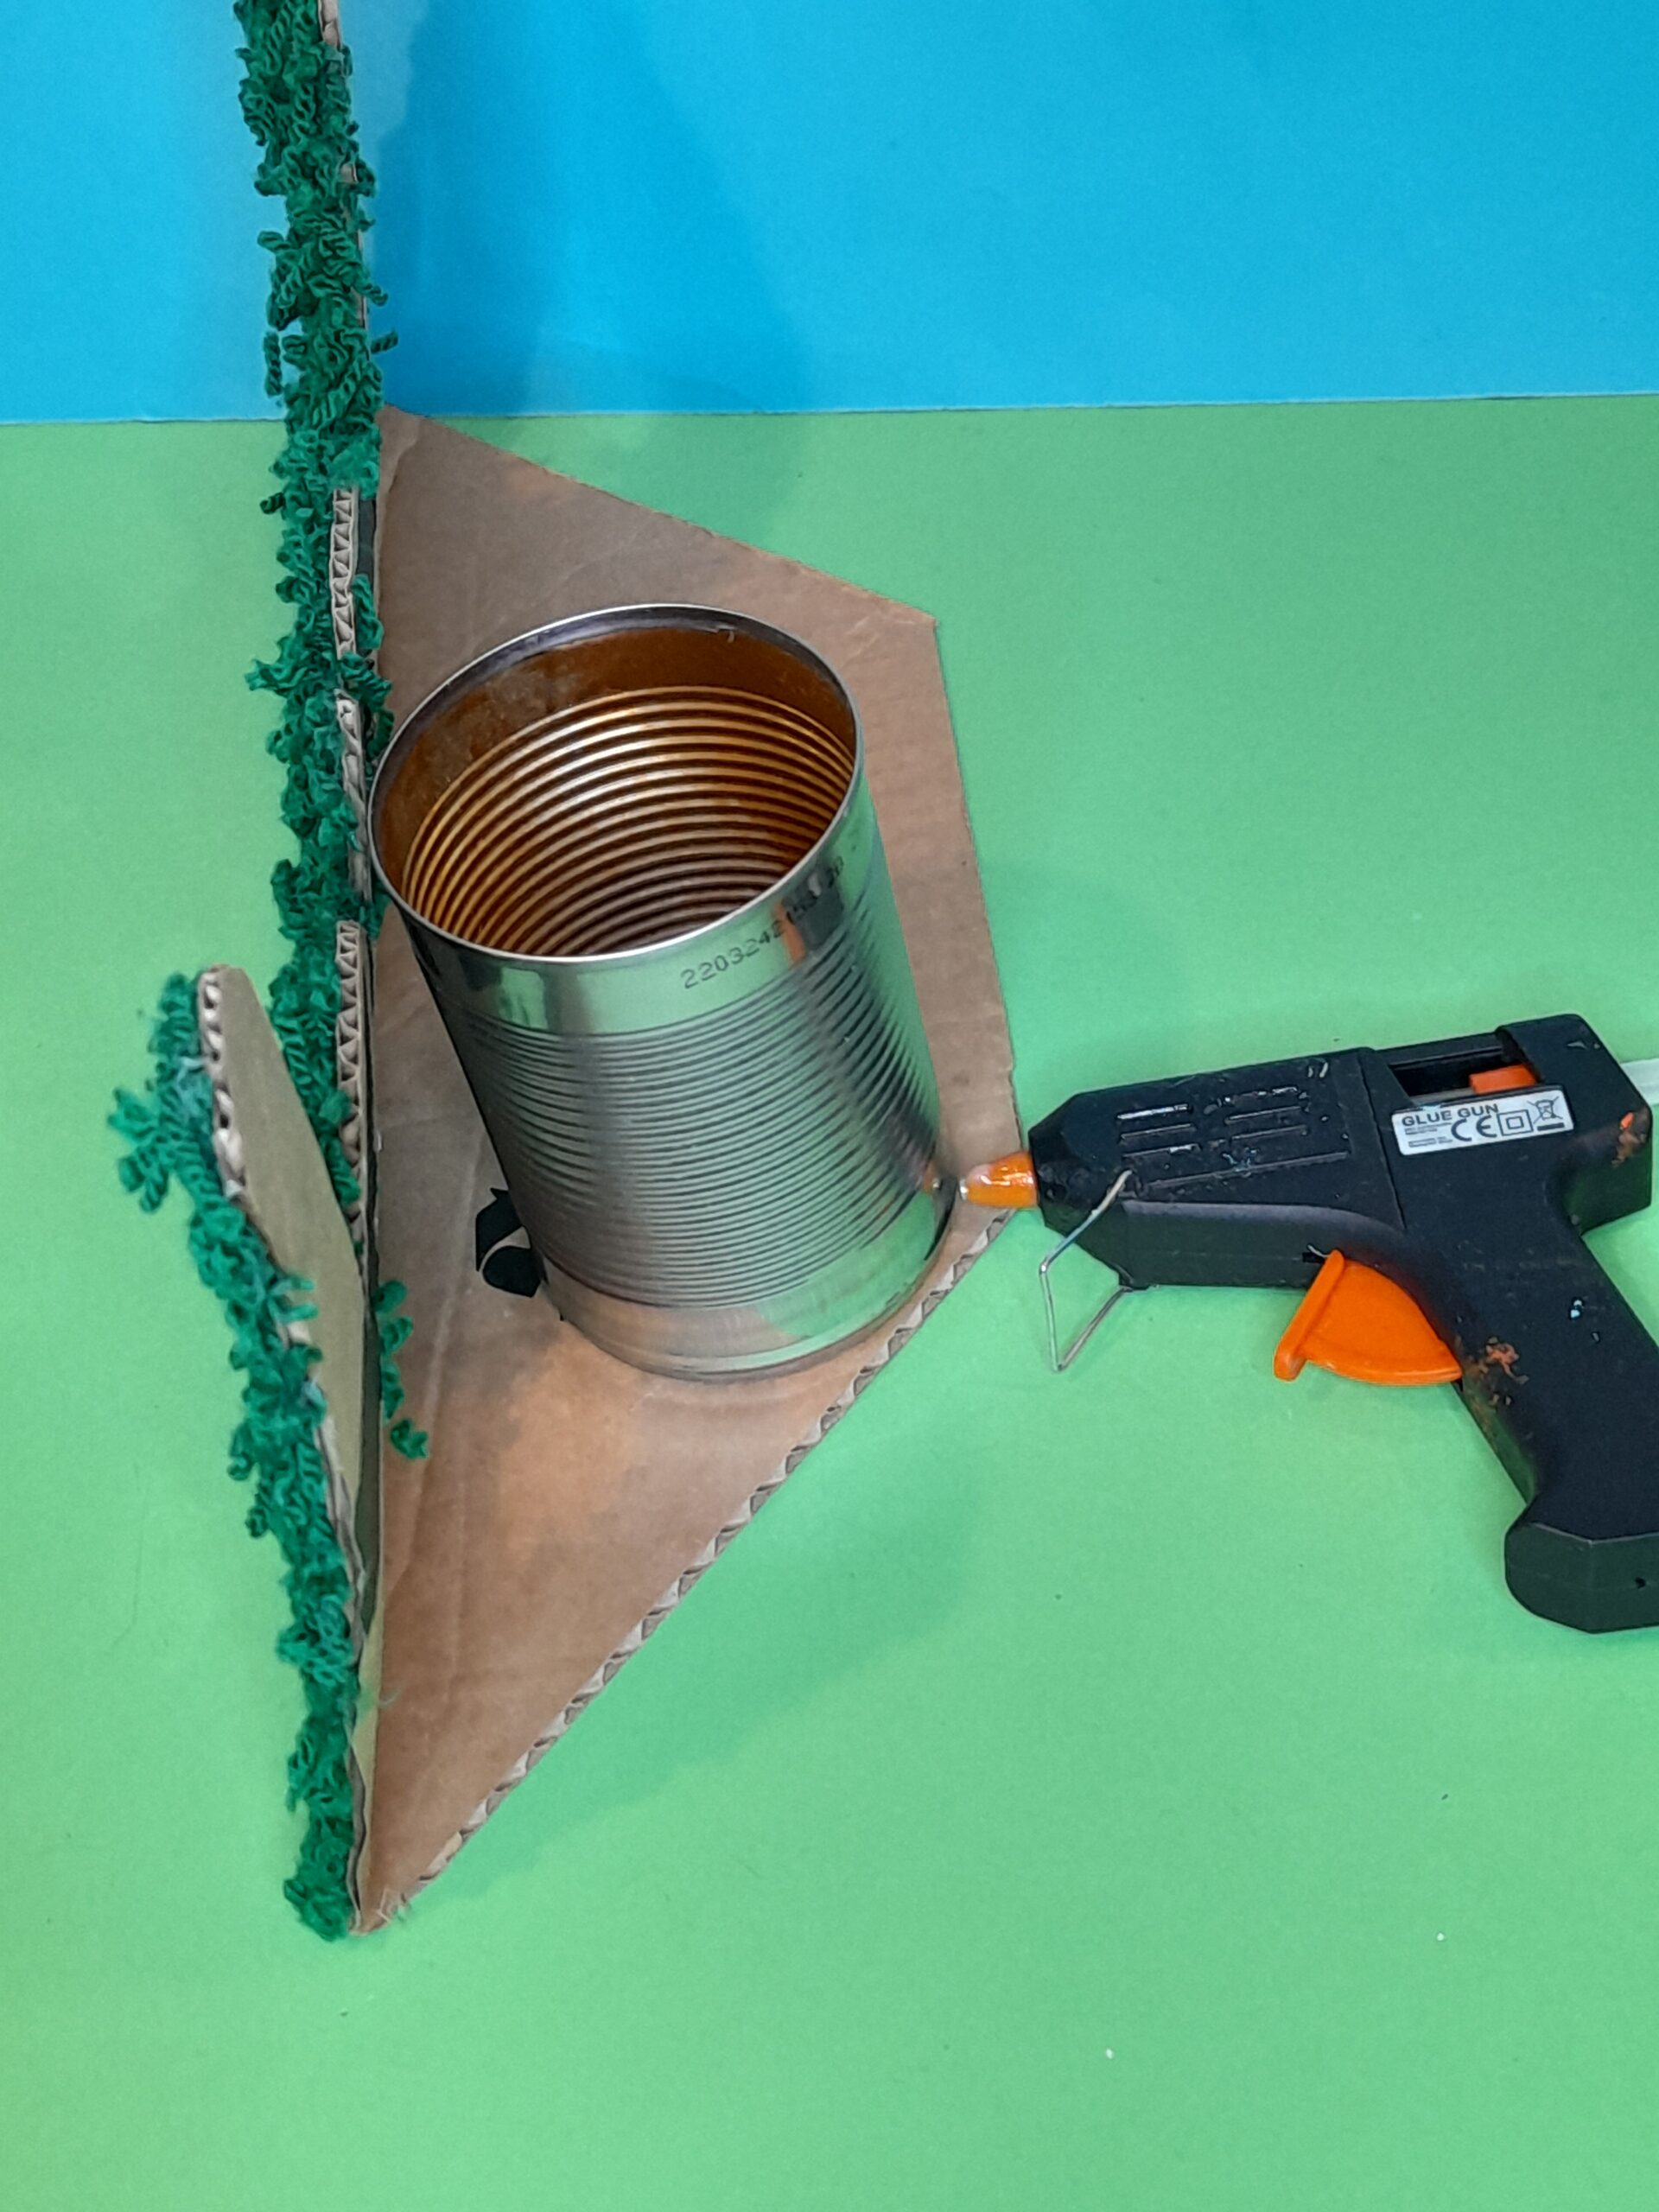
6) Remove wrap from tin can and wash and dry. This is a useful container to put new garden gloves into it as a gift.
7) Use hot glue to stick it on the back of the word ‘Dad’ like so.
USEFUL TIPS!
GETTING THE ARD READY.
Follow the same instructions as above to prepare the packaging card for decoration.
Once you have the word ‘Dad’, then it is ready to add the texture.
WOOL FOR TEXTURE!
Grab the wool and pull out a long strand. Now cut tiny pieces, which will be the grass.
Keep cutting the wool, until you have built up a large pile, this will be ready to hand if you need it.
FILL UP SPACES.
When you have covered the whole word ‘Dad’ in wool, go back and keep adding PVA glue to the spaces and fill up with more wool
TIN CAN SUPPORT.
To support the word ‘Dad’ glueing on a tin can to the back of the this will hold it upright, and it will also become a useful container to put a gardening gift in, like gardening gloves.
Hey there, when you click on links in this post and you make a purchase, I may earn a small commission that l can use towards resources (other than throw-outs) for project making within my website😀
Maybe, you are still looking for quick solutions for Father’s Day, with just a bit more of a BOOMF! affect, then consider this great site that will provide you with that and more!
Yes, from your fun, and crazy Father’s Day cards, to exploding confetti cards, then BOOMF! is just the place for you to check out!
Here are some of the BOOMF reactions, when the receiver unbeknown to them, rips open their exploding confetti cards and…………
TO CONCLUDE!
Within this post, I show you how to craft two different Father’s Day projects!
SAVE PACKAGING CARD!
Use your cardboard packaging card to help craft the familiar word ‘Dad’, then decorate it!
Each project is different, but resonates with typical aspects of our Dads!
TWO IDEAS, YOU CHOOSE!
The first is a D.I.Y. fanatic, and the second is a Gardener lover!
You get to choose the one you like the most, or you can grab or have the embellishments for the card.
SAVE, SAVE, YOUR BROWN PACKAGING BOXES!
So save, or keep hold of any packaging card, as this is the basis for these projects!
Here are more Father’s Day projects that might interest you, as an alternative activity for your kids to craft!
The First is about….. WOW, word portrait of Dad!
The Second……………. Dad’s favourite treat on the go!
The Third………… Fun cone holders!
The Fourth……….. Tin Can and Glass jar D.I.Y. Holders.
Thank you so much Jan, I am happy you enjoyed this post! And I hope those who get to view it, will get some kind of inspiration for Father’s Day too, and make ‘Dad’s’ gifted card presents with a little bit more sentiment, and that WOW factor!
Once again, Thanks for your support!
Happy Crafting!
Julia.?
I am so glad I found your article. I live in Guatemala, where greetings cards are just about unknown. I have friends who have kids, and we all sat down together and made cards; we had a truly creative afternoon full of fun and laughter. We ended up with beautiful cards and beautiful memories. Thank you
Wow, I am glad to reach out as far as Guatemala! It’s great that you have had that special time together, with friends and their kids getting creative and making lovely cards!
I am also happy to have inspired you in one way or another to craft with what you have to hand, having fun at the same time!
That’s my aim, to come up with crafting solutions, using your ordinary junk, and up-cycling them into interesting projects for kids to do.
In that way you are keeping them busy, and at the same time interested with the task ahead!
Thanks for your super comment!
And Happy Crafting!
Julia. ?


Amazing work. The videos have a significant effect on the article. Your overall design is excellent.
Keep up the excellent work.
Jan
Thank you so much Jan, I am happy you enjoyed this post! And I hope those who get to view it, will get some kind of inspiration for Father’s Day too, and make ‘Dad’s’ gifted card presents with a little bit more sentiment, and that WOW factor!
Once again, Thanks for your support!
Happy Crafting!
Julia.?
I am so glad I found your article. I live in Guatemala, where greetings cards are just about unknown. I have friends who have kids, and we all sat down together and made cards; we had a truly creative afternoon full of fun and laughter. We ended up with beautiful cards and beautiful memories. Thank you
Wow, I am glad to reach out as far as Guatemala! It’s great that you have had that special time together, with friends and their kids getting creative and making lovely cards!
I am also happy to have inspired you in one way or another to craft with what you have to hand, having fun at the same time!
That’s my aim, to come up with crafting solutions, using your ordinary junk, and up-cycling them into interesting projects for kids to do.
In that way you are keeping them busy, and at the same time interested with the task ahead!
Thanks for your super comment!
And Happy Crafting!
Julia. ?