Row, row, row that boat gently down the stream….Do you remember that nursery rhyme? In this post, we are going to make paper boats that float!
Boats and paper boats that float!
Here is a subject that all kids love! Small boats, large boats, crafts, speedboats, ships, pirate ships, yachts, diggys and sailboats.
MY INTENTION!
I shall show you how to build a boat, I wish, but more like find an easy solution to craft a boat, but out of paper!
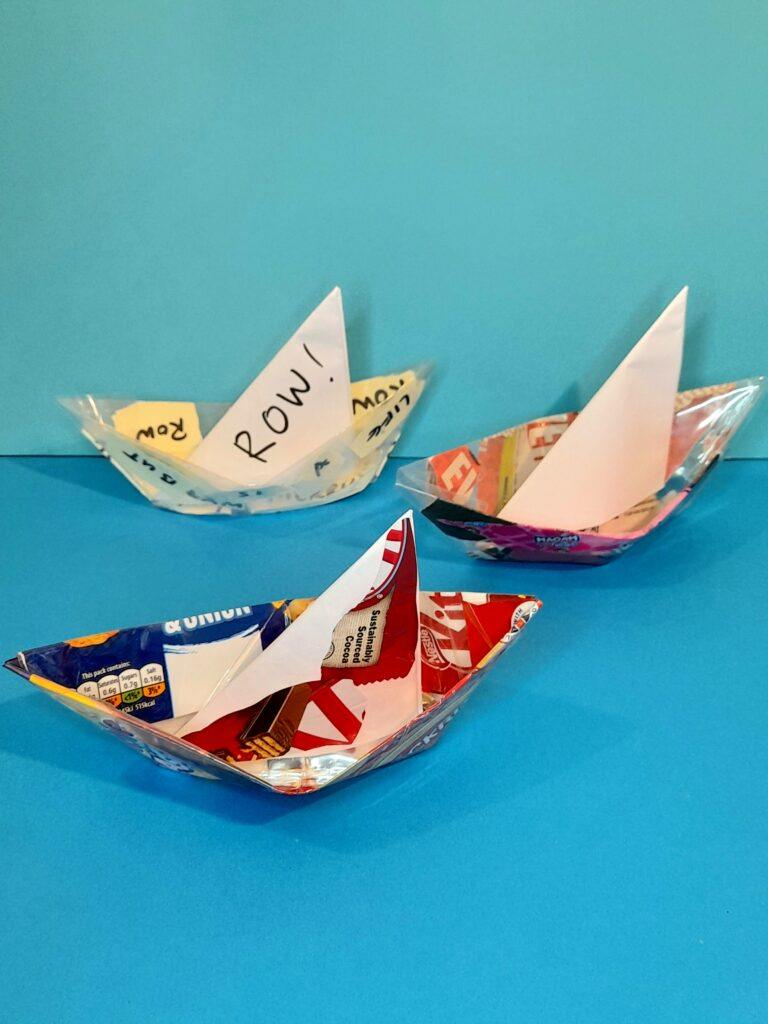
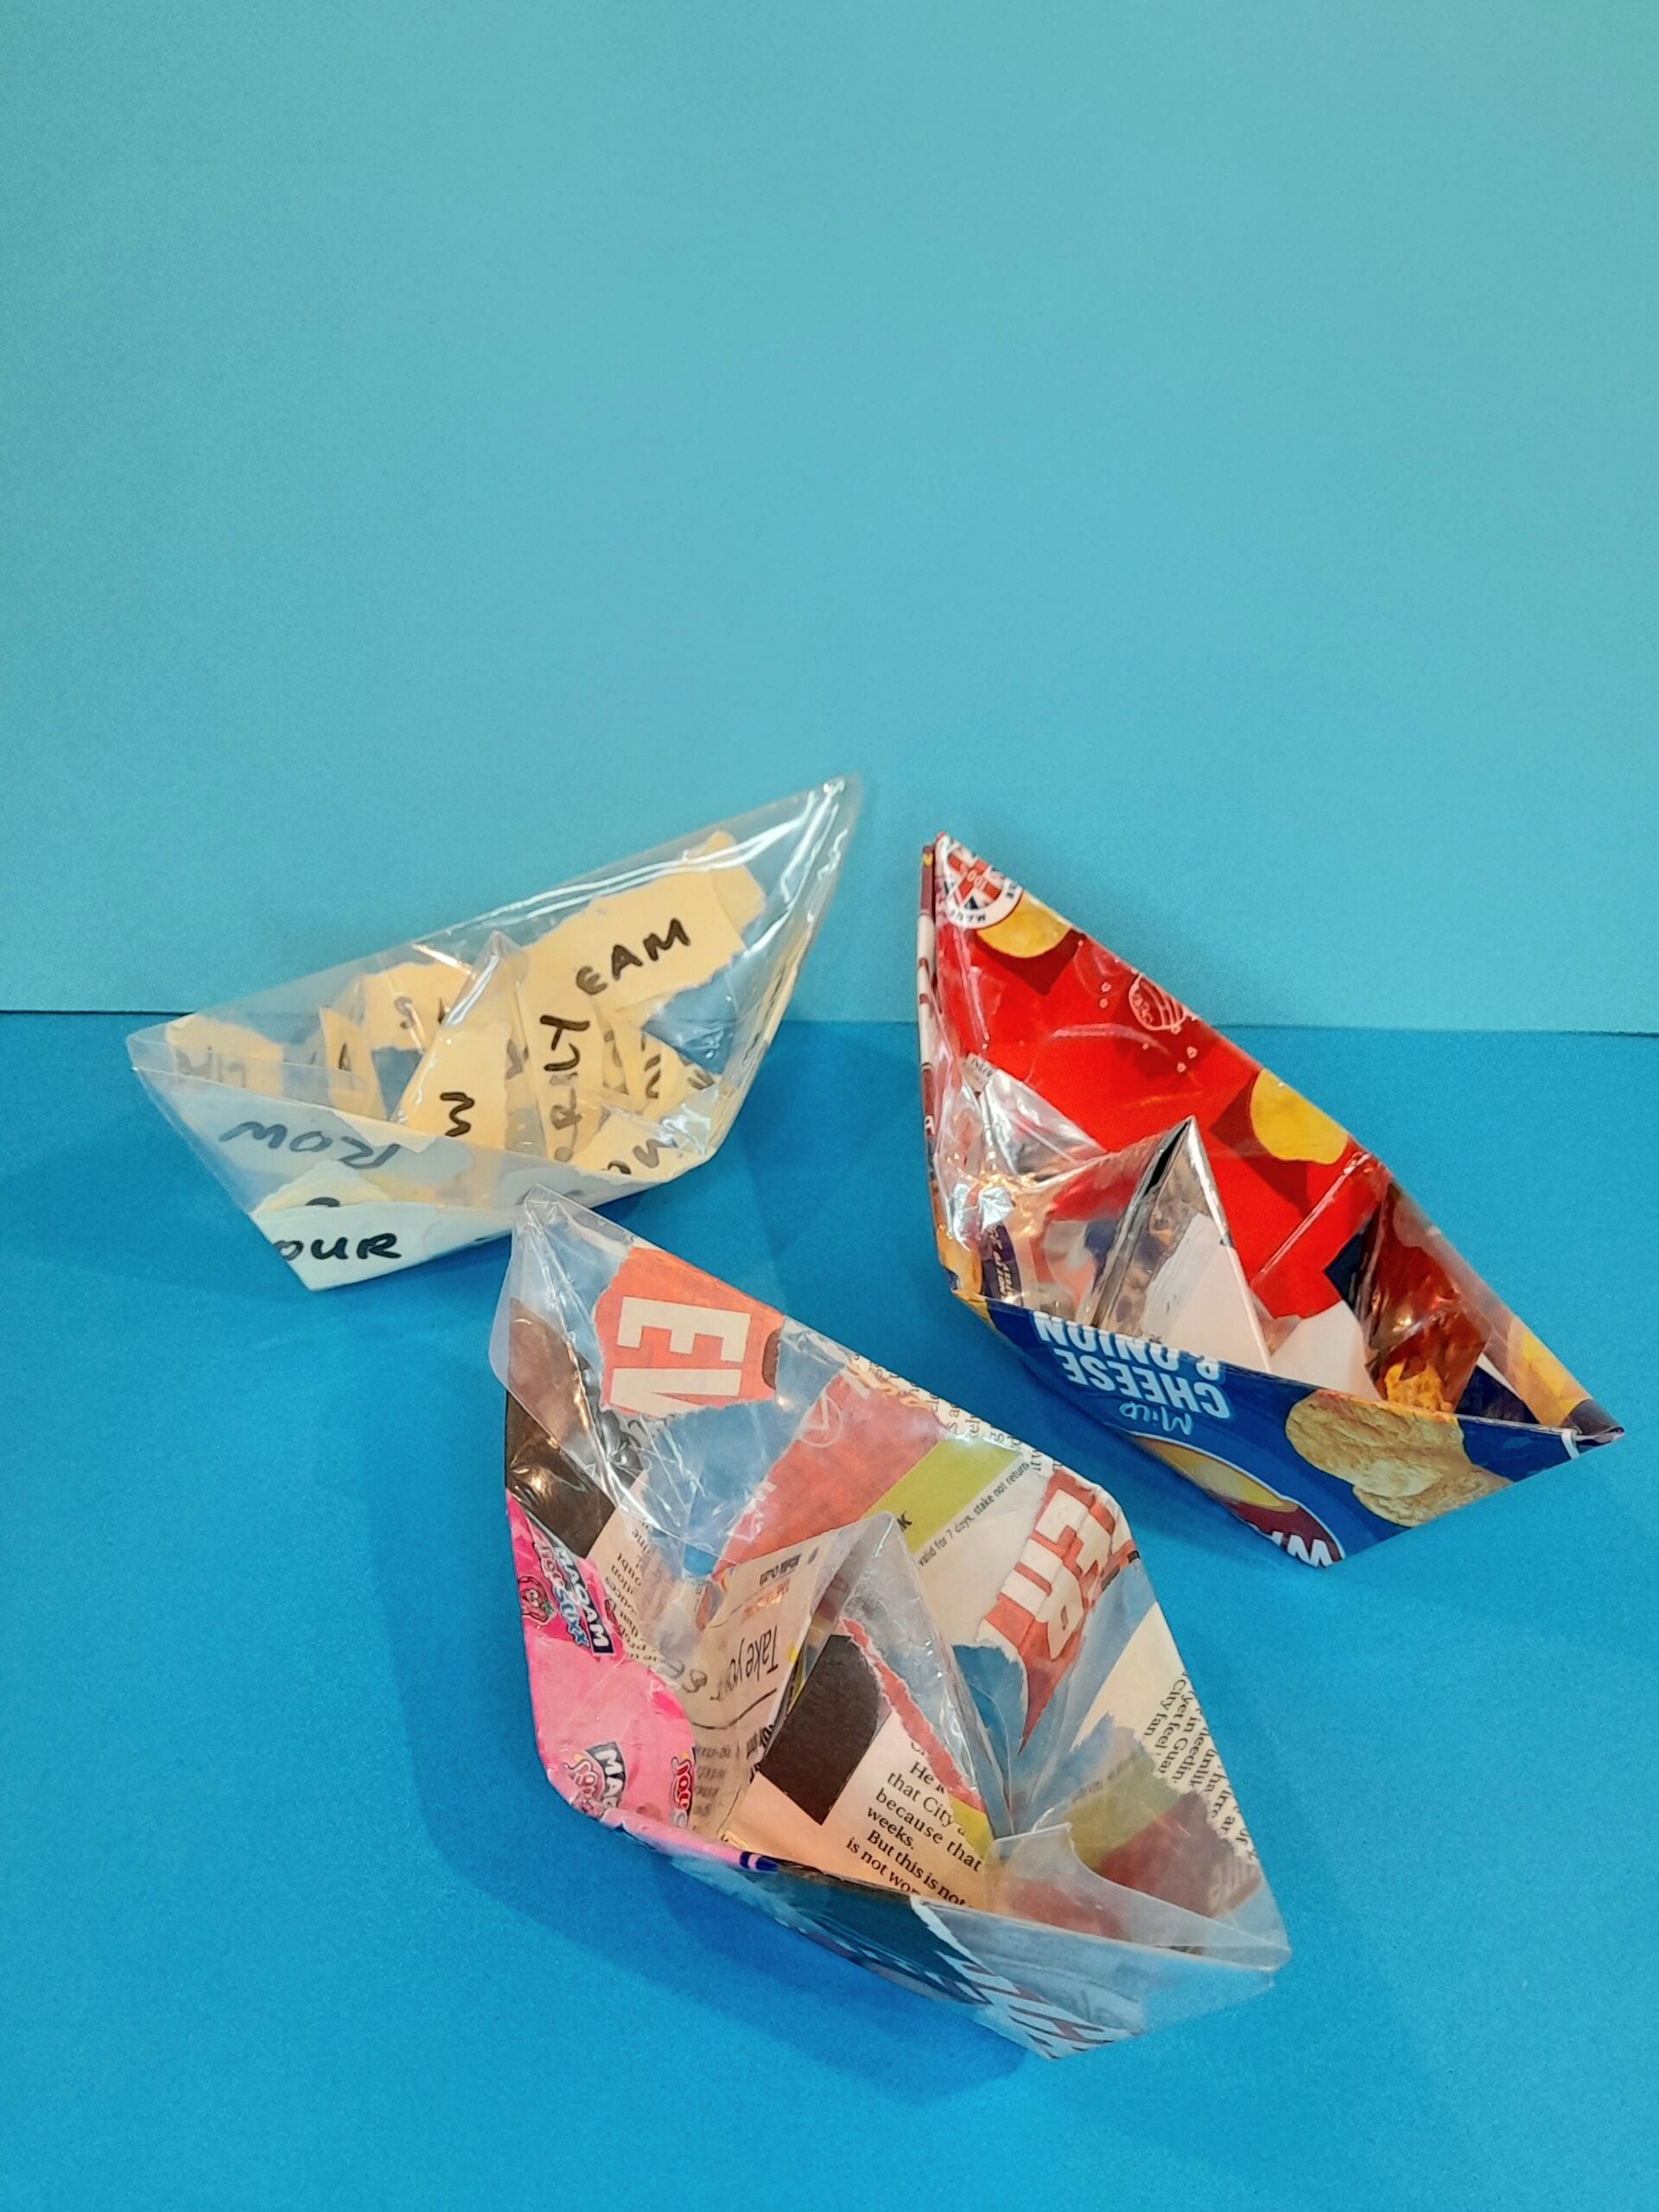
Because we want our boat to go into the water, we are going to……….. Make Paper Boats that Float!
WHAT KIND OF BOATS?
Glancing upon our harbours, there are rows of boats all lined up ready to venture out to rivers, canals and even to sea.
Sounds good, doesn’t it? like freeing yourself from the city fumes, noise and congestion when you sail out at sea, breathing in the fresh air and breaking free from the ties of our everyday surroundings!
WAKEY WAKEY, LET’S BRING YOU BACK TO REALITY!
Can you remember, or have you ever, when you were a kid or have your kids ever tried to make a paper boat?
I remember back in the day, as a kid, I used to be able to make a paper boat out of a newspaper!
Then over the years, unfortunately, I forgot how to make one, I just lost that hey presto moment!
I WAS CHALLENGED!
Until one day, having sat in a class, a child asked me if I could make him a boat!
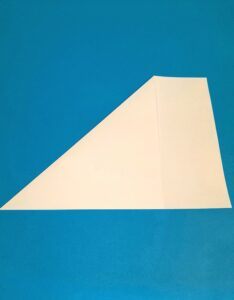
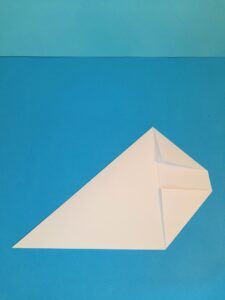
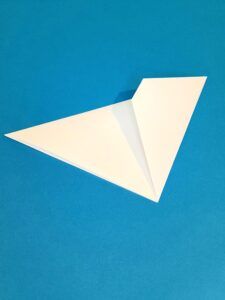
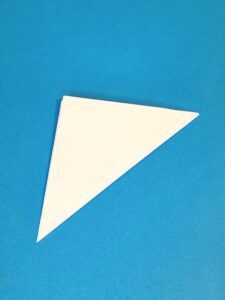
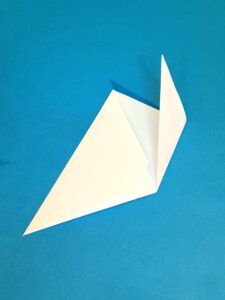
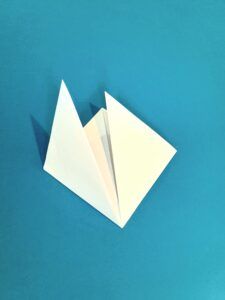
Ooh, I thought, I’ll try, having many takes, but I failed drastically. Fold after fold, I tried and just couldn’t pull it off.
Time after time, I tried to fold an A4 sheet of paper and kind of got halfway there, then lost my way.
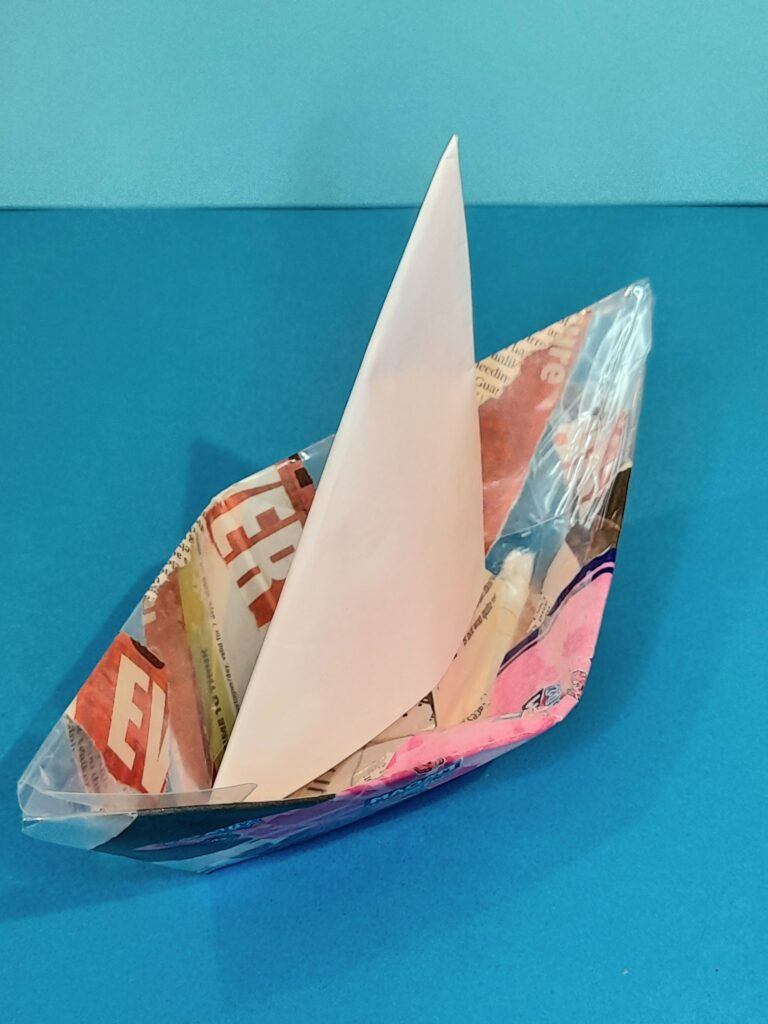
I let this go, but I was not beaten yet. By fluke, I randomly grabbed an A4 sheet of paper and, without much thought, had another go, and viola I got it! I found a way to fold and pull out a boat.
FOATS OR NOT!
But will it float? I asked myself, the kids would run to the sink, fill it up with water and place their paper boats in it.
For a while, the boats would sit on top of the water, and the children would push or pull them or even blow, and they would float, but this was not lasting!
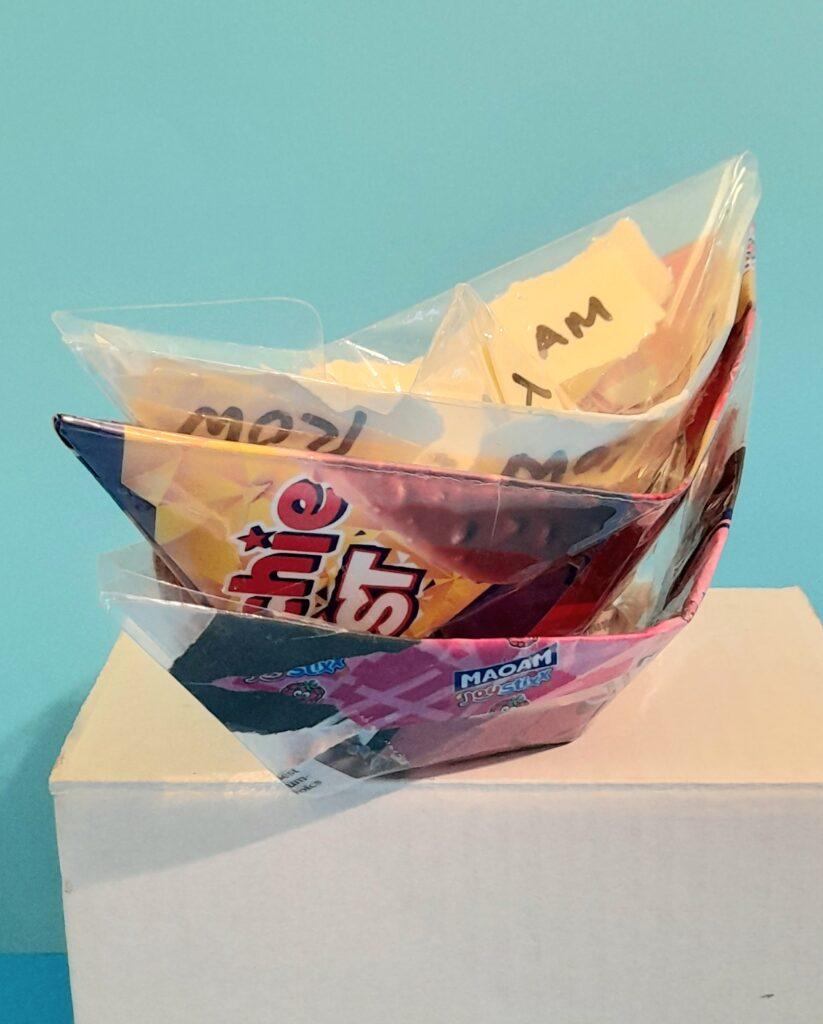
Eventually, paper being paper got waterlogged, and the boats would sink after some time!
So how would we stop this from happening?
How can we make paper boats that float?
STOP PAPER BOATS GETTING WET!
So the solution is to stop the paper from getting wet, how? you may ask.
Well, it would have to be covered in plastic and with what? you may ask. IMPOSSIBLE! not impossible.
How to secure the paper!
Simple, paper will be laminated! Once you laminate your paper it will protect it from getting wet and sinking!
This is cool as you can layer different types of papers within the laminating sheet.
(You can find Laminating machines and pouches at:- Hobbycraft, Amazon, Argos and Currys.)
WHAT RESOURCE?
As I like to recycle my throw-outs, I kept hold of my sweet and crisp wrappers which I will use as decoration for the boats and or even bits of newspaper!
Also, a handwritten nursery rhyme that I will also use to decorate our boats as well.
ARE YOU READY?
Before we move, here is a short demo showing you how to fold your A4 paper into a boat. (I use a similar method.)
Here are the examples, one with snack wrappers and the other the lyrics from the ‘Row, row, row your boat’ nursery rhyme.
QUICK TIP!
Once you have laminated your sheets, you can fold them into boats by following the steps in the video above. How to make a paper boat.
It may be a bit harder to fold the laminating sheets, as they are quite resistant to your folding, but persevere with it. Kids may need an adult to help, pressing hard to get a crisp fold.
Using a ruler will help to make the creases sharper.
ARE YOU READY?
RESOURCES!
Laminating machine.
Laminating pouches.
Coloured papers. (your choice)
Snack wrappers/ newspaper.
Black felt-tip pens.
Scissors/Ruler.
Glue stick/sellotape.
FOLDING LAMINATED DESIGNS!
I would have preferred a larger sail, so I found a way to do this!


BOATS WITH BIGGER SAILES!
Slide the larger sail over the smaller sail of the boat, and it will look more prominent.
You can have it either all white, or you can glue on bits of the wrappers to make it more funky.
To stop the larger sail from popping off, you can glue it into place.
Here are three different styles of boats. One in different snack wrappers, the other with torn newspaper and the last one with a handwritten nursery rhyme.
Each word was torn away and placed within the laminating pouch in the way the song is sung.
Folded words will go astray, though you can make out what’s written, and now they all have bigger sails!
Here are the boats in water, blowing them to see how they float!
BOATS THAT FLOAT!
As you can see, these laminated boats float, aided by some gentle blowing!
I placed them in a bath of water, to demo this, whereas you can set up a paddling pool or a large plastic bath and have fun, using straws to blow to win!.
They may go slightly lopsided, but you can pull them open at the bottom to give them a more square shape, and then they will float more evenly!
STACKABLE!
Best of all, they can be stacked neatly one on top of each other and put away for next time!
SOME TIPS!
PRACTICE, PRACTICE!
- Practice folding paper first, until you get the hang of it, then you can move on to laminating your design.
YOUR CHOICE!
- Your boat design will last longer in water if it’s covered in plastic, but you can always stick to paper or cards and make loads of them if they get too wet!
AN ALTERNATIVE!
- If you do not have a laminating machine, you can try sticky back plastic, the stuff you use to cover books with, although you may need to tape it down a bit.
TAPE UP GAPS!
- After laminating and making your boats, you may need to tape up any gaps to seal holes so water won’t seep inside them.
DRY OUT!
- When you finish playing with boats, remove them from the water and pat them dry with a tissue or kitchen towel to remove water and moisture from them.
POWER THAT BOAT!
One way to help your boat move is to blow it with a straw, but have you ever thought of adding power to the boat with a balloon?
Yes, a balloon! You attach it to a gap at the back of the vessel and hold it tight or hold it with a peg, and then let it go!
Watch this short video to demo exactly what I mean!
Cool, isn’t it? Kids can grab some LEGO pieces and build a boat, then blow a balloon and attach it to a gap at the back, securing it with a peg.
But don’t take my word for it; check out a super STEM-inspired kids’ site, Green Kid Crafts, that shows you how to do this activity.
Click on the link below, and it will take you to their example.
Just how the video shows it in action!
Once you jump in to check out Green Kid Crafts, they also offer great activity boxes that are uniquely created with everything a child needs to create their STEM-inspired invention.
They do all the hard work for you, so you don’t have to worry about finding items to proceed with the activity, because all the necessary resources are included within each box.
WHAT GREEN KID CRAFTS OFFER!
Green Kid Crafts delivers a monthly STEAM activity box for kids. You choose the age group (3–5 or 5–10+) and the subscription length, from one month up to a year.
Each month, a new themed box arrives with 4–6 science and craft projects plus a learning magazine. If you’re unsure, you can try a one-month subscription first.
THIS IS THEIR STORY
Developed by teachers, crafty moms and STEAM experts (science, technology, engineering, arts and mathematics) to support key developmental skills for kids ages 2-10+, our products, including educational toys, STEAM kits, eco-friendly toys, and STEM kits, celebrate creativity with craft projects and activate thinking, questioning, inquiring, and original creation as we guide children through fun science experiments.
In an effort to encourage growth of the “whole child”, all of our kits are reviewed by our panel of experts to meet our Happy & Healthy Child criteria.


Hello Julia,
I was in the same dilemma when my youngest asked me to create a paper airplane for her. I got halfway with it, and I failed to remember. It requires me a couple of yt videos to consume to be able to finish it, ugh!
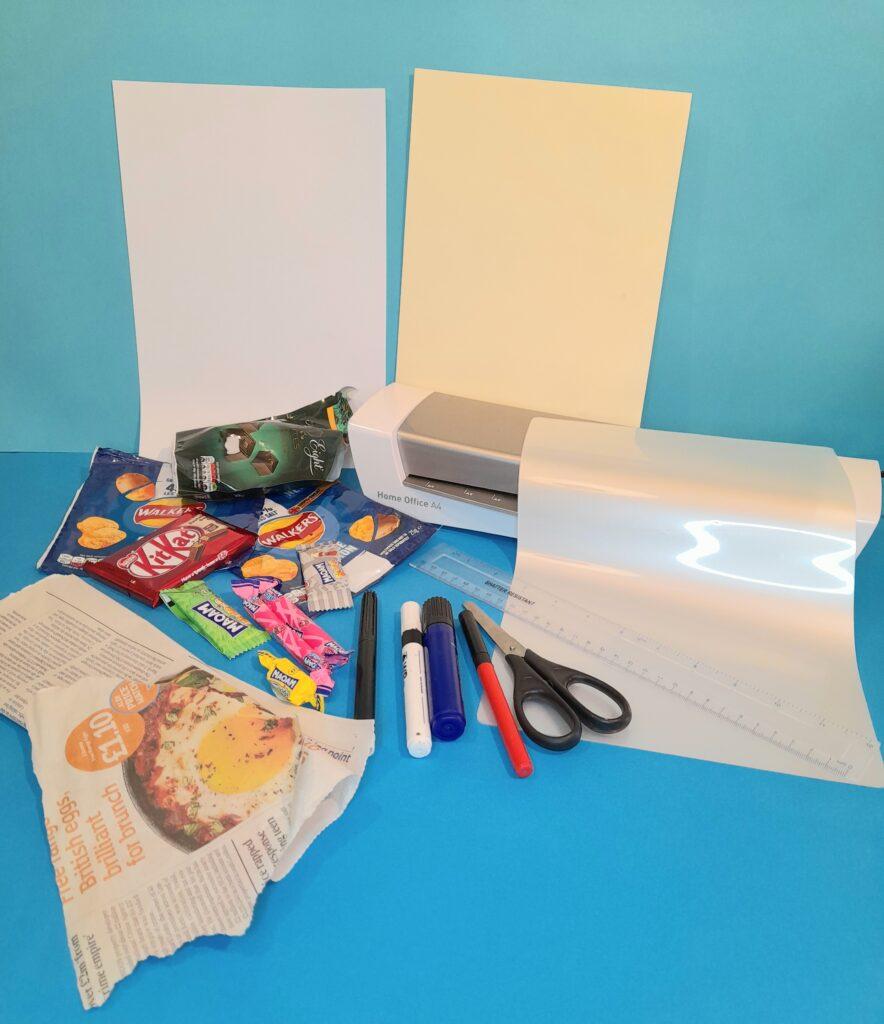
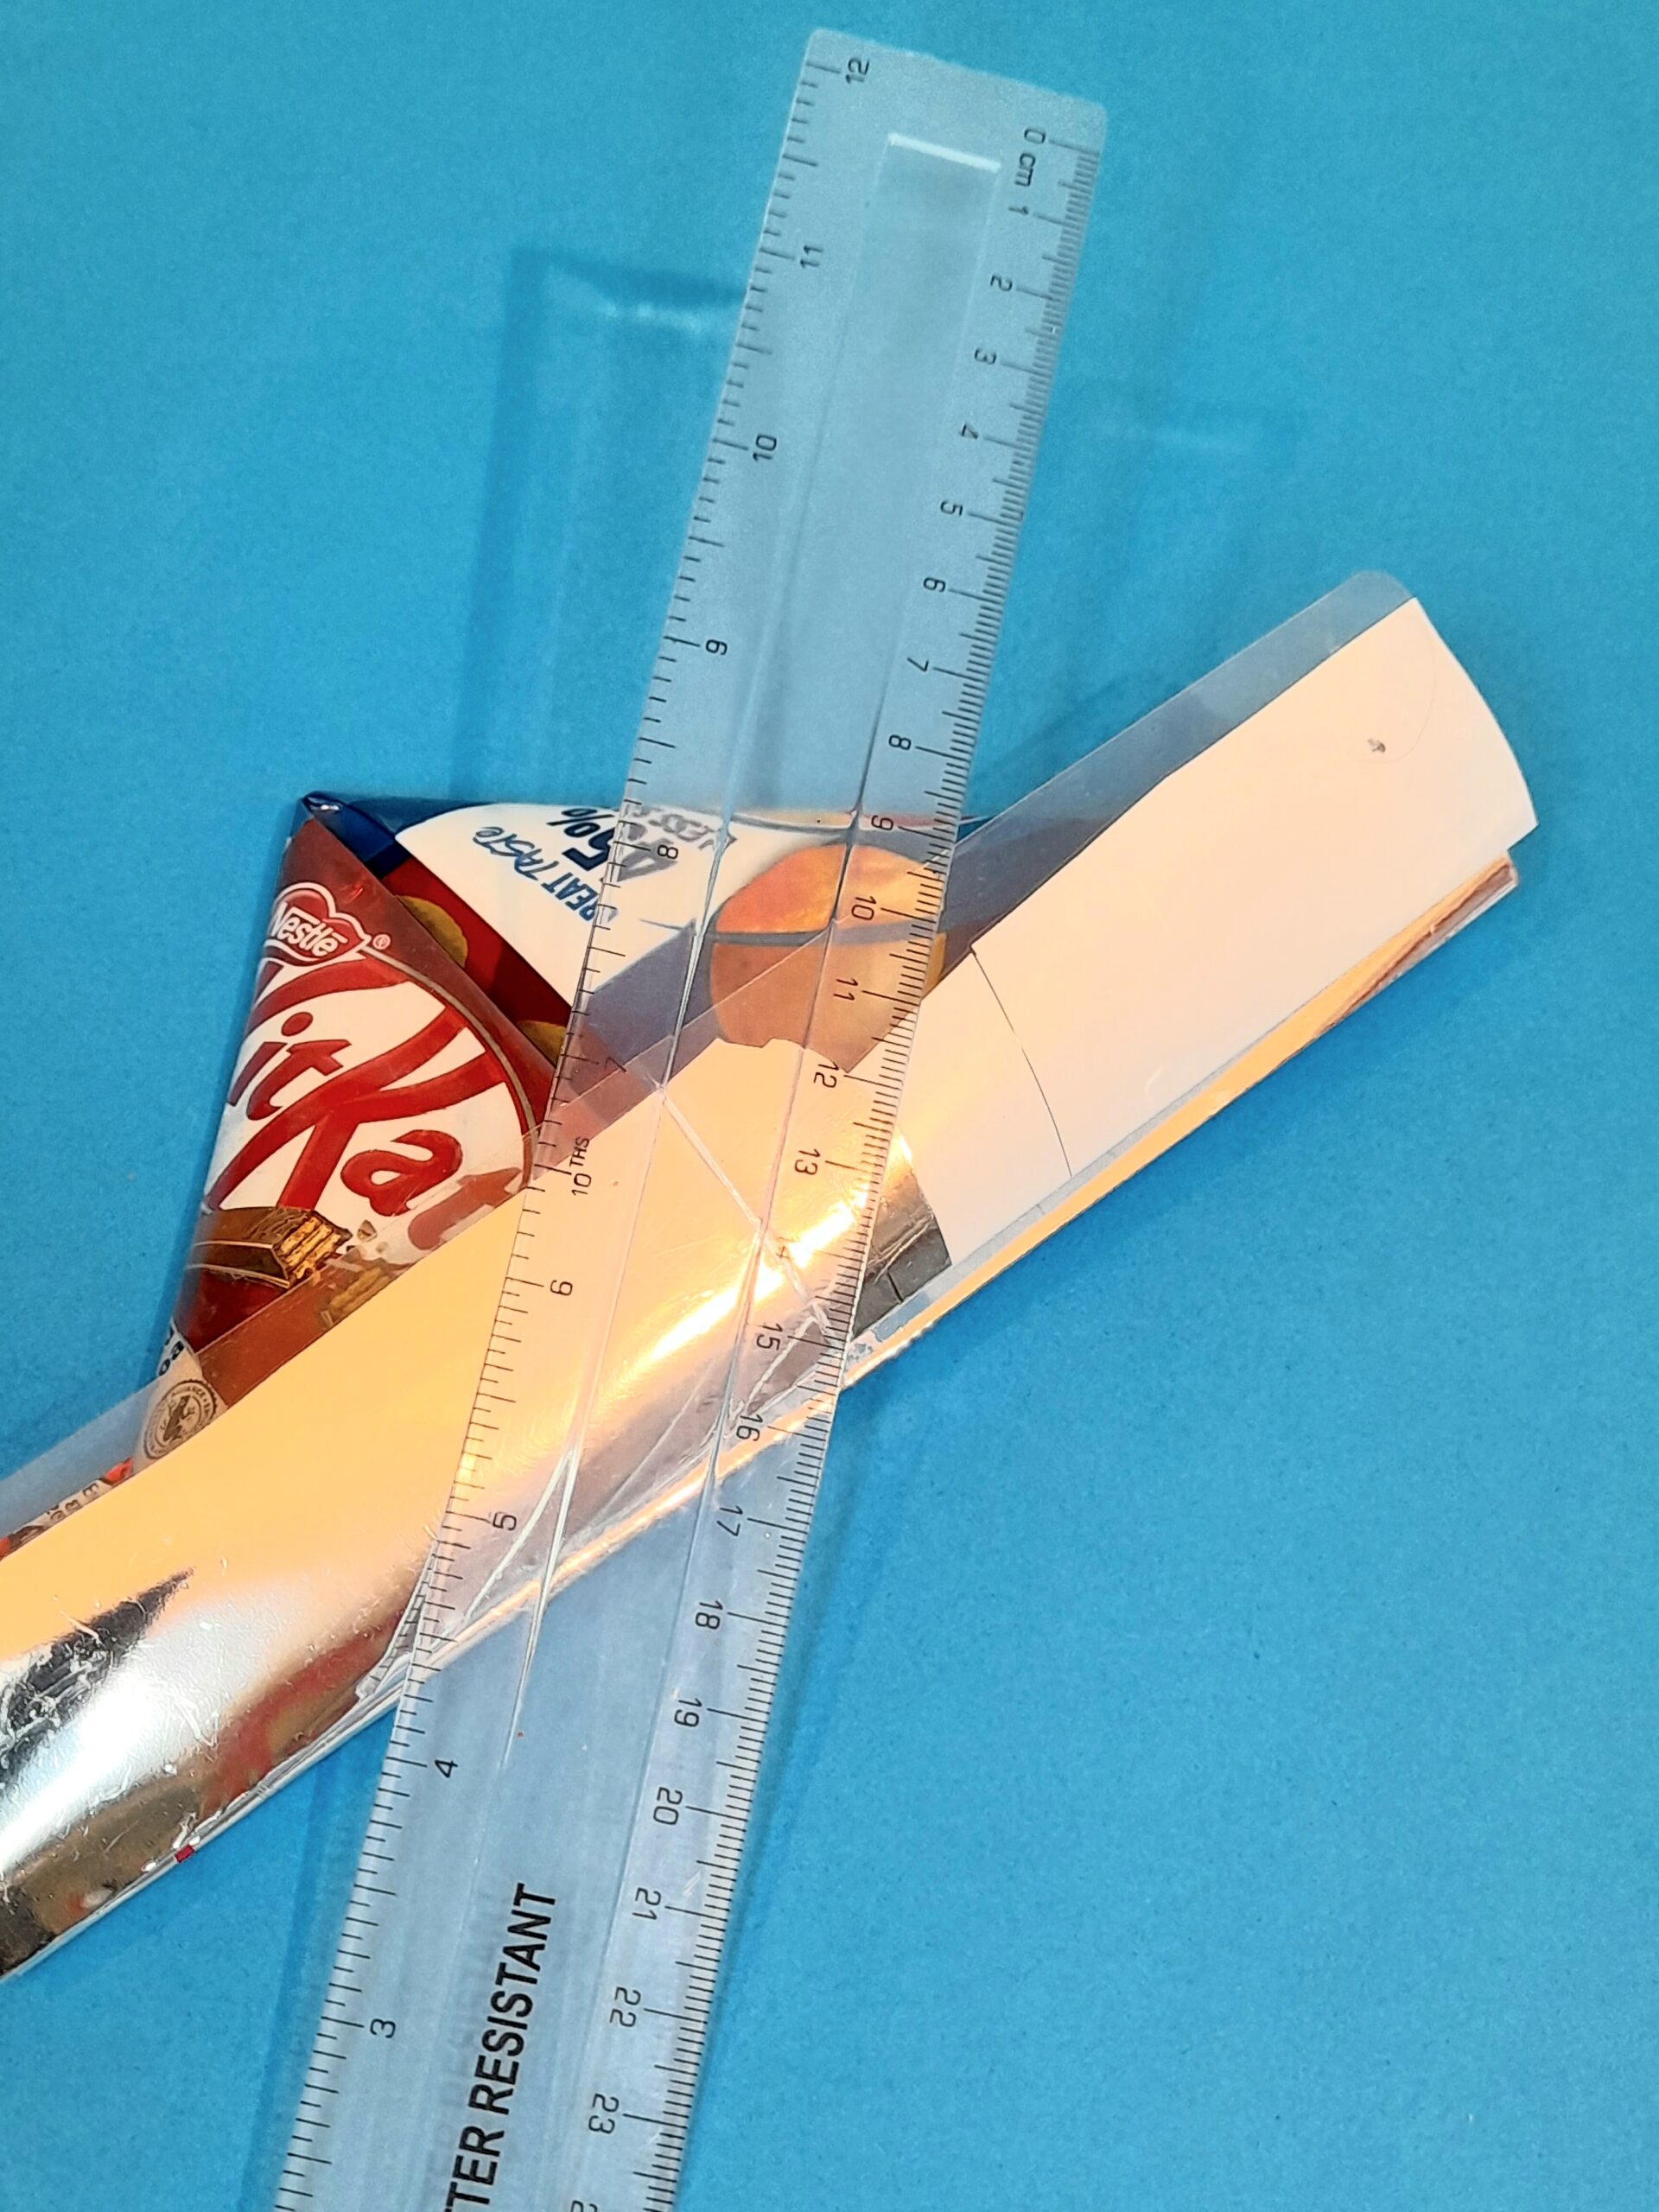
The laminating film is a great idea, so I assume you would have to use the thinnest one that you can find so you can fold it easily. Good thing we have a laminating machine, the long one and not just for IDs.
Thank you for giving me an idea for this weekend’s activity with my kids.
Hiya Lemuel, haha, so I am not the only one! Once you get the jist on
how to fold it, it becomes easy peasy lol.
Now I show off in class and say ‘want to see how I can turn this piece of
paper into a boat? Kids love it, then I get a queue!!! some get it and
some don’t.
Anyways, love you can use your laminator in a constructive way, if you can get
hold of the thinner type of sheets yeah, but mine were 80 microns and although a bit
hard to press, just perservere and you can get a good crease.
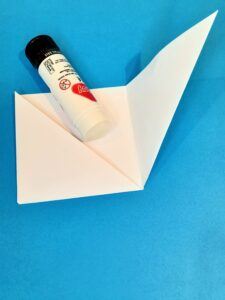
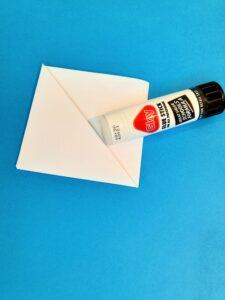
Oh,before you pop the boat into water, maybe seal up any openings with some selotape
it will make it more waterproof.
Thanks for your comment.
Happy crafting.
Julia.?