RAG RUG FROM OLD CLOTHES!

What to make from your Throw-outs!

Weave yourself an easy Rag Rug, recycling your packaging wraps, and your old clothes!

Don't throw away!

What do you do with all your old clothes that occupy space and sit in drawers?

ANY CLOTHES!

Whether it’s t/shirts, shirts, trousers or even old bed sheets, and perhaps feeling a little bit guilty in throwing them away?

QUALITY IS NOT THAT GREAT!

These days, some clothes are mass-produced, and run off cheaply, as it would work out more economical for the seller.

ARE THEY A BARGAIN?

Great for the buyer to find a bargain, at affordable prices, but what about the quality?

However, clothes made with cheaper fabrics, and how they are produced may not last as long as you would have expected! 

UNFORTUNATELY!

So, there are many throw-away clothes, ripped, torn, or worn out much sooner, especially with children, when wear and tear is not there!

HOW DO YOU DEAL WITH THIS?

You can donate them to charity shops, or offer them to those who could make good use of them again!

SAVE OUR LAND!

The less we throw out, the less there will be on landfilled mines, littering and cluttering our land, whereas in this case our clothes can be put to good use!

LET’S THINK!

You can turn your old clothes into something creative, useful, and aesthetically pleasing, and the result would have a sensory element to it.

MY INTENTION!

This would be a money-saving activity, where you will be re-using your old clothes, sheets or fabrics and do a craft, that would look great when finished!

Do you have any ideas what it could be?

 
Picture from Pexels.com by Ron Lach.

LET’S GET WEAVING!

Have you ever heard of a RAG RUG? This is a rug, that has been woven with rags!

Yes, with your old rags! these are all your old clothes that will be cut into strips and woven into a rug!

ACCESSIBLE RECYCLING WRAP!

AROUND BOTTLES!

As I like to utilize any recycling that can be used again, I came across this brown packaging stretchy reinforced paper, that has a criss-cross pattern through it, with a corrugated effect, and is used to wrap around bottles.

AROUND FRUIT!

Then there is this white type of wrap. This has a softer texture. When they are both stretched out there is a weave-like pattern through both of them, a series of holes that you can thread strips of fabric through, and ultimately make a Rag Rug from your old clothes!

This is the brown packaging used to protect bottles, and white softer wrap used to protect fruit, instead of bubble wrap!
Here is a close-up of this material with series of criss-cross holes. The brown wrap has smaller holes, and the white wrap much larger holes.

GATHERING YOUR RESOURCES!

  • This is very simple. 

  • Stretchy packaging, or any weave-like material with holes in it.

  • Different strips of fabrics, your colour choice, or whatever you have!

  • Cutting instruments. 

  • A lot of patience and time put aside!

Before we begin, here is a quick video on the history of the Rag Rug, and how it came about!

ARE YOU READY TO BEGIN?

     RESOURCES.
  • Some rug canvas, any packaging with a weave structure, or hessian.
  • Lots of strips of coloured fabrics.
  • Cutting board.
  • Scissors/Rotary cutter.
  • Patience!

LET’S START!

In the second image the brown cotton fabric, frayed quite a lot, when threading and tying into a knot, so I chose not to use it for this project.

SOME THOUGHTS AHEAD!

WHAT SIZES?

In the demonstration, the brown wrap is approx. 28 x 26 cm, and the white wrap is approx. 27 x 50 cms. These are the sizes of the wraps, that I had to work with.

TO CONSIDER!

Taking these sizes into consideration, and depending on how many wraps you can get your hands on, you can build and extend the size of the rug as you go along.

ONE TO LABOUR OVER!

This is not a rush project and can be one in progress.

Regard this as a special time with your kids to do whilst chatting and catching up, or watching your favourite TV, show.

   SOME TIPS!

    FLEXIBLE!

  • These packaging wraps came with glass bottles and the white wrap with fruit.
  • The wraps are quite stretchy, and you can easily pass the rag strips through the holes.

    ALTERNATIVES!

  • If you cannot get hold of any of these packaging wraps there are rug canvases, that are designed for needlework, or rag rug work. 
  •  Rug canvases are available on eBay, Amazon and any hobby craft store.

    LOOK OUT FOR!

  • The larger the holes to pull the rag strips through, the better, especially if a child participates.

    ADAPTABLE!

  • The aim of this project, is for your kids to have a go, so a child-friendly weave canvas or a packaging wrap that has similar criss-cross or square holes would work.

     WHAT TOOL?

  •  Some of these weave canvases, may have smallish holes, so you may need a simple tool to pull or push the rag strip through the holes would help, so a sharp pencil or anything with a point would come in handy.

    WHAT CUTTER?

  • I used a rotary cutter to cut the rags into strips, although you can slide a pair of scissors along the cotton fabrics and cut equally long strips. (Rotaray cutter can be purchased from eBay, Argos, Amazon and a good Hobby craft shop).

    CERTAIN FABRICS.

  • Avoid rags that can fray, this would not work as well. A vest or t/shirt type of material, which stretches, would favour well.
  • Once you have pulled the fabric strips through the holes, tie each strip up.

    NEATEN OFF!

  • When the rug is completed, you can trim down the rags so they are equal to the eye in depth.

    EXTEND!

  • If the piece of canvas weave is too small, you can craft a few and stitch them together, so the ultimate finish will be a large handcrafted rug.

    ALTERNATE YOUR COLOURS!

  • Depending on the colour of your rag strips, try to blend them with different colour waves here and there, to give an even look.

I will continue adding line by line and see how this looks when I have finalized the rag rug.

Then I will update you with the results.

I need to find more rags to cut into strips, so there may be a time lapse before I come back with the results.

Hey there, when you click on links in this post and you make a purchase, I may earn a small commission that l can use towards resources (other than throw-outs) for project making within my website😀

(affliate disclosure)

LET ME BRING TO YOUR ATTENTION!!!

I love anything a bit different, and also fun for kids to do, there are different ways to have fun in design projects, and sometimes, not that hard to do!

Keeping in line with rugs, carpets, and even door mats, this is something that might be of interest to you.

So there is this super carpet company that is based in Germany that is just a bit different!

When you are on their website, simply click on the translate link, top right hand corner, and the German text will convert to English.
Have you ever thought of designing your very own door mat?

This is a floor mat, with a bit of a difference!

All the work is taken out of your hands, and all you do is provide one of your favourite pictures, or choose one from their library with a range of free images available!

WHO CAN DO THIS?

Fussmatten Welt can do this for you!

Jump in and take a look, this is a German carpet company, that specialises in anything you like door mats!

In this instance, you can have a picture of your choice, an image, a fun logo, or a saying and have it printed on a doormat.

Check them out here! ⇓

Check them out here! ⇓

FUN AND UNEXPECTED!

Imagine seeing your visitors’ faces, when they reach your front door and low and behold, there is this amazing photo of your family greeting their guests!

SOME FEATURES THEY OFFER!

DIRT AND GRIME!

I know you wouldn’t want to tread on one of these amazing logo mats, especially if they have a relative’s face on it, but guess what, you can wash these mats up to 150 times! and they will last at least 5 years!

    WHAT’S MORE!

  • The carpet pile is 100% polyamide.
  • Reliable dirt absorption, amounting to 3-4 litres pm2.
  • There is NO colour change, and washes are colourfast.
  • Pile height is approx 7-8 mm.
  • Rubber backing and thickness approx. 1-4 mm.

MAKE A DECISION?

So you can choose from one of their free photo banks via Pixabay or…..you can design your mat using your own pics, logos or family/pet photos.

All you have to do is follow their easy online solution centre, with easy-to-go links.

If uploading your images, choose the size, and follow through the instructions!

In a previous post, I went ahead and added a photo, of my two volunteers designing a doormat and followed their instructions, and it was pretty easy to configure.

See near the end of the post how it looked!

Jump in ⇓ and see what it looked like!

If you are in need of inspirational fun, activities and art stock then, look no further as…⇓

Or…if you are looking for easy and affordable weaving kits, that have everything on hand then…….

Baker Ross can offer you just that!

There is also an opportunity for your kids to practice their cross-stitching!

There is a range of cross-stitching kits that cover all types of themes.

With excellent ready made resources, that are fun and also challenging!

Plus, also available is an array of craft resources!

So if you are short of any art supplies, then Baker Ross is the place to be!

Jump in and check them out, there are many super kits to choose from, and will definately keep your kids busy for the holidays ahead!

TO CONCLUDE!

In this post, I show you how you can make good use of your old clothes, and convert them into a fun activity, that being a Rag Rug from your old clothes!

LOOK FOR!

By utilizing a simple bottle, or fruit packaging wrap as a canvas weave, you or your kids can craft a super rag style rug.

MY INTENTION!

craft just one piece, as a quick activity to do with your kids, or make a few, and once you have several weaves with your rag strips, you can sew them together creating a much bigger rug!

WHERE TO PUT IT?

This can then be placed in the kids’ bedroom, toy room, kitchen or extension, the choice is yours.

Or hang it up, as a wall hanging where you can admire your handy work!

WHAT YOU NEED!

So hold on to your old clothes, select what colours will work together, and get cutting!

Look for packaging wraps made like a weave, or find a canvas weave to work with.

DON’T FORGET!

I would love to see what you come up with, and I can add your creation as an update to this post, so do get in touch with a picture of your handiwork

So happy Rag Rug weaving!!!

8 thoughts on “RAG RUG FROM OLD CLOTHES!”

  1. Hey Julia, what a cool project! Turning old clothes into a rag rug is such a creative and eco-friendly idea.

    I love how you use packaging wraps too – it’s amazing how everyday items can be transformed into something beautiful and functional.

    The step-by-step guide is super helpful, and I’m definitely inspired to try this out.
    Can’t wait to see how it turns out with my own twist! Keep up the fantastic work with these unique ideas. 😊👍
    -Chris

    1. Hi Chris, I am so glad you liked this Rag Rug project, and has inspired you one way of another to up-cycle your old clothes, and packaging wraps!
      I think we take for granted that we can make good use of our junk in one way or another, after a second inspection, and get creative!
      I am also happy to hear that you liked the step-by-step demo, that shows an easy peasy way to do your rug, that’s my intention to show an idea, and then demo it, made super easy for kids, as well as adults to carry it through!
      Here’s saying a big thanks for your super comment, and Happy Crafting!
      Julia.😀

  2. Hey there, Julia!

    I stumbled upon your article while contemplating the fate of my overflowing closet. The idea of turning old clothes into a Rag Rug seems both creative and eco-friendly. Kudos to you for encouraging sustainable practices!

    I’m curious about the weaving process. Have you personally tried making a Rag Rug, and if so, what was your favorite part of the creation journey? Also, any specific tips on choosing the right fabrics to ensure a durable and aesthetically pleasing result?

    Looking forward to diving into this crafty adventure!

    1. Ha ha Chas, this is an adventure! It all started when I was researching knitting, crocheting and then rug making!
      So what does one use to make a rug with, and bingo old clothes, rags!
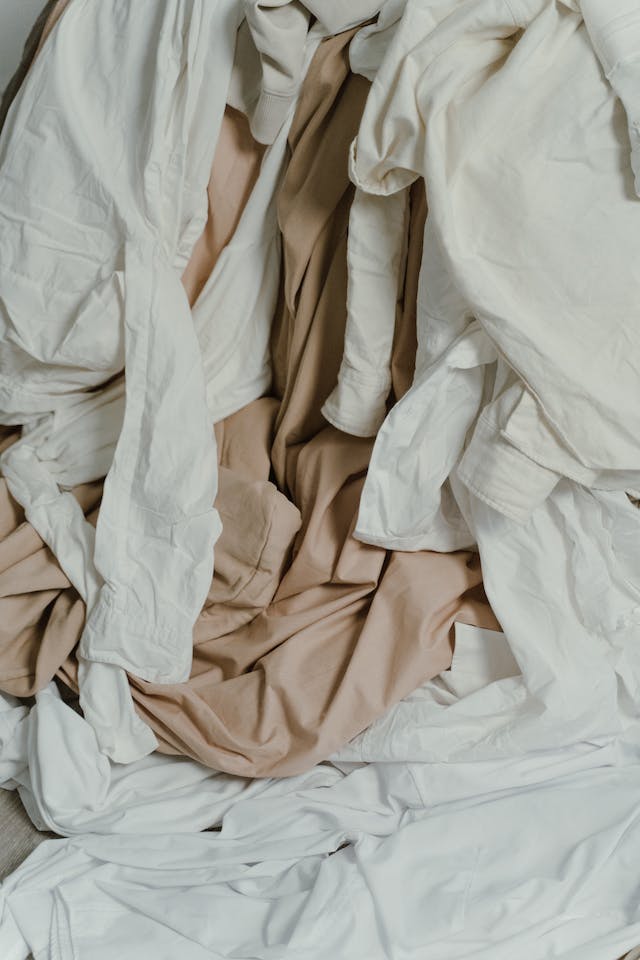
      You need a lot of material in order to make one of these rugs. Also the amount of clothes one throws out is unbelievable….but wait a minute, most of these clothes are still ok, and some have memories attached to them!

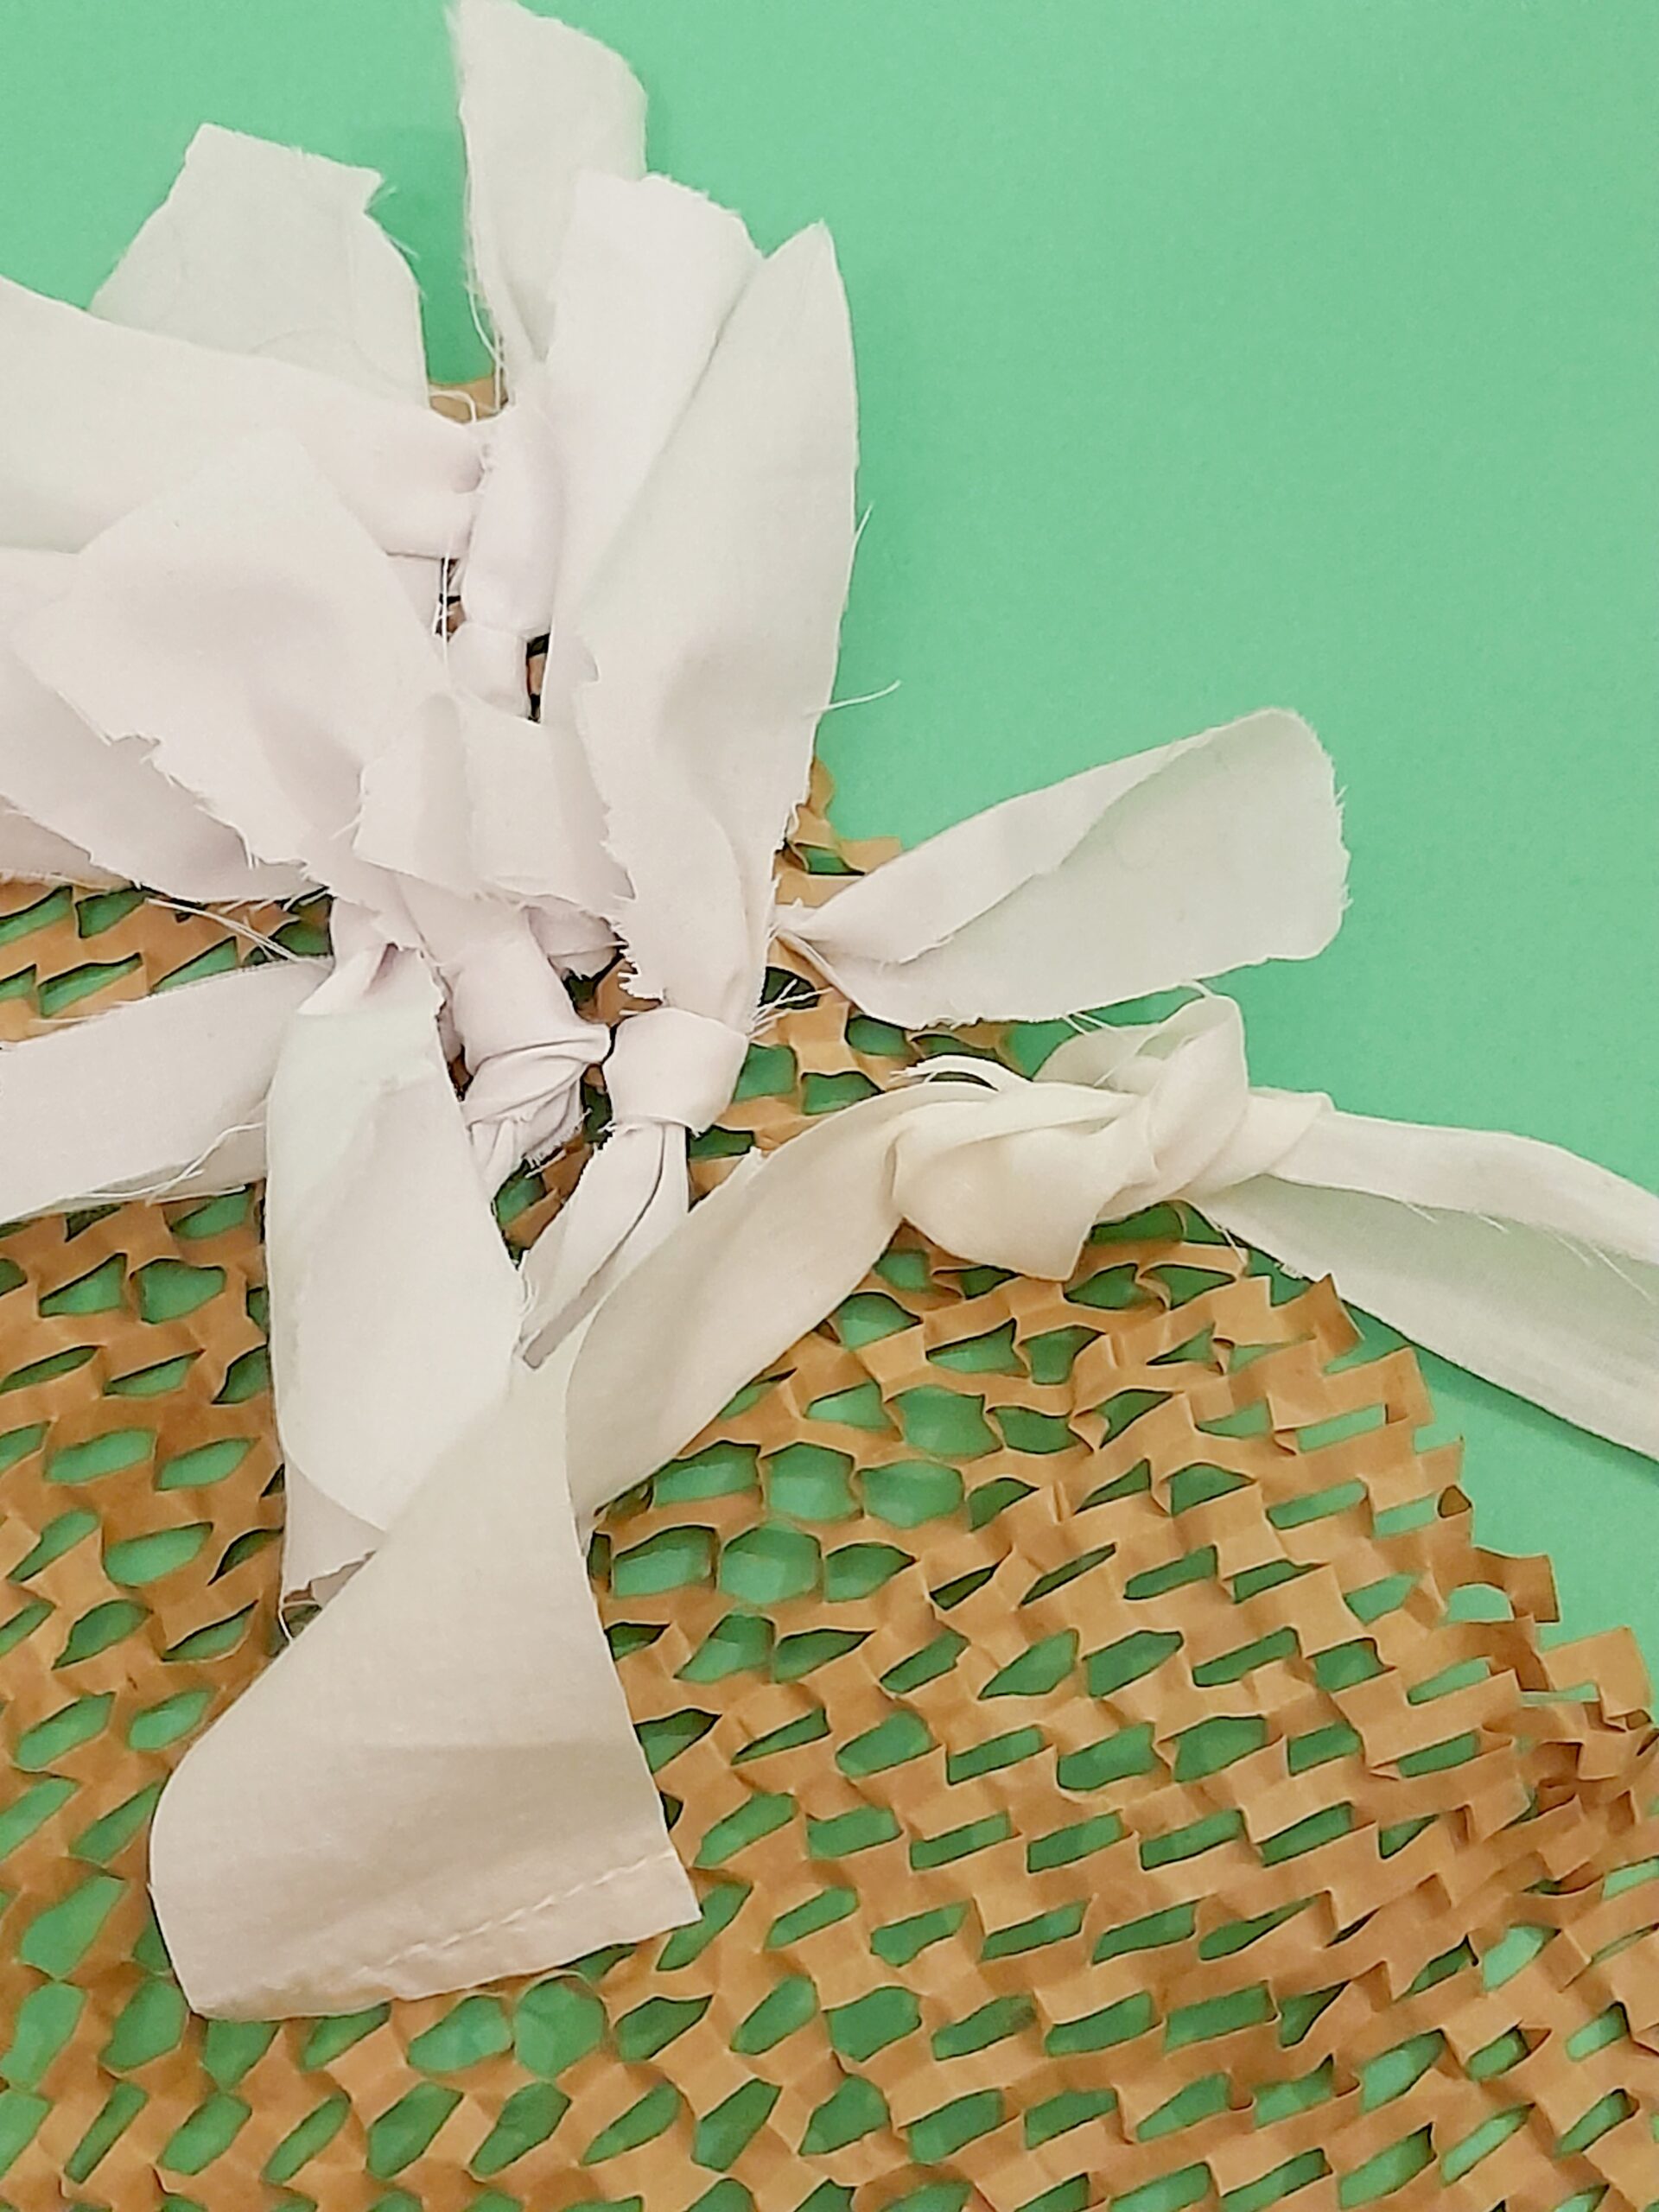
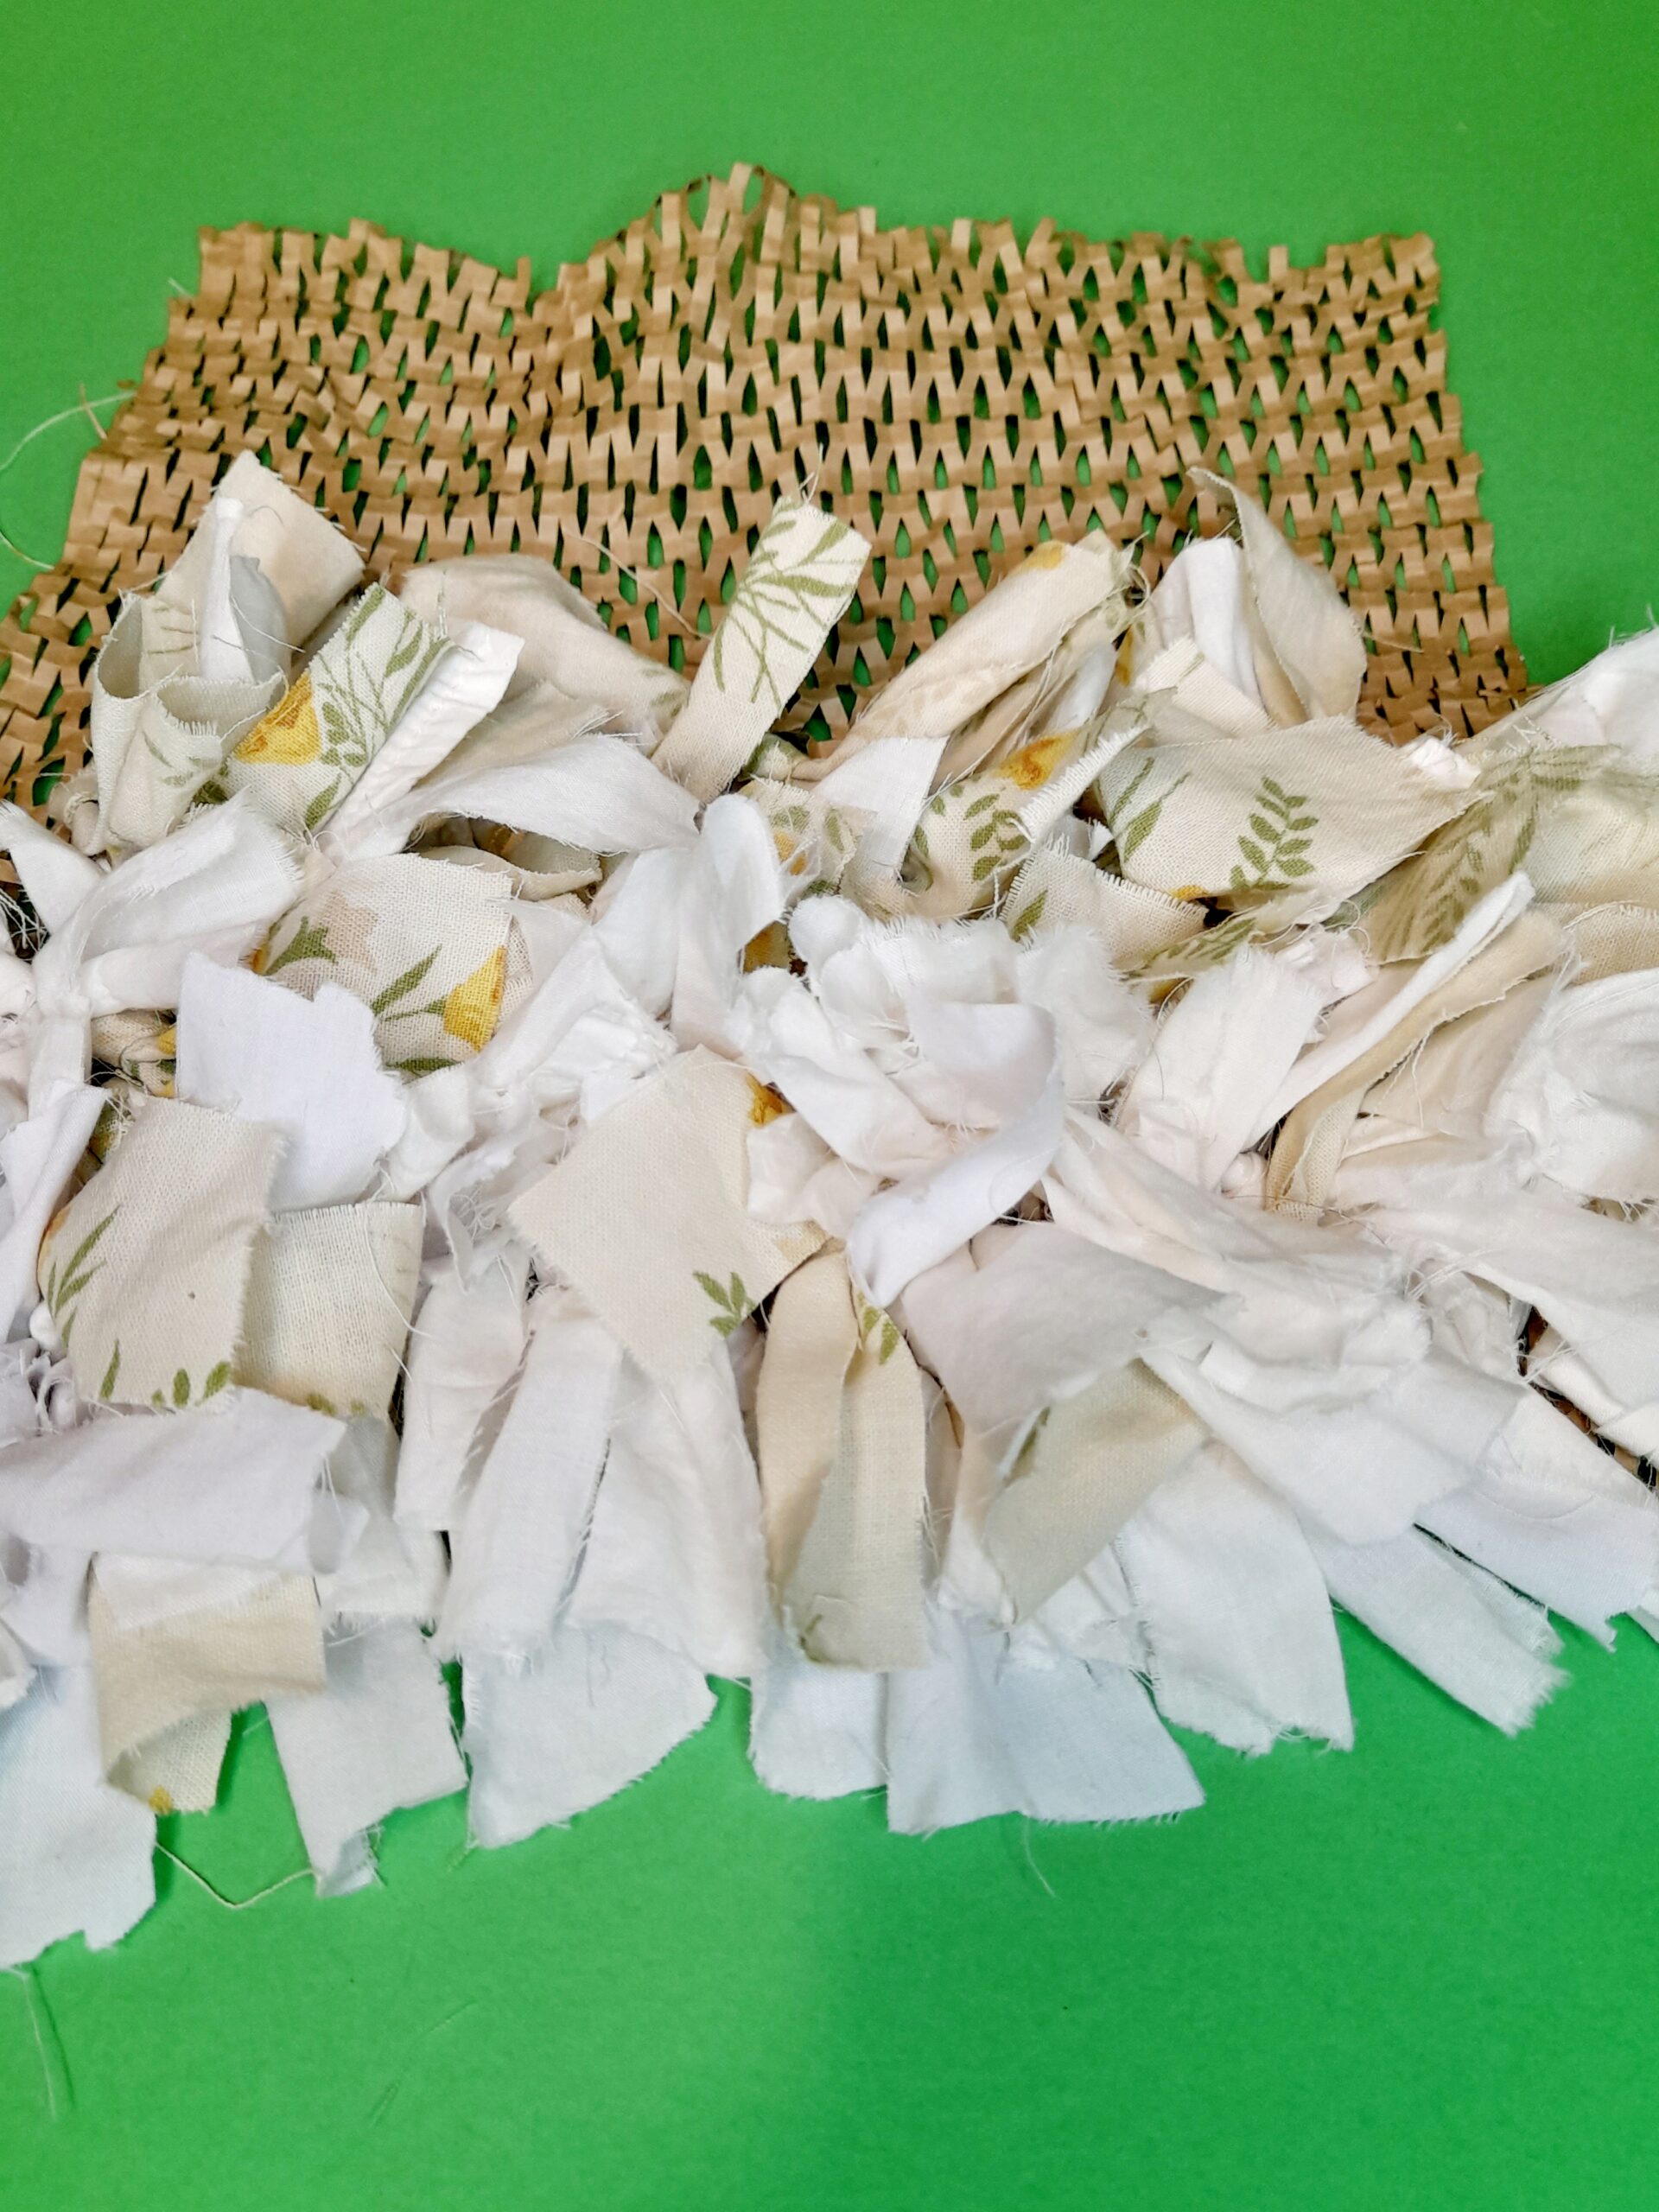
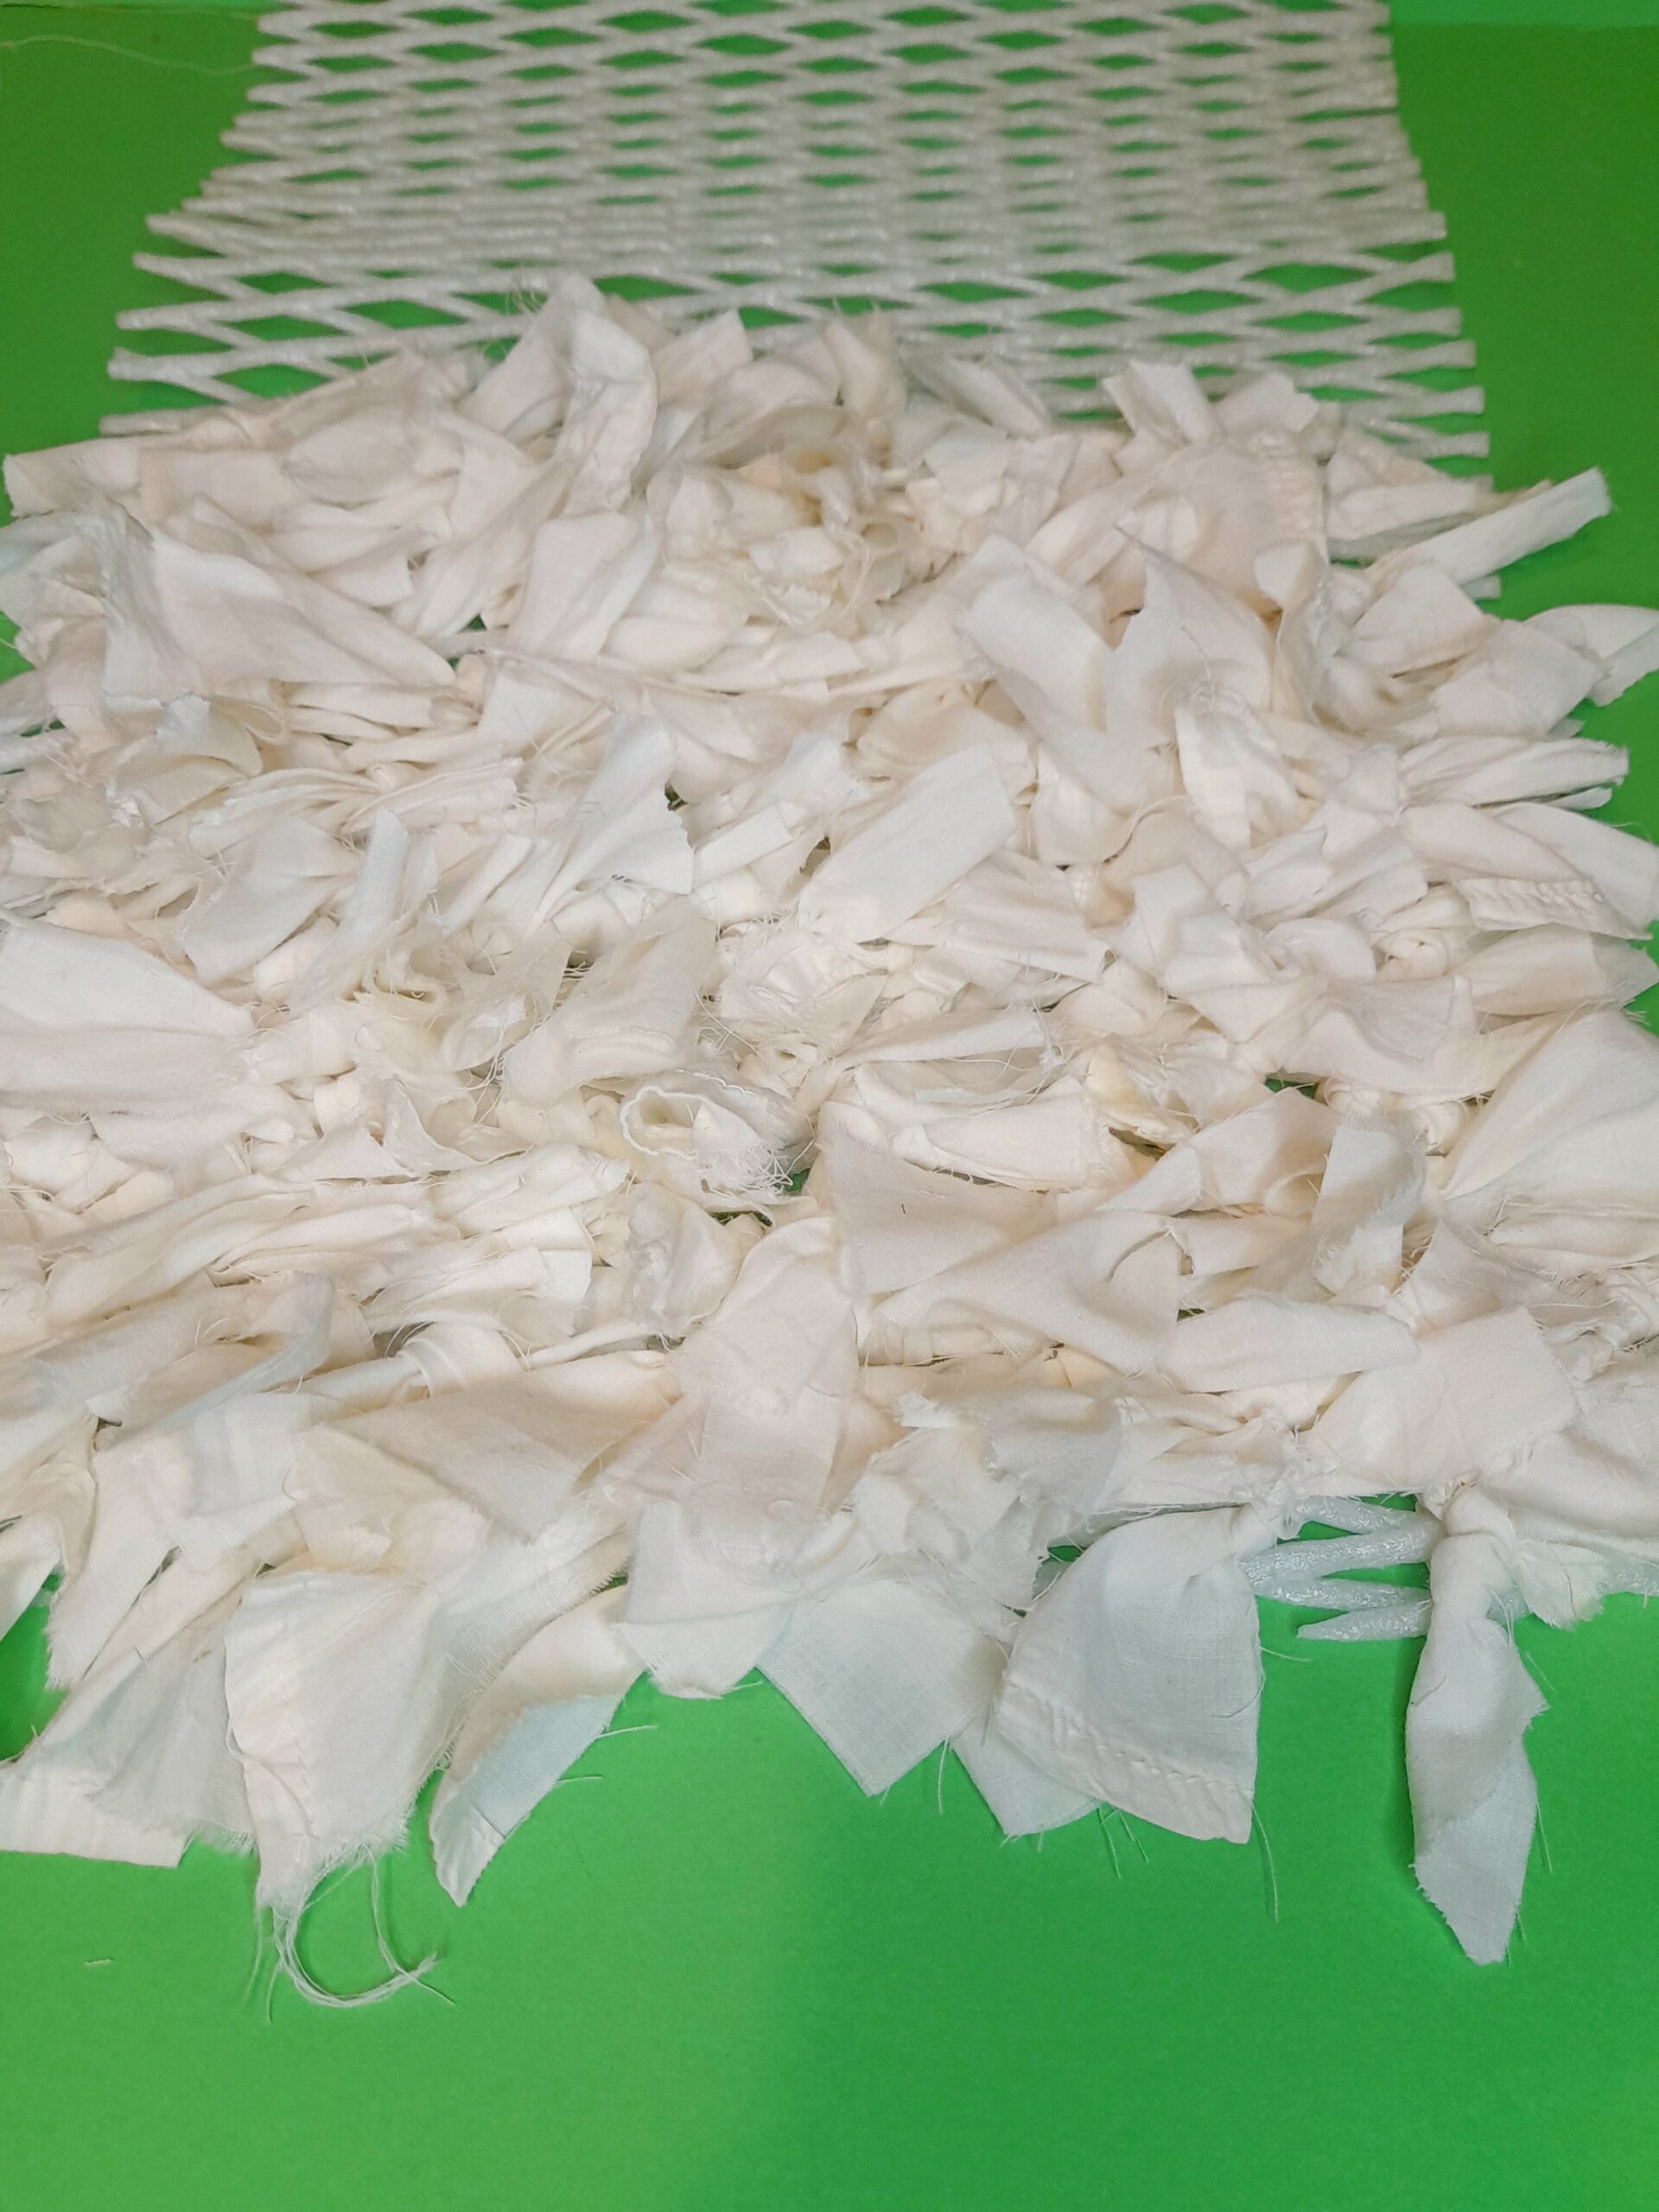
      So what a better way to re-use these to make a rug, and the outcome is a touchy, kind of rug full of texture and very eye catching!
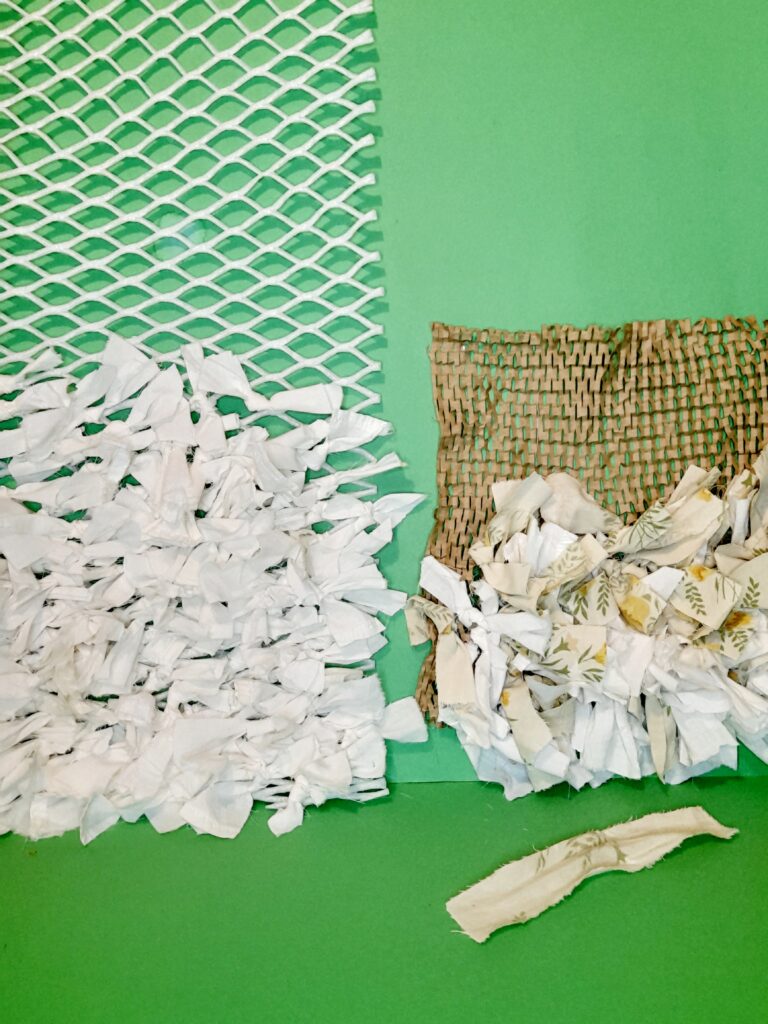
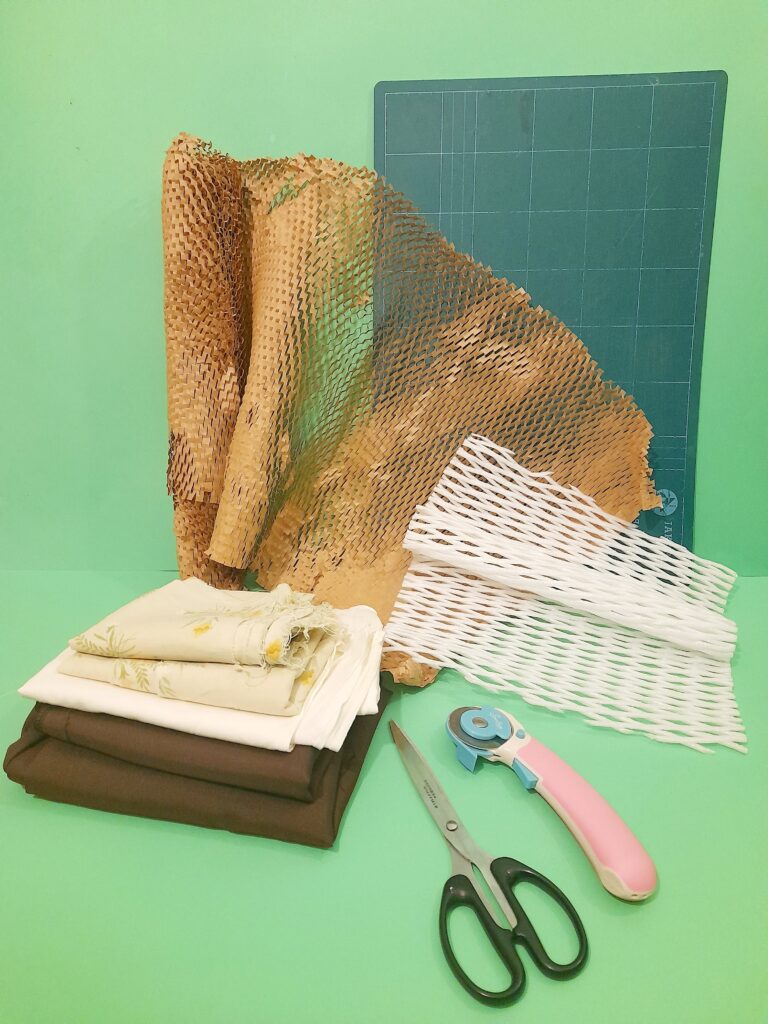
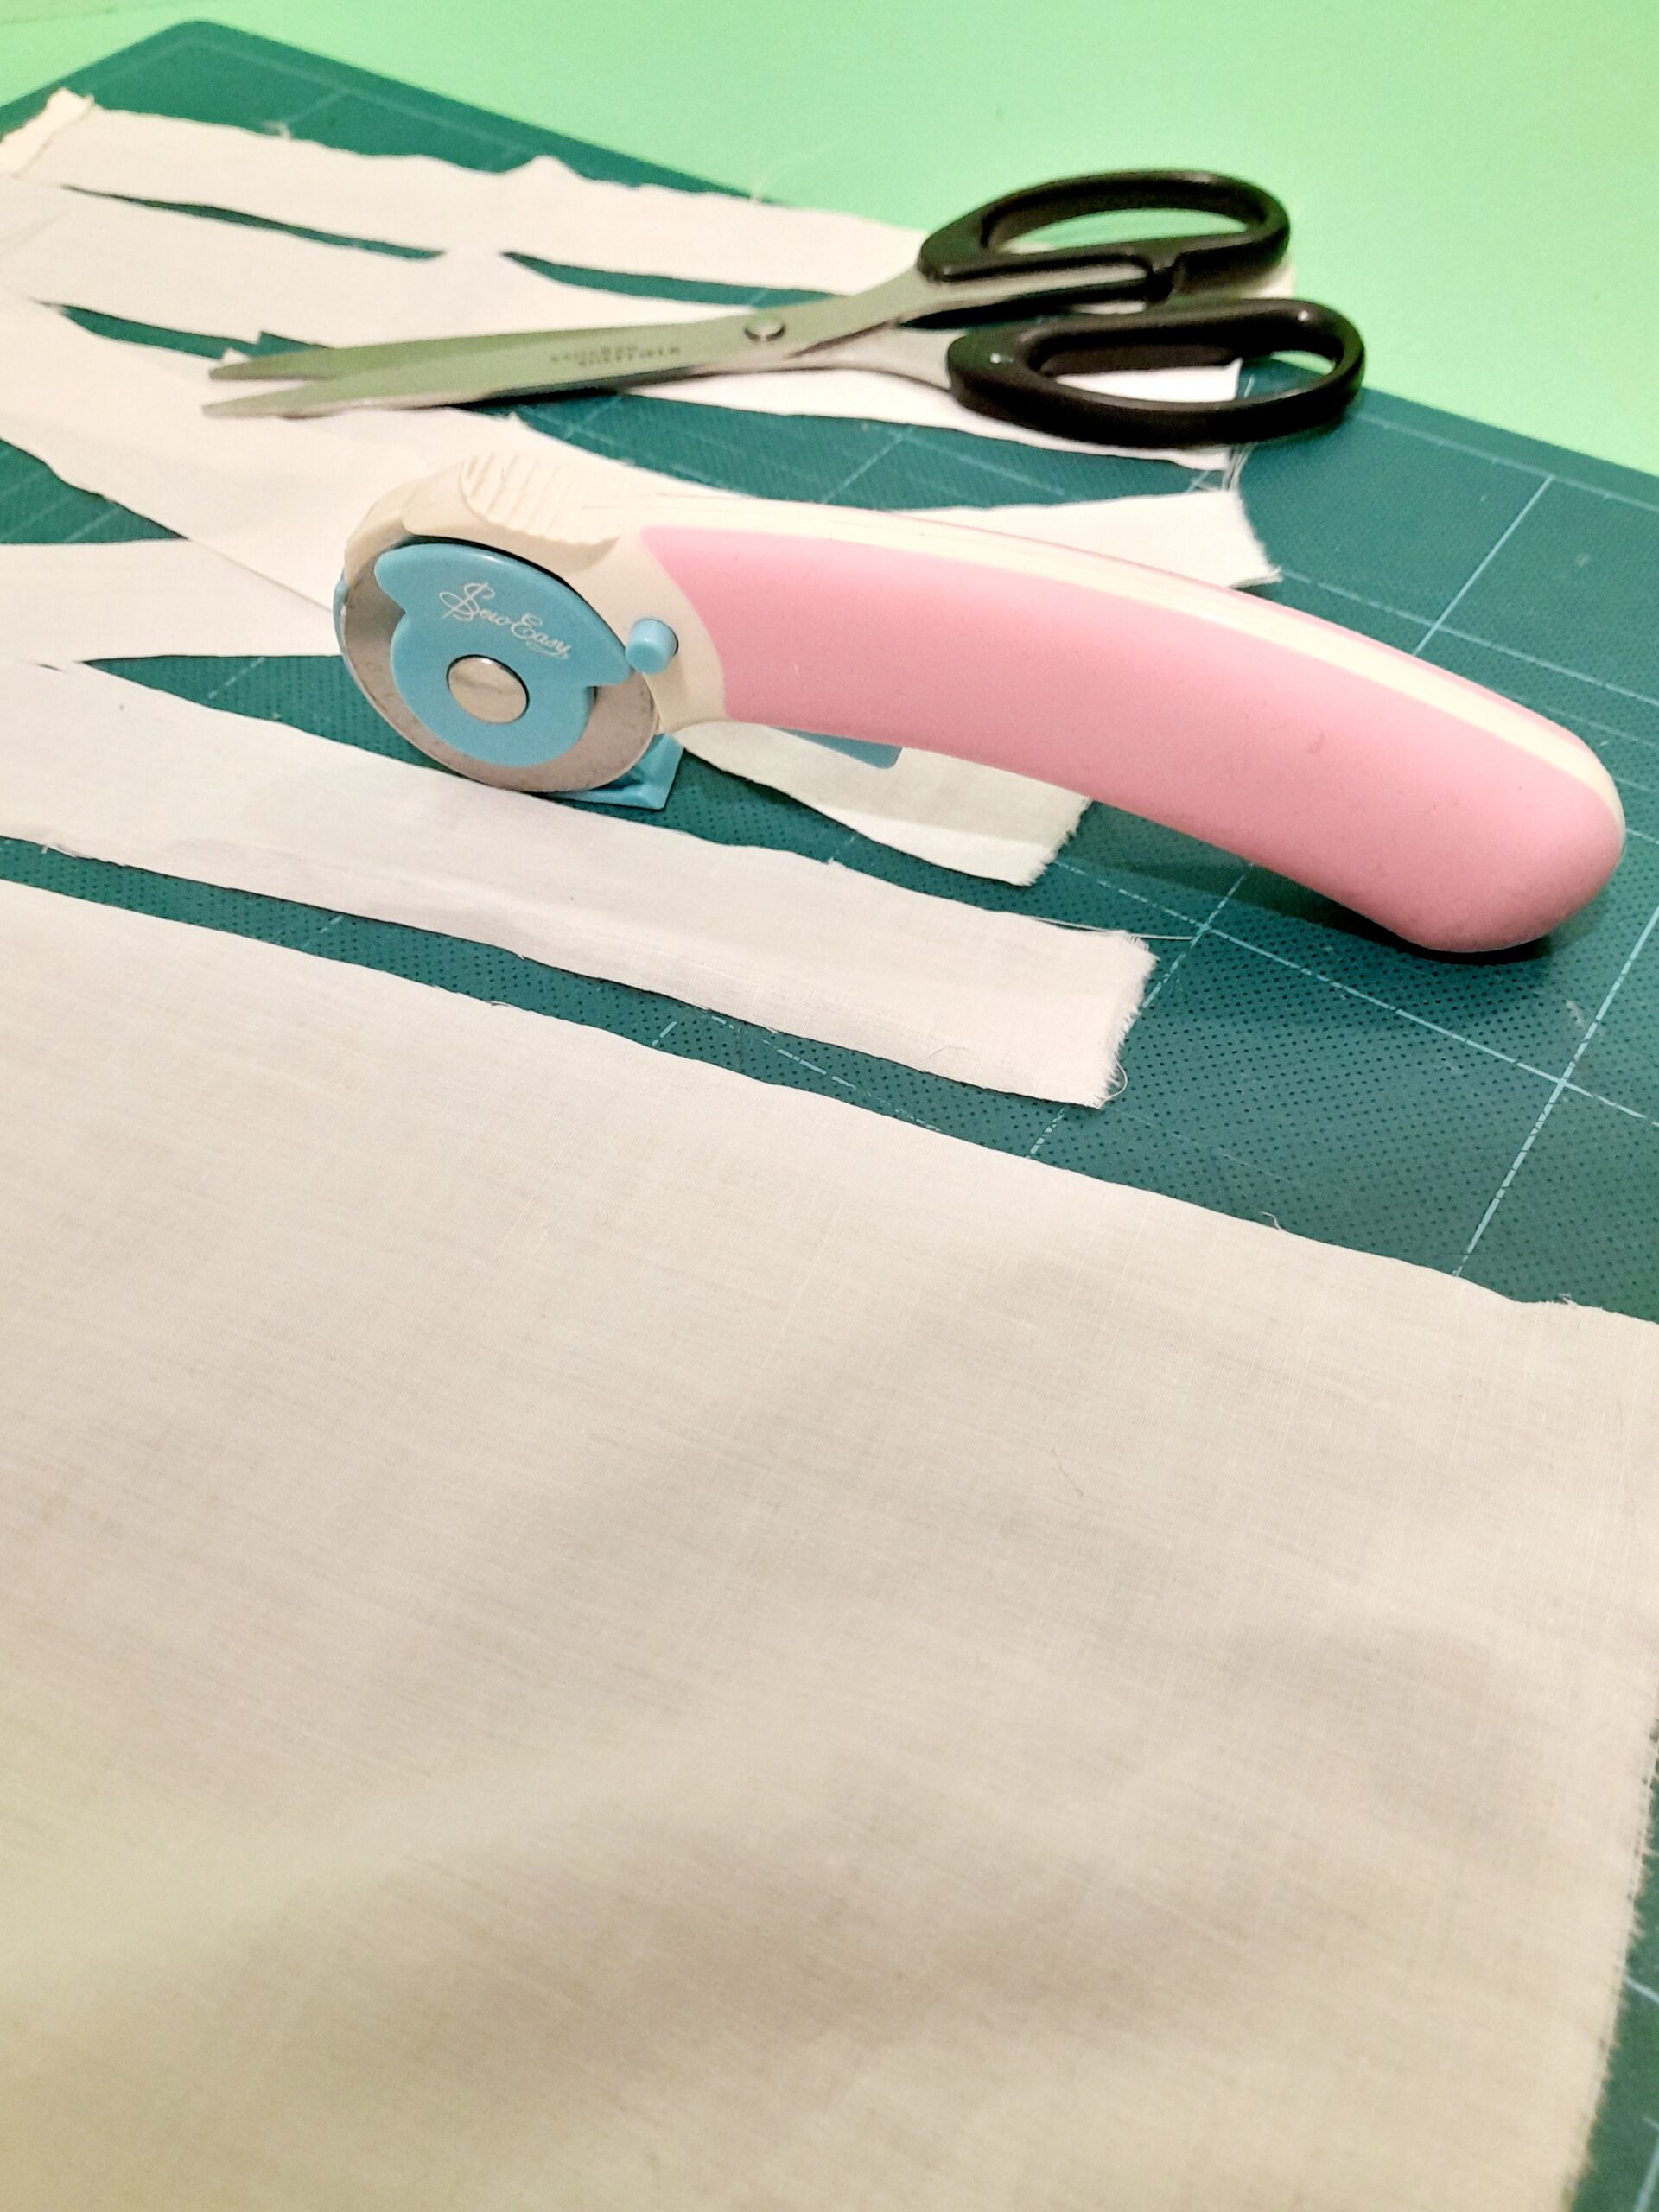
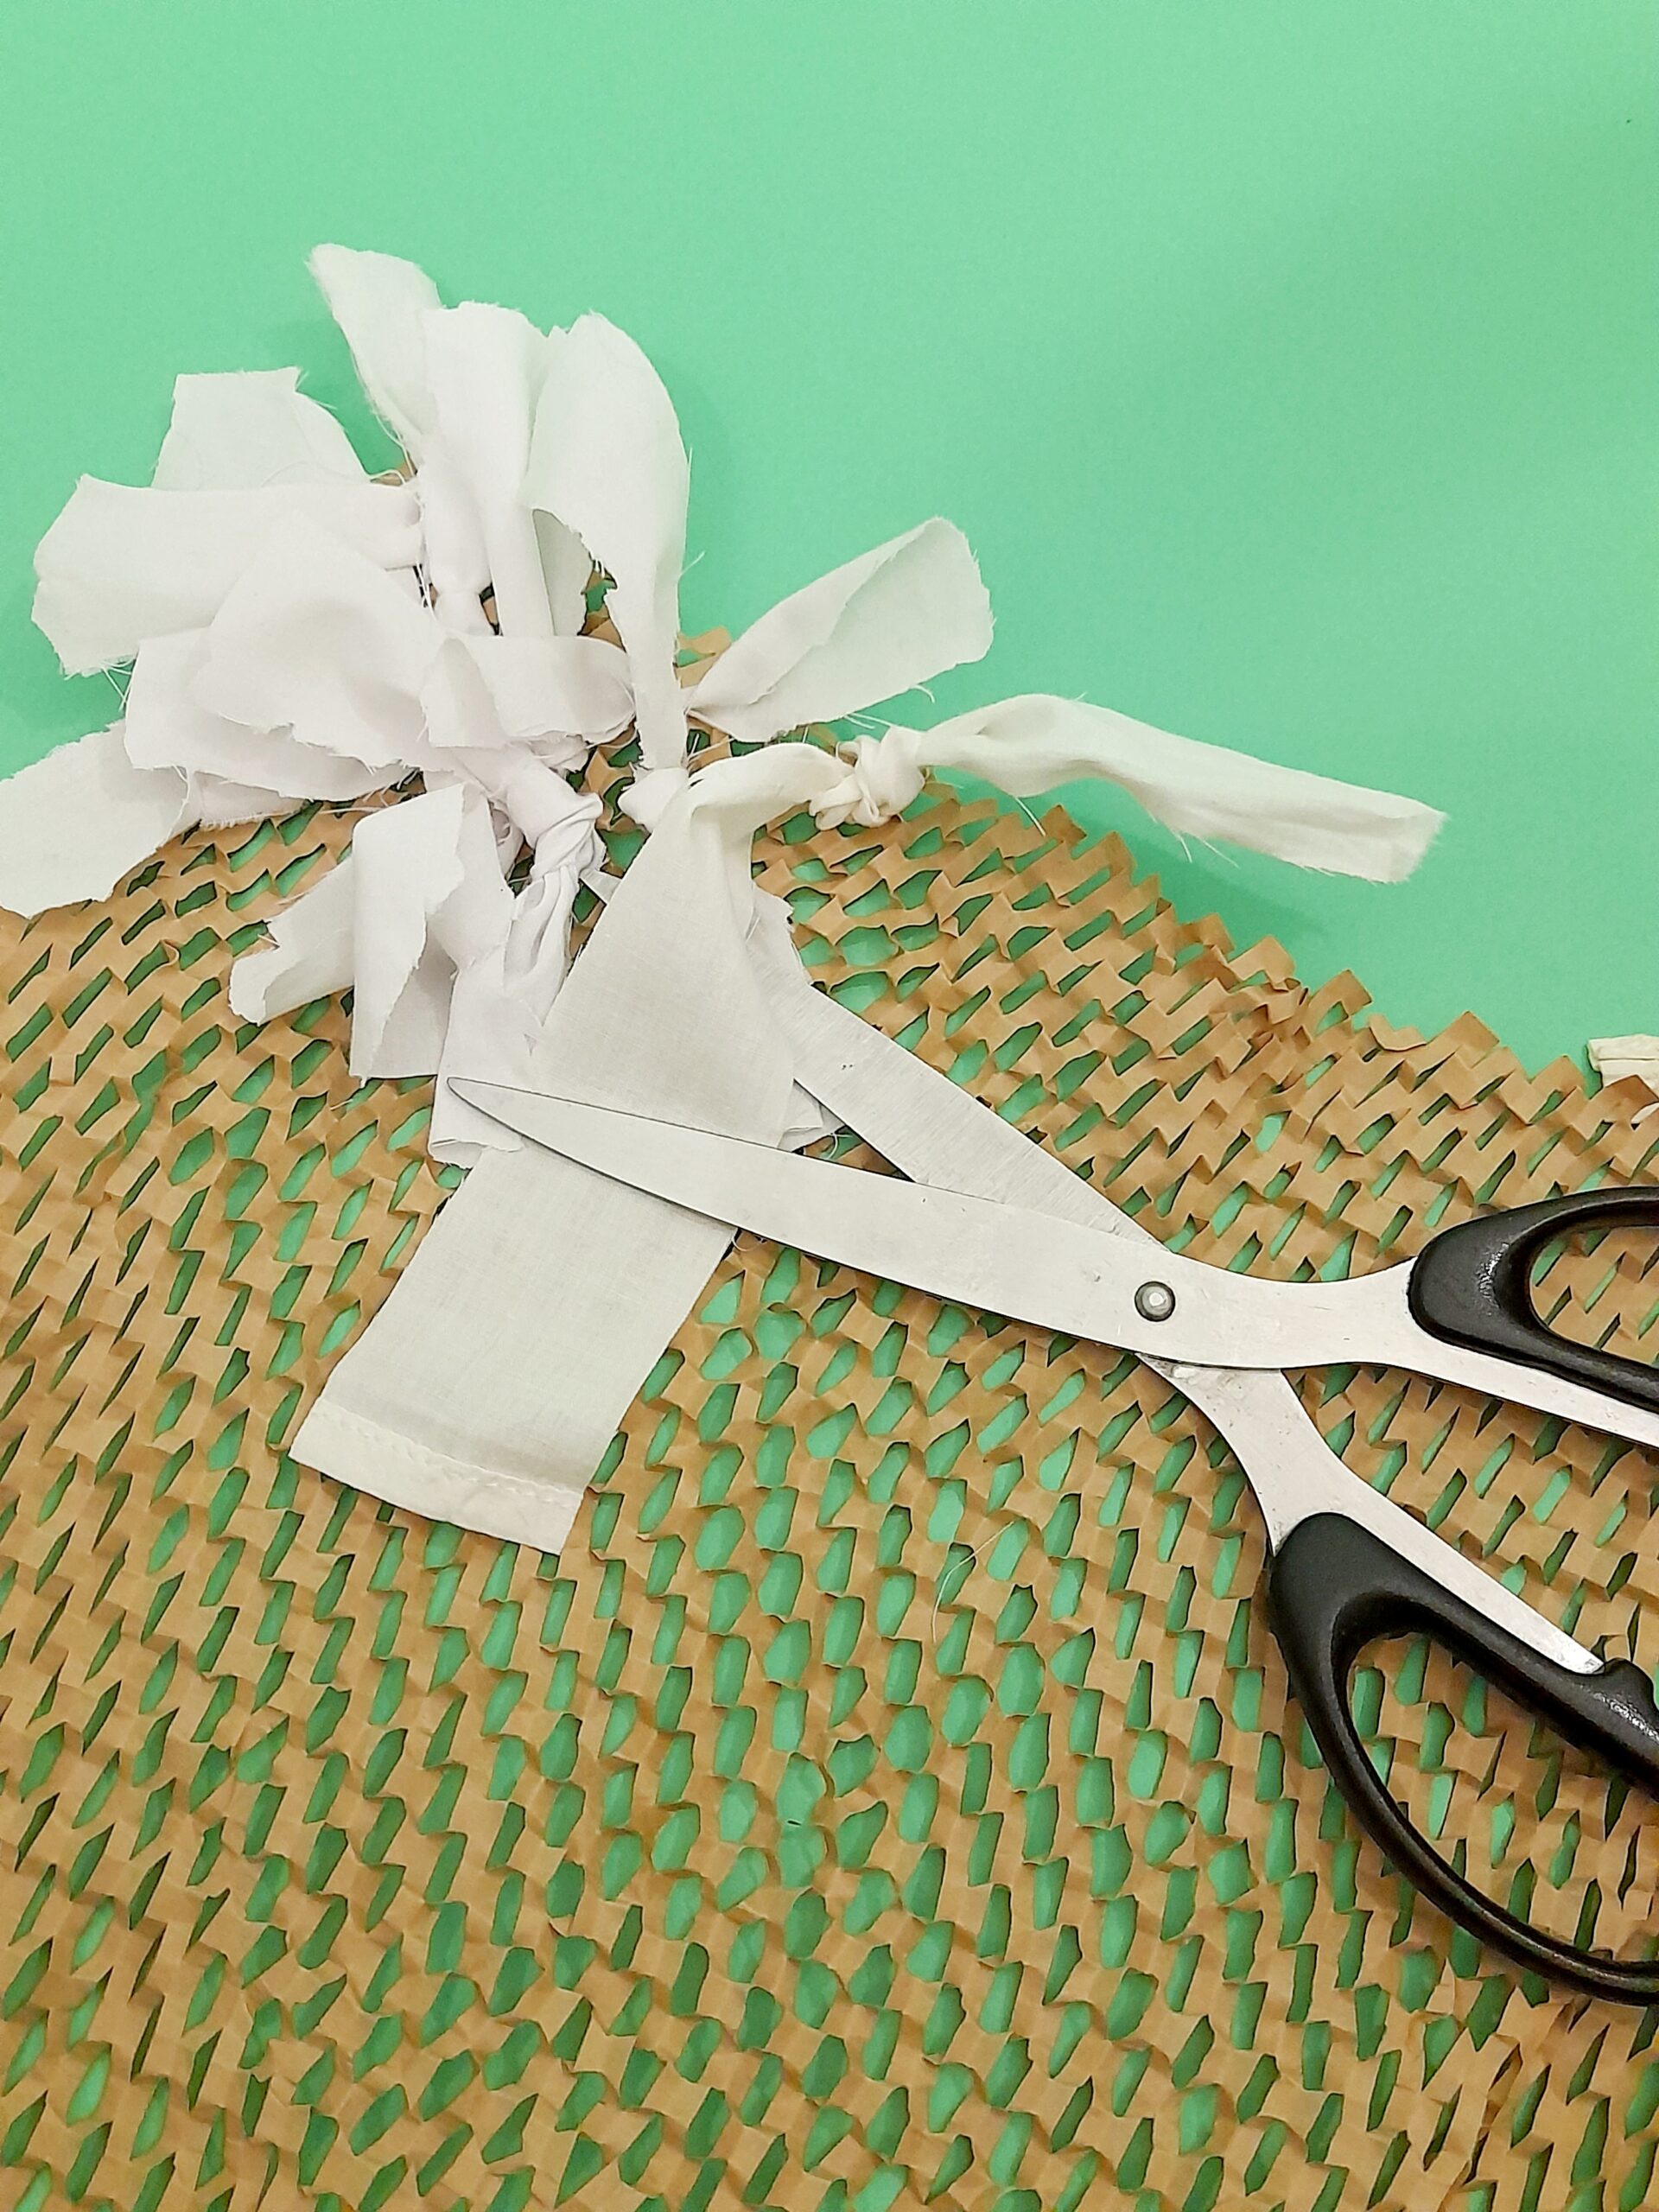
      I have began to make a rug, cutting up loads of cotton strips, but found some fabrics started to fray, so I reverted to stretchy types of fabrics, with elastane in them, or cotton sheets that don’t fray. I have run out of fabrics, but will go on the hunt around the house for more and all the hand-overs from my kids.

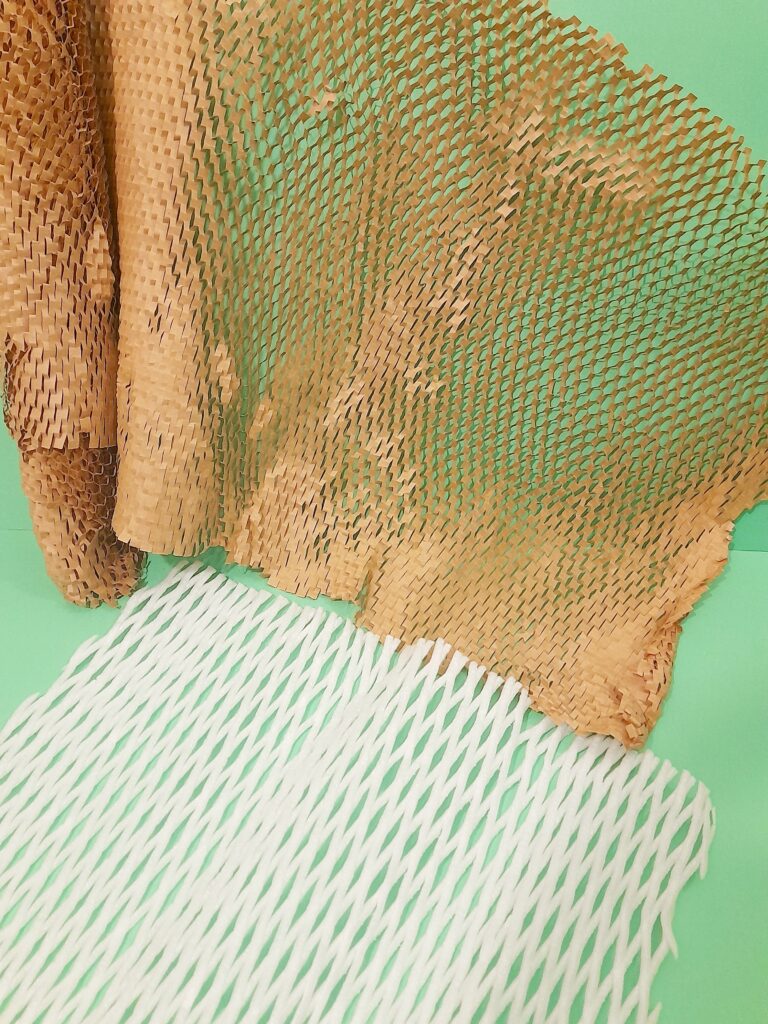
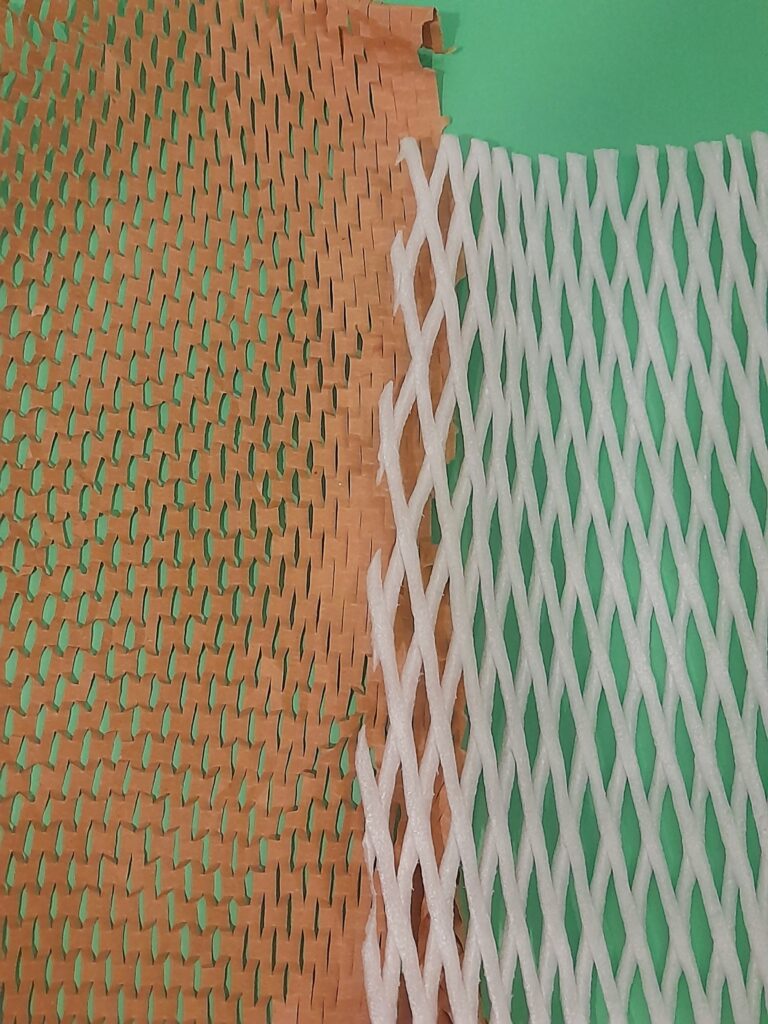
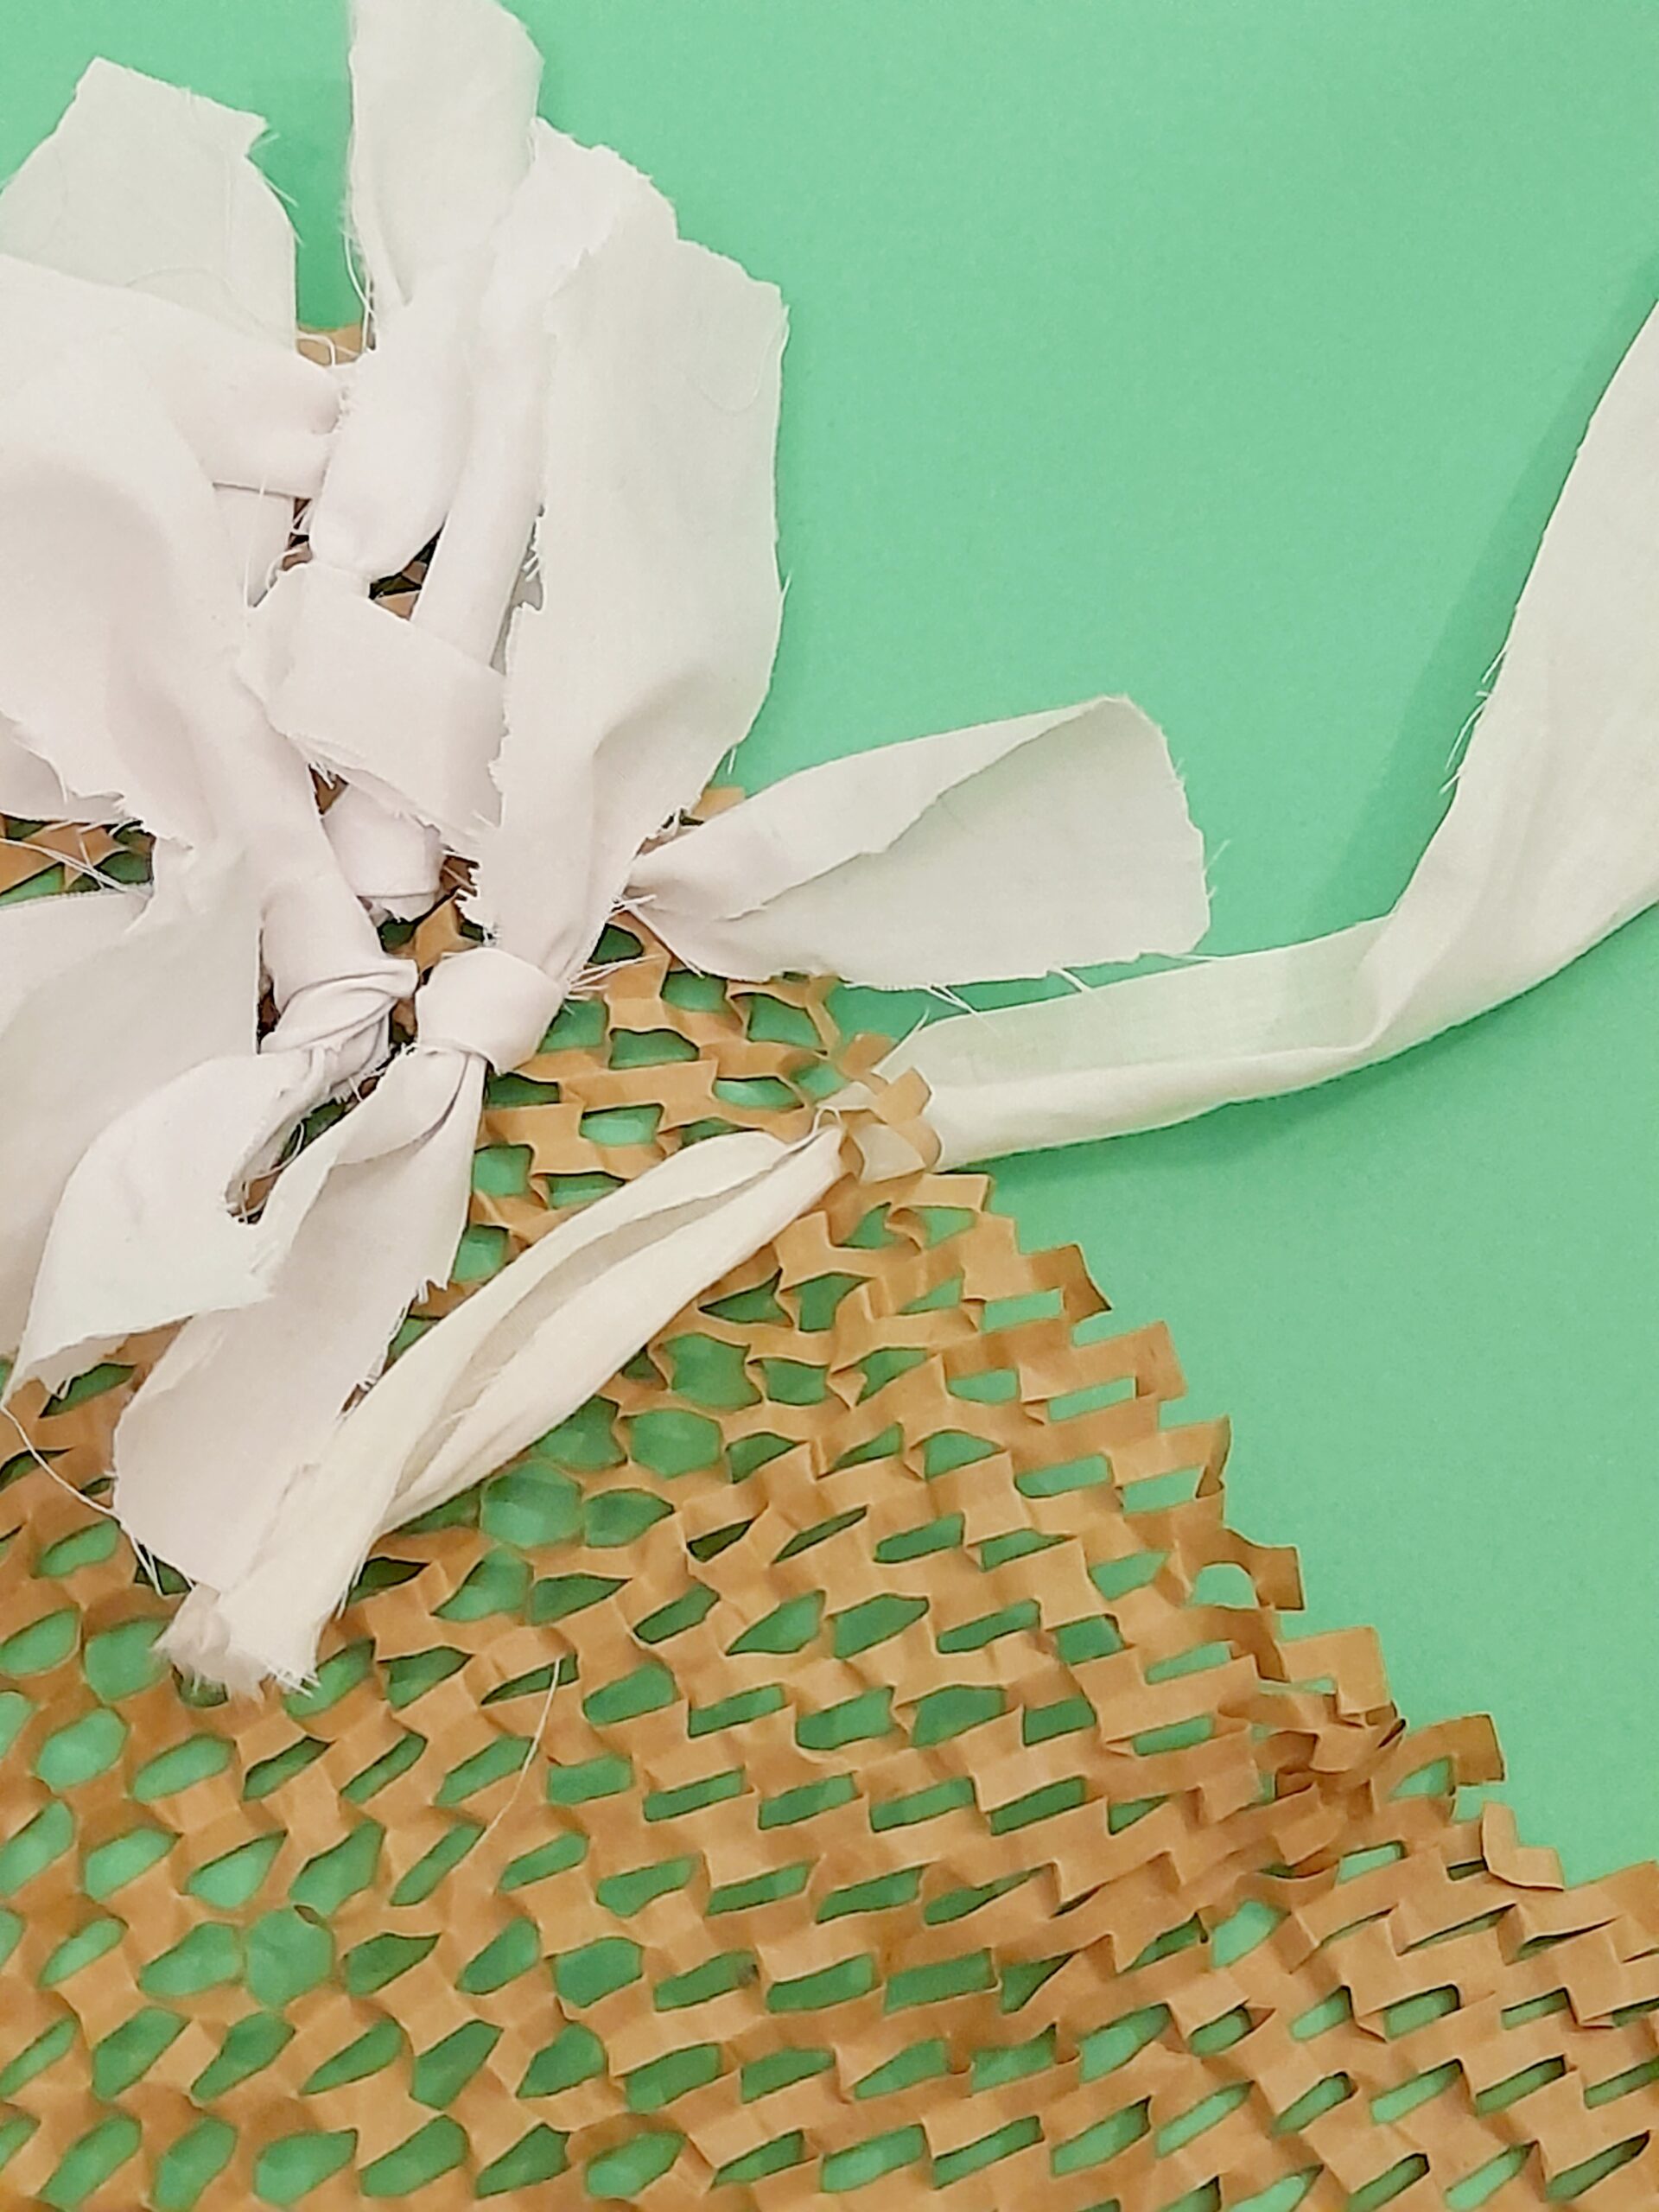
      As for the packaging wrap, I still have some left and will continue with this project and see how far it takes me, and update this post showing my results. Furthermore, if you can’t get hold of this type of packaging wrap, then I recommend checking out Canvas weaves, or hessian type of fabrics, that have large stitching holes, this makes weaving strips of fabrics easy to pull through, you just need to work out the size of your rug.
      Once again, thanks a bunch for your excellent comment and…..
      Happy Crafting a Rag Rug!
      Julia.😀

  3. Hi Julia,

    My cousin is an Infant School Teacher and she could really benefit from the ideas you have on this website.

    I have shred your website with my brother as he has two young children, but my cousin could intertwine your ideas into her daily lessons.

    I will share your site with her and let you know what she thinks. She may even have a similar idea and set up her own thing on the side 🙂

    Thank you for sharing again and keep up the great work.

    All the best,

    Tom

    1. Hi Tom, I am loving this, yes of course please do pass on my website, I want to encourage as many people, kids, parents, carers and teachers to re-think how we can re-use our recycling, the more the better. We need to think of the bigger picture, don’t you think? And of course by creating fun, affordable and easy projects for kids to do then it is a win, win all the way!
      Thanks for your support and kind words, and I will continue to be inventive and offer crafting idea, where I can!
      Happy Crafting!
      Julia. 😄

  4. Hi Julia,
    What a fun project to make and so well put together. I thoroughly enjoyed the entire post. I have artist days with my 10-year-old grandson and we have a wonderful time together.
    When my granddaughter was much younger we made doorsteps with rocks covered with old wrapping paper and decoupaged them. I still use mine and think Kate has her one as well.
    You have given me great ideas as I loathe throwing old clothes out and try to re-invent them.

    1. So glad I could offer you some inspiration to make good use of your old clothes! I also hope there are other projects you can dive into and have a go with your grandson, and eventhough some might be for younger kids, there are ways to enhance them and make the activities more challenging!
      I love your rock wrapping idea, though having easy access to them, like living by a beach and where there is an abundance of them helps and and you can pick the ones you like, and the best part they are free, and rock hunting would be a fun activity to do with your kids lol! Otherwise you can also purchase a bag of rocks these days, (not so fun).
      I haven’t done a project with rocks yet, and there are some cool activities one can do with their kids, as long as they have the right paints and sealants.
      You can write or draw any kind of patterns on them, and then coat the painted rocks with vanish, to seal them, and they become paper weights, or simply fun projects for kids to do! though yours sound real fun too!
      Thanks for your super comment, and…..
      Happy Crafting!
      Julia.😀

Leave a Reply

Your email address will not be published. Required fields are marked *