Have you ever thought of making a laptop out of a humble Shoebox and a plastic cake tray? So let’s recycle our throw-out material into ShoeBox Crafts!
Recycle your shoe box into a Latop!
Different tech. A picture from Pexels.com by Cottonbro Studiio.
Today we are surrounded by all this techno stuff, whether it’s smartphones, tablets, computers, or smart TVs, and not forgetting gaming with X-Boxes or with PlayStation!
MY INTENTION FOR THE SHOEBOX CRAFTS!
I shall recycle a shoebox into a fun, learning laptop.
Of course, it won’t be a real type of laptop, but a make-belief one, in this case with interchangeable parts, so in this post, we are looking at ‘shoebox crafts’
COOL KIDS!
Kids are well in there with savvy knowledge, walking around with their smartphones.
KEEP IN TOUCH!
As parents or carers, it’s our link to our kids and a way to communicate, especially in an emergency!
EXPERIMENTING!
So, let’s get back to the laptops. I have found kids as young as two who know that pressing keys on the keyboard will get some kind of change or an image up on the screen.
COPYCATTING!
We are kids’ role models; they would observe and copy what we do unbeknownst to us!
Mimicking our actions, and they are really like mini us!
QUICK TO LEARN!
They know that if you press a button on the remote control, they can change the TV channel.
HAVING FUN!
They may even like banging away on the keys, like it were an instrument, a piano even, looking at you with a massive smile on their faces! Oh, dear!!!
So this is a warning, do not leave your precious laptops at hand and let your kids play with them
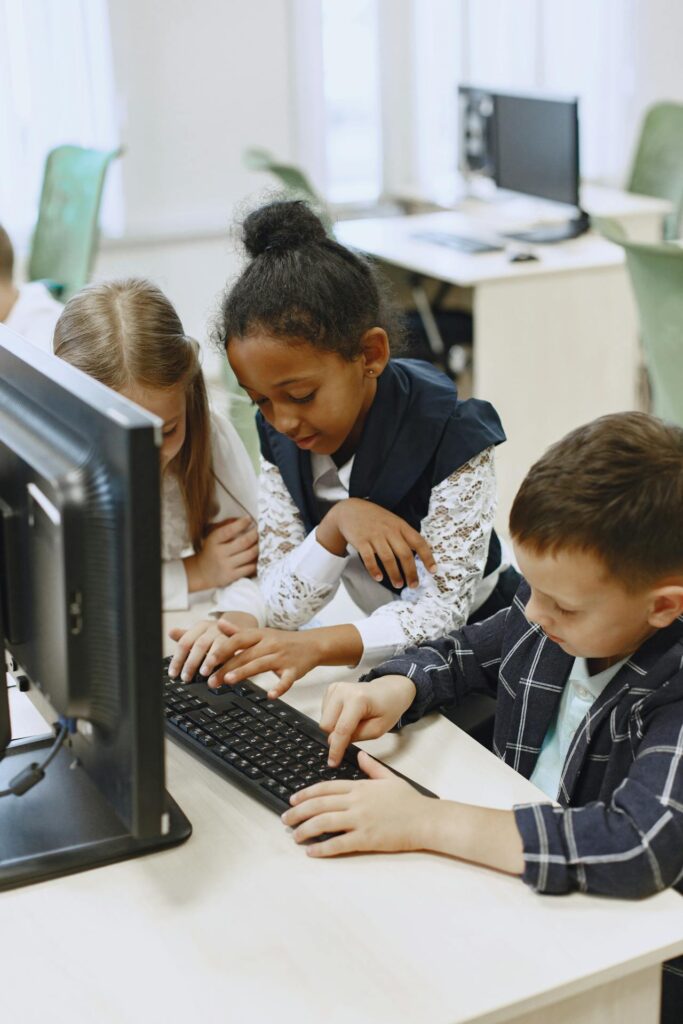
Kids playing on the computer. A picture from Pexels.com by Gustavo Fring.
This is so with computers or laptops, the only thing is he younger they are, the worse the outcome will be….a great toy this is, they may be thinking, causing mayhem and losing all your work! ouch!
WHAT I HAVE IN MIND!
I am looking to make a laptop out ofa shoebox! This will be our shoebox craftsfor this project.
It will be more like a learning tool, where you can pretend it’s a laptop, but learn at the same time.
INTERACTIVE GAME!
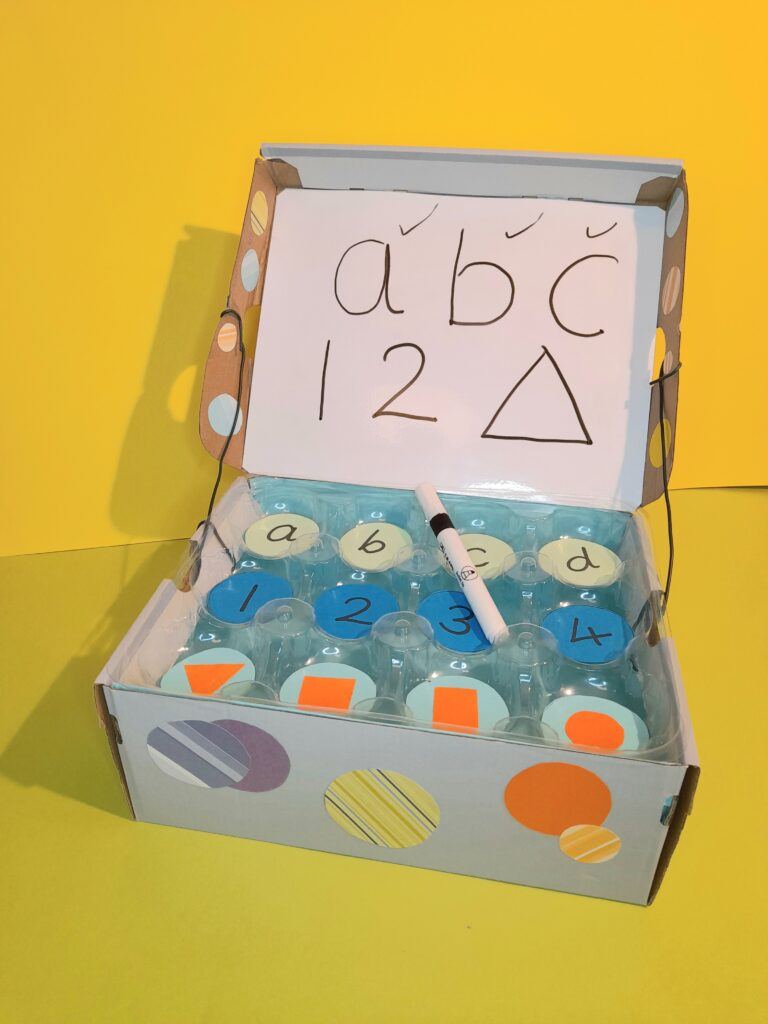
I shall be making it fun and easy to work with, where you can change the letters, numbers, and shapes as they move on. The beauty of the shoebox is that you can store all the parts that make up the game within it.
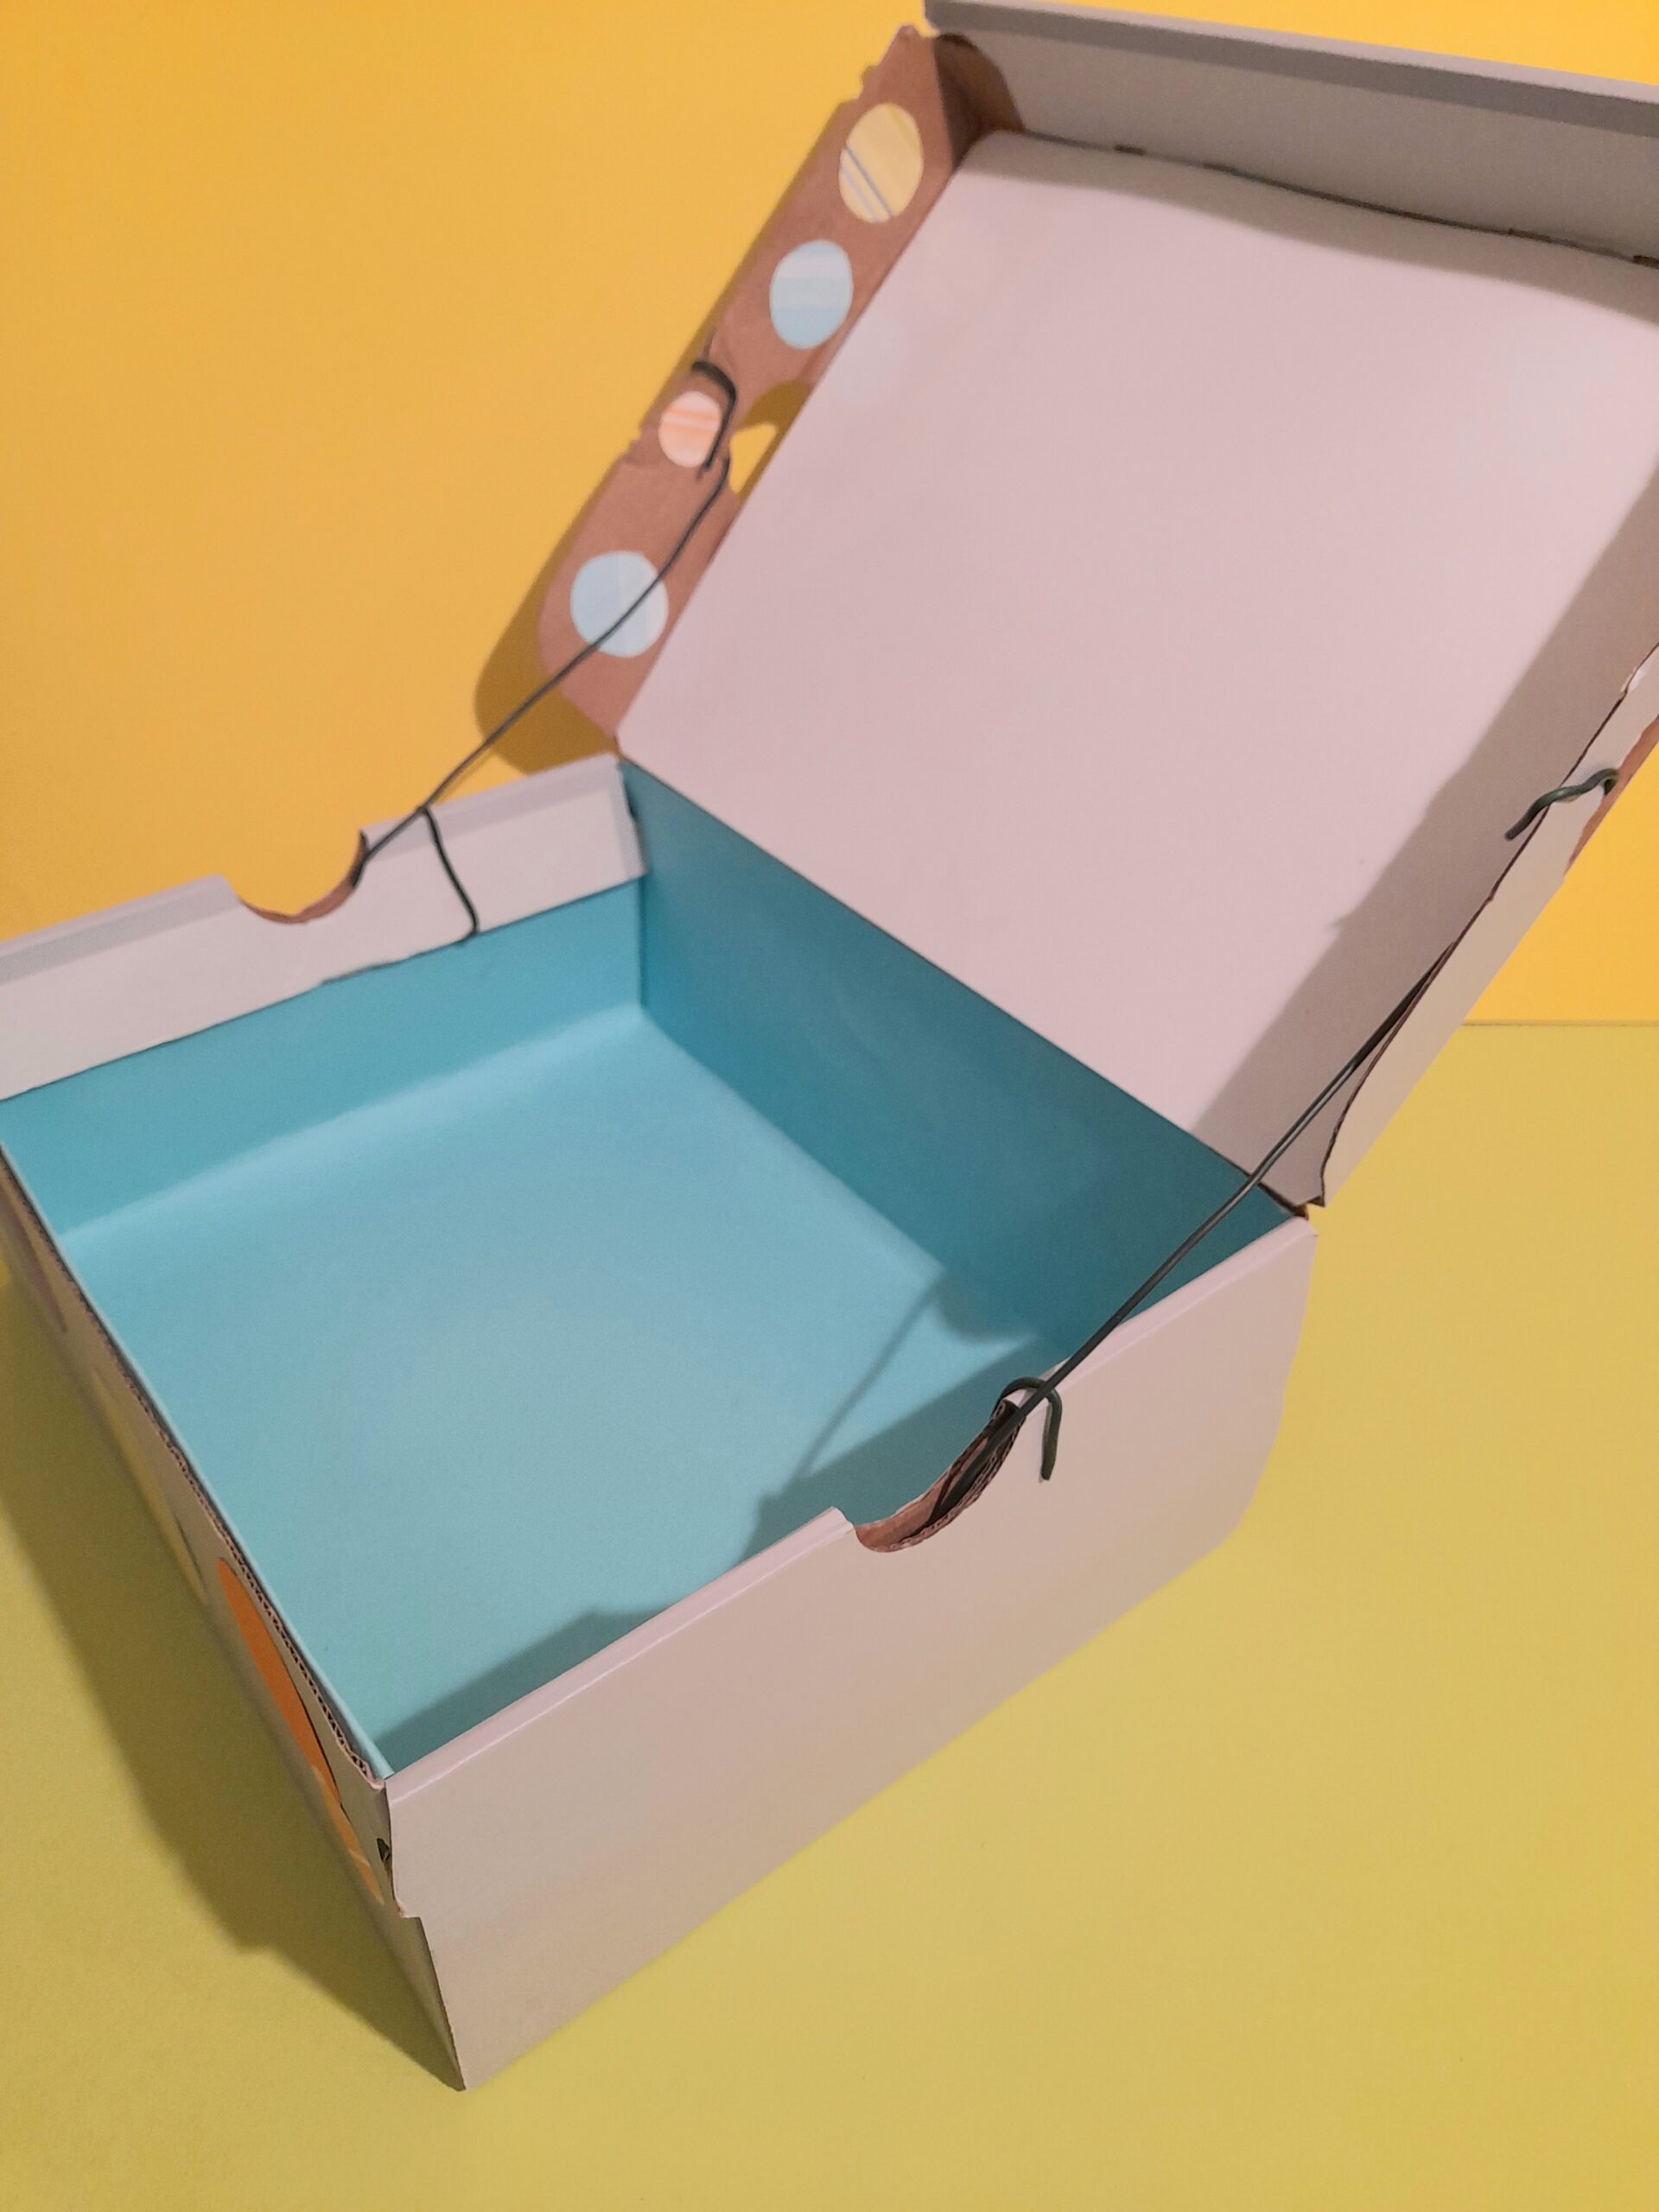
Simply lift the plastic tray and put all resources inside the box. Replace the plastic tray and shut the lid.
Shoebox crafts laptop.
ADAPTING THE KEYBOARD!
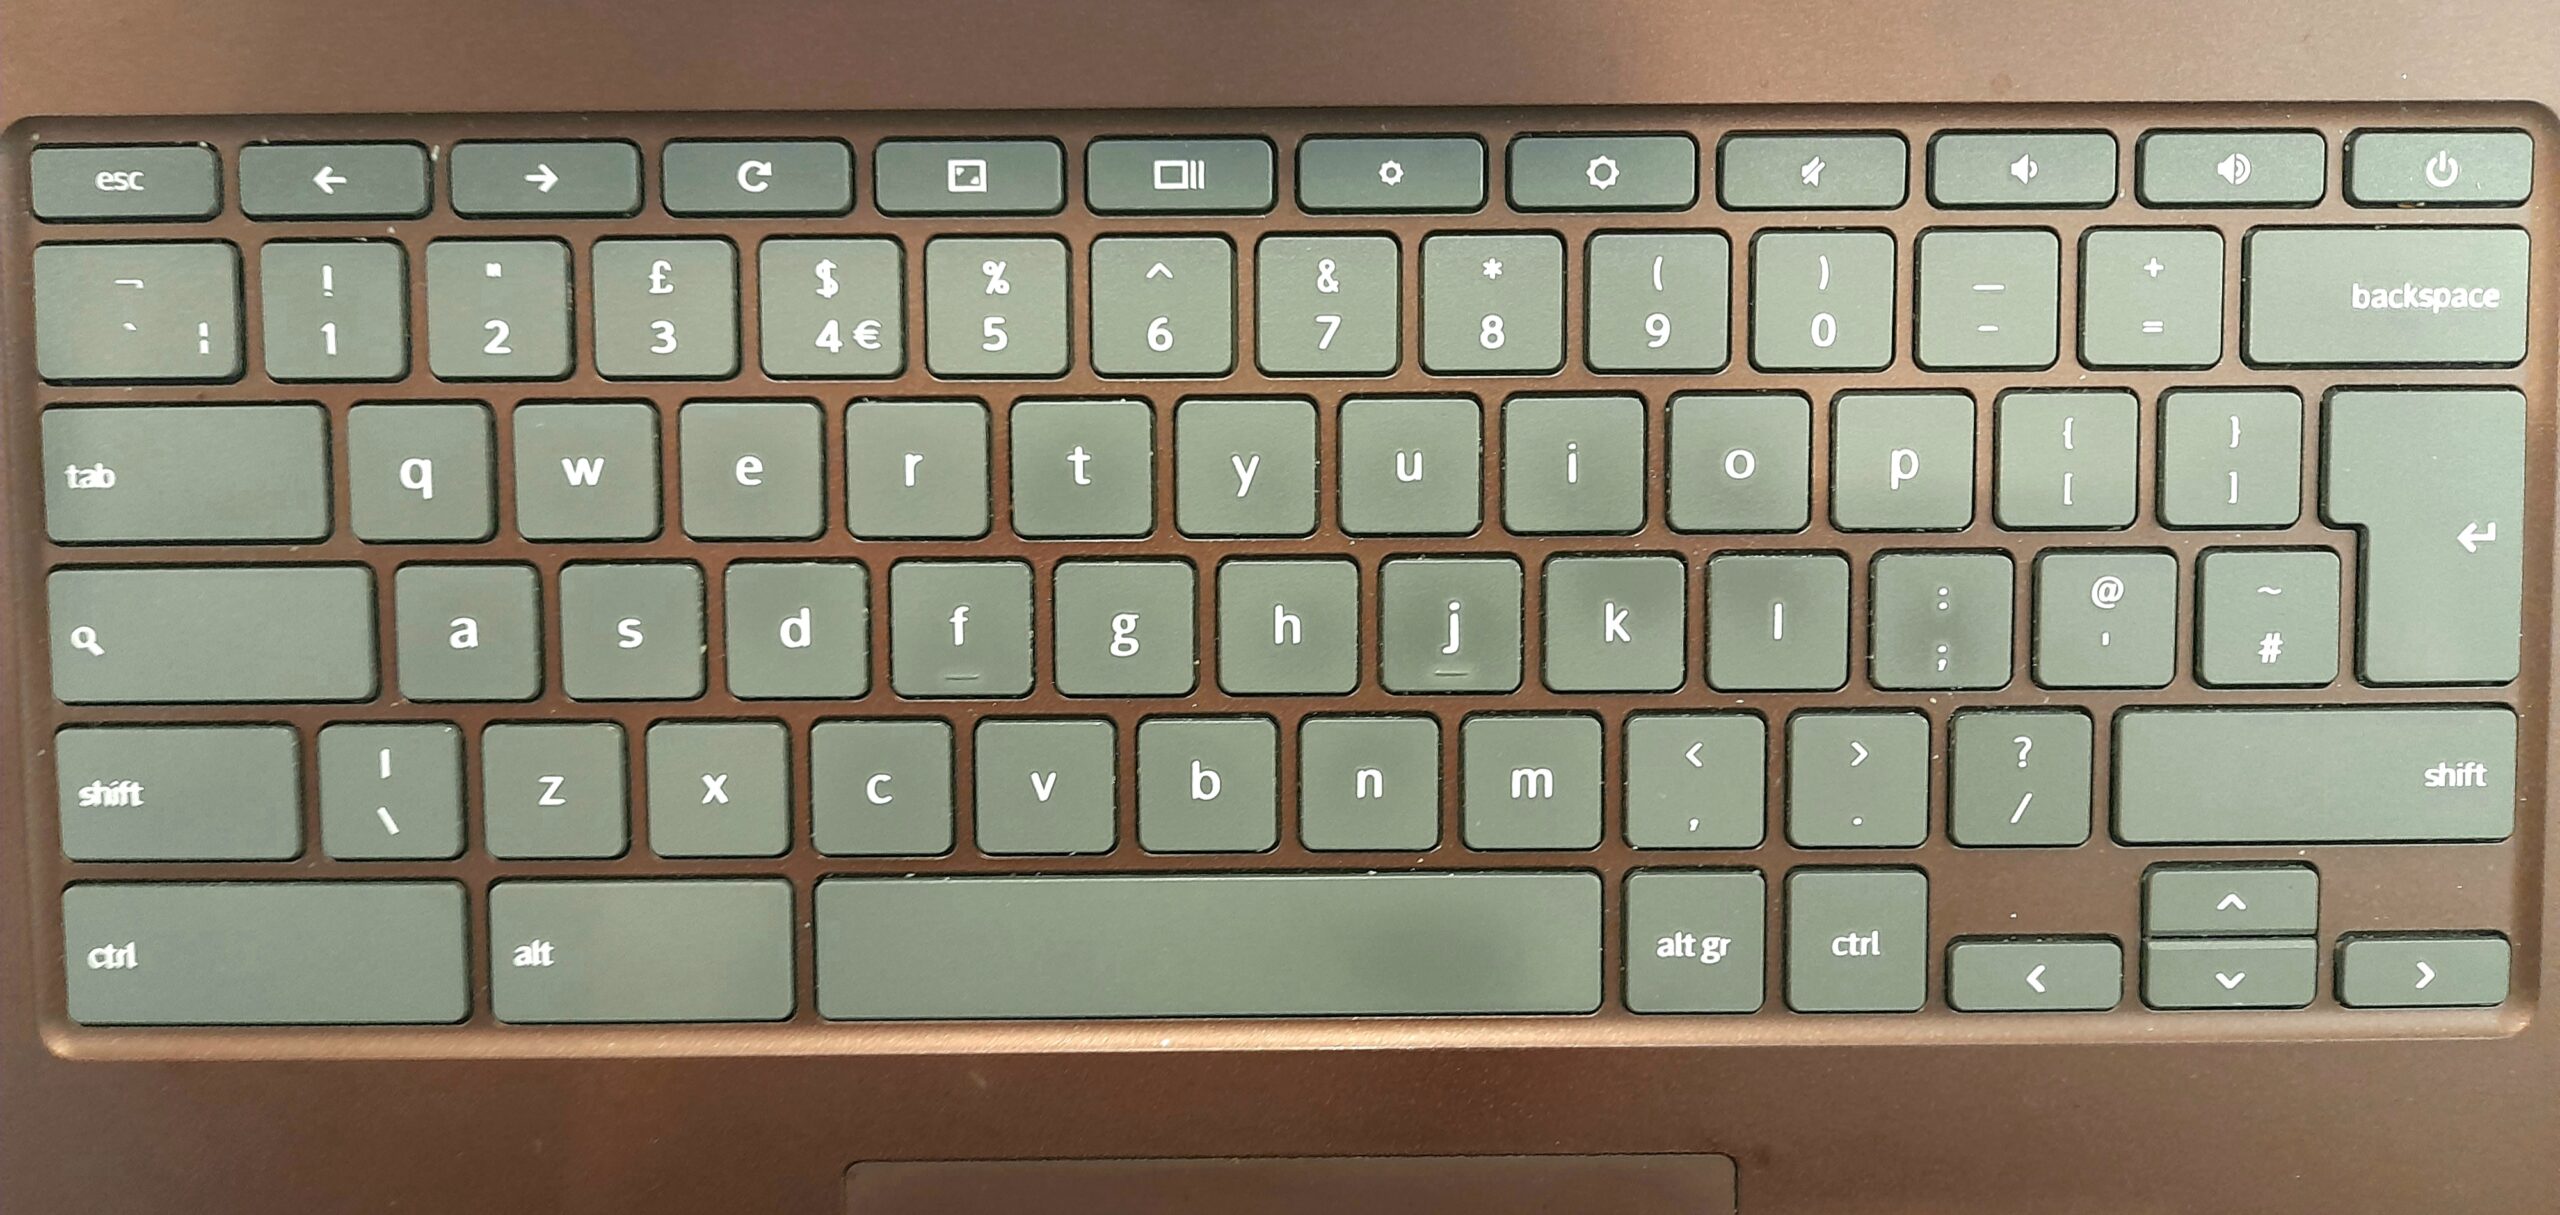
I find the keyboard quite difficult for kids to learn with, so I will make it verysimple and have some large letters, numbers, and symbols.
Learning the Alphabet and numbers in sequence, adding or changing the letters and numbers as they become more confident.
This is what a keyboard looks like, as you can see, too overwhelming for the young ones.
WHY IS THE KEYBOARD THE WAY IT IS!
I suppose it makes some sense; we just got used to it.
OLD SCHOOL!
When I went to school, I did a Pitman typing course, where you learn how to type using an old-fashioned typewriter, learning how to type without looking at the keyboard.
IT BECOMES SECOND NATURE!
I remembered the position of each key by laying my hands over the keys and memorising where the letters were.
NO PROBLEM!
Today I type without a thought, yet when I take my hands away, it’s hard work to remember where the letters are. I find it easier to type when I am not looking at the keys.
I reckon kids today learn as they do to type with their thumbs or two index fingers, and they do this very quickly too!
Now let’s get back to the Shoeboxcrafts!
WHAT YOU NEED TO LOOK FOR THE SHOESBOX CRAFTS
HOLD ON TO YOUR SHOEBOXES!
Look for a medium-sizedshoeboxand aplastic cupcake holder, one that holds 12 cupcakes, where you can fit within the shoe box, and it sits comfortably.
The cupcake holder would be thesurface to place the keys within the holes, the numbers, letters, or shapes. This will be made clearer once you have started with this project.
REUSEABLE SURFACE!
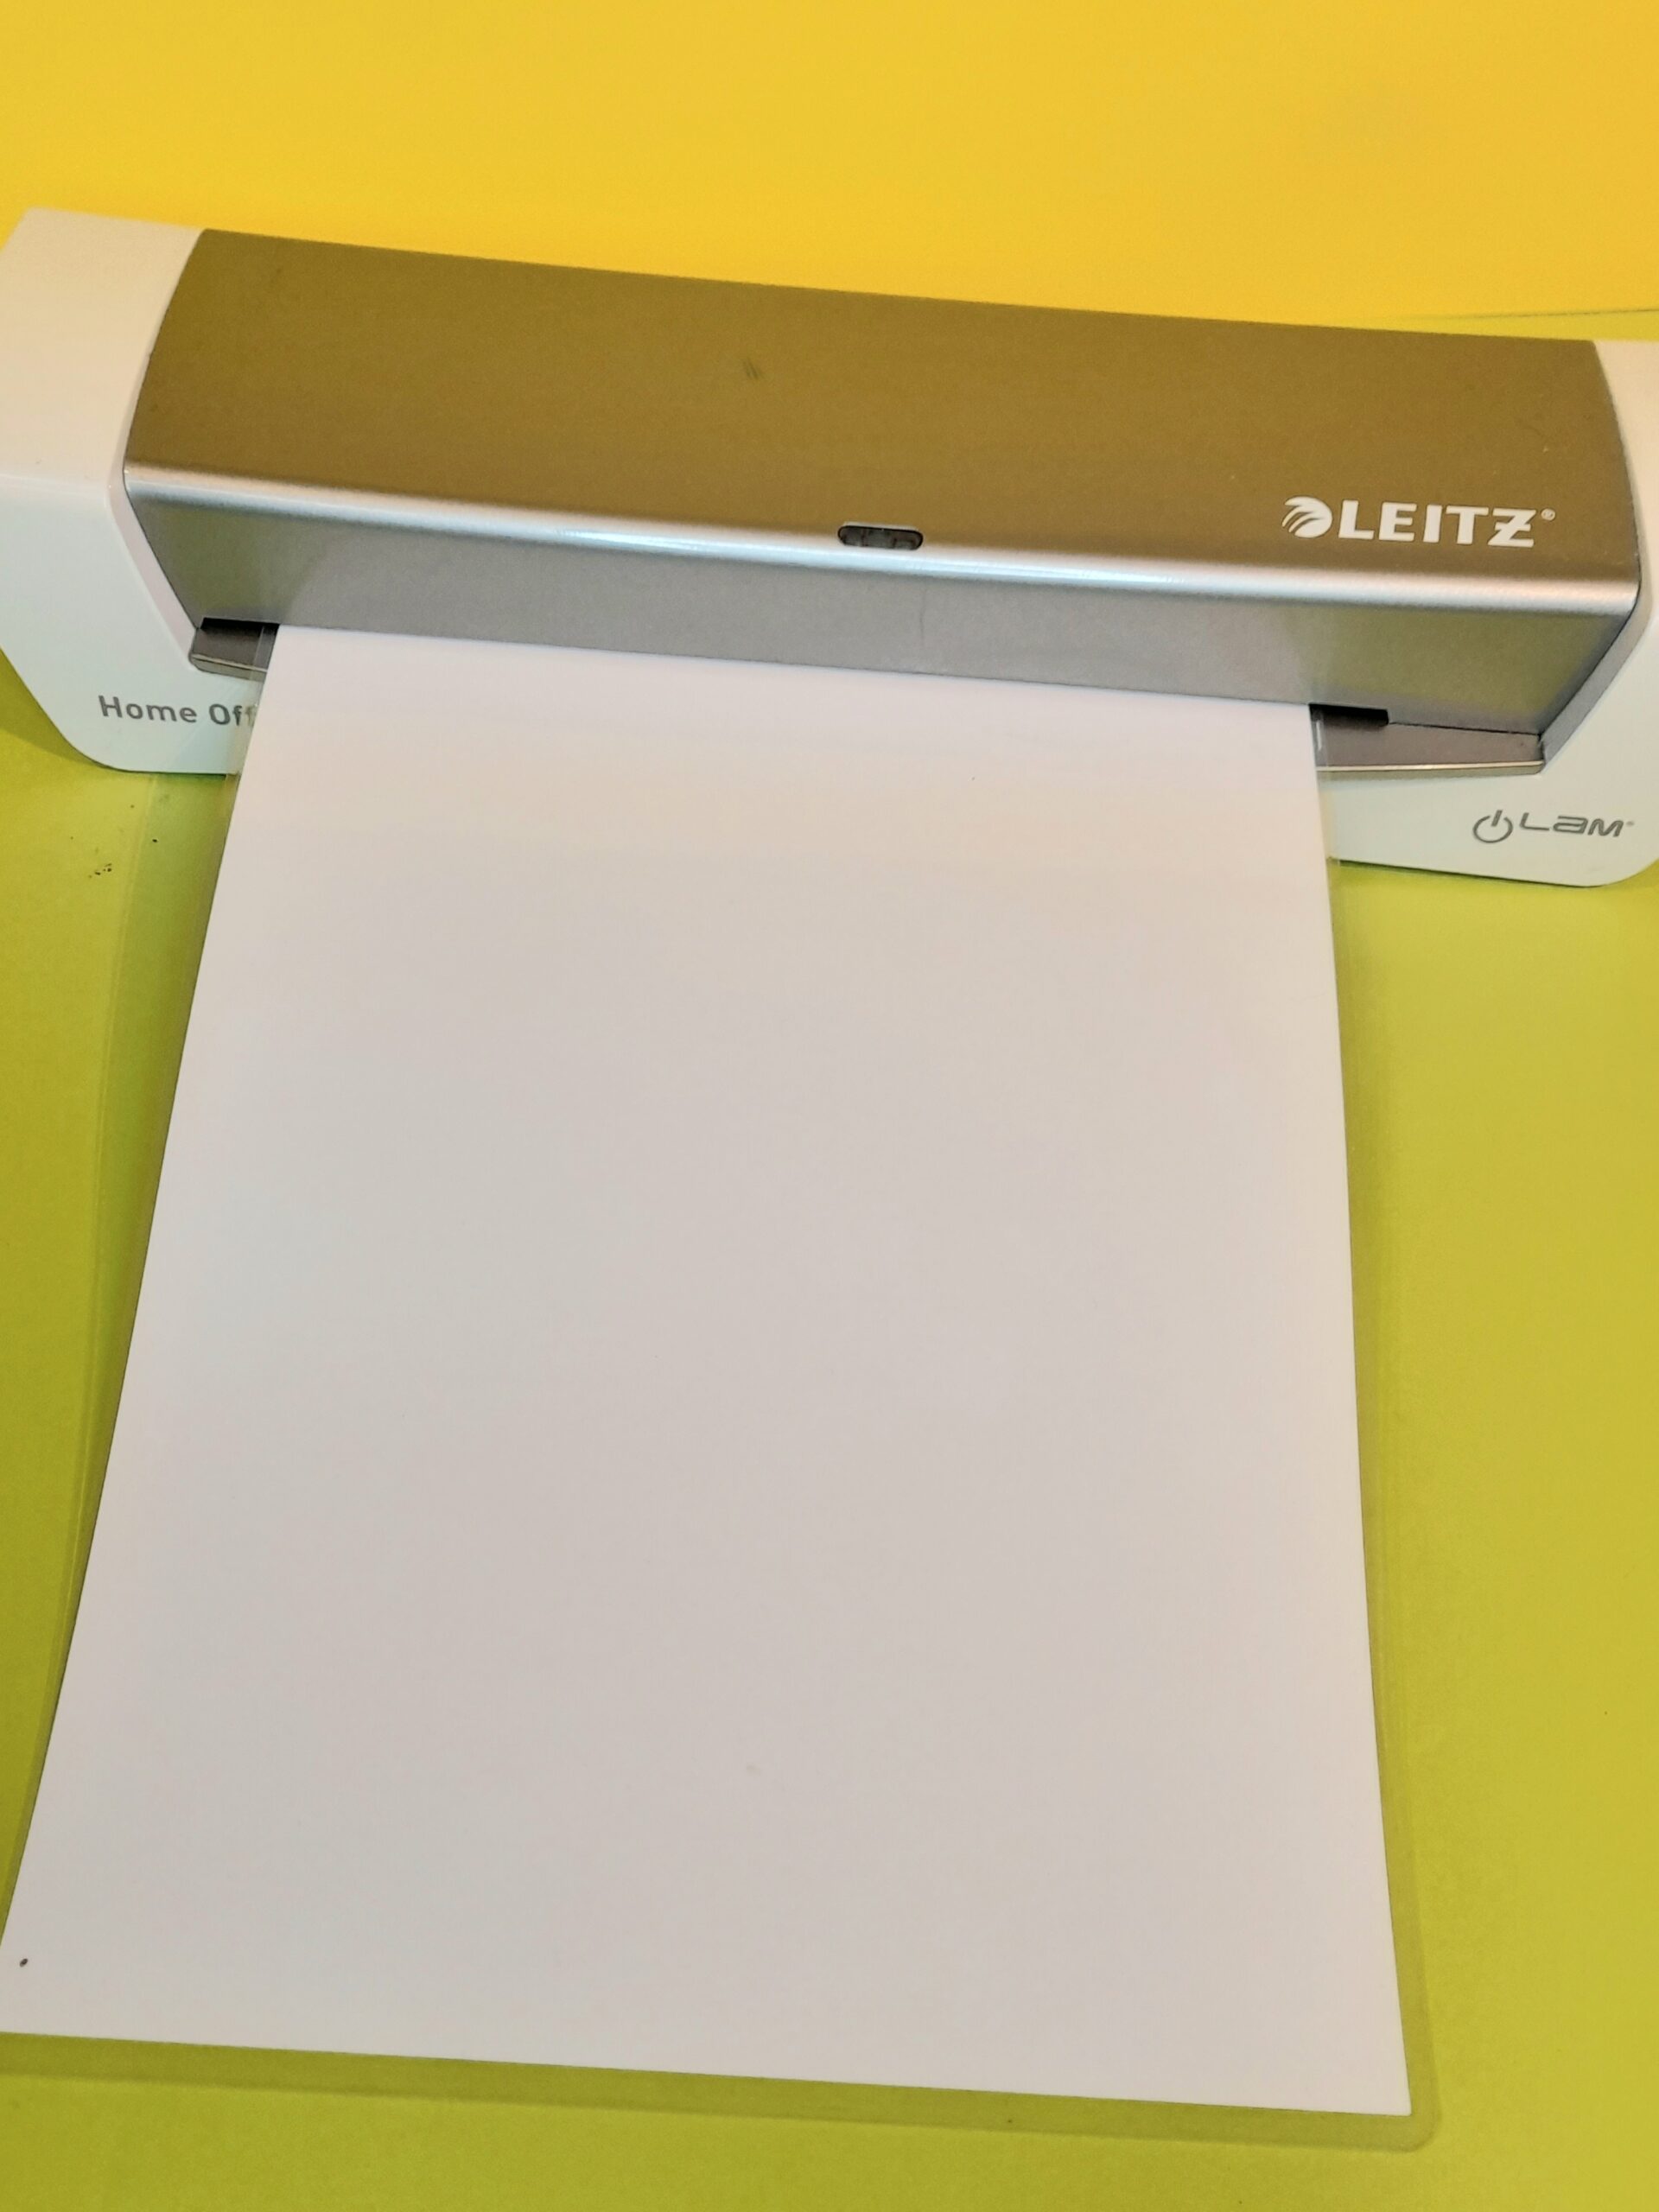
If you own alaminating machine, you can laminate one white A4 card.
A MEANS TO WRITE ON!
If you don’t have a laminator, then some A4 white cards would work. Trim the cards to fit inside the lid, flip over to use the back, and replace them once you have run out of space. Use a bit of Blu-Tack to keep it still.
LET’S MAKE A SHOE BOX LAPTOP!
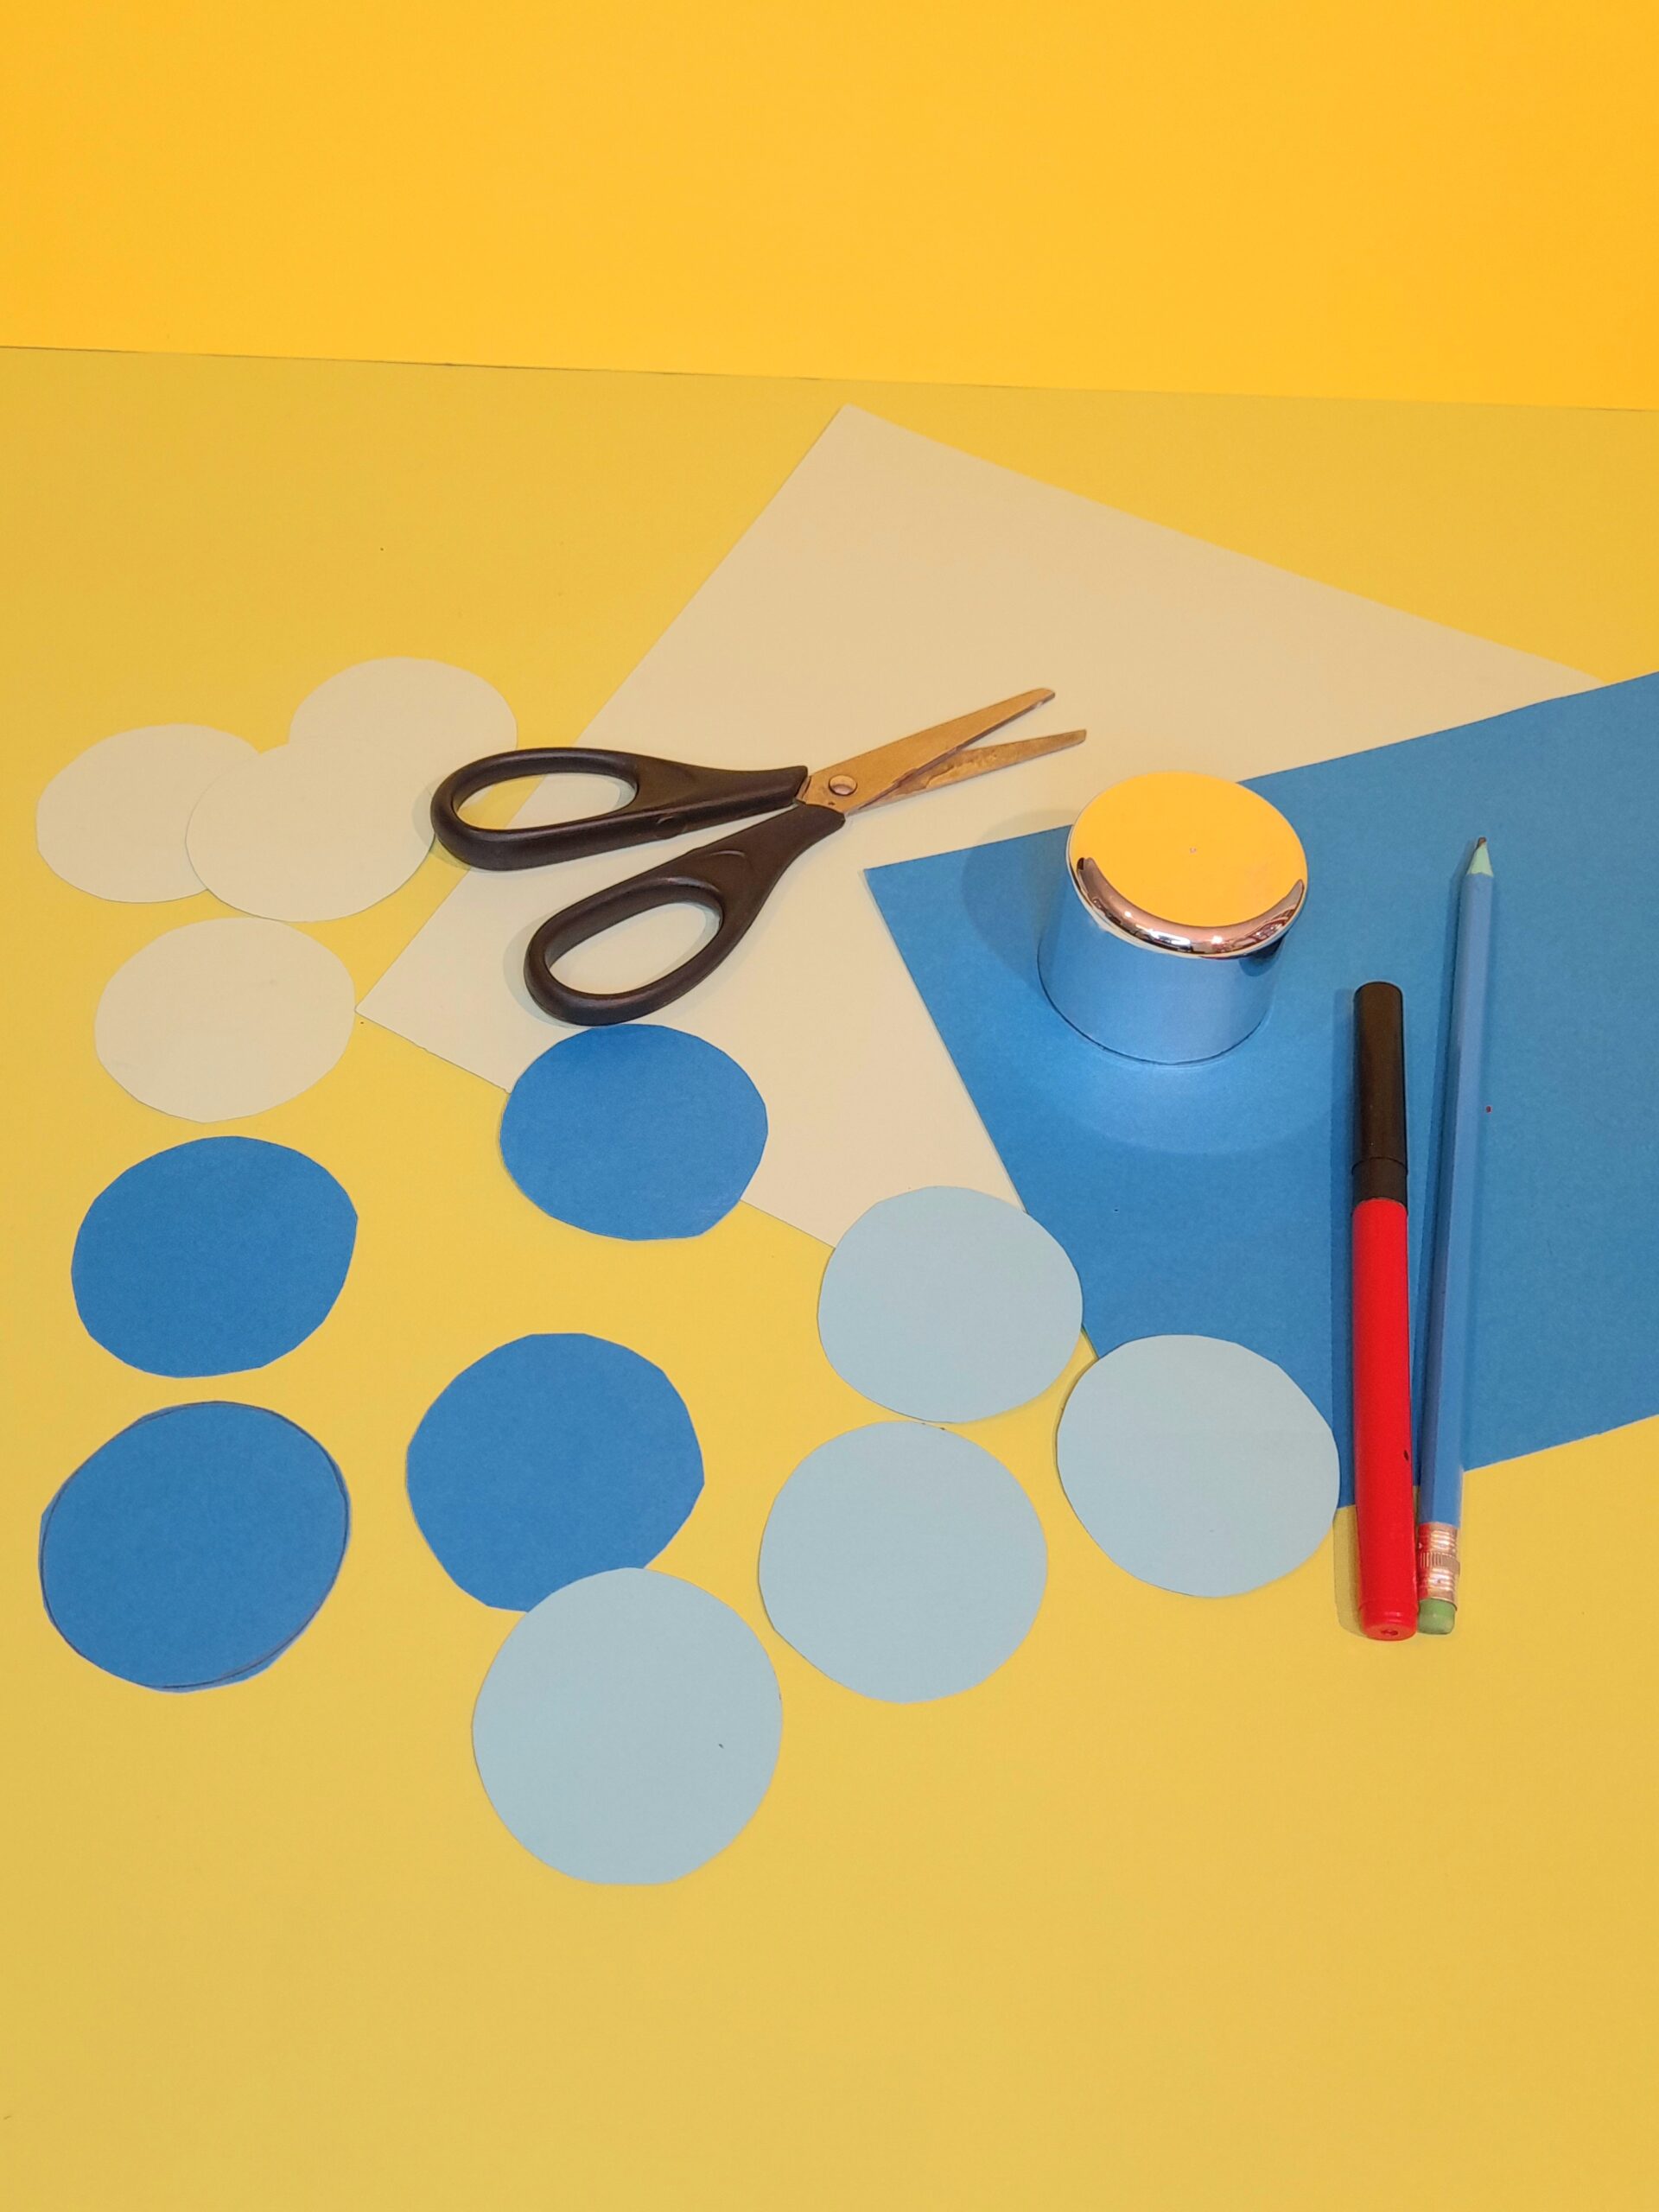
Resources for Shoe Box Crafts.
RESOURCES!
1 medium-sized shoe box.
1 plastic cupcake tray.
A range of different coloured cards/Papers.
Scissors. Ruler (not shown)
Black felt pen (broad tip)
Different-sized round shapes to use to draw circles with.
Double-sided tape/ Glue stick.
Large sheet of coloured paper/card. (for the inside of the box)
2 long pieces of garden wire.
LET’S GET STARTED!
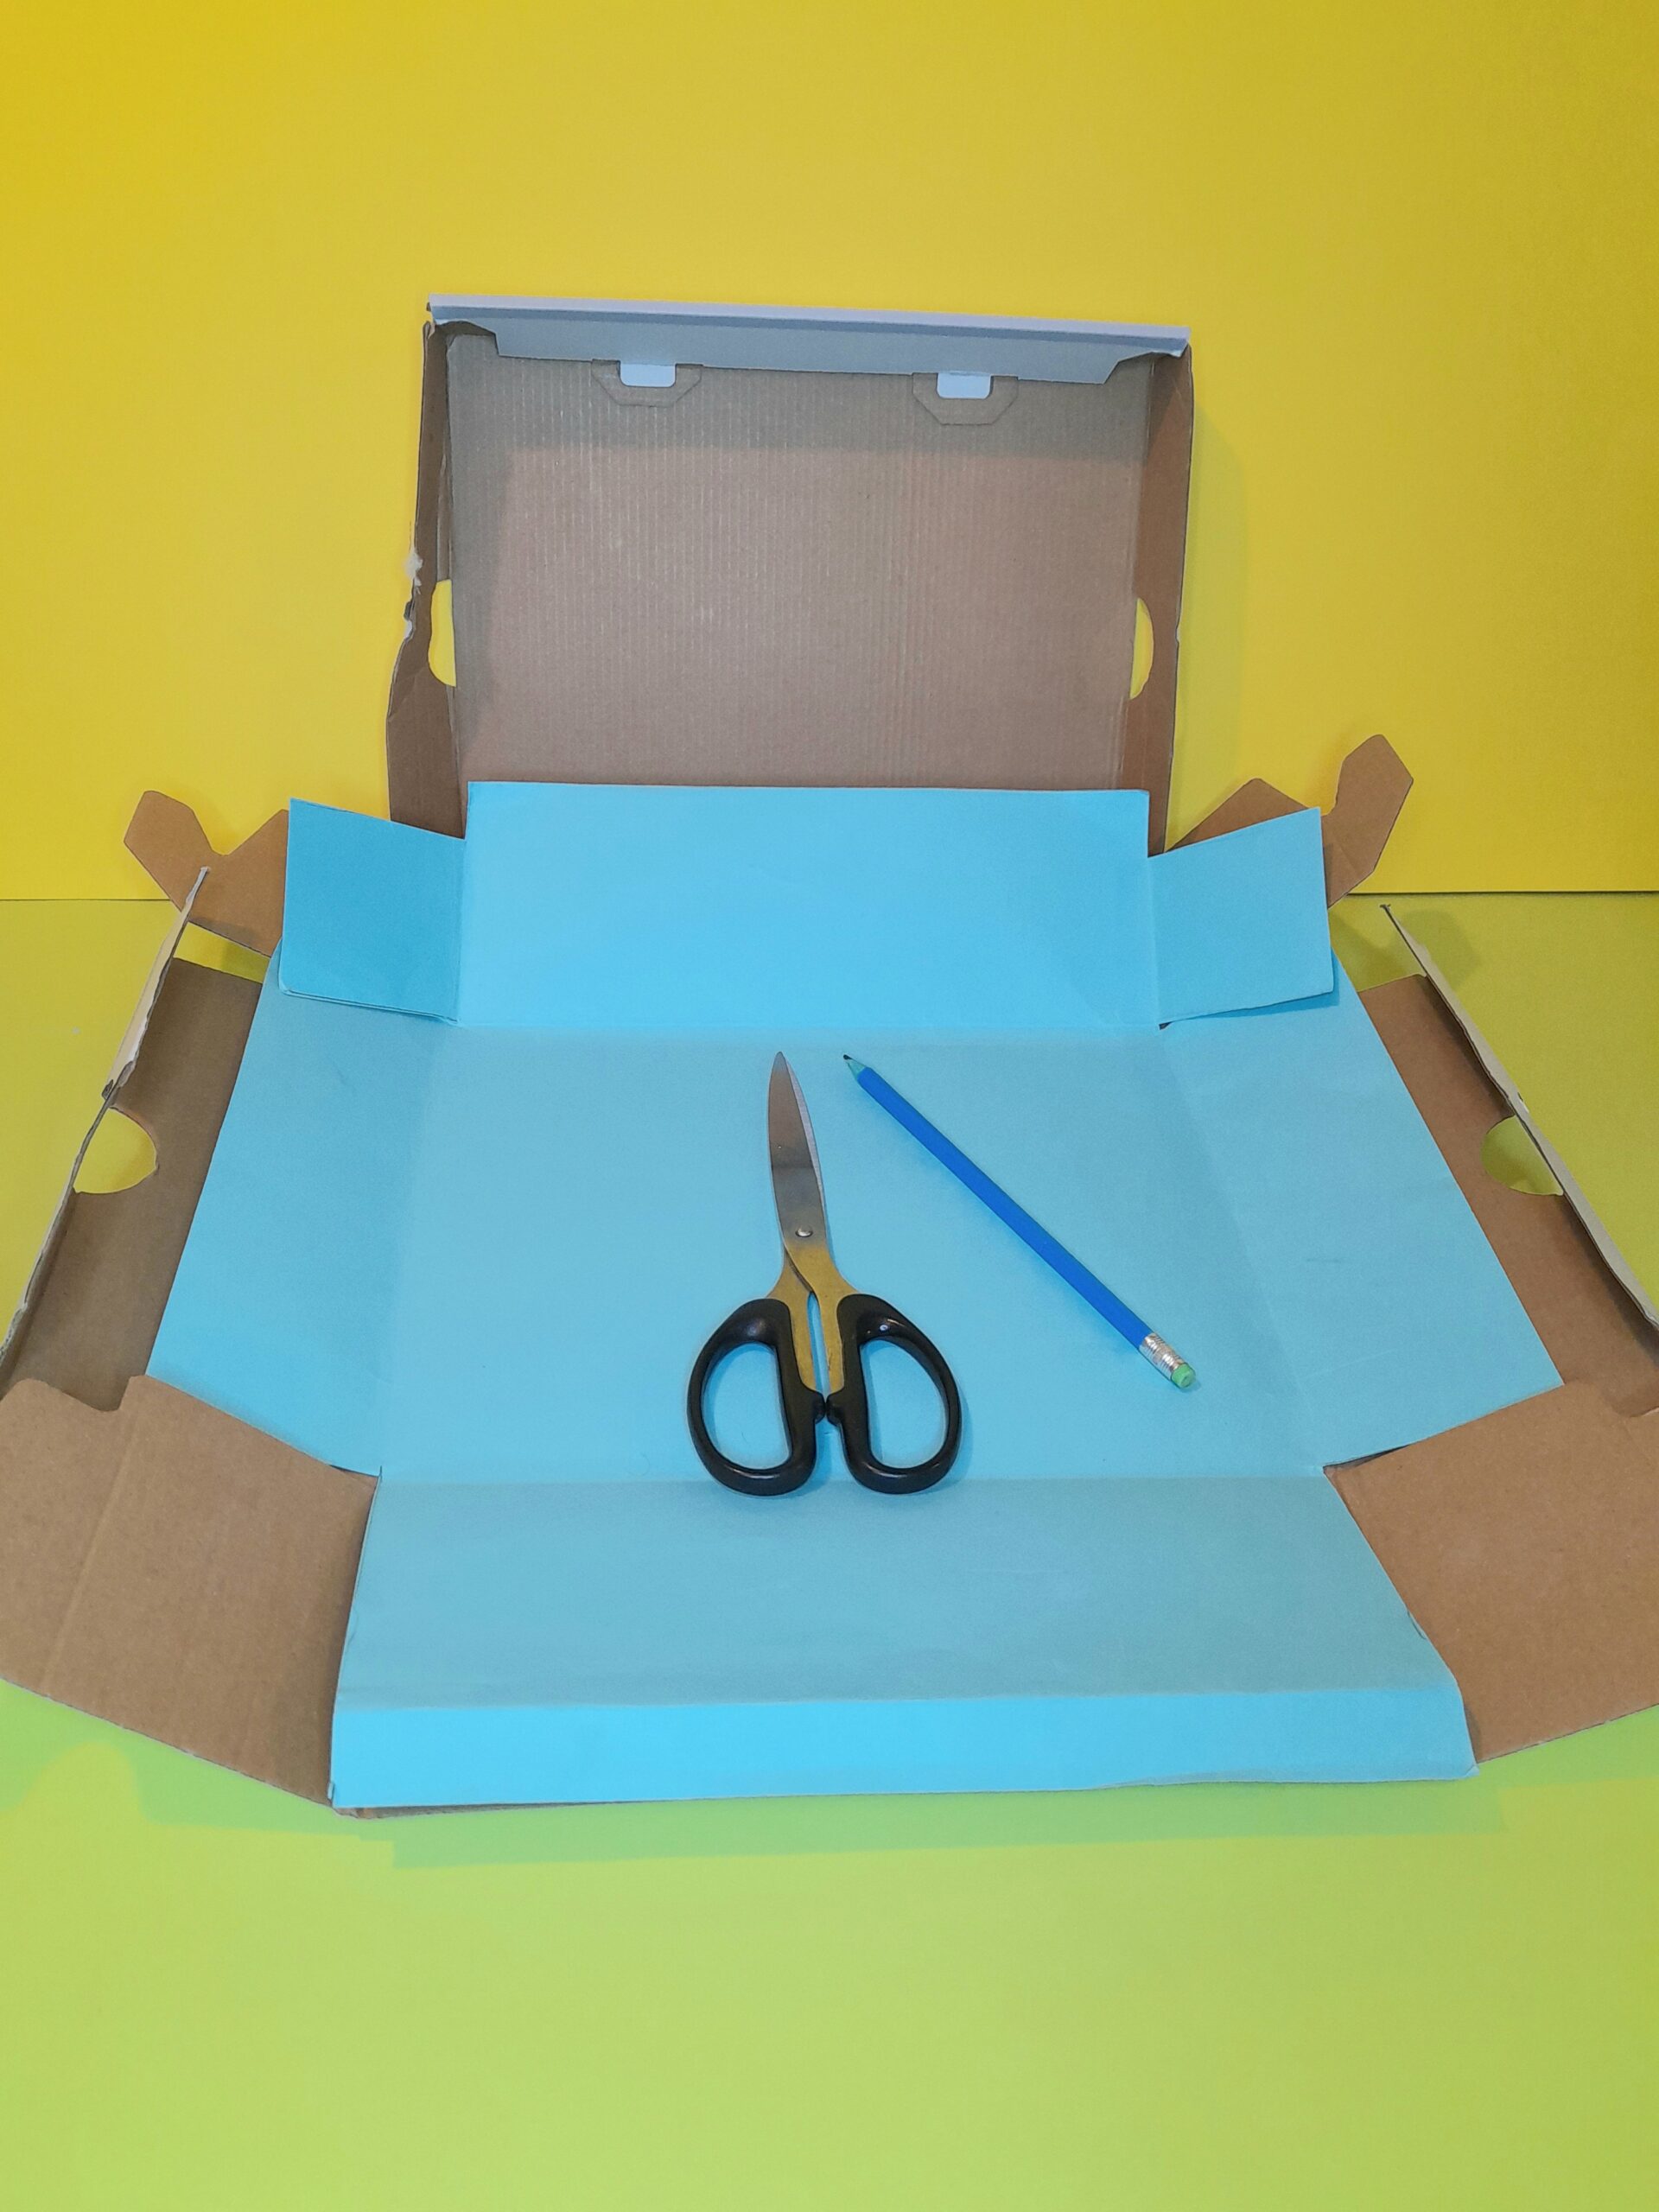
1) Open up shoe box and cut large card to fit inside box.
2) Neatly fold card and insert into box.
3) Fold down and press firmly.
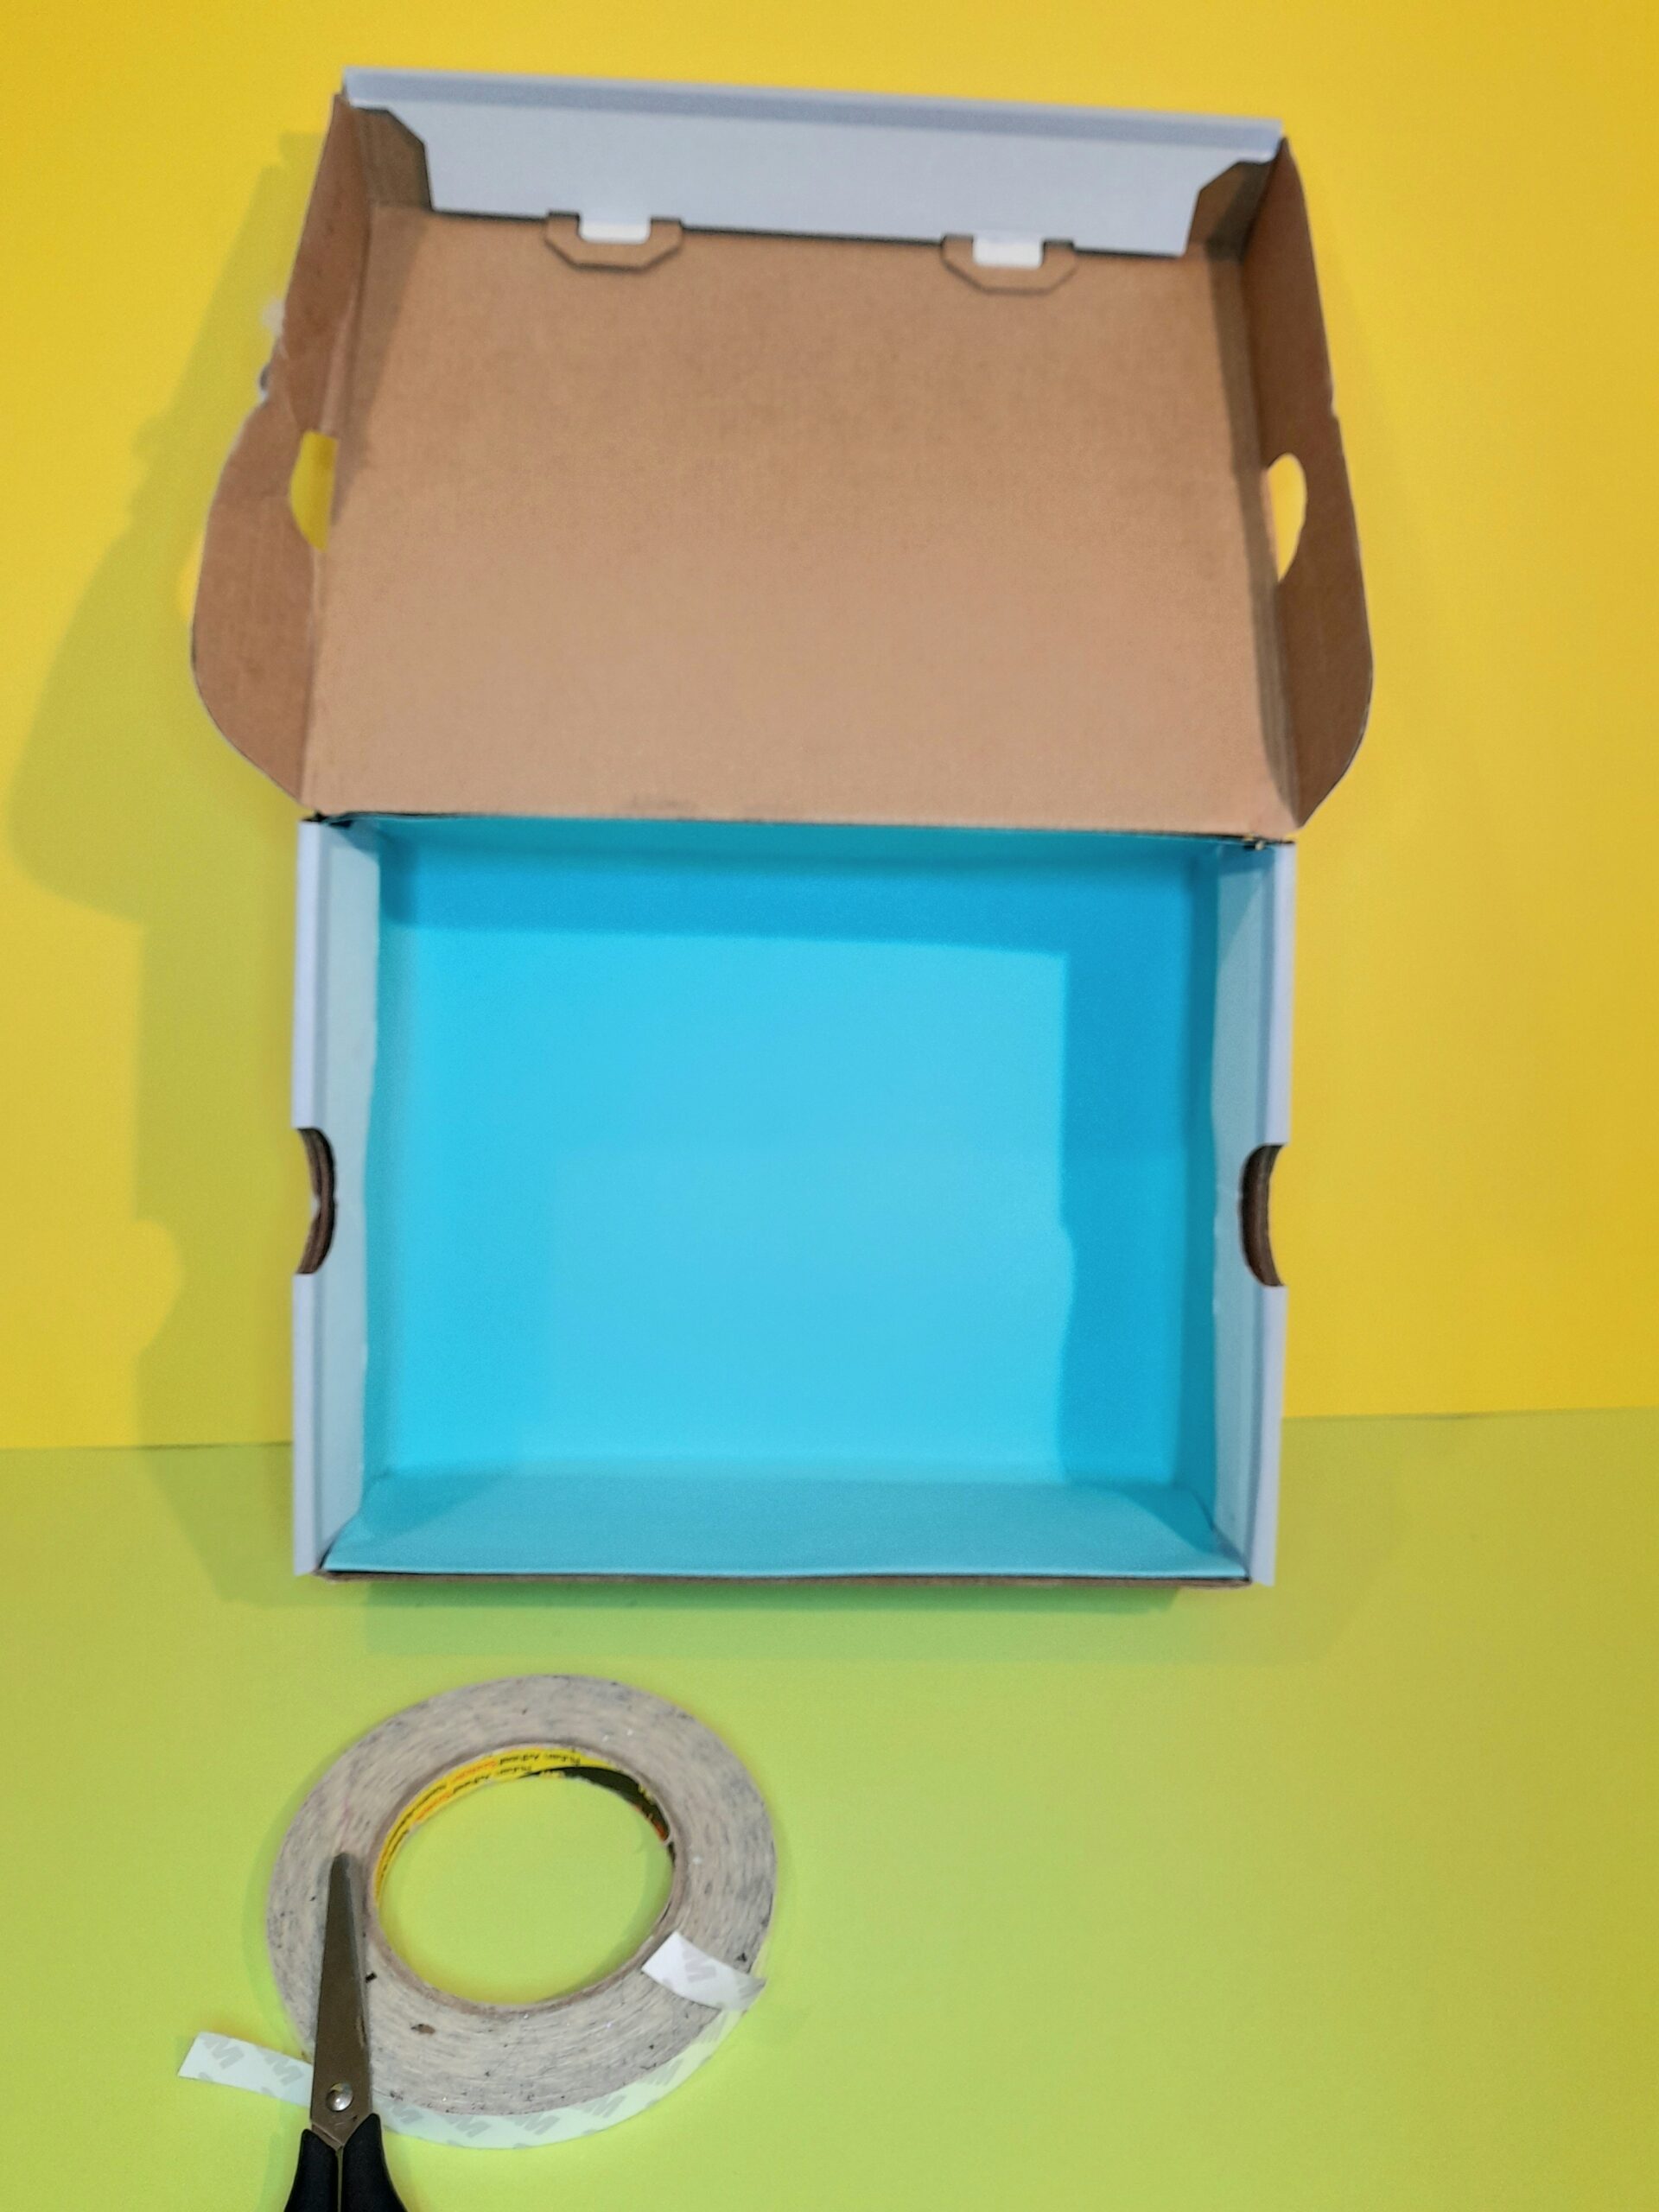
4) Using double sided tape stick inside box.
5) Laminate A4 card.
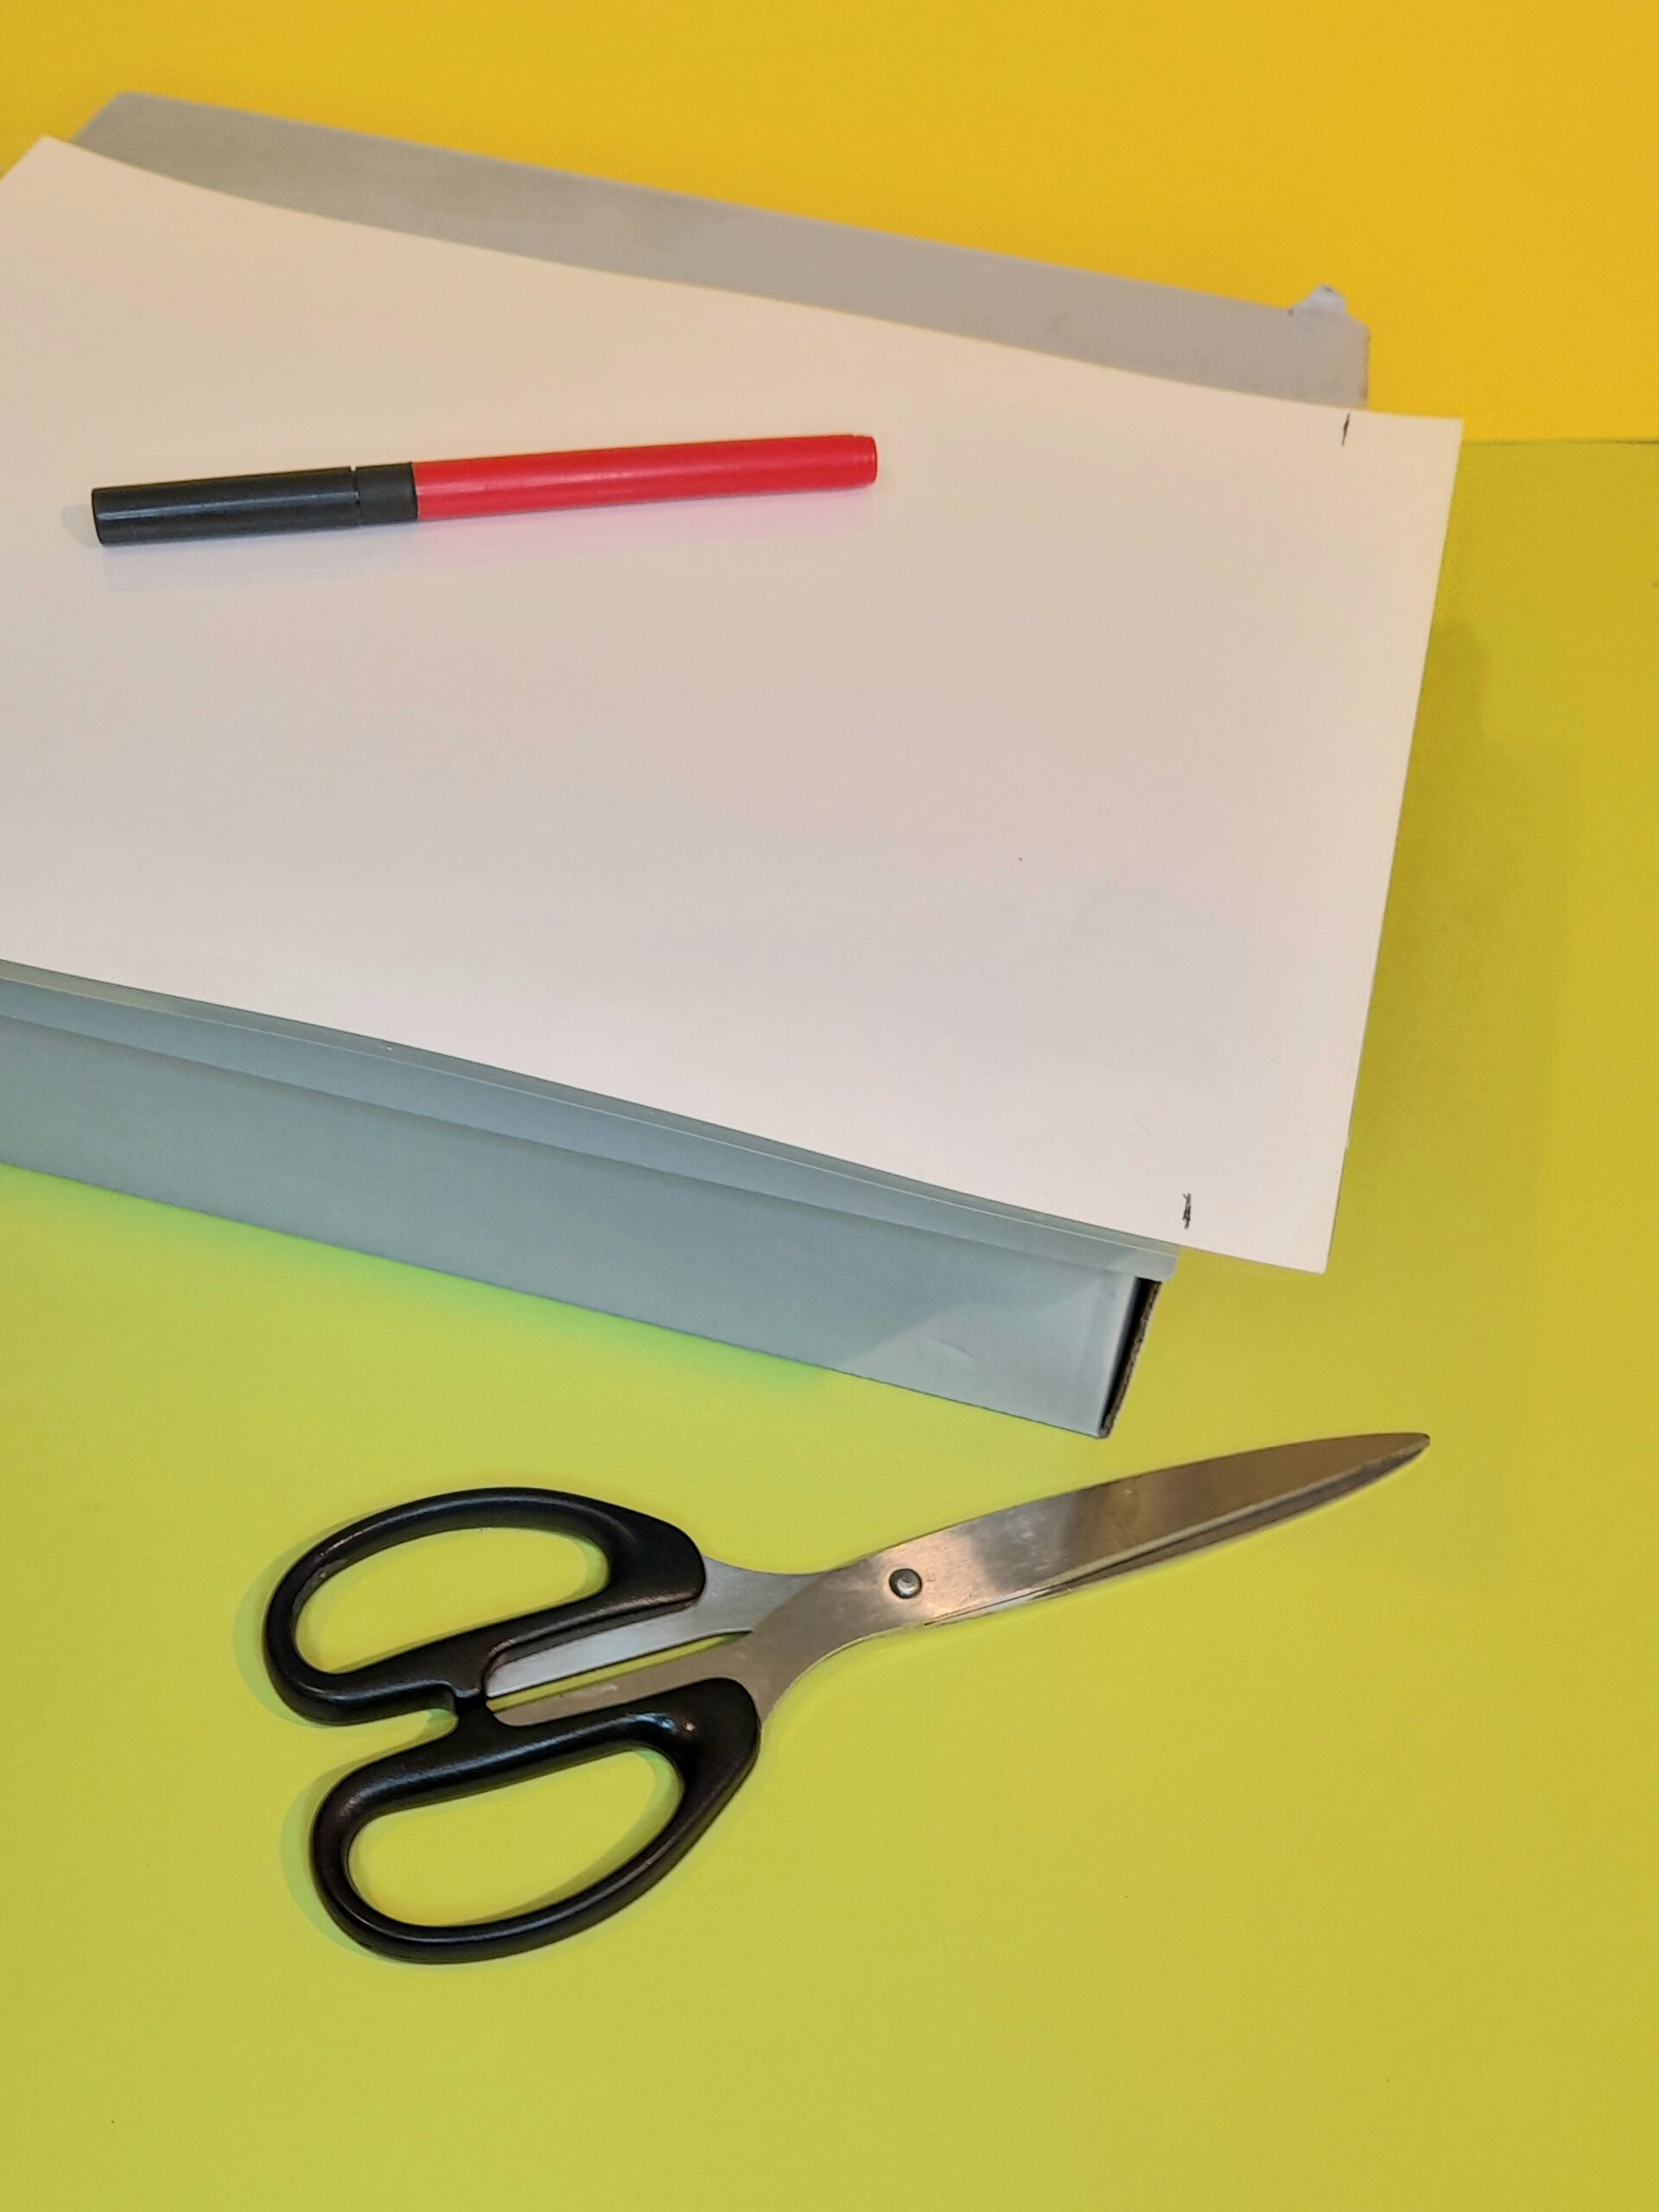
6) Lay on top of box and measure to size.
7) Rule that section and cut off.
8) Then cut corners to fit inside the lid, then use tape to stick on to the lid.
9) Place cup cake plastic tray inside the box.
10) Now cut different size circles and stick on the outside of the box.
11) Attach the garden wires from the lid down into the holes in the bottom box twist to hold wires tight.
12) The wires will hold the lid securely so you can write on the laminated card.
13) Draw and cut out circular shapes.
14) Use coloured card and cut out smaller different shapes to stick on circles.
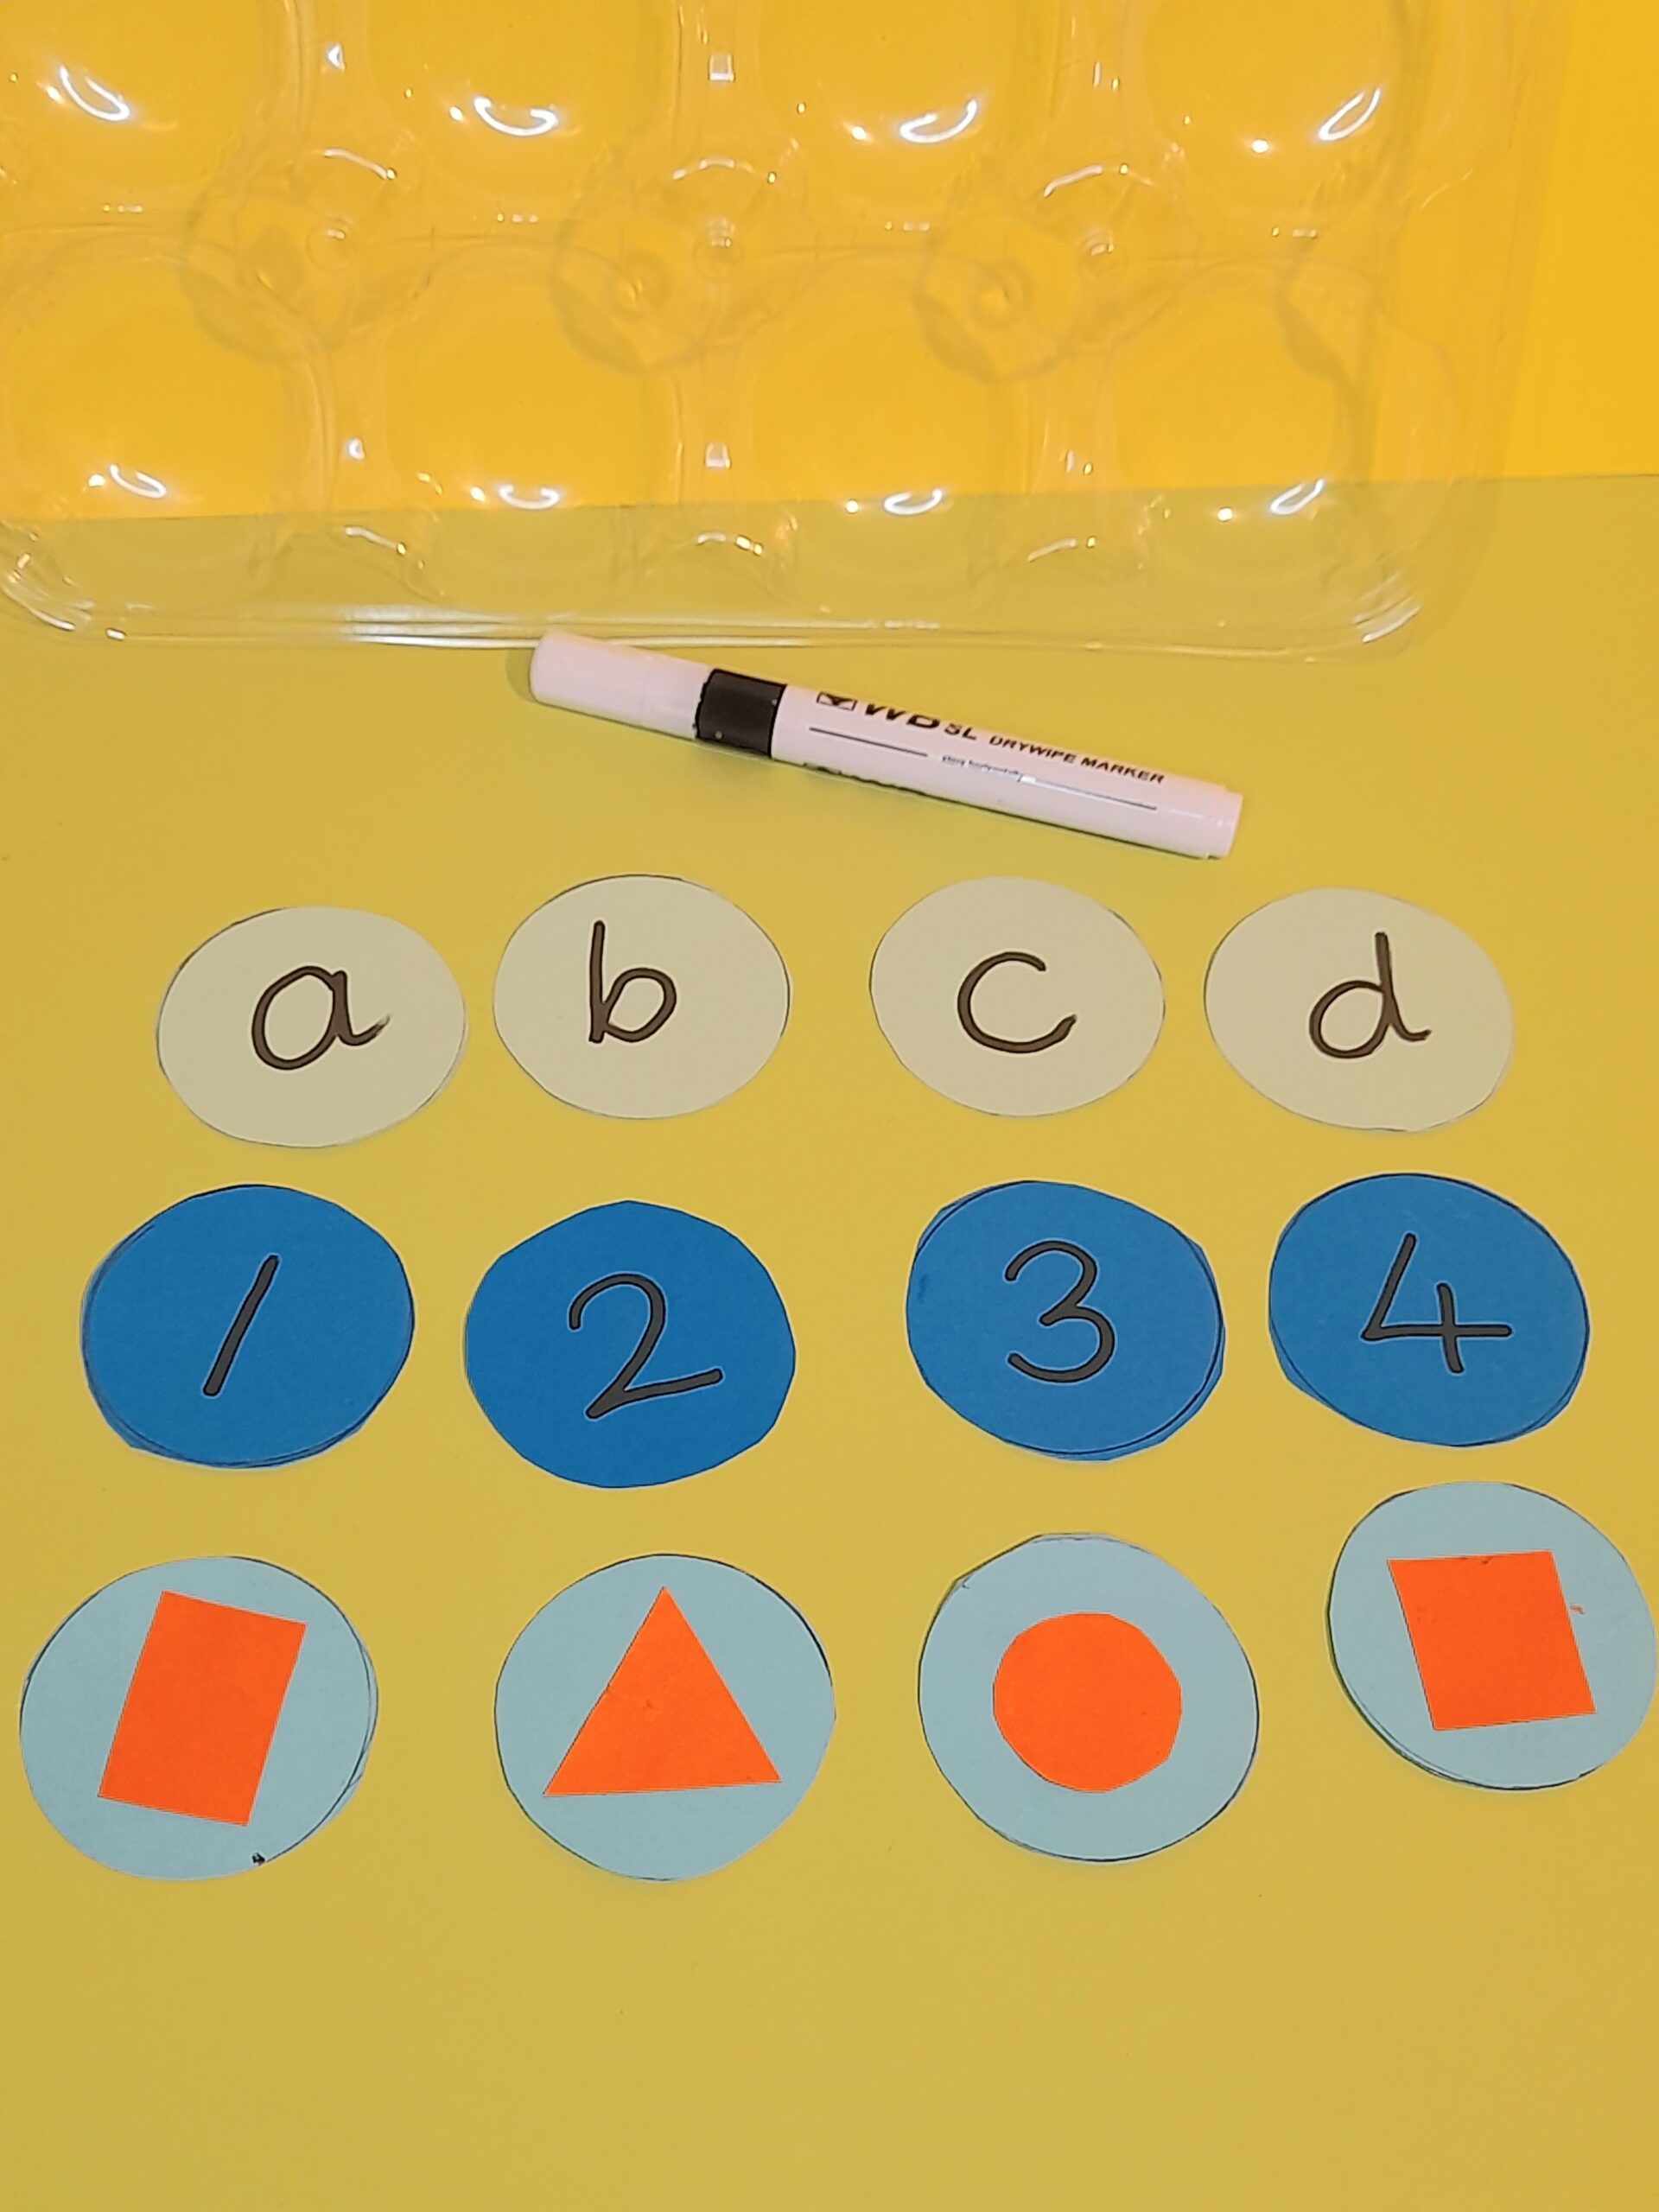
15) Write on other circular shapes letters, numbers.
16) Place into the plastic holder.
17) With a black white board pen practice letters, numbers and shapes.
18) Rub off and practice.
19) The board is like a screen, where you can freely draw digits.
20) Pack away all parts under the plastic tray inside the box.
TIPS FOR SHOEBOX CRAFTS!
When you open up the shoebox, it’s a laptop with a keyboard, but much more simplified.
HOW TO ATTACH
When attaching the letters, numbers, or symbols, use a glue stick to gently tack them in place, or use a bit of Blu-tack, so you can replace them easily.
LETTERS, NO.S / SHAPES.
A bit like a learning game, with corresponding letters, numbers, and shapes. or dots. o oo ooo and so on.
You can have capital letters on one side and lowercase letters on the other side of the capital letters.
WHAT COLOURS?
Working with colours can be an option. Have differentcolours per circle, and kids can have colouredboard markers. As they scribble each colour, you say, ‘This is orange’,‘This is yellow‘, and so on.
ADVANCE LEARNING.
You can make it into a game. Once your kid has mastered the first few letters and numbers, then you can make another set of each and move on with their learning.
PRETEND SCREEN!
The whiteboard is your screen, where they can write what they see below.
PRETEND KEYBOARD.
Kids would touch each digit before writing it, as if pressing the keys on a keyboard.
LOOK AFTER THE WIRES.
You can close the lid, and the wires will bow out or slide in, and when you open the lid again, the wires will straighten out again, holding the lid upright
A WIRELESS SHOEBOX CRAFTS TOY!
The shoebox crafts cover one of many solutions to fulfilling our kids’ overwhelming desire to be on laptops, computers, PlayStation games, and more without having to plug in or use batteries.
Who would think we can use our junk to make a kid-friendly make-do laptop?
We can’t stop the progression of technology, and as our kids grow up, they will be exposed to more technological devices.
Occasionally, it is refreshing for our kids to experience hands-on, simple crafting using paper, cards, and all sorts of throw-outs to be creative,explore different mediums, and be inventive, which they won’t get from watching a screen all day!
BACK TO BASICS!
This project brings us back to basics. It’s an easy and simple way to introduce your kids to the world of make-believe computers!
In this case, it’s hands-on, where they can write or scribble digits while pretending the whiteboard is like a laptop or a computer screen.
MOVE THEM ON!
As your kids get quicker or perfect their letter, number, or shape formation, you can upgrade or move on to more letters of the alphabet and more numbers.
THINGS TO WORK ON!
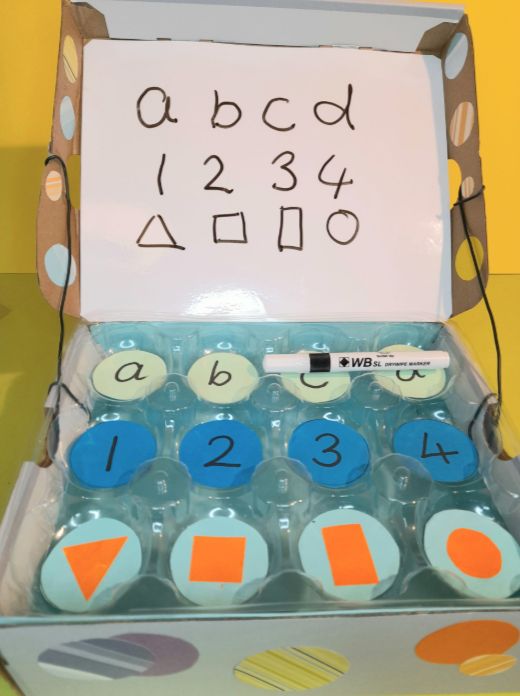
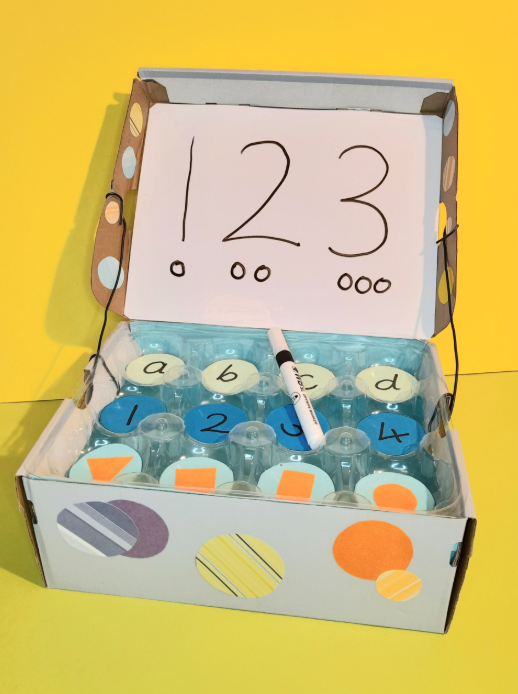
Shoebox crafts, numbers and dots example shown for kids.
Here is the example, where you, the adult, guide the child by drawing:-
1 o for number 1,
2 oo for number 2 and
3 ooo for number 3.
You model the letters, numbers, and shapes, and your kids can trace over them.
Rub out and allow your child to guess how to draw the shapes.
Faintly draw the outlines of the letters, etc., and they can trace over them.
Write three-letter words like:-
cat, mat, fat, sat. Then put them into sentences:- The fat cat sat on the mat.
Do simple sums:- 1+1=2
Use dots as well as numbers like:-
2 •• 3 ••• 4 ••• and so on. Kids will start to recognise symbolic grouping of numbers, like on a dice.
LOOKING FOR A SIMILAR TOY?
CHECK THIS OUT!
Kids Laptop toys at Etsy.
If you like the idea of toys being in a simplistic format, with no batteries or flashing lights and endless screen time, but is similar and is hands-on and interactive!
Hey there, when you click on links in this post and you make a purchase, I may earn a small commission that l can use towards resources (other than throw-outs) for project making within my website😀
So what are we doing as a conscious nation wanting to protect our planet and do our bit?
SOME IDEAS!
Well, for one, it’s cutting back or thinking about how to reduce our energy supplies and recycling as much as we can, ultimately reducing landfillsites, managing sustainable waste, and protecting our ocean and the sea life that exists within it! This is the way to go, don’t you think?
CHECK THIS OUT!
So what do you do once your PC, Laptop, or MacBook gets old? Would you take it to the dump yard, or simply leave it to gather cobwebs?
You could pass it on to another member of your family, or charity, but if it’s had its day and it’s no longer usable, then have you thought of recycling it in a good way?
Let’s remember, and I am sure most kids will know the three ‘R’s……….. Reduce-Reuse-Recycle’
Wait a minute, you might think, how?
Let me introduce you to this super site:-
⇓⇓⇓
Currys is one of the UK’s largest electrical stores with approximately 289 stores dotted around the UK.
They offer a free service, where you can take your old tech, and they will glady recycle it for you.
UPDATE!
So, having discovered this service, I took five broken-down gadgets, two shredders, one small TV, a broken fan, and a printer to a Currys store.
They welcomed me and took all items for recycling, and on top of that, I was offered a £5 voucher to spend at the store!
All in a good day’s work! Don’t you think?
JUST AN ADDED NOTE!
BE KIND TO OUR EYES.
Our kids, as well as we adults, can get quite wrapped up in our laptops, computers, or Playstations, and we can overlook the fact that our eyes will ultimately suffer.
LIGHT AND EYES!
Too much gazing at the light emanating from our screens can tire our eyes, and even though we have had a good night’s sleep, our eyes would have paid dearly.
TIRED EYES!
Waking up with tired, burning, or itching eyes with a heavy head is due to overworked eyes.
We all need to take care of our eyes, and there is a simple solution….Yes, limit the amount of time your kids have access to their techno gadgets, but also follow this rule.
HOW TO HELP YOUR EYES!
20-20 -20 rule. Every 20 minutes, look away and find an object about 20 feet away for 20 seconds.
Looking at an object at least 20 feet away relaxes the eyes. Looking at something close up for a long time will strain the eyes.
TOO MUCH SCREEN TIME!
Also, looking at the screen too long reduces your blinking, and you can get dry eyes, known as ‘dry eye syndrome’, so blinking rapidly will help lubricate the eyes.
This is how to Palm your eyes. A picture from Pexels.com by RF._.Studio_.
PALMING.
I find ‘Palming’ helps relieve my eyes and relax them. This is the process of rubbing the palms of your hands together and placing them gently over your closed eyes for about five minutes, sometimes even longer.
THE OUTCOME.
The warmth from your hands and blackening out the light will make a difference to your eyes. They will feel revitalised and refreshed.
It’s like wrapping up your eyes in warm blankets and giving them tender loving care. You should try it and see for yourself!
I know there is a lot to take in. If you choose any of these eye exercises, Palming would be the one to go for, and add it to a daily routine!
LET’S CONCLUDE!
I have shown you how you or your kids can whip up a simple laptop by crafting with your junk!
With just a shoebox and a plastic cake tray, you can upcycle these items and put together a fun, interactive laptop!
GET YOUR KIDS TO HELP!
Style it how you like. You can get your kid to work on letter building, numbers or shapes. You choose where they start and progress with their learning, and the best thing is you can rub it all out and start again.
DON’T THROW AWAY!
I hope I have inspired you to have fun making ‘Shoebox crafts’. So hold on to your shoeboxes and cake trays, because it’s a great activity to start with before they get introduced to the real thing!
What a great idea! And I love that you provide step-by-step instructions for the shoe box laptop. I’m not that talented in terms of crafts … so this is definitely helpful! Thank you!
Hi Katharina, I am so glad you like this project! I love to inspire
kids and adults to try and be inventive and make interesting projects
like this fun laptop!
Also my aim is to get kids to recycle as much throw-outs as they can
and be creative at the same time!
Thanks for your comment and I believe anyone can put together this
shoe box crafts in no time, just follow my instructions. Give it a go!
Happy Crafting!
Julia. ?